
Although landscape photography may seem simple to you, it is far from it, in fact, it is one of the most difficult photographic disciplines to master. Anyone can take a great photograph of an impressive landscape, but becoming an exceptional photographer is a path that you must travel photo by photo, stumble by stumble, gaining experience and thus being able to reach a good destination.
Taking a picture of a beautiful landscape is not the same as taking a beautiful picture of a landscape. Can you tell the difference? That's where the great photographers stand out from the rest, and you can be one of them with all these landscape photography tips and tricks.
Experience is the name we give to our mistakes, and in today's article I will tell you about some of the most common mistakes made by landscape photographers, so that you can shorten the path a bit.
MISTAKE #1: PURCHASING LENSES AND ACCESSORIES OF DUBIOUS QUALITY.
When you begin to enter the world of landscape photography, it is very likely that, soon after, you will begin to discover that there are endless accessories that can make your photos spectacular. Don't be a victim of your own anxiety and don't buy the first thing that comes to hand because he who pays badly pays twice.
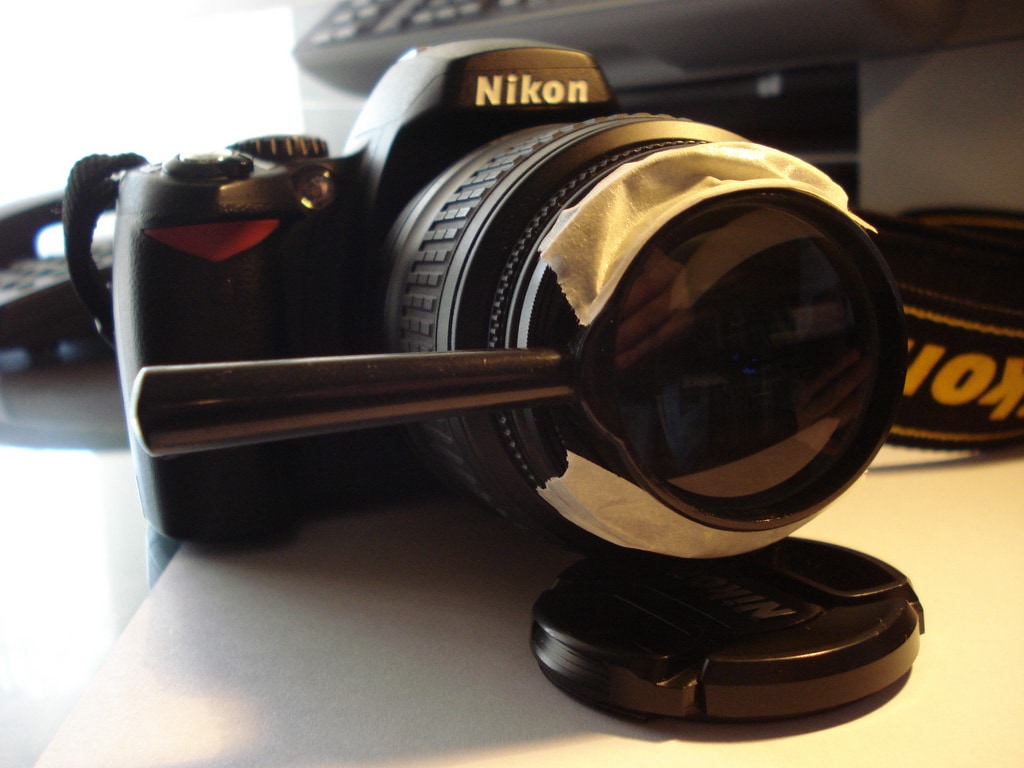
If you buy a lens, filters or even a tripod of dubious quality, this loss will carry over to your photos. Cameras are constantly being updated, but a good lens, an excellent filter or a robust tripod will accompany you throughout your life. Try not to fall into the brand trap , and if you didn't know where to invest, in the camera or in the lenses , you already have the answer.
Before you make your next purchase, take a look at the following items:
- The definitive guide to buying lenses for your SLR camera
- 8 ways to improve your photos thanks to a filter
- The tripod that your camera would like to have
- 8 accessories that your SLR camera needs
MISTAKE #2: FOCUSING AT INFINITY.
Although you may be tempted to always focus at infinity, in search of making the photograph of that beautiful landscape come out as sharp as possible, it is not always the most recommended when it comes to achieving quality photographs.
If you only focus at infinity, you will be wasting a large portion of depth of field and you will be forced to use very closed diaphragms, causing the entire photograph to lose sharpness, and consequently, quality.
Remember that the objectives reach their best performance with intermediate apertures f/8 or f/11, so using very open or very closed apertures will reduce the quality of the photographs.
If using intermediate apertures you still can't get the entire photo to come out perfectly sharp, you can use two techniques:
- Hyperfocal: consists of knowing the distance at which your camera will focus everything clearly according to the focal length you use and the diaphragm opening you choose. From the hyperfocal point, everything will come into focus.
- Bracketing: consists of taking several photographs of the same scene, varying the focus in each of them and then, using a computer and software (eg Photomatix) to join them all and achieve photographs with an amazing depth of field.
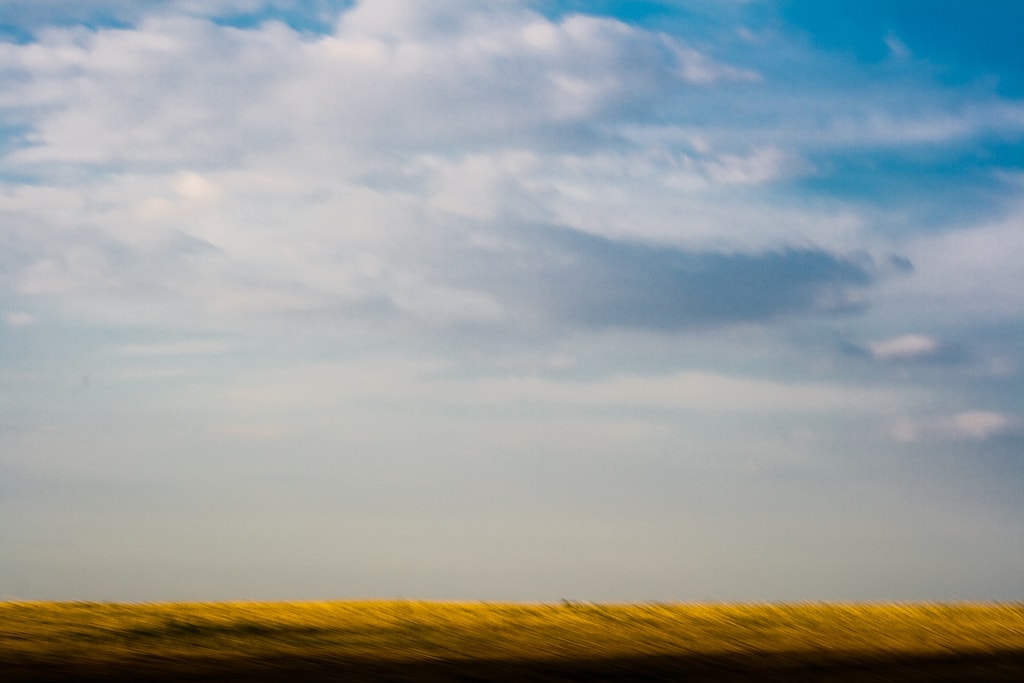
MISTAKE #3: JITTERY IMAGES.
Using smaller apertures in order to obtain greater depth of field and to keep everything in the scene sharp implies either increasing the ISO sensitivity or reducing the shutter speed in order to achieve a good exposure.
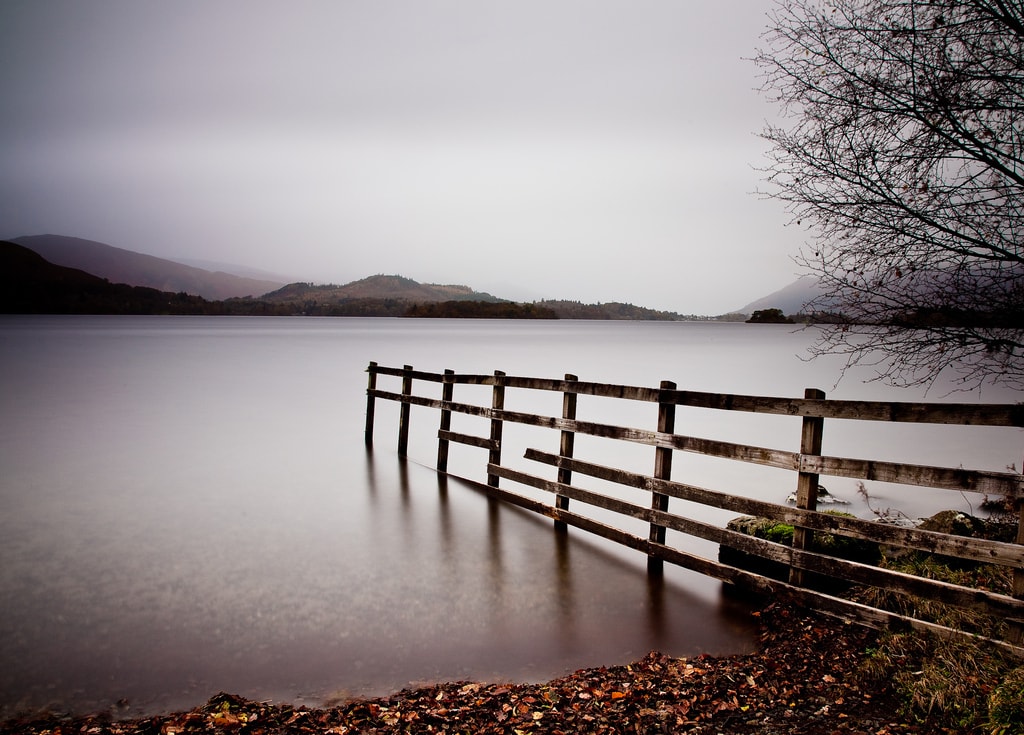
Increasing the ISO sensitivity is not free: it increases the amount of noise in your photos and consequently reduces their sharpness and quality, something essential in landscape photography. Decreasing the shutter speed also has its cost: the probability that the photograph will come out blurred, losing sharpness, although reducing the risk of shake is easier: you only need a good tripod that gives you stability and knowing how to mount it .
In extreme cases where you need to work with very, very slow shutter speeds, a tripod will not be enough. Keep a remote shutter handy or set your camera to delayed release mode and flip up the mirror: use the screen as a viewfinder to avoid unwanted vibrations. To learn more about these, I recommend that you read the article about 24 ways to achieve sharpness in your photographs .
MISTAKE # 4: MISSING THE SUNRISE AND SUNSET.
At the beginning of your career as a landscape photographer, you may not have the necessary equipment to be able to take your photographs in low light conditions, so your actions will be limited to situations where the light is favorable to you. This can result in your landscape photos becoming somewhat monotonous due to lighting.
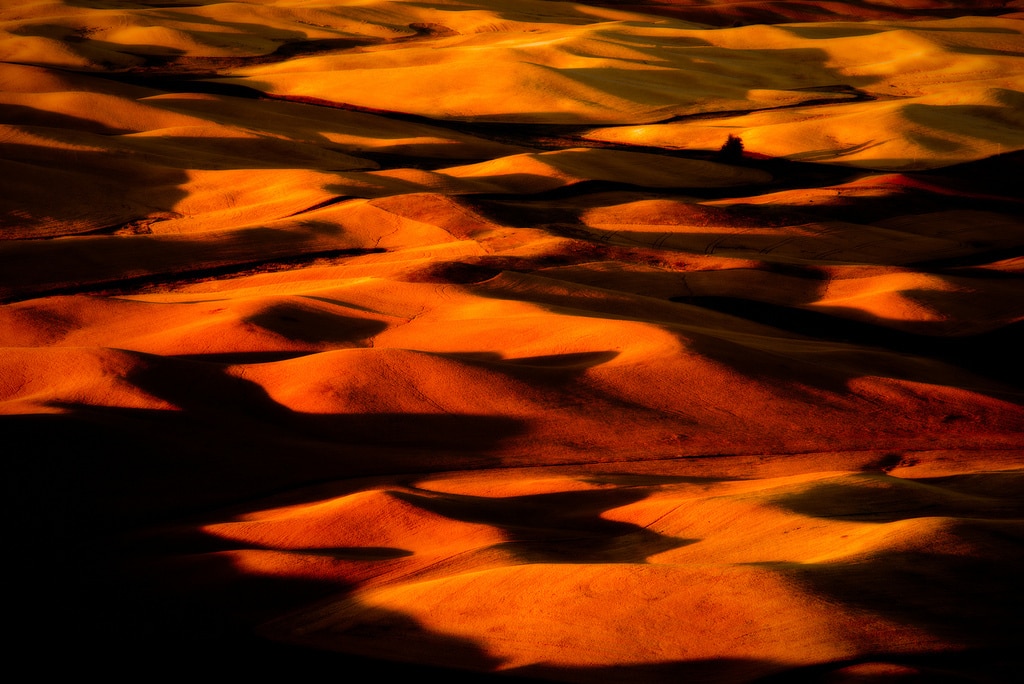
Try to get up early and go out to take photos as soon as the sun rises or wait for sunset and take your photos at sunset. You will notice that these two moments are excellent for taking your photographs since, thanks to the position of the sun, the light falls on the scene laterally, creating very attractive textures, shadows and patterns that will make your landscape photographs more expressive.
Some time ago Mario wrote an article about how to photograph spectacular sunrises and sunsets , I recommend you take a look!
MISTAKE #5: NOT TAKING FULL ADVANTAGE OF A LOCATION.
Unless you organize a photographic trip, it is very likely that you do not have the necessary time to fully exploit the possibilities that a certain location offers you, even more so if you have come across the landscape on a trip instead of having planned it.
If you do not dedicate enough time to analyzing the scene and evaluating all the possibilities it offers you, when framing the photograph, it is unlikely that you will be able to cover all the possible framings.
Have you ever been left with the feeling that you have not achieved the photographs you would have wanted? Unfortunately, if after photographing a sunset you are not satisfied with the resulting photograph, to return to have the sun in the same position and be able to correct the framing you will have to either camp and wait for the next day, or return another time with a more complete idea of what is the result you hope to obtain in your photography and this is not always possible
When you come across a landscape worthy of being portrayed, do not rush, take your time to evaluate all the possibilities that it offers you, the compositional elements that you can include in the photograph, the angles from which to take the shots, etc. The more you work on the scene, the better results you will get with your photos. Few things will frustrate you more than leaving a place knowing that you have not been able to make the most of it.
MISTAKE # 6: EXCESSIVE CONTRASTS.
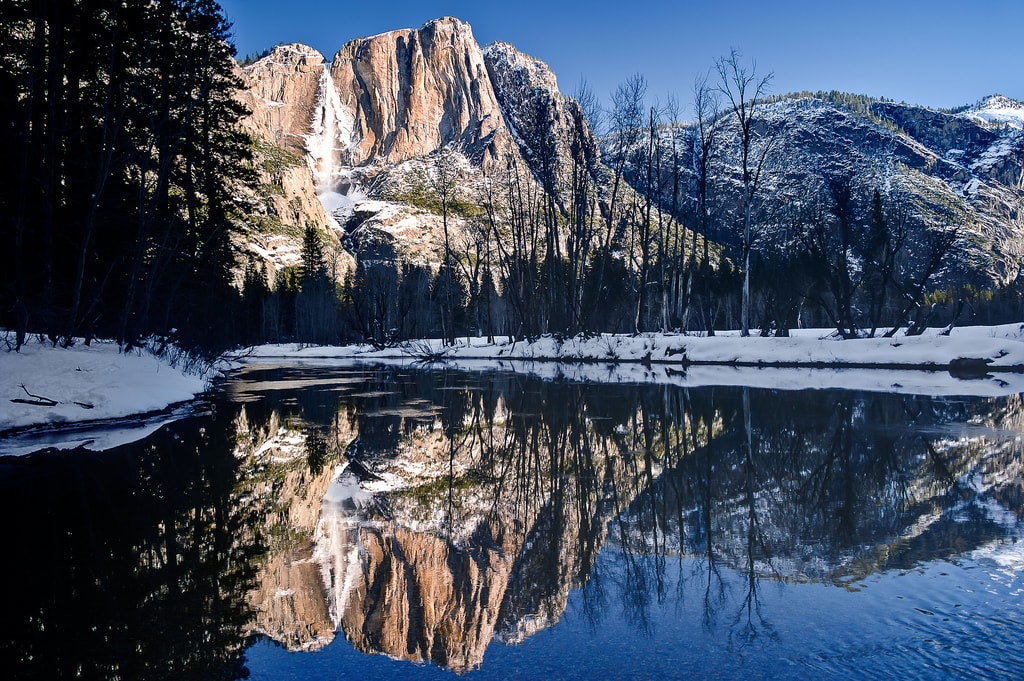
Your eye is capable of perceiving details in situations where your camera cannot. One of these situations is when highly contrasted scenes are presented, that is, when the difference between lights and shadows is very large.
In these situations, it becomes really complicated that you can obtain details in both at the same time, lights and shadows, so you will have to choose which one you prefer and adjust the parameters of the shot for the chosen one.
Your camera's ability to "pick up" detail in both highlights and shadows is known as "dynamic range." In order to make the most of the full capacity of your camera's sensor to capture information, you must make a correct exposure. In this way, you will be able to capture the greatest number of light and dark tones at the same time in a photograph.
But how to do it correctly? The key is to configure the settings of the shot so that the lightest objects that appear in the scene are not overexposed, that is, totally white without any detail. In this way you will ensure that your camera is capturing the greatest amount of light tones possible and at the same time, you will obtain greater detail in the dark ones. Do not worry, in the next article we will see it in greater depth.
As an introduction to the different ways of measuring light in photography, I recommend that you read the following article: Examples of Light Measurement Modes in Photography.
ERROR # 7: ABSENCE OF PROTAGONISTS.
Commonly in landscape photographs, the main objects tend to appear far away in them, causing them to get lost among the rest of the landscape as one more element within it.
As Mario said in the article 11 simple tips for stunning landscape photography :
“The landscape can be amazingly beautiful but the entire landscape cannot be the protagonist. Every successful landscape photo contains some central element, something that people consciously or unconsciously notice when looking at the photo.”
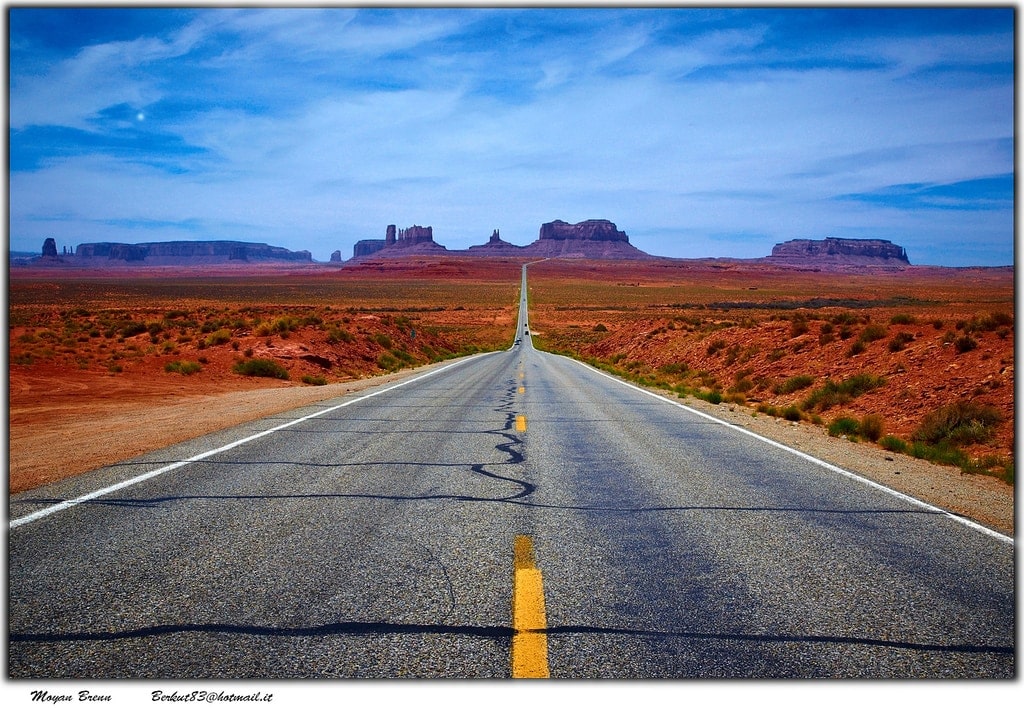
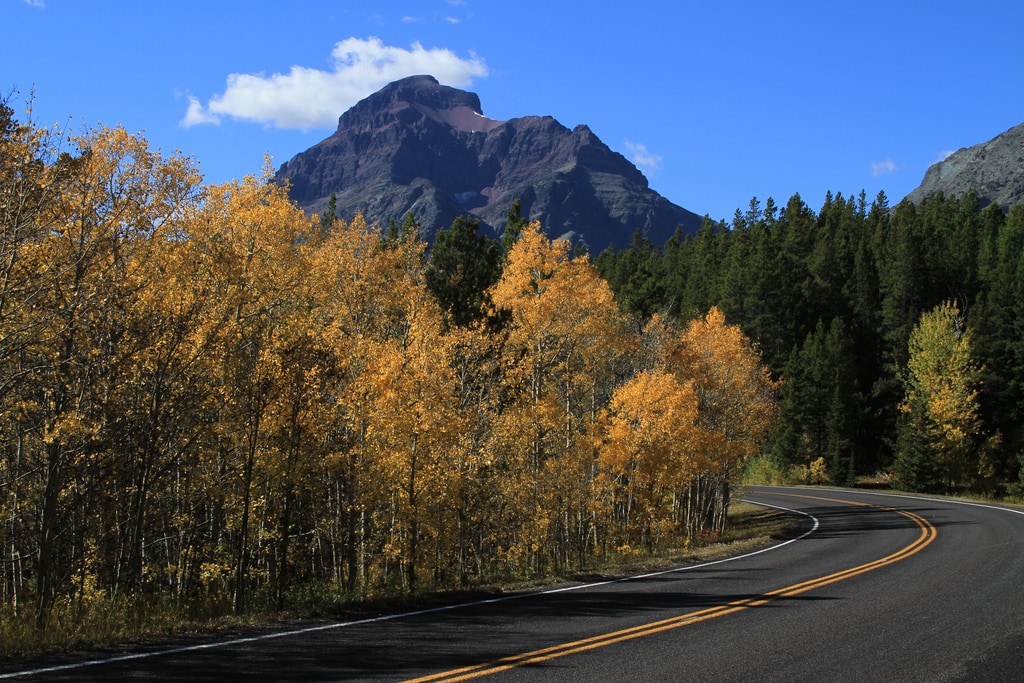
Try to use the trees, rivers, rocks, roads, and any other element that you find attractive to help direct the observer's gaze and give them a "sense of place", that is, they feel inside the photograph.
Not everything always has to be hundreds of meters from the lens, try to get closer and use the elements of the landscape to enhance the foreground and thus achieve more expressive photographs.
Include people? Why not? Make the most of your creativity and incorporate the human factor into your landscapes.
Some time ago, Esteban Fabian Gentile, Argentine painter, graphic designer and photographer specializing in landscape photography, winner of several international awards, collaborated with the Photographer's Blog and shared his vision and technique in landscape photography in the following article: Trick to improve your landscape photos . More than recommended reading!
MISTAKE # 8: FUND WITHOUT INTEREST.
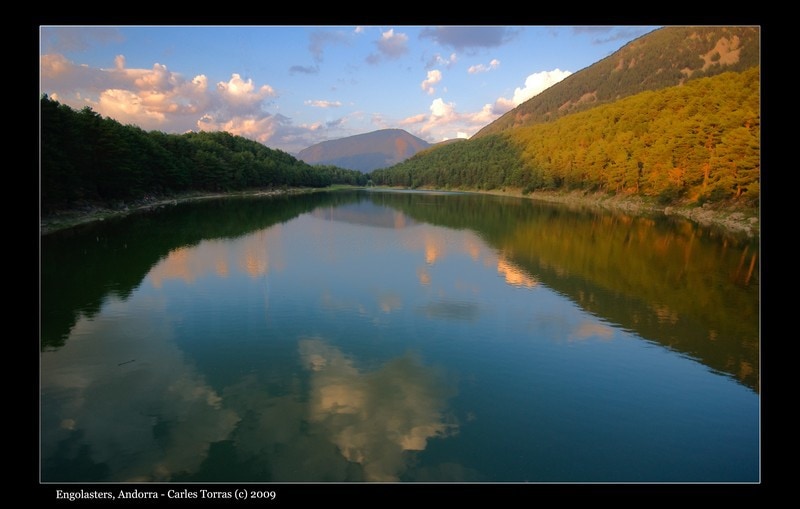
In most of the landscape photographs that you can find on the Internet, the background is the protagonist of the scene. These types of photographs do not generate much interest for the viewer unless the landscape is so spectacular that, by itself, it leaves everyone speechless.
In the different locations where you are going to take your photographs, pay close attention to the background of the same since in landscape photography, the background really matters. Remember that in this type of photography, sharpness is essential and the entire scene must be clearly distinguishable. Getting attractive backgrounds will be key for your photos to achieve the impact you want.
As I told you at the beginning of the article, taking excellent landscape photos is not an easy task at all and one of the reasons is because you must combine all the elements present in the scene, to achieve an impressive photograph, since it does not you can manipulate them, you can only place them in the frame.
Again, I recommend that you take a look at the tips that Mario prepared for all those fans of landscape photography: 11 simple tips for impressive landscape photography .
MISTAKE #9: IMPROPER MODE.
It is very likely that at first you will be tempted to use the predefined camera modes for your photos, in this case: landscape mode. It may be easy and fast for you, but what's the point if you let the camera decide for you?
This mode closes the diaphragm in order to gain depth of field (sharpness) and compensates for the "loss of light" resulting from closing it, decreasing the shutter speed, in order to obtain a correct exposure.
So far everything is correct but why not use it? Because when the camera automatically measures the "amount of light" in the environment, what it does is calculate an average between the lightest and darkest tones (lights and shadows), which means that it does not capture all the information that the sensor of your camera is capable of capturing, losing details at the extremes (lighter and darker tones).
Also, why let a machine make decisions for you? The important thing is you, your photographic eye and your knowledge , the camera is just the means for you to capture them in a photograph.
MISTAKE #10: MISSING ELEMENTS.
In a landscape you will not only find clouds, mountains, trees, rivers and rocks, you will also find, although at first you may not notice it, an endless number of lines and shapes that, although they do not appear, are there.
All the elements that make up a photograph have a sense and a direction and according to how you arrange or use them in the frame, your photographs will acquire a totally different character or another. Use these elements to guide the viewer through the journey you devised through your photographs.
As in all the rest of the photographic branches, in landscape photography you must also always take into account what you want the message to be communicated to be and the sensations to be transmitted, so having the purpose clearly It will help to use all the (natural) means to achieve it.
If you haven't read it yet, I recommend you read: 9 tips and tricks to improve your photographic composition . If you want to break the photographic rules, do it, these are just guides for you to use or not when composing your photographs.
As I told you at the beginning of the article, experience is the name we give to our mistakes! So you already know…
