

It is very likely that, if you are taking your first steps in photography, you make the mistake of not spending enough time choosing the background in your photos. This is a very common mistake for all photographers, even some of the most experienced ones: not working on their backgrounds as much as they work on their protagonists.
A photograph, to be truly spectacular, is not enough to have a luxury protagonist or an amazing object. Photographs are much more than the sum of their individual parts, they are a whole and are perceived as such.
Would the photograph illustrating the article have had the same impact if it had been taken with a different background?
One of the best ways to enhance both the protagonists of the photographs as well as the messages and sensations that they transmit, is by looking for the photography to work as a whole, where the close-ups are enhanced by the rest of the elements present. In the scene.
For this reason, in today's article I bring you 11 tips so that the next time you walk with your camera in hand, pay more attention to everything that happens behind your photos. Are you going to miss them?
- Explore every angle
- And all focal lengths
- Don't forget the depth of field
- turn off the background
- work your funds
- Create your own backgrounds
- The background as the protagonist
- If you have no alternative, move the subject
- fill the frame
- plan
- Take advantage of open spaces
WHAT IS THE BACKGROUND?
The background of a photograph is made up of all those elements that, not being part of the close-ups, remain within the frame of your photographs. The background is not just a wall or a landscape, but everything that interacts in them: the sun, the shadows, people, objects, etc. That they will help you reinforce the feeling of place, that is, the message and feelings that your photographs convey.
The fact that the background may not be in focus or is totally out of focus does not exempt you from paying due attention to it. The objects may not be distinguishable, if the bokeh or blur is very high, but in any case, the colors, reflections or lines that would have been visible can enhance or ruin your photos. And not to mention if the background is clear and sharp, where the need to work with it becomes even more important.
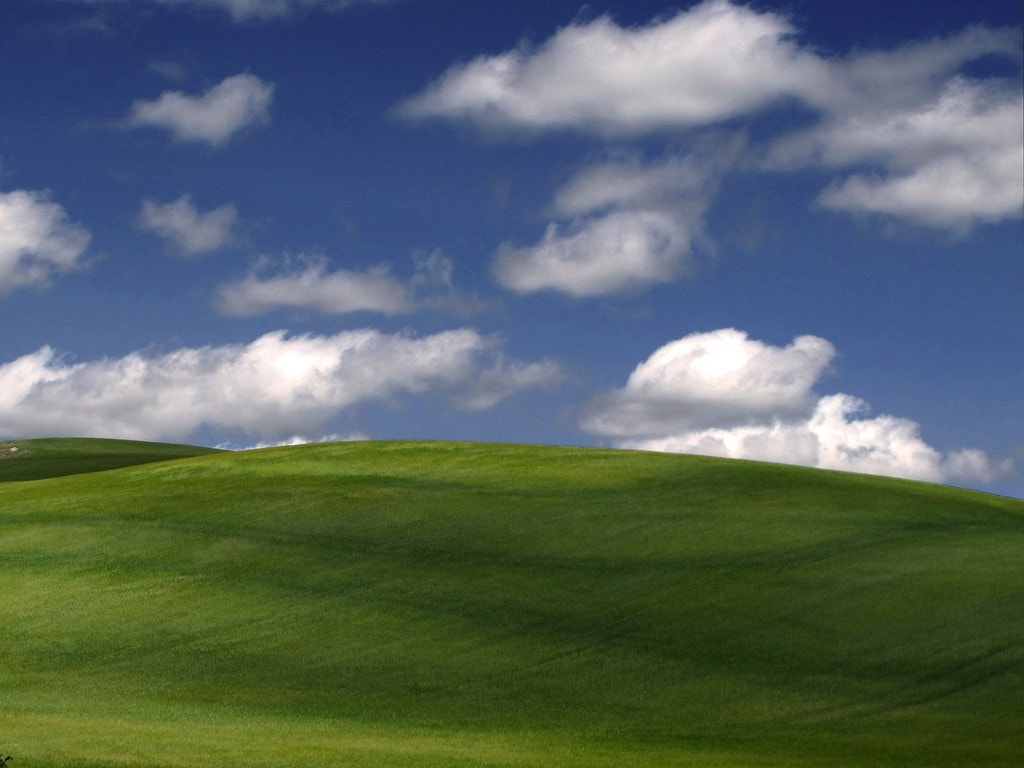
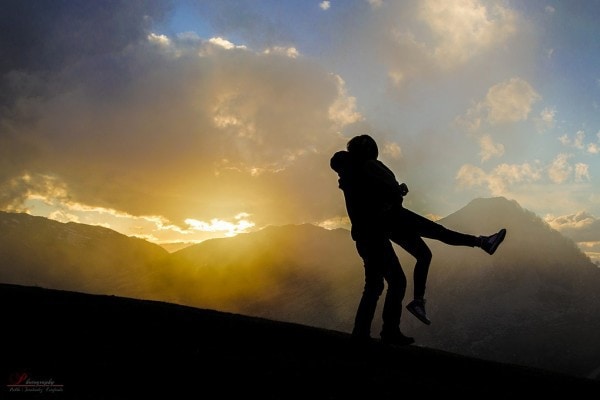
Take a look at the following example:


Both photographs have been taken of the same person in the same situation. The first of them, despite respecting many of the best-known rules of photographic composition, does not end up causing the impact that the second does. Why?
Look at the spectacular mountains in the background: the race is no longer on a road but now on a mountainous road, with beautiful landscapes and slopes. The background contributes a lot to the sensations that the photographs transmit, which is why it must not be lost sight of when composing them.
As I told you in the article “ 16 Ways to Give Prominence to Your Subjects ”:
“The fact that the background is not going to come out completely clear or totally out of focus does not mean that you can not worry about it. Pay close attention to the backgrounds when taking your photographs if you want them to really go unnoticed but at the same time reinforce your protagonist. A suitable background can make a good photo a great photograph.”
The key to choosing one background or another is: pay attention to what you want to emphasize, that is, what will be the reason for your photograph and then surround it with all those elements that help you enhance it: place it in the frame and compose the image. photography around it. An inappropriate background can end up ruining the entire photo.
Keep in mind that, most of the time, less is more, so more sober backgrounds with softer tones are preferable to those where chaos and disorder take over the situation. In the quest to empower your protagonists, try not to get the opposite effect, distract the viewer's attention.
HOW TO IMPROVE THE BACKGROUNDS OF YOUR PHOTOS?
A photograph is not just a capture of a portion of the scene that is transferred to paper (or computer), but it is an image that implicitly carries an endless number of feelings and sensations that are waiting for an observer to enjoy them.
That is why it is essential that, when preparing to take a photograph, you never lose sight of the background and work with it as much as you would with your protagonists.
To do so, I have prepared 11 tips to improve your backgrounds and, therefore, your photos:
1. EXPLORE EVERY ANGLE
One of the mistakes that is most often made when taking the first steps in the art of photography is: staying still. Before taking a photograph, walk the scene and evaluate all the possible angles to take the shot so that you make sure that the chosen background is the one that best combines with the subject and with the message you want to convey.
You have as many possible angles to take a picture as ideas in your head, do not stay with just one. Go through the scene and select the best ones.
2. AND ALL FOCAL LENGTHS
Depending on what type of photographs you are looking to take and the number of elements you want to include within the frame , the "optimal" focal length will vary and with this, the background of your photos will vary.
If you plan to take portrait photographs, where all the prominence is focused on your subject, a background without many elements that distract the viewer will be optimal (longer focal lengths: 85mm). On the contrary, if you are about to photograph an urban landscape, where the background elements will serve to position the viewer, the shorter focal lengths will allow you to obtain better results.
As you increase the focal length, the angle of view or "portion of the scene" will decrease, which will change the perspective of your photos and vice versa. I recommend that you take a look at the following articles if you want to get a better understanding of this topic: “ How to Capture Superb Compositions Thanks to the Focal Length of Your Lens ” and “ Everything You Need to Know About The Focal Length of Your Lens ” .
The level of sharpness or blur that you will achieve in each of your photographs will depend on the focal length (which I have just mentioned) and the aperture of the diaphragm that you choose to take them. The more open the diaphragm (f/1.8, f/2.8, etc.) the greater background blur you will get and the more closed it is (f/16, f/22, etc.) the greater depth of field and therefore more backgrounds. sharp. For you to better understand this concept, Mario explains it to you in this video:
If you want to enhance the prominence of your subjects or objects, separate them from the background by blurring: use wide open apertures (f/1.8, f2.8) so that the backgrounds do not distract the viewer's gaze. If you want the background to come out very sharp, try closing the diaphragm, this way you will get a greater depth of field and your backgrounds will come out well focused.
Take a look at the following article: “ 16 Ways to Give Your Subjects Center Stage ”.

4. TURN OFF THE BACKGROUND
Unfortunately, there isn't a switch to turn the backgrounds on and off at will, but if you use flash or other light, you can darken it while bringing out the foregrounds. I eat?
Flashes have a certain range: if the subject is far enough from the background, when you fire the flash, you will illuminate the foreground and the background will be darker as it is not hit by light from it. In the same way, you can use sunlight, light from a lamp or any other type of light source that allows you to differentiate the light between the planes of your photographs and their backgrounds. In this way, you will achieve that attention is focused on the subject of your photos, while the background, by being a little more "off", will not distract the attention of the viewers.
To better understand how flashes work and to be able to get the most out of them, I recommend that you take 5 minutes and read the following articles: “ Everything You Need to Know About Flash ” and “ Tricks for Better Flash Use ”.

5. WORK YOUR FUNDS
The background will always be present in a scene, so one of the first things you should do is verify that all the elements of the scene, not just your protagonists, are arranged the way you want. In this way, you will not leave anything to chance and you will be able to enhance the implicit messages in each of your photos.
One of the most frequent mistakes of the photography enthusiast is to concentrate all the efforts on the subject of the photograph and forget the frame (background) in which it will be placed. The background can enhance the sensations that your photos convey or ruin them. Never stop working with them if you want to achieve the best results.
Once you've decided on the background for your photos, it's time to frame it. Take a look at the following article: “ Everything You Need to Know to Frame Your Photographs ”.
6. CREATE YOUR OWN BACKGROUNDS
As strange as it may seem to you, the background is not always given by the scene. Whether you work inside your home, in a studio or why not, in an open space, you can always model the backgrounds yourself.
Although these types of techniques are used mostly in studios, where you can modify the background of a photograph through infinite backgrounds, fabrics, etc., nothing implies that the same techniques cannot be used outdoors. The key to doing it is: imagination. If you exploit your creativity to the maximum there will be no bottom that stops you.
Notice how with a black leaf in the background and a flash you can manipulate the background:

If the previous photograph has impacted you and you want to know how to do it, be sure to read the following article: “ How to Get Attractive Images Of Flowers (Like These…) ”.
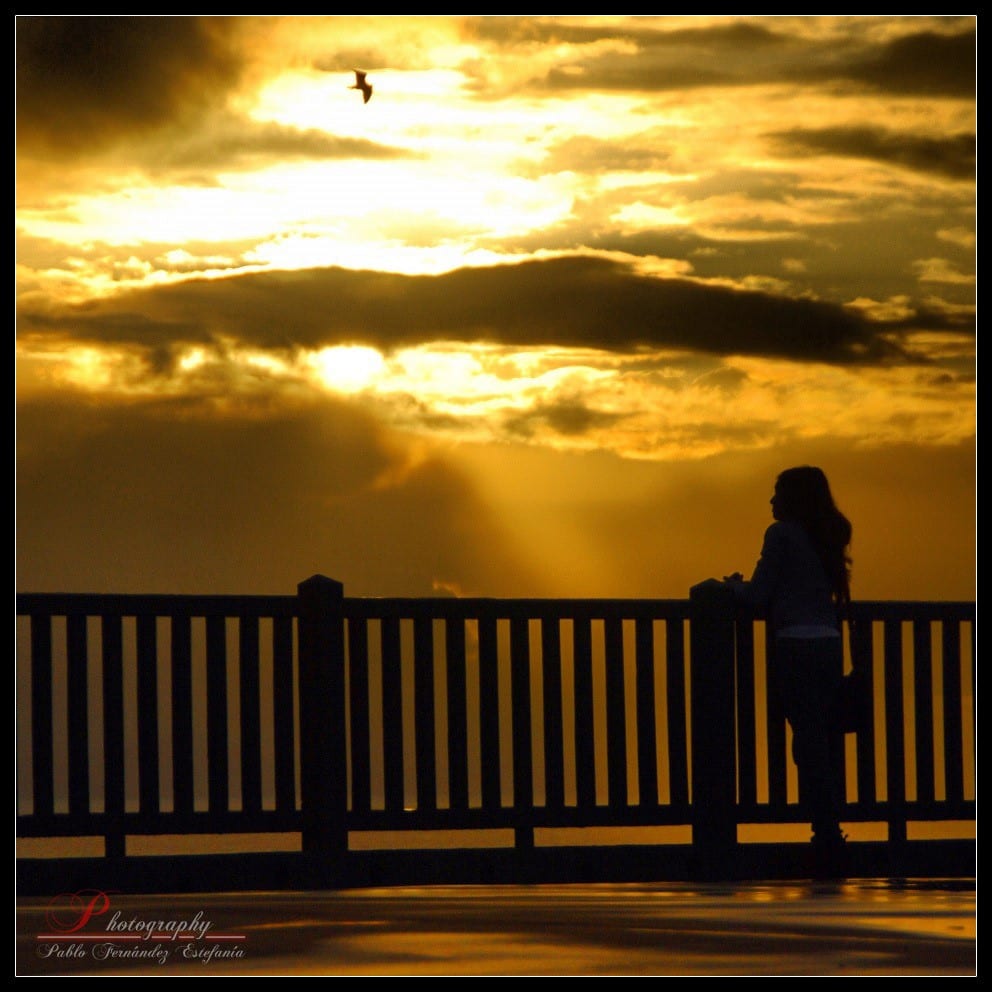
7. THE BACKGROUND CAN BE THE PROTAGONIST
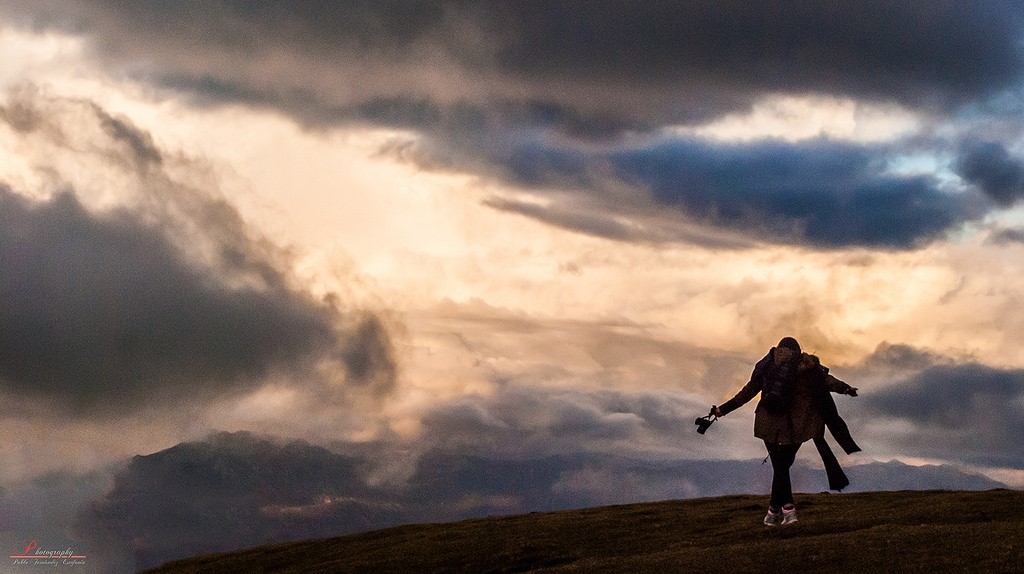
There are certain situations, like the one you will see in the photograph that accompanies this tip, where the background can be so spectacular that it makes up the subject of the photograph. The fact that a background is generally chosen that accompanies the main motifs does not prevent things from happening the other way around.
If you want to portray the spectacular nature of a background, landscape or sky, you can give it more prominence in your photograph by increasing the portion of the frame that it will occupy in the final photograph.
Look at the following example, the photographer has portrayed a spectacular sky and has chosen a girl to reinforce the message of the final photograph. The ground line or horizon has been placed so low that it detracts from the girl and she assigns it almost entirely to the sky.
8. IF YOU HAVE NO ALTERNATIVE, MOVE THE SUBJECT
If you've gone through every possible angle to frame your shot and you're still not happy with the background in your shot, don't be shy, kindly ask your subjects to move somewhere else, or if it's an object move it yourself.
Although it is true that in ideal conditions it is you who should move, this does not mean that, if you consider that the impact of your photographs will be enhanced by changing the background, you cannot politely ask your models to position themselves elsewhere. After all, you should be the director of the whole scene, not just the one in charge of pulling the shutter.
Take a look at the following articles: “ 11 Tips and Tricks for Stunning Portraits ” and “ 26 Easy Tips and Tricks for Professional Portraits ”.

9. FILL THE FRAME?
Before you take a photo, you'll need to decide how much of the background to include in the scene. This decision is fundamental since the way and the "amount" of background that will appear in your photographs will significantly affect the messages and sensations that they will transmit.
In the article " Everything You Need to Know to Frame Your Photographs ", I told you that:
“The more portion of the frame your subject occupies, the more prominence it will have and you will also be able to capture it in all its splendor (in great detail). Now, perhaps the environment makes the photograph and the relationship of the motif with it reinforces the message it transmits, such as a photograph of a passerby and the city in the background as a frame.”
Therefore, depending on the sensations you are trying to convey, you will have to opt for one alternative or another: fill the frame with your main subject or object, or open the plane (use shorter focal lengths) and get the most out of it. background to enhance your photos.

10. PLAN
While it's not always possible to plan a series of photos but rather to have them presented to you and then put together and have a piece of work to show, it's always better to plan than not.
On many occasions you can plan without even leaving your comfortable chair. How is this? Think, imagine and work on your next compositions directly in your head so that, when the time comes to make them come true, you have a clear idea of what you want to achieve.
Will you work in open spaces or in a studio? Will you use the background as an element or will you fill the frame? Will I take my shots with natural light or with artificial light?
These questions and many others are what you should ask yourself before going out to hunt for photographs or before producing them. The fewer factors you leave to chance, the better chance you have of, when a unique situation arises, being ready to portray it.
 >
>
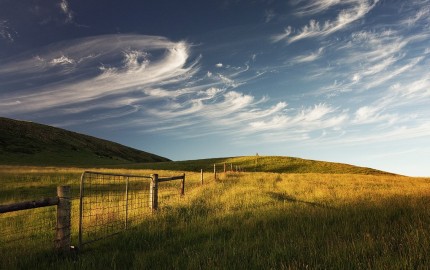
11. TAKE ADVANTAGE OF OPEN SPACES
As long as you work in open spaces, the possibilities of working with your funds will multiply. The wide variety of backgrounds that you can include in your shots will allow you greater freedom when it comes to using certain apertures and focal lengths so that you can either blur the entire background, or take it out clearly to dress up a photograph.
Go out and take advantage of all the benefits of nature to get the most out of your backgrounds: the blue sky, the gray clouds, the reflections of a lake or puddle on the ground, a leafy forest or a river can give your photos a background worthy of a great artist like you
Now that you know the importance of working on the backgrounds of your photographs and what are the ways to get the most out of them, all that remains is for you to put into practice everything you have just learned (or review if you already knew).
