It is almost inevitable to first imagine a landscape full of colour, a golden sunrise or sunset, or even the hour when everything turns blue. This does not mean that it is the only way to capture it. In fact, there are black and white landscape photographs that take your breath away. And if you remove color from a landscape... how is it possible for it to impress in such a way? I tell you. But first, let me recommend our black and white photography mega guide so you can dig deeper if you're interested in this genre.
Returning to the subject, sometimes we think that our camera is like a photocopier (in color and in black and white), only instead of photocopying small formats, it is capable of reproducing huge scenes. Nothing is further from reality. Your camera is not even remotely a copier, if you think that way you are underestimating it as much as you are. Your camera is a creation tool.
You don't need a pretty landscape to achieve great landscape photography. If you have it, perfect, it will help you, but you need something more and easier to achieve. You have to imagine that you have a blank canvas in front of you and that your brushes are your camera, your head and your heart. Today we will discuss the camera settings above, because you have on the blog this very complete guide on landscape photography with all the tips and tricks you may need. In today's article I'll try to give you some tricks to use your head and heart to make a black and white landscape as impressive as a color one (or more so).
1. SEE IN BLACK AND WHITE
The first thing to keep in mind is that any landscape will not look good on you in black and white. You have to first learn to see in grayscale to verify that the result is worth it, since each color has its equivalence in this scale. What in color can be a good contrast, the same in black and white is not.
A little trick is, if in doubt, shoot with the monochrome option of your camera. And if you like it, do not hesitate, shoot again but this time in color or if possible in RAW . In this way you will not lose part of the information that you will need when editing the image.
2. PAMPER THE COMPOSITION
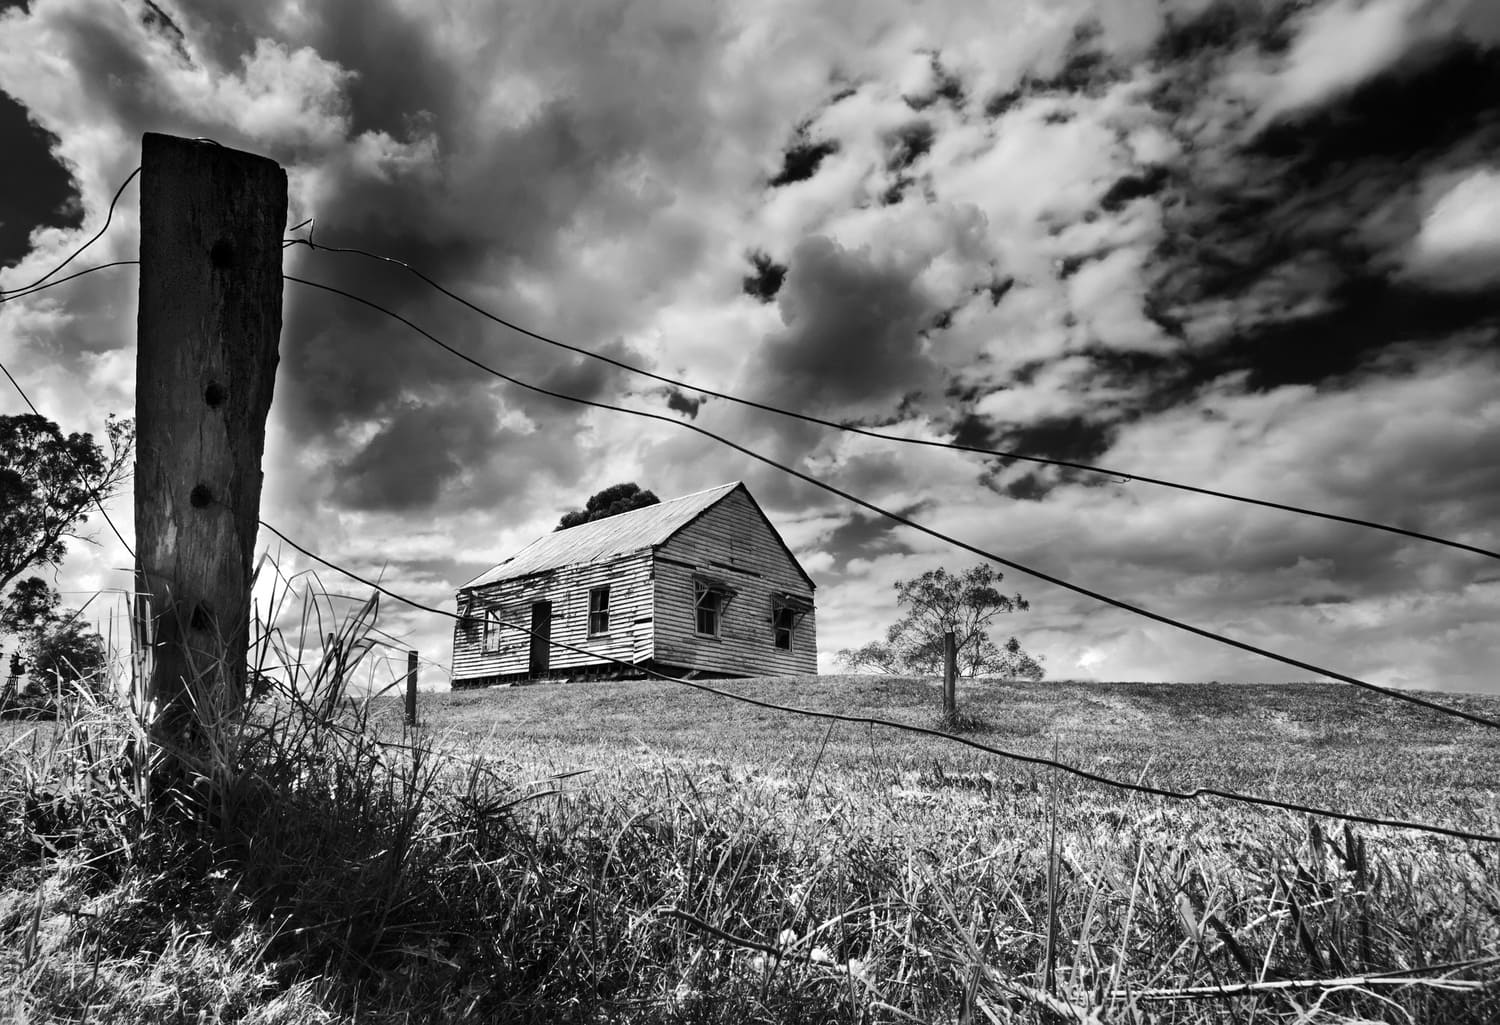
If composition is a fundamental element in any photograph, in a black and white landscape it becomes even more relevant. As I told you at the beginning of the article, we usually expect a landscape in color, this happens because it is the way our eyes usually see it, but also because the colors of the landscapes arouse many emotions. Color can even constitute the very composition of a landscape, so when eliminating it, we must treat the way in which we arrange the elements within the frame with much more care . Because we have also said it, it is not about reproducing, but about creating, so it is up to you to distribute the elements of the landscape in such a way that they immediately capture the attention of the honorable public.
Ok, this said is very easy, but how to do it? Well, here are some tricks:
use the lines
If you think that the lines are only in the city, it's because you haven't seen enough landscapes ? The lines are a strong resource in composition and in black and white they take on more prominence. Look for them in the scenarios you have in front of you and use them to guide your gaze to the center of interest , or turn them into absolute protagonists. And remember the strength and the "S" curves and the diagonals, they are really powerful and they have a lot of emotions associated with them.

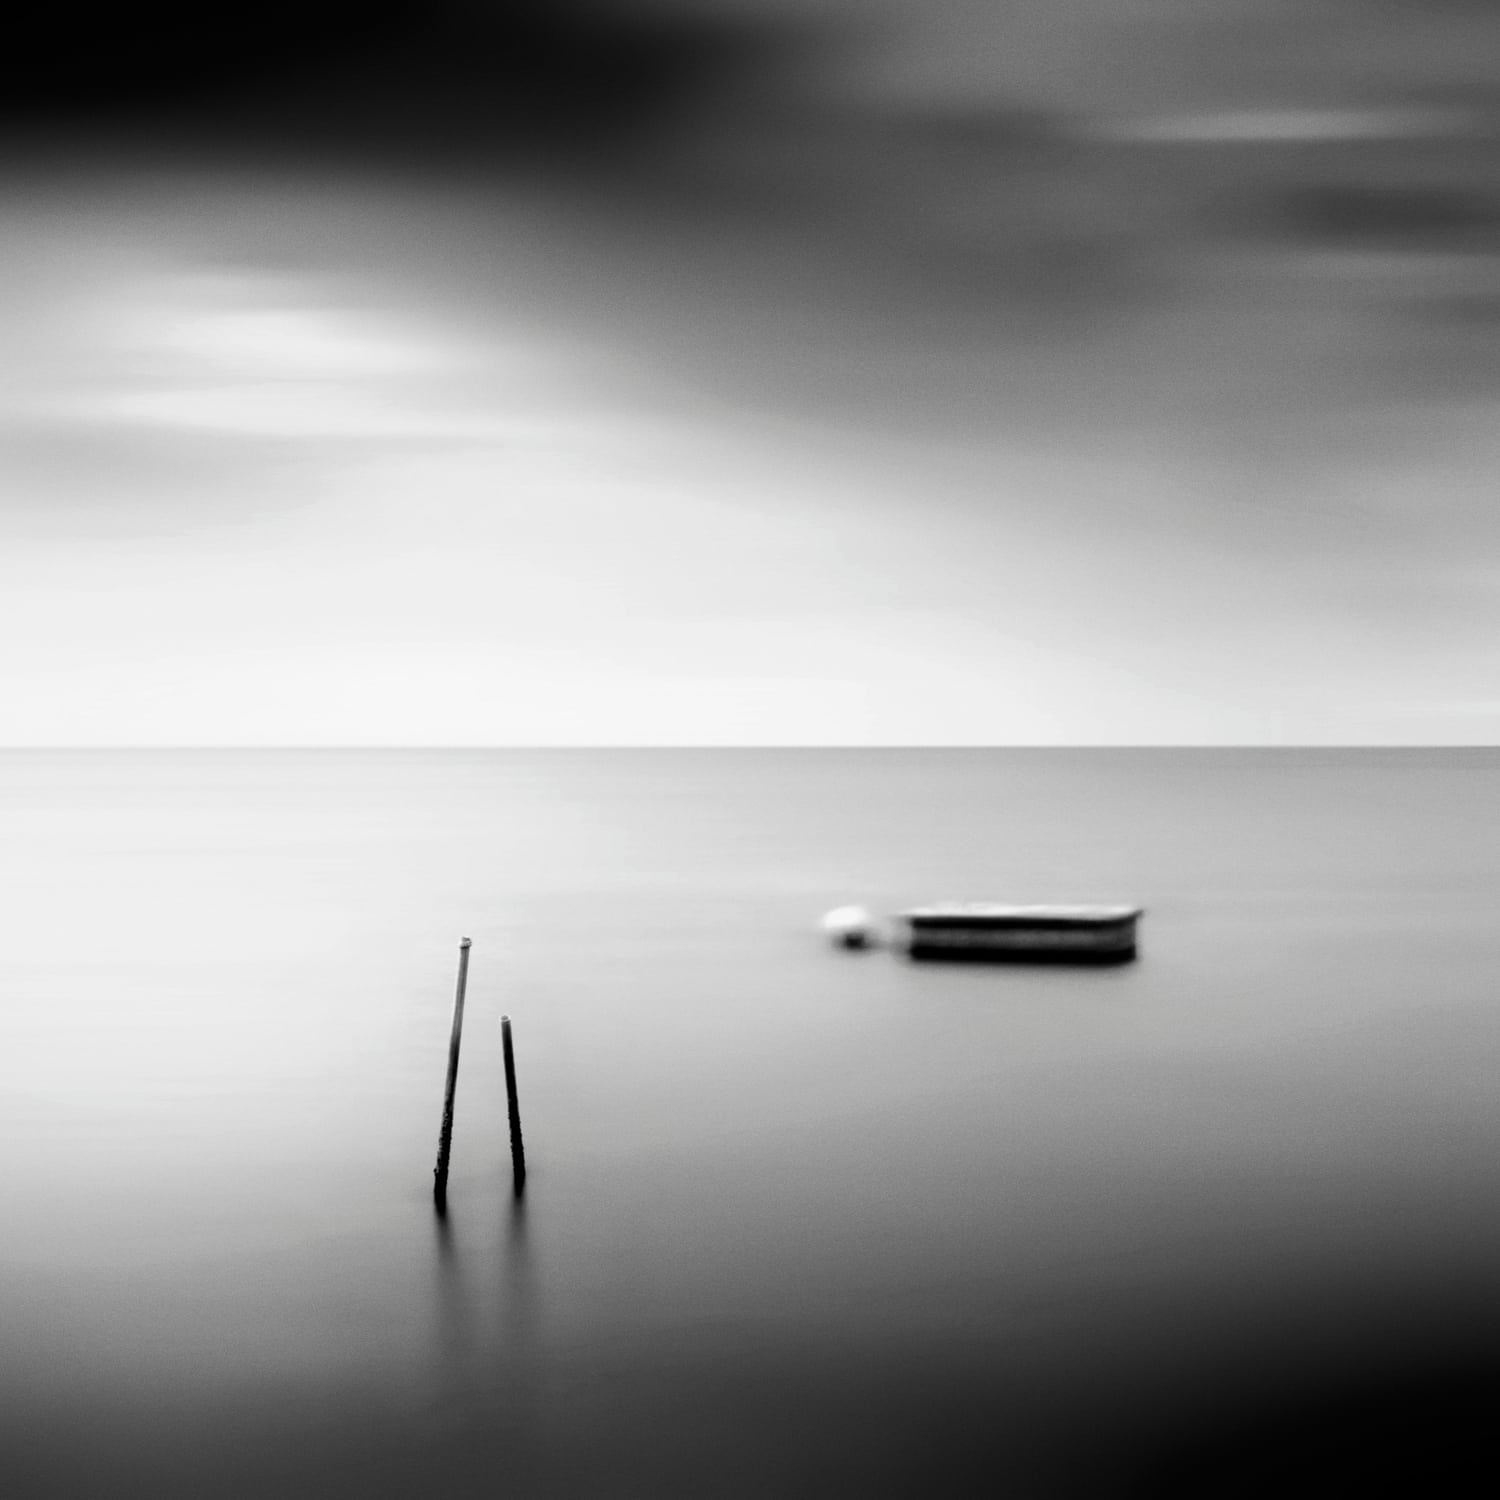
Turn to minimalism
Less is more. Another premise that I will repeat as many times as necessary without losing my smile or my knuckles shaking when typing it. Less color and fewer elements means more impact and more interest. One idea is to resort to the use of negative space to create a minimalist landscape of impact. The image above is a good example of a minimalist landscape, but here's another one for you, not for lack of inspiring examples ?
Rhythm
It is not about capturing some little birds singing the bals, but about including repeated elements that add rhythm to the image. Depending on the type of rhythm you capture, you can transmit different sensations. Everything you need to know about visual rhythm is here .
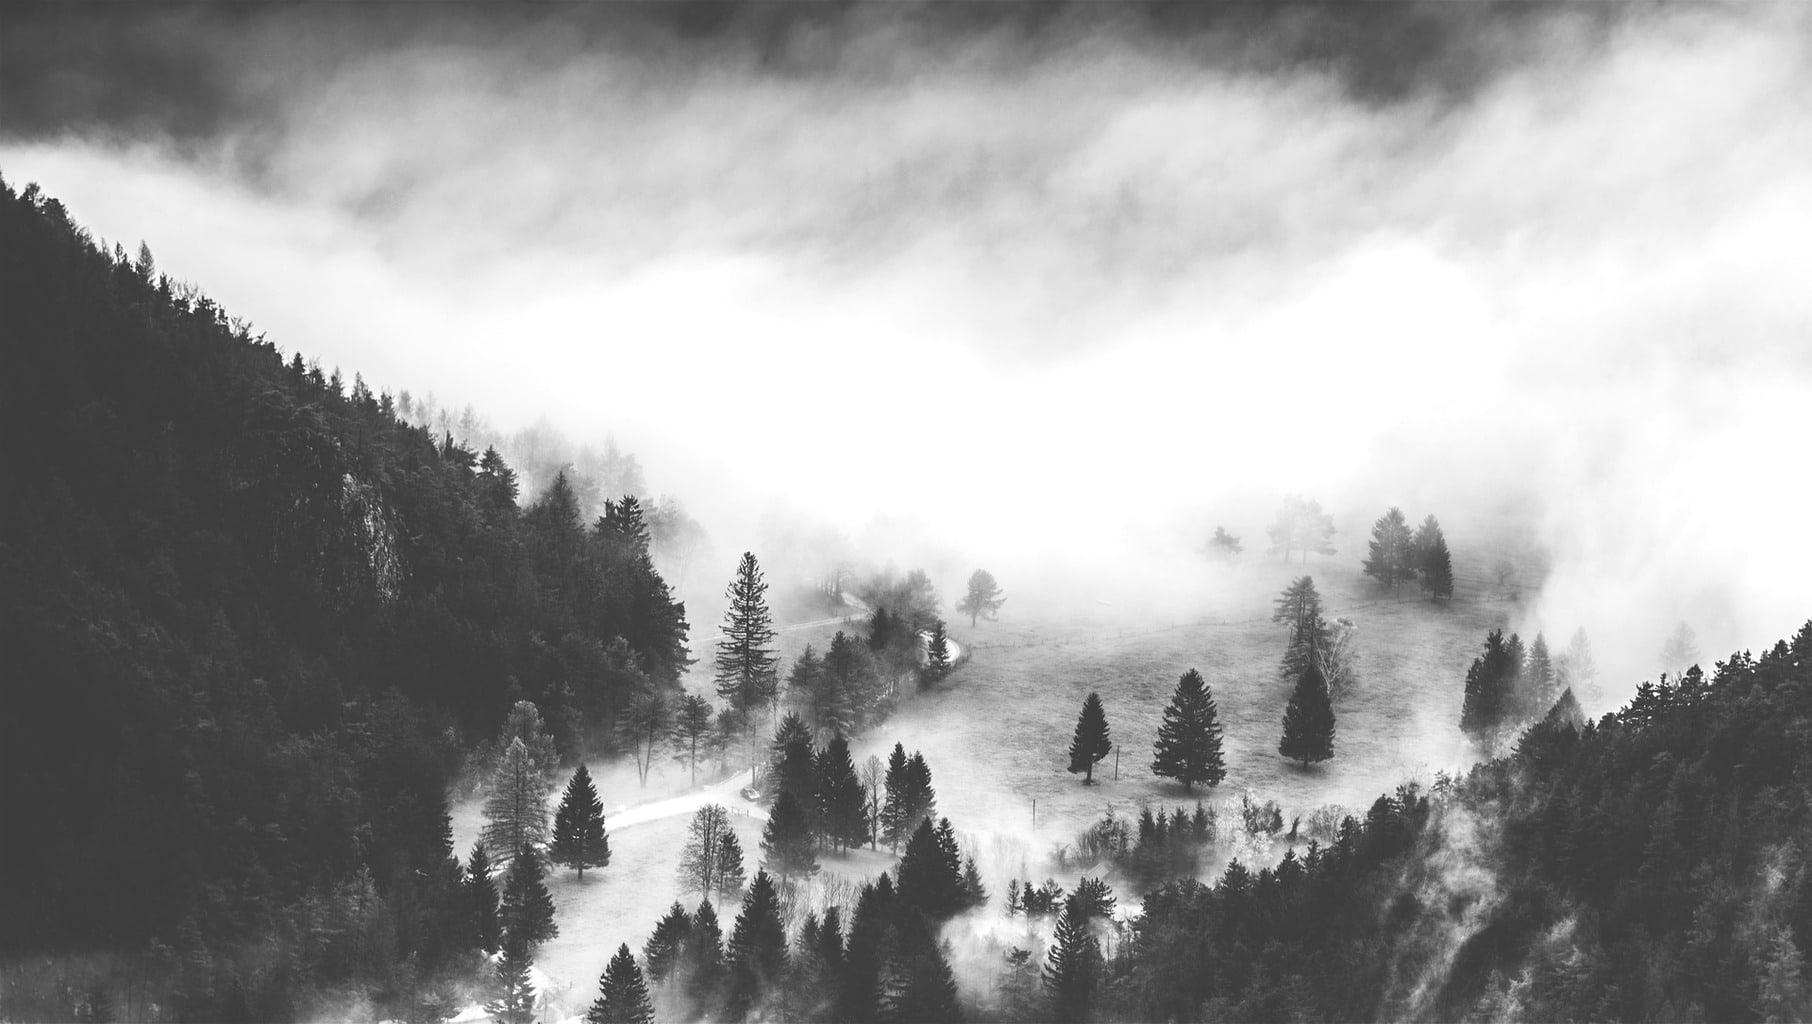
3. LOOK FOR THE MIST
If you get up early, you're in luck, but if you like to romp in bed you'll have to make an extra effort, yes, it will be worth it. The fog gives it a wonderful texture, an aura of mystery and gives a special atmosphere to the place. Although it is very rare, this makes it even more interesting. Do not miss the opportunity that presents itself for a few more minutes between the sheets! And follow these tips to photograph her ?
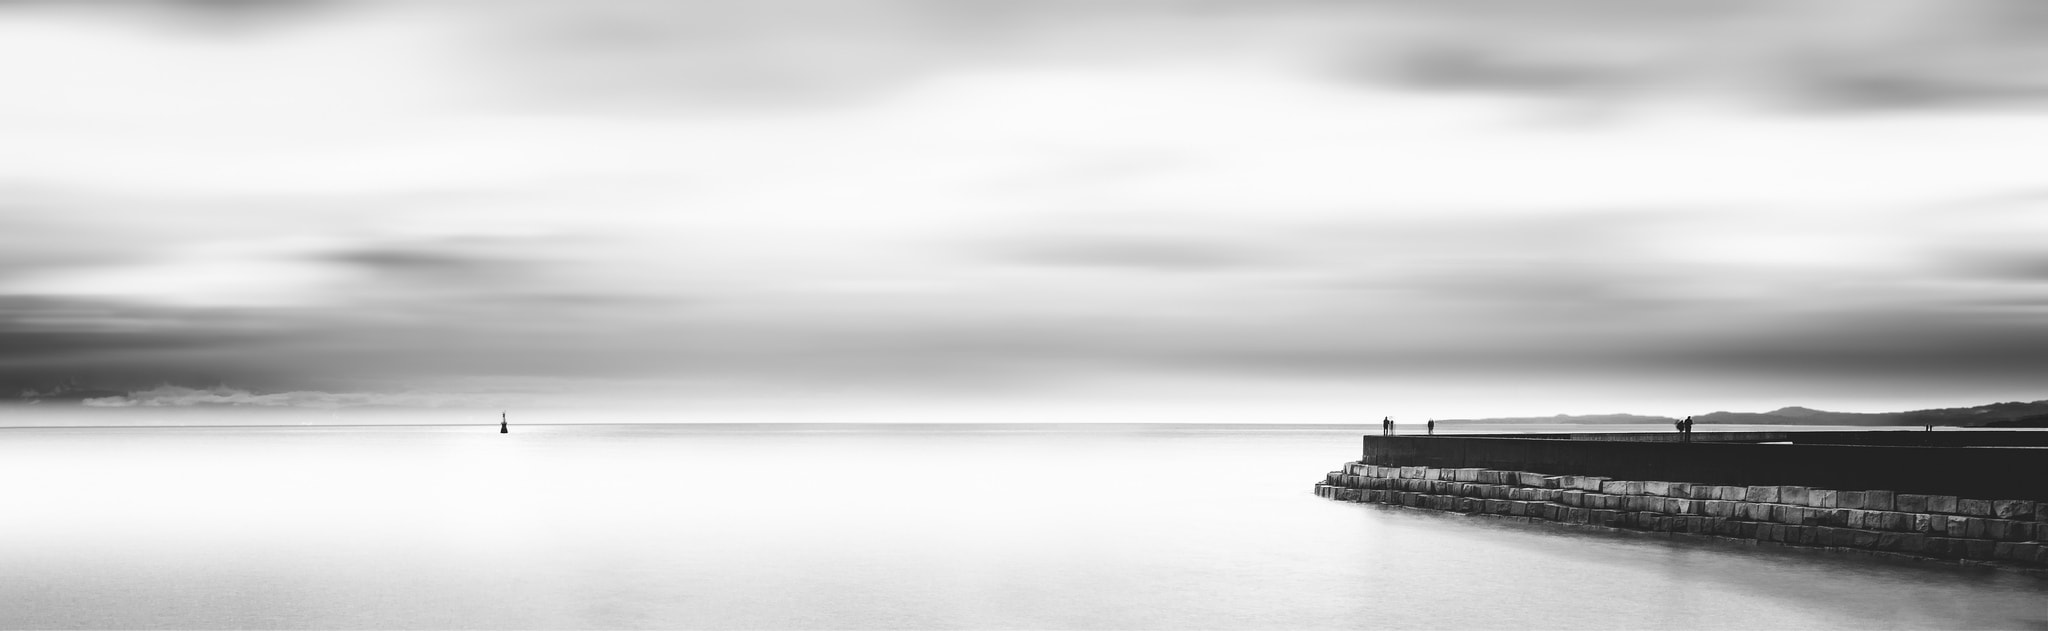
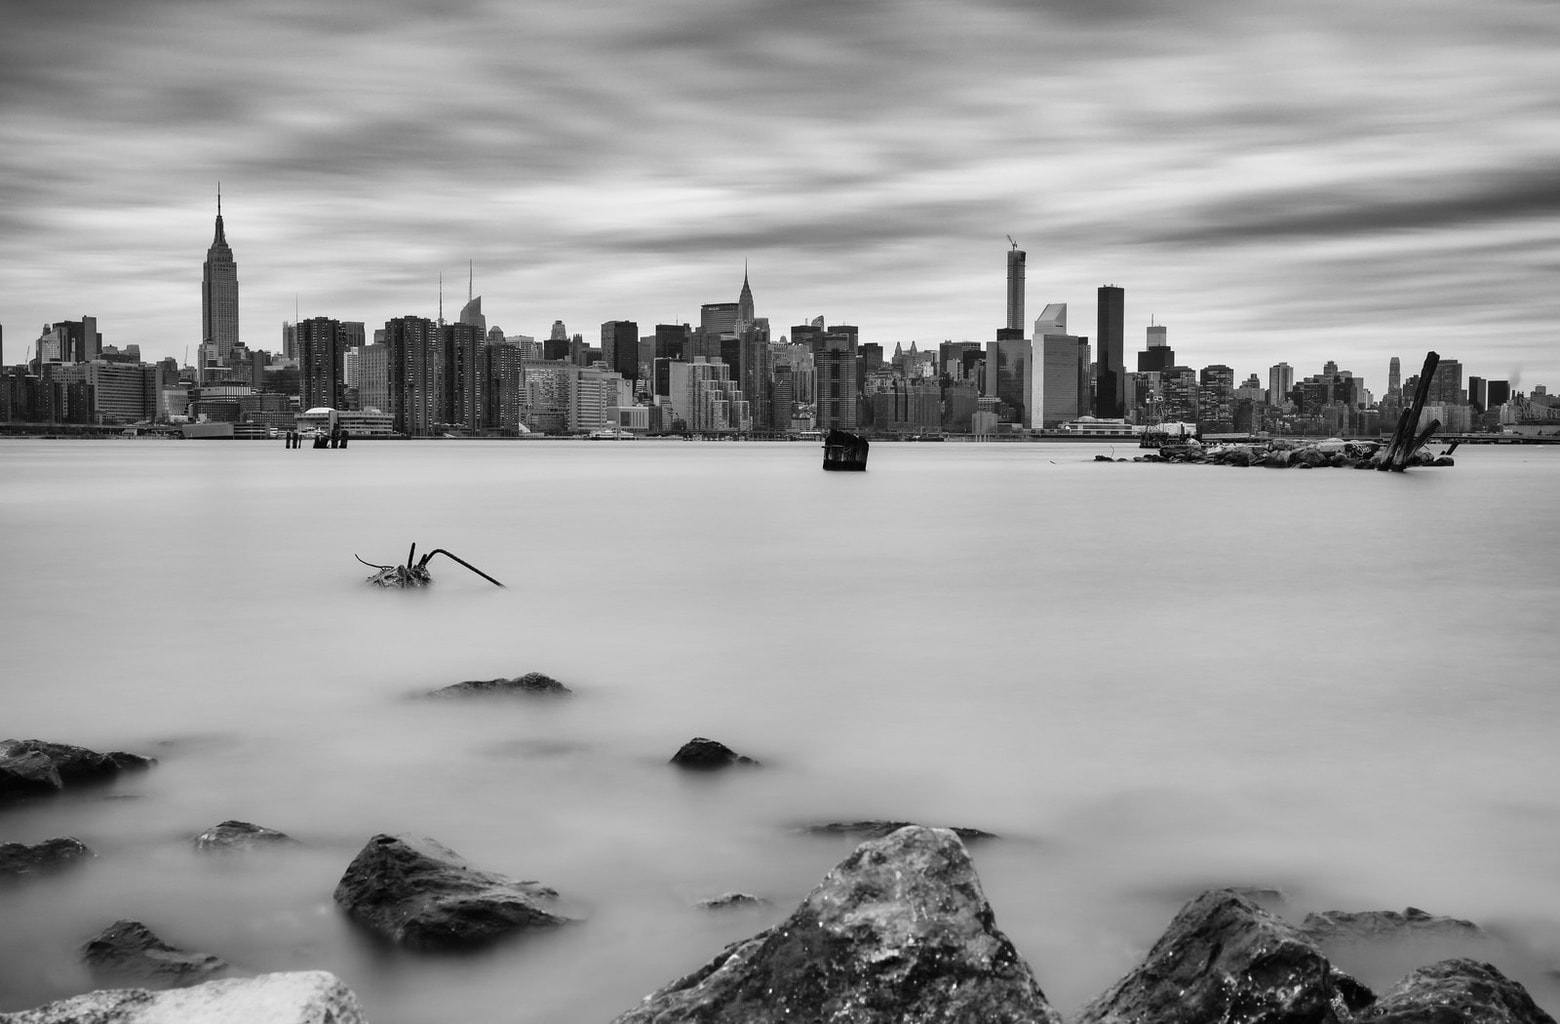
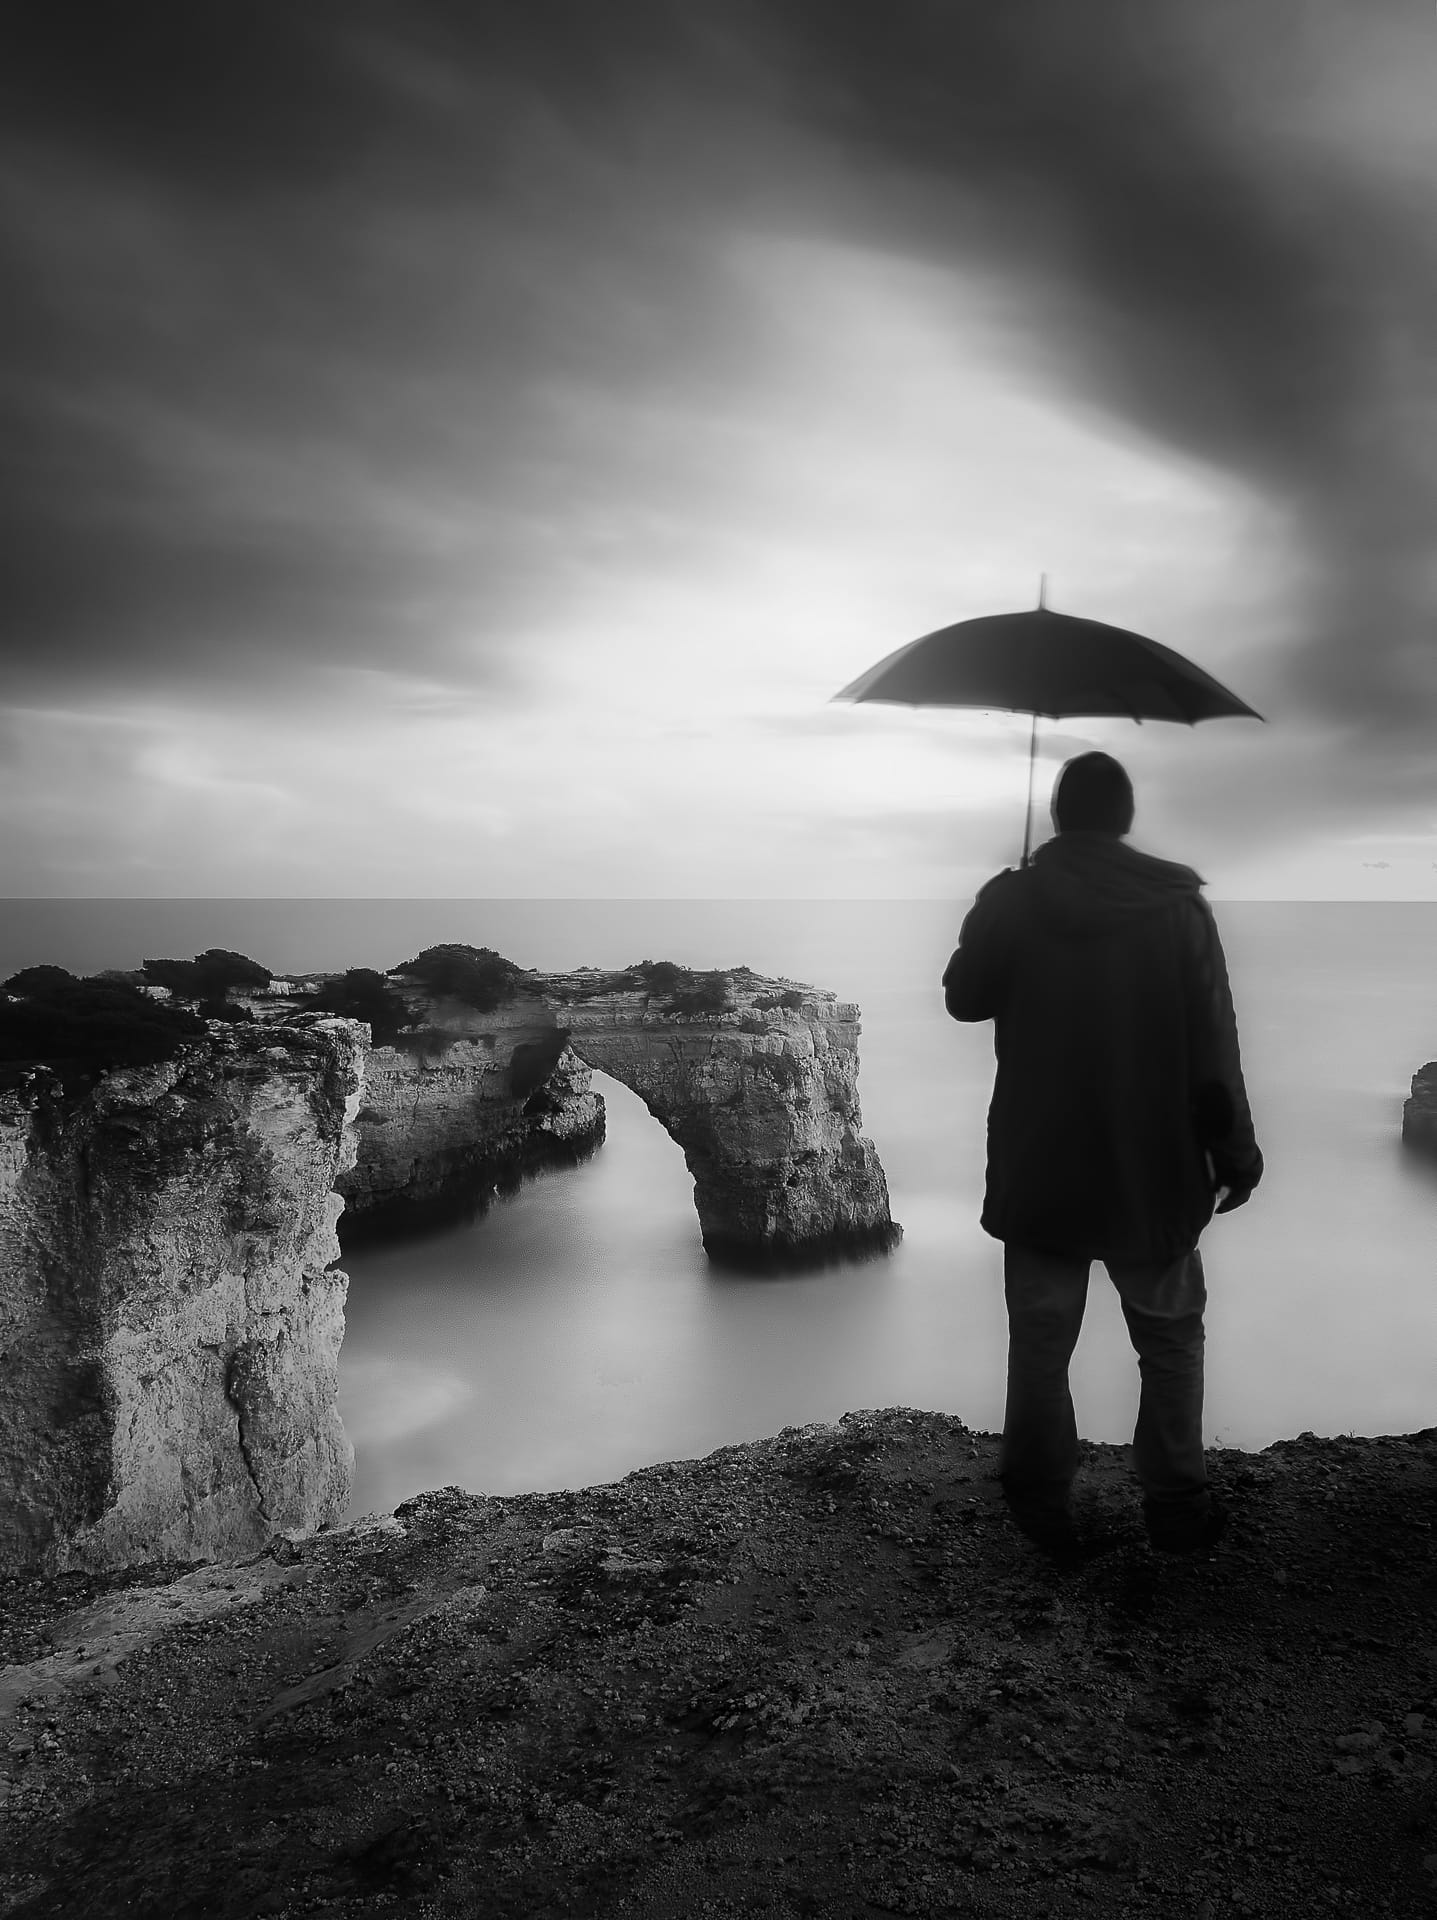
4. PRACTICE LONG EXPOSURE PHOTOGRAPHY
The long-exposure photographs of water have that dreamlike, unreal and at the same time hypnotizing point. The texture of the water is similar to that of a great painter's brush stroke, on your blank canvas the silky effect will look like a movie . You can see it in the first two photographs and in the following:

Long exposure is not only for water, beyond the silky effect, you can capture spectacular skies or heart-stopping cities.

5. USE FILTERS
Surely many times you have seen a landscape in black and white and you have been left with your mouth open and wondering how they have achieved that effect. Well, beyond the composition, the sharpness or the use of the depth of field, there is a trick that will give a completely different life to your landscapes, it is about the filters.
The filters in landscape serve both to shade the light and to provide greater drama. You can use polarizing or color filters. The truth is that about the latter I will tell you that it is much more comfortable to apply them with an editor than to carry a lot of different filters for each occasion. Of course, the fun is not the same in front of a computer as in front of a great landscape ?
What you won't get is good control of the light through the filters if you do it in the edit instead of on the ground. Here's everything you need to know about landscape filters .
6. MAKE GOOD USE OF LIGHT
And speaking of light management, you should know that depending on the type of light you have, it can completely change the landscape. Harsh midday light will help you achieve high-contrast landscapes full of drama. On the contrary, the diffused light that cloudy days give you or the first and last hours of the day are ideal for creating softer landscapes and transmitting sensations of peace. If what you want is to highlight textures, you will have to take advantage of when the sun is going down, so that the shadows are projected in their maximum splendor, highlighting any relief. The harder and more lateral the light, the more the textures will stand out and the more realistic your image will acquire.
Light is a very powerful tool, learn to use it and your landscapes will have another dimension. Think about what you want to transmit and plan your session for the time or day when the light is adequate.
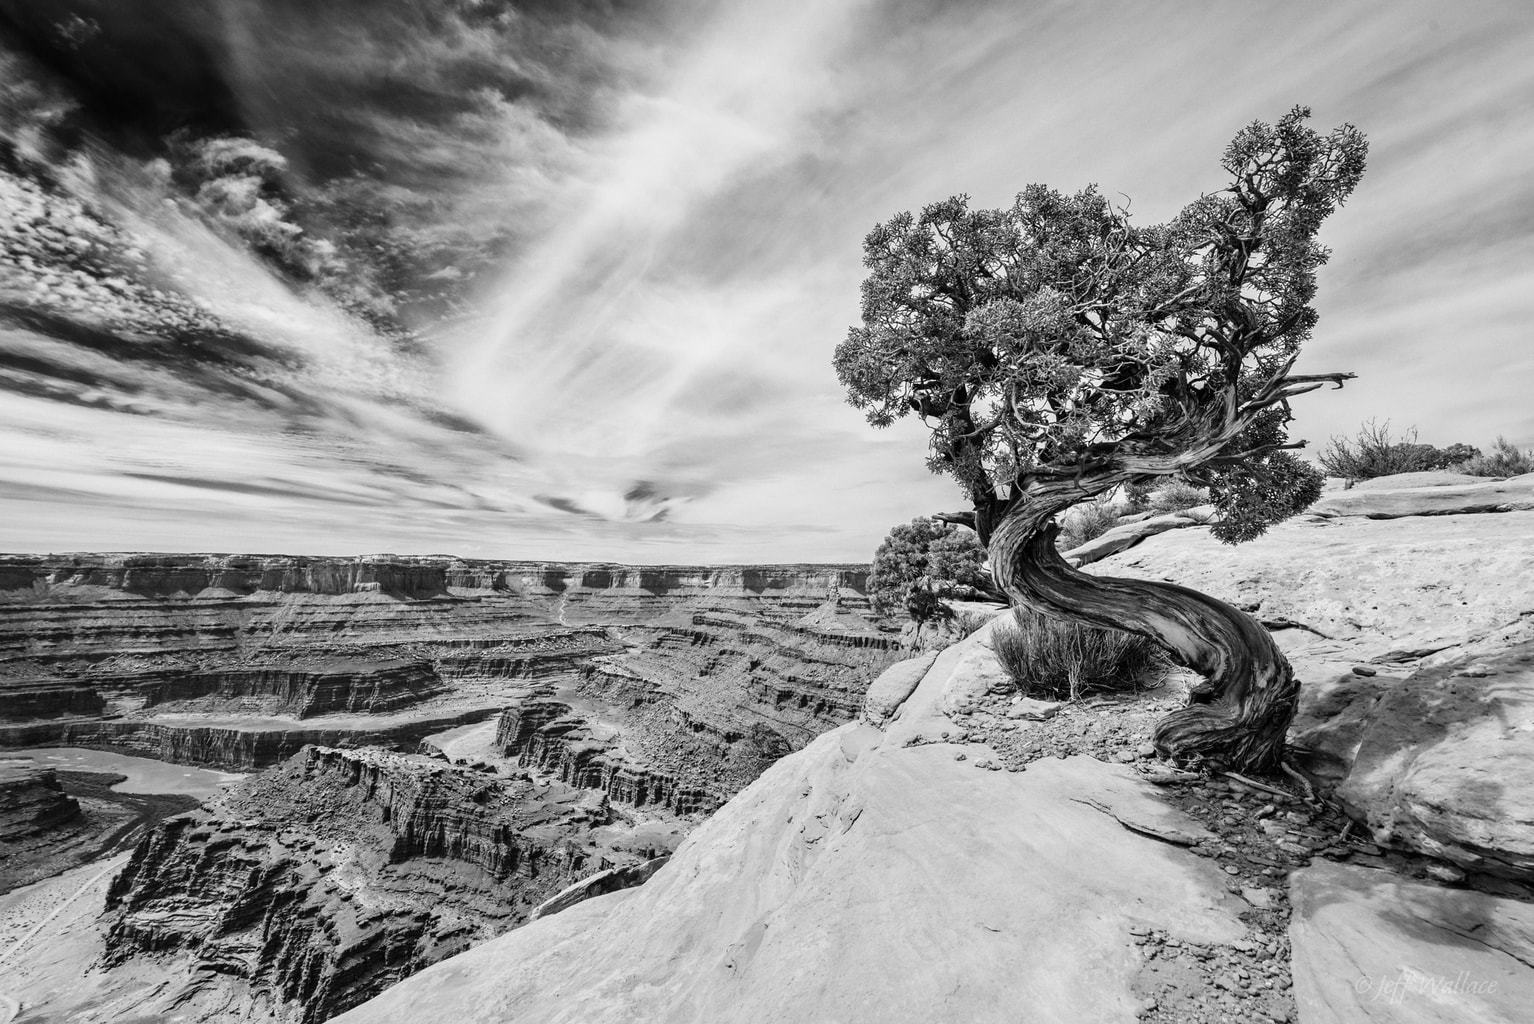
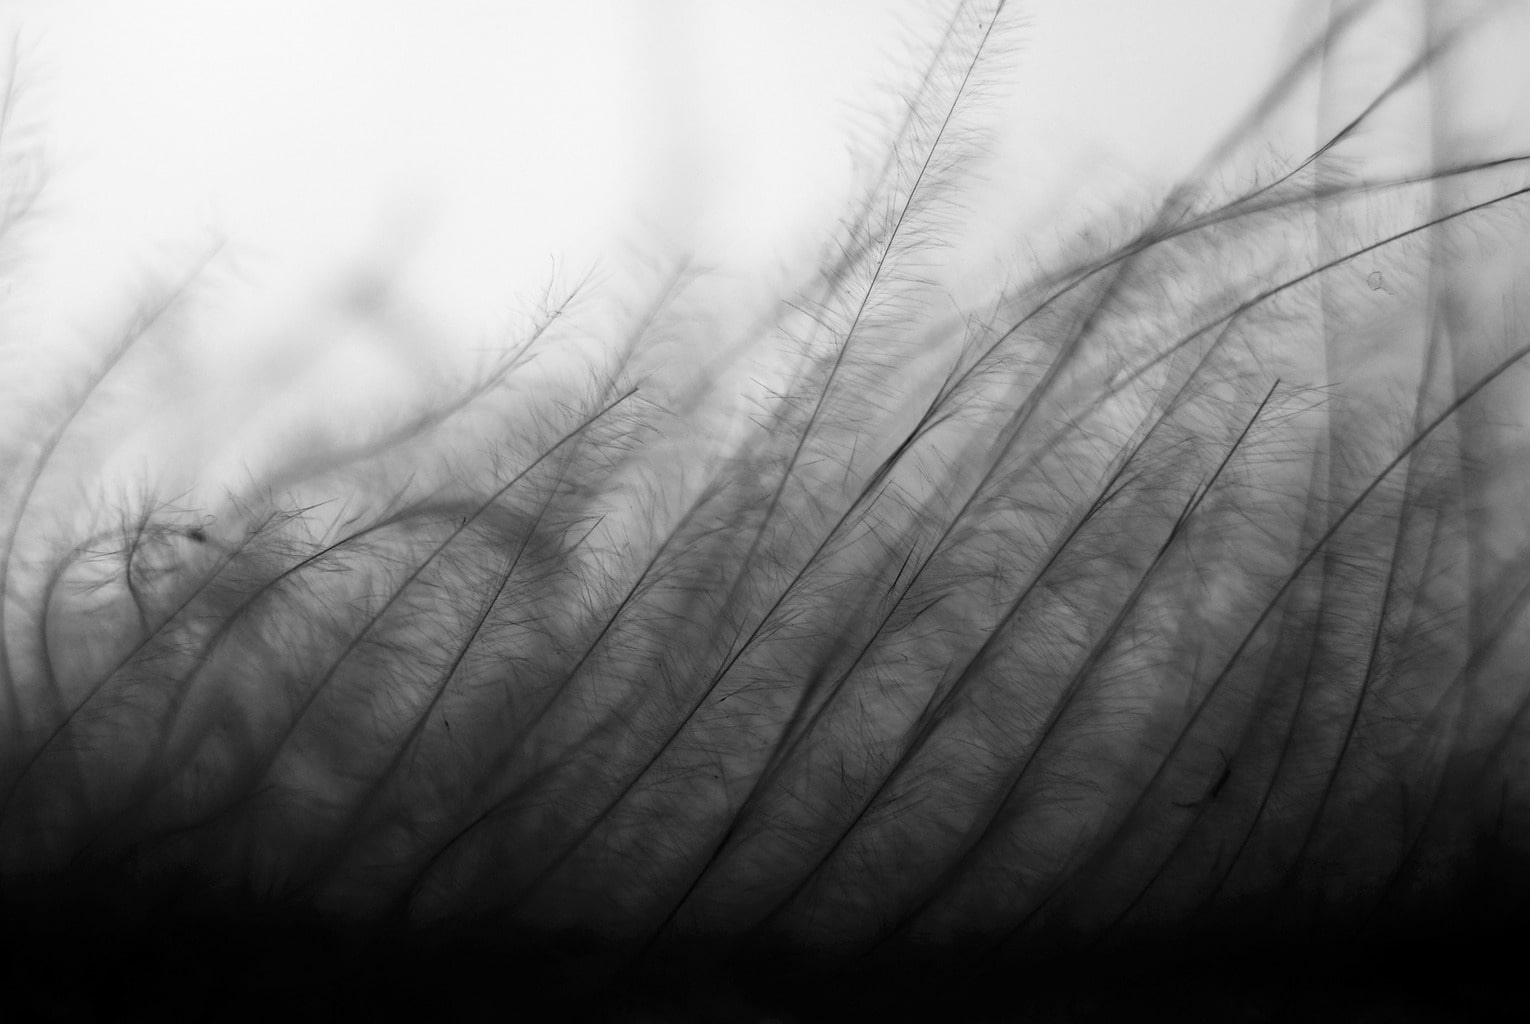
7. HIGHLIGHT THE TEXTURES
Textures are especially favored in monochrome images, give them a special place in your image. In the previous point we have talked about the light that highlights them the most, now I will remind you that to soften the textures you use a diffused light and that the textures that you can enhance in a landscape are:
- stones
- Sand
- tree trunks
- rocks
- very cloudy skies
- Water (I have already told you about the silky effect ? )
- Fog
If you manage to make the spectator perceive the rough touch of the trunk, the smoothness of that round stone or feel the fluffiness of the clouds, you will undoubtedly have won him over.

8. KEEP AN EYE ON THE ISO VALUE
In black and white photography, the noise caused by a high ISO value is much more apparent. If you don't intentionally go after it, looking for a specific effect, try to set the ISO to as low a level as possible.
9. INCLUDES CLOUDY SKIES
Many times we make the mistake of including a completely clear sky. In reality it is very nice to see an intense blue sky, but in a photograph it is of no interest, and if it is in black and white, even less. If you want to give prominence to the sky, fill it with clouds so that it causes a strong visual impact.

10. LET YOUR IMAGE MOVE
You can provoke sensations through movement, a soft breeze that you feel just by looking at the image, a dizzying fall, the speed of the cars in a city...
11. FEEL IT
If you feel the landscape, your audience will too. We have mentioned some strategies to convey emotions with photography, but the most powerful tool is you. In addition to using the tricks of contrast, light, composition, etc... you will have to really feel what you are doing so that the viewer feels it too, leave part of your soul in the photograph. That will not fail you. Never.
12. PRACTICE
Another "trick" that we will repeat over and over again on the blog, as it is the most infallible of all. Practicing is the only thing that will help you master all these tricks almost without thinking and find your own. With it you will be able to apply several of these strategies without even realizing it and, best of all, it is the direct path to having fun with your camera and to achieving impressive photographs.