

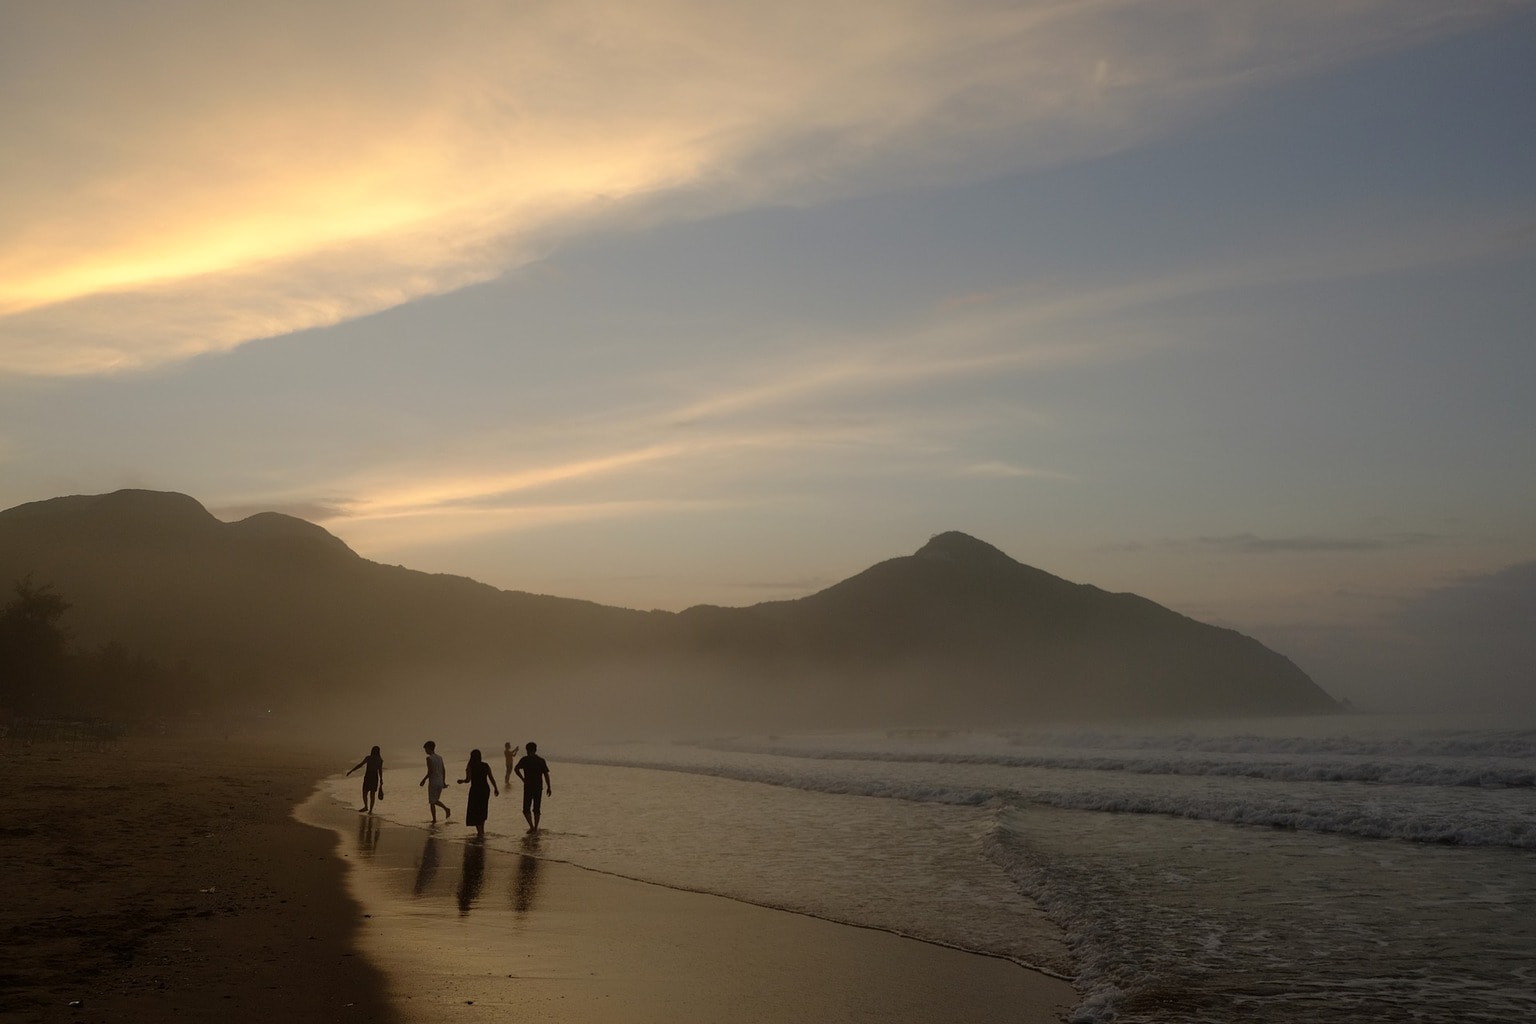
The beach in summer is a classic, but beyond the photograph of your little feet in the sun with the sea in the background, there are many artistic possibilities to explore between the sand and the sea. Now, how many times have you found when you returned home from your vacation that your beach photos are a disaster, they are boring, they are poorly exposed or they have no interest artistically speaking? You are not the only one or the only one, we have all been through it. The sea is so beautiful that it deceives us, because although it seems to us that its beauty in itself is already a great image, the truth is that it is usually not true on many occasions. More is needed, much more ;-). And since we head headlong into the summer on this side of the hemisphere, and consequently many of us will pass by the beach, we are going to do our homework to avoid themost classic mistakes in beach photography :-).
Oh! But first, if you are into nature photography, do not miss this mega guide that we have prepared for you with tricks, advice and a lot of inspiration.
1. CROOKED HORIZONS
It is the most classic and most attractive error and, although it is true that it is easy to correct with an editing program, it is also true that you will not be able to correct it without cropping the image in some way. I am very manic about framing and composition and I can't stand having to reframe a photo, I can't forgive myself ;-).
So since the horizontal lines that mark the sand and the sea are very dominant in beach photos, if you decide to include them in the frame, pay due attention to them before pressing the shutter. You can help yourself by activating your camera's on-screen help guides (see your instruction manual).

2. UNCLEAR CENTER OF INTEREST
This is another classic beach photography mistake, the result of which is that we don't understand the image or that it doesn't appeal to us enough to pay much attention to it. This can be due to several factors:
A BAD COMPOSITION
Learning to direct the gaze through the frame is a compositional job that you can achieve through the basic rules of composition. In this case, rules or regulations such as:
Everything you need to know about composition in this mega guide that we have published for you, with tips, tricks and much more.

CROWDED IMAGES
Unless you are lucky enough to find a secret corner of paradise, you will probably be sharing the beach with more than one beach tourist, with more than one umbrella, arm sleeves, garish swimsuits, floats, mattresses, coolers, etc., so it is especially important that you bring attention to your surroundings when taking your picture. Look around you and think before you shoot. Everything that does not interest, try to keep it out of the frame. To do this, try to get closer , to vary the framing , to change the point of view, look for photogenic details , etc. In short, think before you shoot ;-).

NOT KNOWING HOW TO PLAY WITH DEPTH OF FIELD
The depth of field is the area in focus in the image and is directly related to the opening of the diaphragm of our camera. The depth of field allows us to highlight our protagonist by isolating him from the background (open diaphragms) or integrating him into it through a high depth of field (closed diaphragms).
3. NOT TAKING CARE OF THE BACKGROUND
Related to crowded scenes, it is especially important that we focus not only on what we want to highlight but on everything that surrounds it. A bad background can easily ruin a photo. A beautiful portrait with an umbrella sticking out above the head, an arm, an elbow... Surely this is not the first time this has happened to you and probably not the only time, but with practice you will learn to pay attention to several things at once .
4. FLAT IMAGES
Another typical mistake in beach photography are flat images, without depth or with little sensation of it, in which the foreground and background are practically stuck and the distance between one and the other is not appreciated.
In order to solve it:
5. THE LIGHT
As always, but especially in beach photography, light can be your great ally or your worst enemy.
The main problems on the beach are the hours at which we usually photograph our daily scenes. I don't know if you're one of those who go to the beach from 7am to 9am, at least not me, so I usually find myself in situations where the sun is high and the light is harsh and overhead (from above). This translates into scenes with a lot of contrast between light and shadow , in little sensation of volume of the objects and, in portraits, in unpleasant shadows under the eyes.
What solution do we have then? Things are looking bad, huh? Don't worry, there are solutions:
In portraits:
Generally:

6. BORING IMAGES
The best ingredient to avoid boredom is to look for what is different . Try to focus on details that you find around you, pay attention to repeating patterns , color, curious scenes that happen near you, or vary the shooting angle .
7. EXPOSURE METERING
Depending on the objective of your photography (a landscape, an object, a portrait...) as well as the quality or direction of the light you are facing, the metering mode should be adjusted to what the scene is like . what you have in front of you and what is the result you want to obtain from it. That is, in a harsh light scene (high contrast) if you want to take a portrait, probably the best option is to use a spot metering mode . On the other hand, if you have before you a landscape with a more homogeneous light, you may be more interested in a matrix reading that allows you a correct general reading of the scene.
If you don't know what I'm talking about, don't worry, we have a great article on exposure: Detailed guide: how to correctly measure and expose your photographs
8. NOT TAKING CARE OF THE EQUIPMENT
This is the definitive error, because the rest of the errors have more or less solutions, but not taking good care of the equipment near the sea and the sand can cost you dearly. Pay special attention especially in those acts in which the interior of the camera is exposed (change lenses, cards, batteries...). But, in general, try to keep it well away from the sand, keep it in a suitable backpack or bag, avoid splashes and, obviously, be careful with the enemies of others. A camera on the beach is a juicy candy, don't get lost.
How about? Have you ever made any of these mistakes in beach photography? Let's solve them then ;-). And if you want to help someone else get better beach photos this summer, share this article on your favorite social network. Thank you and see you next time.
