
A black and white photo contains a certain mystery. Sometimes these pictures can say much more than color. Black and white portraits look very stylish. You can refresh your photo album without new photo shoots by simply making a black and white photo in Photoshop from the color ones that already exist. But it also happens that you need to make the photo color. For example, you need to paint an old portrait. So how do you make a black and white photo color? After we consider the methods of converting color images into black and white using Photoshop, we will do the opposite. You will learn how to make a color photo from black and white in Photoshop.
How to make a black and white photo in Photoshop
As with any other photo manipulation, in the case of a black and white effect, there are easy and quick ways and options are a little more complicated. First, consider a quick way to turn a color photo into black and white. The following will show how to make a black and white photo more spectacular using customizable special effects. In order to compare and evaluate the ways of converting color photography into black and white, try them on the same portrait.Quick way
Select a photo, open it in Photoshop. To become the image layer and make a duplicate by pressing a combination of keys Ctrl + J . In the main menu, select the item "Image» / Image - «Correction» / Adjustment - «washout» / Desaturate , or easier, the key combination the Shift + the Ctrl + the U . The photo becomes black and white. It remains just to save the result in the desired format. To do this, press the key combination Shift + Ctrl + S and select the desired file type. For example, jpeg.How to make a black and white photo expressive
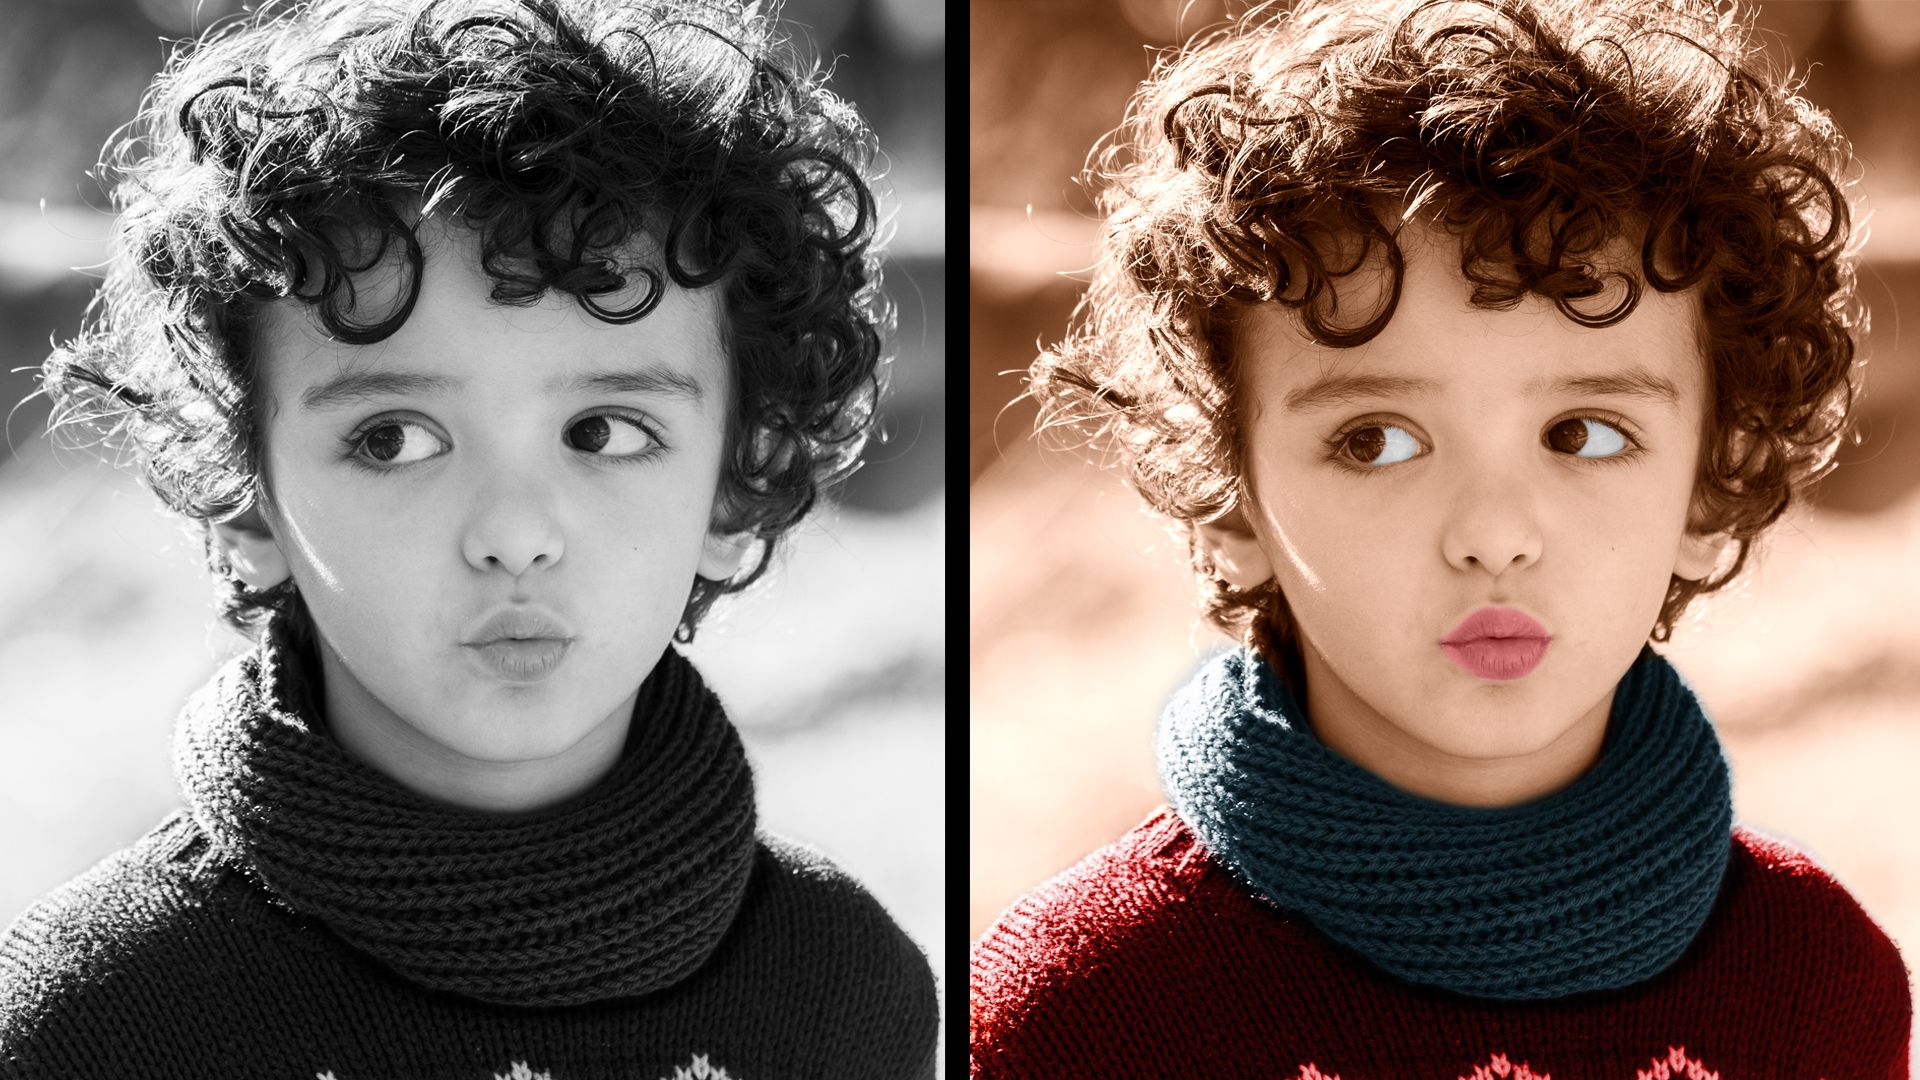
Now we’ll make a black and white photo from the same shot, but more expressive. Select a photo, open it in Photoshop. Next, go to the main menu, the item "Image" / Image - "Correction" / Adjustment - "Black and White" / Black & White . Or easier - press the key combination the Alt + the Shift + the Ctrl + Bed and . Automatically, you will see the settings window in the "Auto" mode. There you will see a gradient for each individual color. On these gradients, you can move the slider to the dark or bright side. Thus, you will make each individual color lighter or darker. So, by shifting the yellow and red sliders to the left, you can achieve lighter gray tones on the skin. A shift to the right will give darker tones. To darken the background, you need to move the color slider to the right, which corresponds to the shade of the background. In this case, blue and blue. When shifting, keep an eye on the image so that artifacts do not appear that spoil it. Here are the settings applied to this photo. Now compare the result of applying the function "Desaturate" / Desaturate (left) and "Black and White" / Black & White (right).How to make a black and white photo color in Photoshop
If the process of converting a color image into black and white is very simple, then the reverse requires more painstaking work. It is not difficult at all, but it will take some time to achieve the result. For example, take a simple portrait. Photo processing time depends on the number of objects in the picture. The more of them and the more complex the background, the more time you spend on processing the image. The working tools will be the hue / saturation / hue / saturation adjustment layer and the soft white brush / brush . Using the adjustment layer is very convenient if you want to make a black and white photo color. So, changing the color on the adjustment layer, you can return to the initial stage and change the color settings. Now, let's take a closer look at how to make a black and white photo in Photoshop color. Open the black and white photo in photoshop, press the key combination Ctrl + J to create a duplicate. You should immediately save our work in psd format. Press Shift + Ctrl + S , in the window that opens, set the file name, the location path and select psd in the file type. Since we will work for a long time, more often press the key combination Ctrl + S ( “Save” / Save ) so as not to lose operating time. We become a duplicate of the layer and apply the adjustment layer “Hue / Saturation” / Hue / Saturation to it . You can call it in the list of adjustment layers by clicking on the image of a half-filled circle. It is located in the lower right corner, on the palette of layers (where you work with layers). First of all, we paint the skin. In the adjustment layer settings window that opens, check the "Toning" / Colorize checkbox , move the color tone slider toward red and yellow. Also in the positive direction (to the right) we move the saturation, the brightness is slightly reduced. So we will achieve a shade similar to the natural color of the skin. Now set the cursor to the mask adjustment layer and press the key combination Ctrl + I . The mask will be inverted and the effect will visually disappear. Choose the tool "Brush» / Brush keystroke Bed and . On the control panel in the attributes, select a soft brush; pressure and opacity leave 100%; remove stiffness to zero. The color of the brush is white. You can adjust the diameter of the brush stroke using the X and b keys (they are also [ and ] ). We select the desired brush size and paint over all areas of the skin. We work on the mask of the adjustment layer. To make it easier to work, the image can be zoomed in or deleted. To do this, hold down the Ctrl key and holding it, press either + or - until you select the desired scale. To cancel unwanted actions, press the combination of the Ctrl + the Alt + the Z . Lips and tongue will be drawn separately, on different new adjustment layers, as they have a pinker shade. After the skin is worked through, go to the layer with a duplicate image and apply the adjustment layer “Color tone / Saturation” / Hue / Saturation to it again . Click the checkbox "Toning" / Colorize . But this time, we will shift the color tone towards pink to tint the lips. Become a mask adjustment layer press Ctrl + I . And, remaining on the layer mask, paint the lips with the same white brush. In order not to get confused, the adjustment layers can be renamed according to the area of ??the picture (lips, skin, cap). To do this, double-click the name of the adjustment layer with the left mouse button, it will be highlighted in blue. Then simply enter the new name using the keyboard and press Enter . Cancel failed prokrasku possible not only through the Ctrl + the Alt + the Z . Change the color of the brush to black and work out the area with a black brush. This will work as an eraser, but the mask will be preserved. To quickly change the color of a brush from white to black and vice versa, click the corner arrow above the working color swatches in the toolbar. So, adding new adjustment layers “Hue / Saturation”, we repeat all the steps with them:- a tick on "Toning" / Colorize ;
- color matching by moving the sliders of tone, saturation and brightness;
- Ctrl + I , invert the mask;
- Remaining on the mask of the adjustment layer, paint over the desired area of ??the image with a soft white brush.
