
One of the most beautiful memories I have and that repeats itself from my childhood and adolescence is lying on the beach enjoying the meteor shower. The silence broken only by the waves colliding with the shore or the rocks, the emotion of making a wish to the tears of San Lorenzo, the magic of summer nights. Every year it was repeated, and if it couldn't be on the beach, I would look for a place to see them. Did the same happen to you? If it is also special for you, surely you would like to photograph the meteor shower with your camera, right? Today I will tell you how to photograph the tears of San Lorenzo or any other meteor shower. And if you like night photography, you will love this mega guide that we have prepared for you with tips, tricks and lots of inspiration.
- Equipment to photograph the meteor shower
- How to plan your next star photography
- How to photograph a meteor shower
EQUIPMENT TO PHOTOGRAPH THE METEOR SHOWER
Let's start with the basics. To achieve the best results, you need the right equipment. Let's see what is recommended or what is essential:
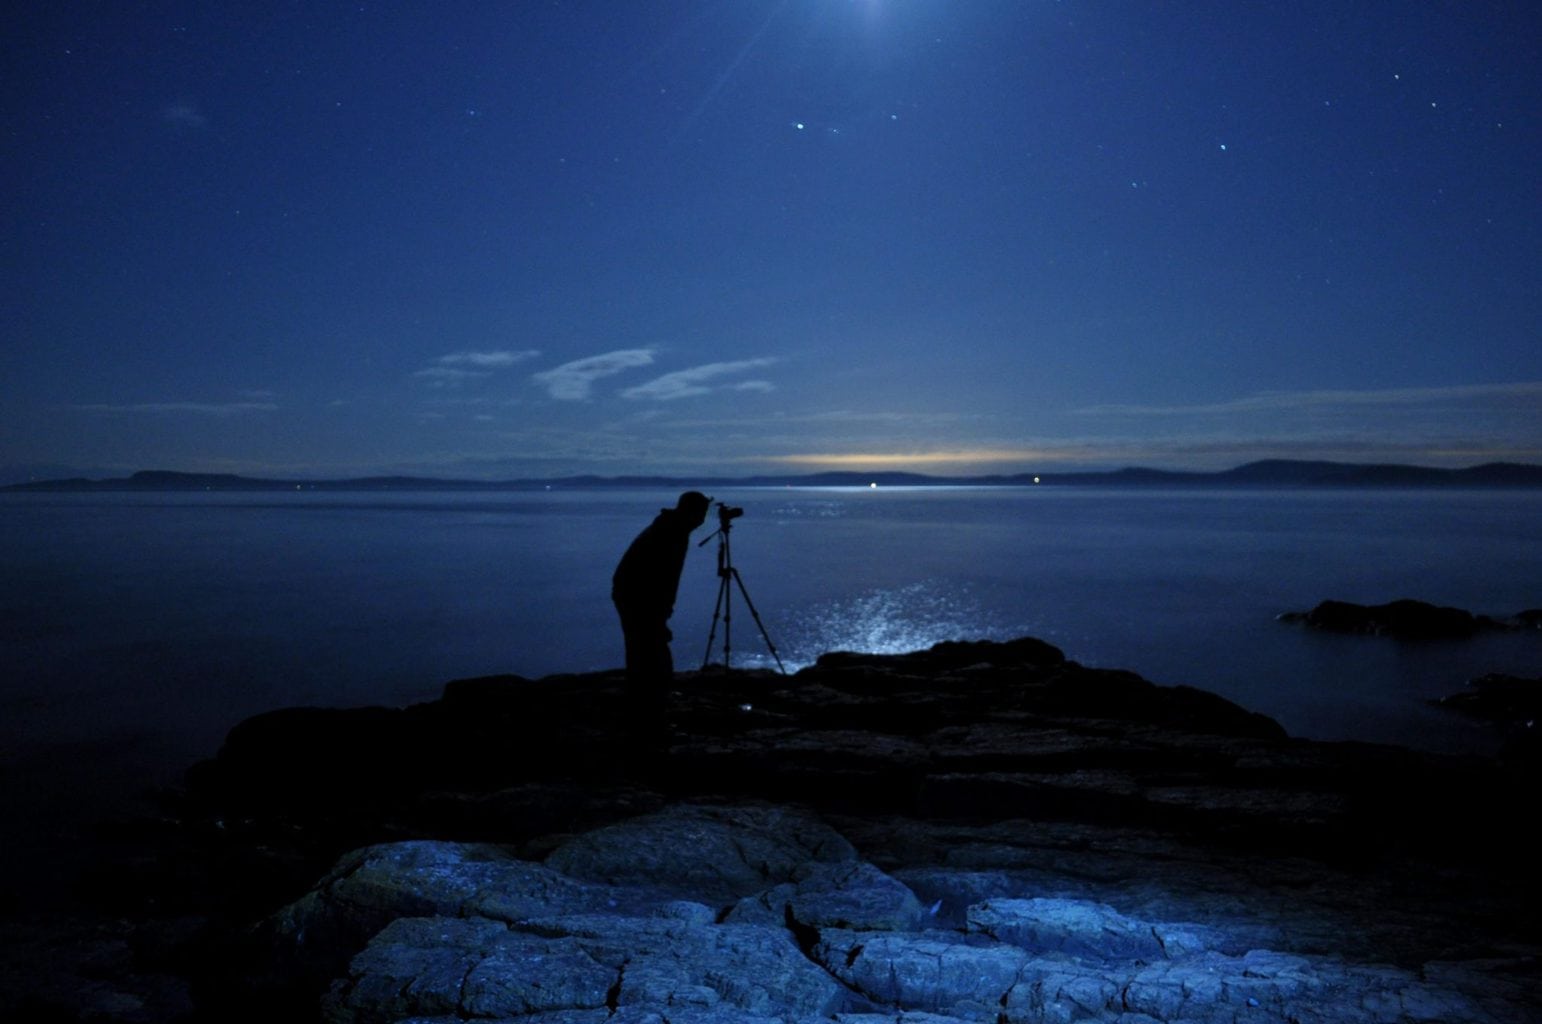
- Tripod. Indispensable. If you do not have a tripod capable of stabilizing your equipment correctly, it is better that you put the camera away and dedicate yourself to enjoying the meteor shower with your eyes. It is well worth spending a good time of contemplation than one of frustration.
- Remote trigger and/or timer. In this case, if you don't have one, there are alternatives. The objective is that you can shoot without having to press the shutter button on the camera to avoid the consequent shakes and that it is done automatically every x time you mark it. Some cameras offer this possibility, you can also use the application that allows you to do it from your mobile, if your camera has this connection option. If you don't have any of this, use the 2s firing delay mode. It's enough, but you're going to have to shoot continuously, you do need patience and concentration, but if the subject really motivates you, you won't mind.
- Camera with manual modes. To take good photos, any camera is enough, but we cannot say this in the case of the meteor shower. This type of photography requires a technique that requires manual adjustment of the parameters. Cameras that only work on auto have little to do here.
- Luminous target. The brighter your lens, the better results you will get. Of course you can try it with an aperture of f/5.6, for example, but you won't get such spectacular stars.
- angle lens. It is not essential but it is recommended. The greater the angle of the sky you can cover with the lens, the more chances you will have of capturing shooting stars and of creating an attractive composition that accompanies your starry sky.
- Batteries and cards. Long exposure photography consumes a lot of battery, so if you have a spare, I recommend that you take it well charged. On the other hand, make sure that the memory card has a large storage capacity and a high writing speed.
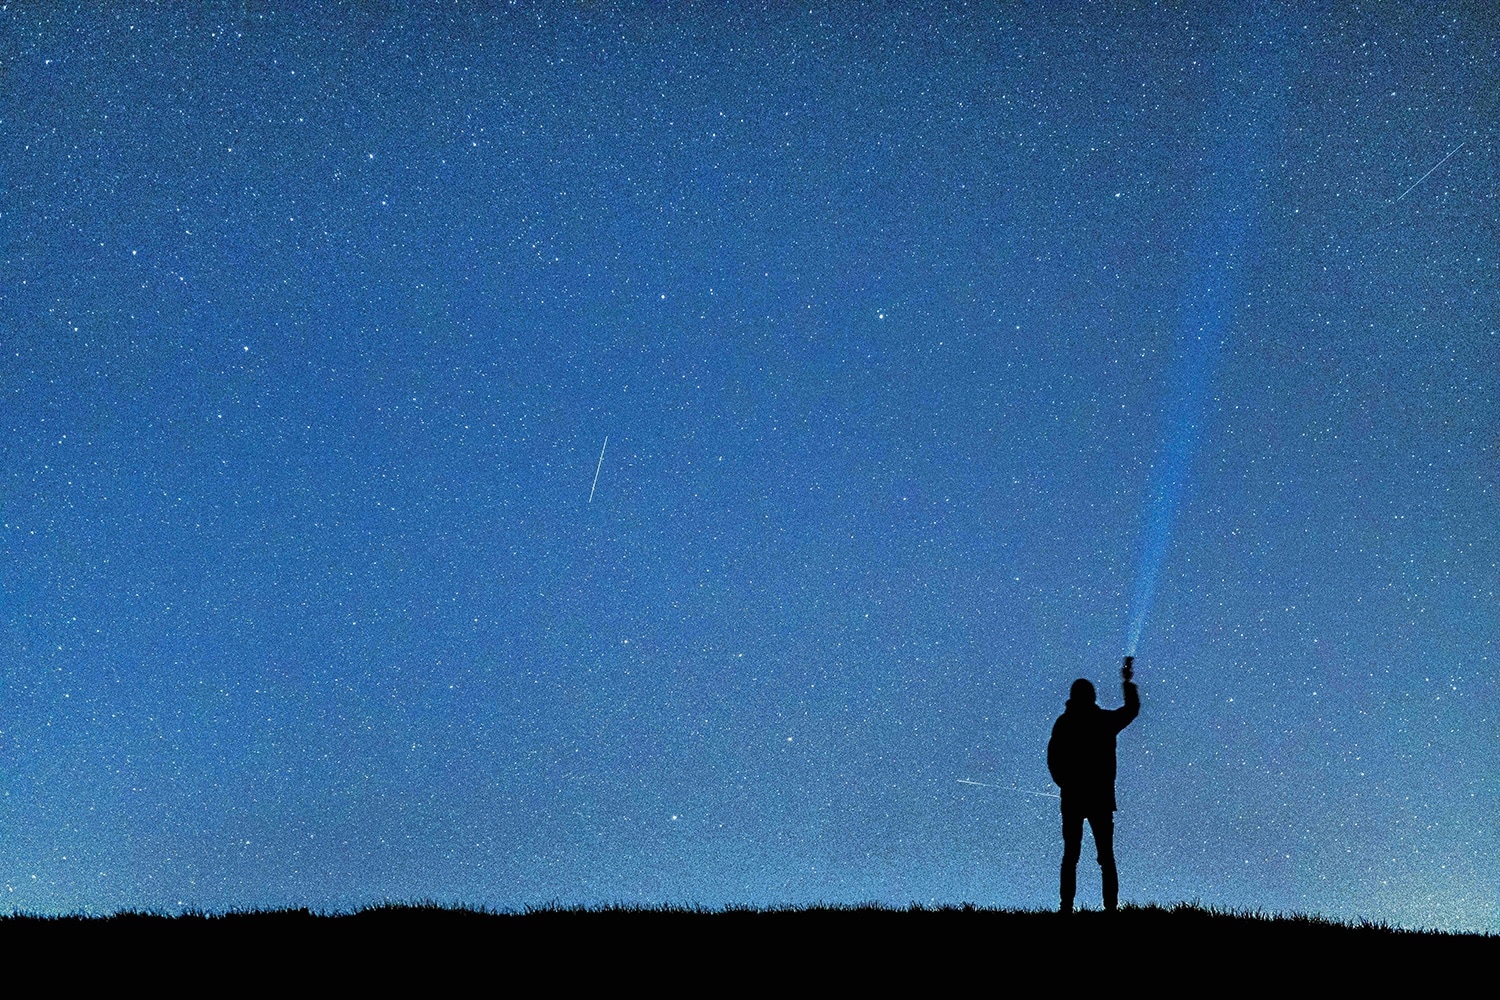
- Flashlight or headlamp. The most comfortable is a front that leaves your hands free to manipulate the camera or the tripod while viewing in complete darkness. Although either of the two will work for you and if you take both much better, because, as I will remind you near the end of the article, a powerful flashlight is very useful to illuminate the close-ups that you include in the image, unless what you are looking for is a silhouette.
- Other lighting fixtures. This is optional and depending on the type of photography you like, but you can also use LED panels that are continuous lights to illuminate a large area in the foreground, external flash or colored gels. The limit is set by you (with your imagination and budget).
- Patience. Yes, this is neither bought nor lent, although it is cultivated. Be clear about the patience you are going to need, this is not to arrive, aim, shoot and go home. You have a few hours ahead of you, so if you go with good company, much better, and if you are one of those people who enjoy solitude and silence, then great, it will scare you.
- Practice. In addition, this type of photography requires more technique and this is achieved with practice. So I advise you, if you can, to do some tests before the meteor shower, even if it is to capture the stars on a normal night. This will help you with exposure times, focusing on the stars, planning. One or several rehearsals before the night of the rain will help ensure results if you have never photographed stars before.
- Chair. And since you're going to be there for a while, the ideal thing is to take a chair or something where you can sit comfortably and wait (some pipes to accompany are also worth it ? ).
- Mobile phone. Well loaded, in case you have to notify where you are, ask for help, etc. Security is also important, if you go to isolated places at night, make sure they know where you are going to be and if you go with company, better than better.
- You can photograph the Milky Way with a shooting star crossing the sky. To do this, you frame the Milky Way and avoid the radiant as much as possible. You can achieve it in a single photo, but equally, not in a single shot. Achieving it the first time is almost more difficult than winning the Euromillion , so you will have to use the intervalometer anyway to catch one at some point.
- Or, simply, a very attractive close-up without the Milky Way but with the long-tailed star. The process would be the same but without the care to capture the Milky Way.
- A stacked with many shooting stars in the sky. You stack in Photoshop the images in which a shooting star has been captured, these can be long lines across the sky if you do not include the quadrant or, on the contrary, including it so that they converge at the same point. In both cases you will have to do a stacking.
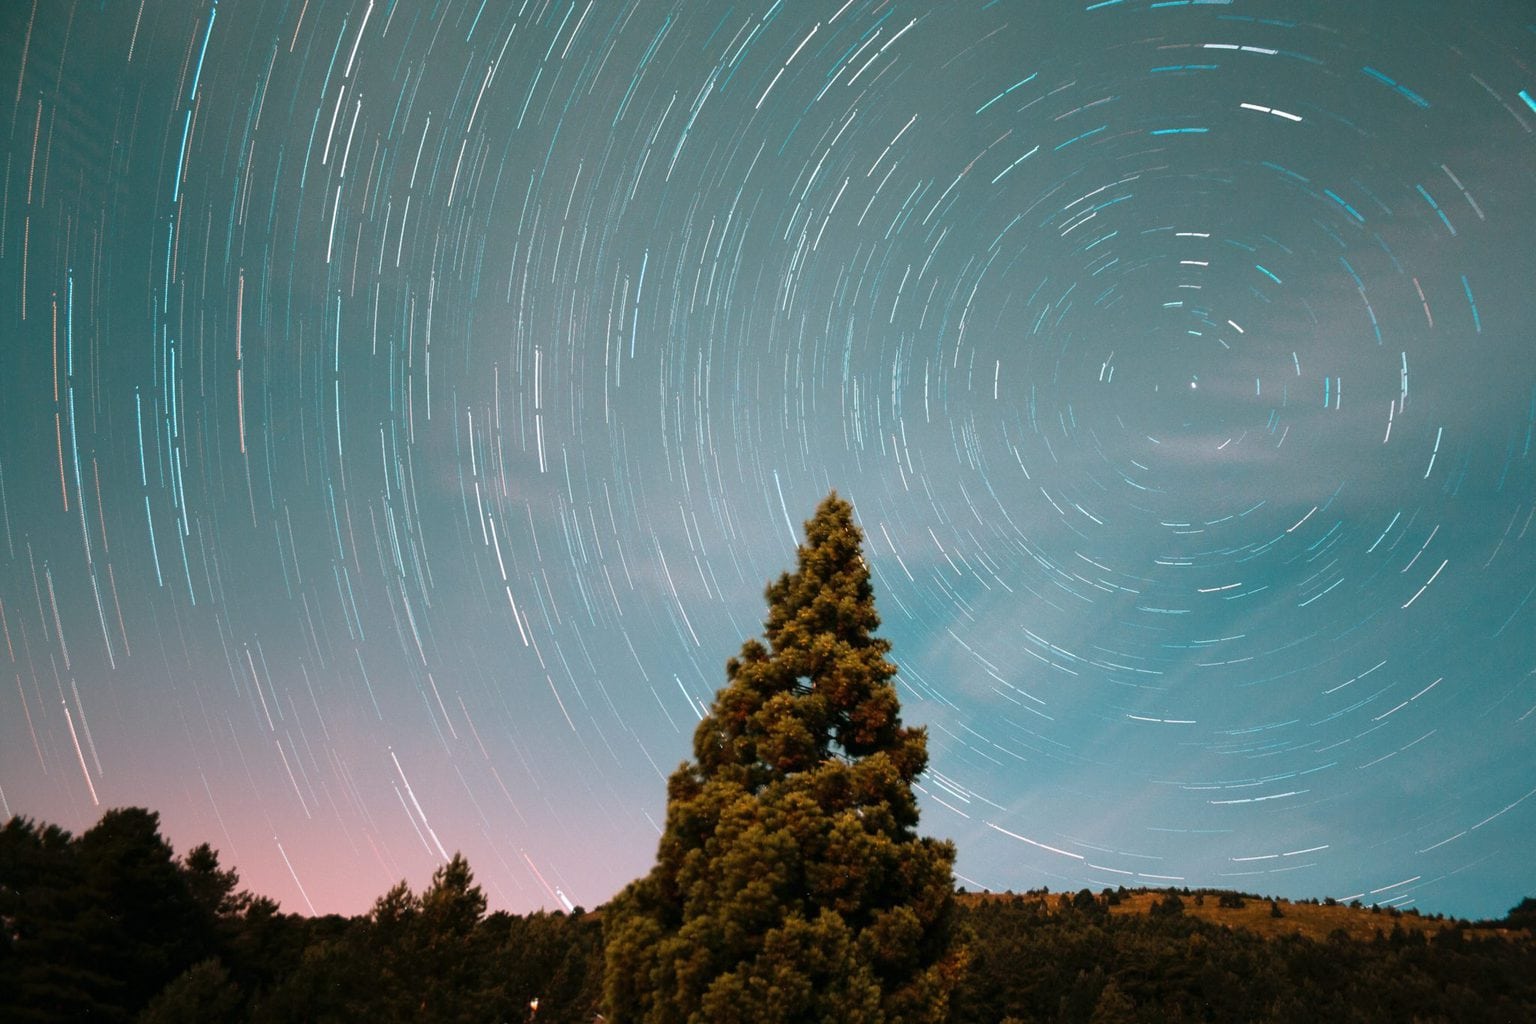
- A circumpolar, at the peak of the meteor shower, the circumpolar will be bathed in stars, as in this image.Circumpolar can be done with one image with a much longer exposure or with several images, both with their pros and cons. In this video you can see how it can be done. But if you want us to explain it to you in one of our articles, you know, we like to grant wishes, so ask in the comments, for now go ahead video:
HOW TO PLAN YOUR NEXT STAR PHOTOGRAPHY
The first and most important thing is planning. Good planning will help you find the best time and know where to point your camera to achieve the best results.
WHEN TO PHOTOGRAPH THE METEOR SHOWER
To find out the best time to photograph the stars, you can turn to astronomy pages that tell you when the peaks are or that give you the job done and save time with the Photopills application.( iOS/ Android). Although it is paid, its price is well worth it if you really like photography, and especially photographing the sky, stars, moon, sun, etc. Although it offers much more (if you want us to talk more in depth about this application and tell you everything it is capable of doing, please leave a comment below ?? ?? ??).
Returning to the planning of our meteor shower, in Photopills you will find a section called "Meteor Shower" that locates your location and shows you the meteor activity, but if you enter the Calendar it shows you all the meteor showers and at what intensity will take place, with information of its maximum peak. Yes, you can look at the next few years, in case you need to plan waaaay in advance.
We are now going to focus on the Perseids, because they are the ones that are currently active and whose peak will take place in the next few days. I'll let you know in time so you can plan ? . Although this article will help you learn how to photograph any other shower (of meteors, of course).
Once inside the Photopills Calendar, it tells you the day and time of the maximum peak of your location. Where I Am Now will take place on August 13 at 1:53 a.m. with approximately 49 meteors per hour.
It is important to take into account the day and time when the rain is at its peak to have more chances. In addition, you must also take into account the presence of the moon, since it prevents the visibility of many meteors. The more moonlight, the less chance of capturing meteors. Once again the importance of planning well is evident, not only the place, but the moment.
If you enter the Peak at your location in Photopills and scroll down, a graph appears that indicates the intensity of meteors per hour throughout the night. In this graphic you can also observe the trajectory of the moon, and know at all times if it will be above or below the horizon. The trajectory of the radiant also appears in the same graph, in a moment we will see what it is and why it is so important.
WHERE TO PHOTOGRAPH THE METEOR SHOWER
The most important aspect is to avoid light pollution. This does not allow us to see the stars properly, much less photograph them. If you can flee to a place far from cities or towns, don't hesitate. To find out which are the most suitable areas, you can use a light pollution map.
Choose a place without light pollution that allows you to focus on the area of the sky that interests you the most, we will talk about that now, while also allowing you to include an attractive foreground to contextualize your sky and add interest to the image.
HOW TO COMPOSE YOUR PHOTOGRAPH OF THE PERSEIDS
Beyond an attractive composition that includes some element such as trees, mountains, a house or any other that contextualizes your photography and accompanies the stars, as we have just mentioned, there is a very important aspect.
It's about locating the radiant . This is the point from which all the stars seem to rain and which gives each rain its name. In this case, as it takes place in the constellation Perseus, the shower is called Perseids. If you include it in the frame you get a drawing similar to this image by astronomer Fred Bruenjes. A photograph like this is achieved by joining several long-exposure images, it is also not made with an amateur lens, but this is another topic, now you are interested in seeing the type of photographs you can achieve depending on how you frame and, if you include the radiant , the stars converge in a point as it happens in said image.
This does not mean that you have to compose yes or yes with the radiant within the frame, but that this will help you plan or choose your composition based on the result you want. The closer to the radiant, the shorter the traces, the further from the radiant, the longer. Knowing this will help you fine-tune the result you are looking for.
HOW TO FIND THE RADIANT IN A METEOR SHOWER?
The radiant is in the constellation of the name of the rain, if they are the Leonids, then you will have to look for the constellation of Leo. I have used AR (Augmented Reality) from Photopills.
The AR allows you to locate the radiant in the location where you are and if you slide your finger, it changes its position depending on the time.
This helps you when deciding your frame in the same place, even if it is not the same day as the rain.
Also, you can see where the Milky Way will be.
IDEAS TO COMPOSE YOUR METEOR SHOWER PHOTOGRAPHY
As we have discussed, depending on what type of image you want to achieve, you will have to plan your photography. What options do you have?
METEOR SHOWERS IMAGE GALLERY
Here are some of the examples that I have mentioned in images.
HOW TO PLAN YOUR METEOR SHOWER PHOTOGRAPHY FROM ANOTHER LOCATION WITH PHOTOPILLS
And what happens if you are going to do the star photography in a different place than the one you are at when planning? Because the most normal thing will be that you plan from home, right? And you may want to take the photo 500 km from home, doing a test in situ is a bit complicated ?
Let's see how to do it from the Photopills Planner.
Once you have the red pin (thumbtack) in the location you have chosen for your meteor shower photographs (you do this by pressing your finger for a few moments right in the place where you want to place the pin), you select the Perseids or the rain of stars that you choose. To do this, click on the map settings that I point to with the purple arrow.
Once inside, select Meteor Shower and the calendar opens where you can select the Perseids or the one that interests you the most. Click OK above to return to the map and all the information on the Perseids will appear. You can see it in the third photo boxed in purple, the peak will be at 1:54 p.m. on August 13.
I have chosen a place on the coast with some stone arches to serve as my foreground.
If you slide the panel above the third photo, where it says Sun, Moon and the coordinates, you can see all the information related to the meteor shower. Now, if you go to the graph below, when you slide with your finger it shows you where the radiant will be at all times with respect to your location and the subject or subject that you have chosen to include in your frame. A past right? All this without leaving the chair.
You can change the location pin if you don't want to include the radiant in the frame. The planner allows you to contemplate different possibilities.
Once you're at the location where you pinned on the rainy day, you can use AR to find exactly where in the sky the radiant will be.
Before you finish, don't forget to save your planning with the following path from Save in the menu below.
Save- Schedule- New Schedule- Name -Save
If you are more into videos, Rafa from Photopills tells you in great detail how to plan a photograph of the Perseids:
HOW TO PLAN HOW MUCH MEMORY YOU NEED ON THE CARD
In the team we have commented that you need a large storage capacity, but how much? It will depend on the number of photos you want to take, the time interval and the weight of your RAW files.
To calculate it, you can use a Time Lapse calculator, like the one offered by Photopills. The first thing you need to know is how many MB are in the RAW files your camera generates. Let's say that it is, for example, 20 MB, that you are going to use a shooting speed of 25s, with an interval of 2s (25s+2s=27s) over 3 and a half hours, according to the calculator, it is 9.10GB of storage the ones you need.
HOW TO PHOTOGRAPH A METEOR SHOWER
With the planning done and the right equipment, let's take a look at the settings and steps to achieve your best meteor shower photography.
- Set up the tripod. Place your tripod in the place you have chosen to photograph with the framing that best suits you. Make sure it is well stabilized, if you can add some weight better. If you plan to do a stack, that is, join several photos to achieve a circumpolar or to have several stars in the same image, do not move it. Nothing at all!
- Focal distance. As we have discussed in the equipment section, the shorter the focal length (lower mm number), the more scene angle you can capture, among other advantages. This also allows you to capture a larger number of stars and include an interesting subject in close-up.
- framing. Make sure that during the entire time you want to take photos, what you want will be in the frame. In other words, if you want the radiant to be within the frame, you have to take into account that it is moving, so you can use Augmented Reality to see where it will be during all that period in order to make your composition accordingly. Like if you want to include the Milky Way, or if you're interested in capturing the stars with a long trail. Always frame taking all this into account.
- Manual mode. Set your camera in Manual Mode to modify all the settings that I am going to tell you about below.
- ISO. It will depend on your camera, but set the ISO to the highest value that presents acceptable noise. Some cameras with very high ISO values do not present noise, but others do, it is important that you know where the limit of yours is. If, for example, 3200 is the highest value in which there is no noise, then adjust to 3200.
- Opening. To capture as many stars as possible, use the largest aperture available to your lens. The smaller the aperture, the fewer stars will be visible in your image, for example, at f/16 only the brightest ones will appear, at f/2.8 you can capture stars that the eye does not see.
- Shutter speed. The exposure time depends on several factors. The first thing is if you are looking to take a photograph with the stars as points, without a trace (except for meteors, of course), or if you want to take a circumpolar one. If you don't know what a circumpolar is, what better way to see it than with an example below.
- Now, this type of photography is not what we are after on this occasion, so we are going to focus on how to calculate the exposure time for the meteor shower. There is a very simple but approximate formula to obtain an exposure time that does not leave the stars as traces due to the movement of the earth:
- 600/focal length=maximum exposure time . In other words, if you use an 18mm focal length, the maximum time you can photograph is 25s. This is an approximate value, so I recommend that you do a test at first and readjust.
- Now, this type of photography is not what we are after on this occasion, so we are going to focus on how to calculate the exposure time for the meteor shower. There is a very simple but approximate formula to obtain an exposure time that does not leave the stars as traces due to the movement of the earth:
- white balance If you shoot in RAW, which is what we recommend, you can always adjust it in processing, but if you can adjust it manually, a suitable value is between 3,400 and 4,000K depending on the darkness of the sky or light pollution.
- Shooting interval. Schedule the shooting interval every 2-3s to make sure you capture as many stars as possible.
- Focus. At night it is really difficult to focus automatically, if not impossible, so you have no choice but to focus manually. You will have to spend a while to make sure that your stars are well focused. One option is to help you with the Live View of your camera if it has it.
- You have two options, focus on the stars manually or focus on the hyperfocal (next point) to have both the foreground and the stars in focus.
- A trick to focus on the hyperfocal is, if this is to give an example of 10m, illuminate with your flashlight any object or element that is at that distance in any direction and focus it automatically. Once in focus, you lock the focus by switching to manual focus and don't touch anything. Always better to focus a little more than the hyperfocal to make sure, if you focus at 11m in this case nothing happens, but if the hyperfocal is 10m and you focus at 9.8m you will fail to focus and your stars will be blurred (total drama). By the way, if someone accompanies you, they can also serve as an illuminated-focused subject ? .
- hyperfocal. To expand the depth of field or sharp area of the image, the ideal is to use the hyperfocal, which is the distance that allows you to focus from the middle of that point to infinity. There are many calculators that let you know the hyperfocal based on the focal length you use and the aperture. If you are going to use Photopills, it also has this option. What's more, with Augmented Reality you can see where that distance is to focus on it. For now, here is the Photopills hyperfocal table.
- Noise reduction. Deactivate the noise reduction, in addition to taking twice as long to take each photograph, we do not recommend it in this case because you can lose half the stars.
- Stabilization. Deactivate the stabilization system of your camera or of the lens, depending on your case, because since the equipment is stabilized on the tripod this is counterproductive.
- Take a test. Before you set the interval and your camera starts working, do a test (or as many as you need) and check that the exposure is correct, that the composition is the one that interests you the most and that the stars are well focused (zoom in the screen to make sure).
- intervalometer. In Bulb Mode, set the shooting interval on the intervalometer between 2 and 5s, to increase the chances of catching stars.
- Illuminate the foreground. Unless you want a silhouette of the mountains or another element with the starry sky in the background, if you include a close-up that you want to be seen, you will have to illuminate it in the first and last photo (this is what the flashlight is for ? ).
- RAW. If you photograph in RAW you can later process your image to your liking and without loss of image quality. The JPG is a file to which your camera has already made the adjustments that it has considered and left the excess information along the way. In the RAW you take it raw and complete. Ready to cook to taste, and be able to highlight more stars.
- Develop your RAW file(s), and export to JPG to open in Photoshop (if you want to do a stack).
Do you want us to prepare an article on how to stack or develop your star photography? You just have to order it below ??????
Did you like this article? If you found it useful, please share it so that your friends who are fond of photography can enjoy their next meteor shower as they deserve. Thank you for reaching the end and until next time.
