
If you hear the Anglophile word Golden Hour , you may not know at first what it has to do with photography, or why so many photographers chase it around the globe.
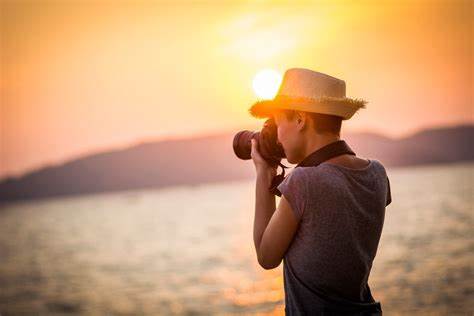
But what you surely know is that there are moments of the day that have a magical light. Magic for painters, photographers and filmmakers, but also for ordinary people. Moments in which the shadows lengthen and the sun envelops everything around it in a warm tone. Magical moments that take place before sunset and a little after. Or unique moments when we wait to see the sunrise.
We know those magical moments that represent the end of the day or the beginning of a new one as Golden Hour . But not only that, the magic also lies in those moments when the sky turns an intense blue just after sunset or just before dawn. That is known as the Blue Hour.
As a photographer, they will be your best allies in terms of natural light. What do you want to know more about the Golden Hour and the Blue Hour? Well, pay attention, because in this article we will talk about:
WHAT IS THE GOLDEN HOUR?
The Golden Hour is the moments before sunrise or immediately after sunset. In these minutes the light is soft, warm and diffused, which makes it one of the best moments to photograph.
The Golden Hour can also be found under the name of golden hour or magic hour.
GOLDEN HOUR FEATURES
The golden or magical hour, as some prefer to call it, has some precious characteristics that, as photographers who love and are aware of the importance of light, do not go unnoticed:
- It is a warm light, with yellow, orange or pinkish tones.
- The light it projects is soft and diffused.
- It has a lateral orientation.
- The shadows are long.
- Increase the textures.
- It creates a magical atmosphere.
WHAT TIME IS THE GOLDEN HOUR?
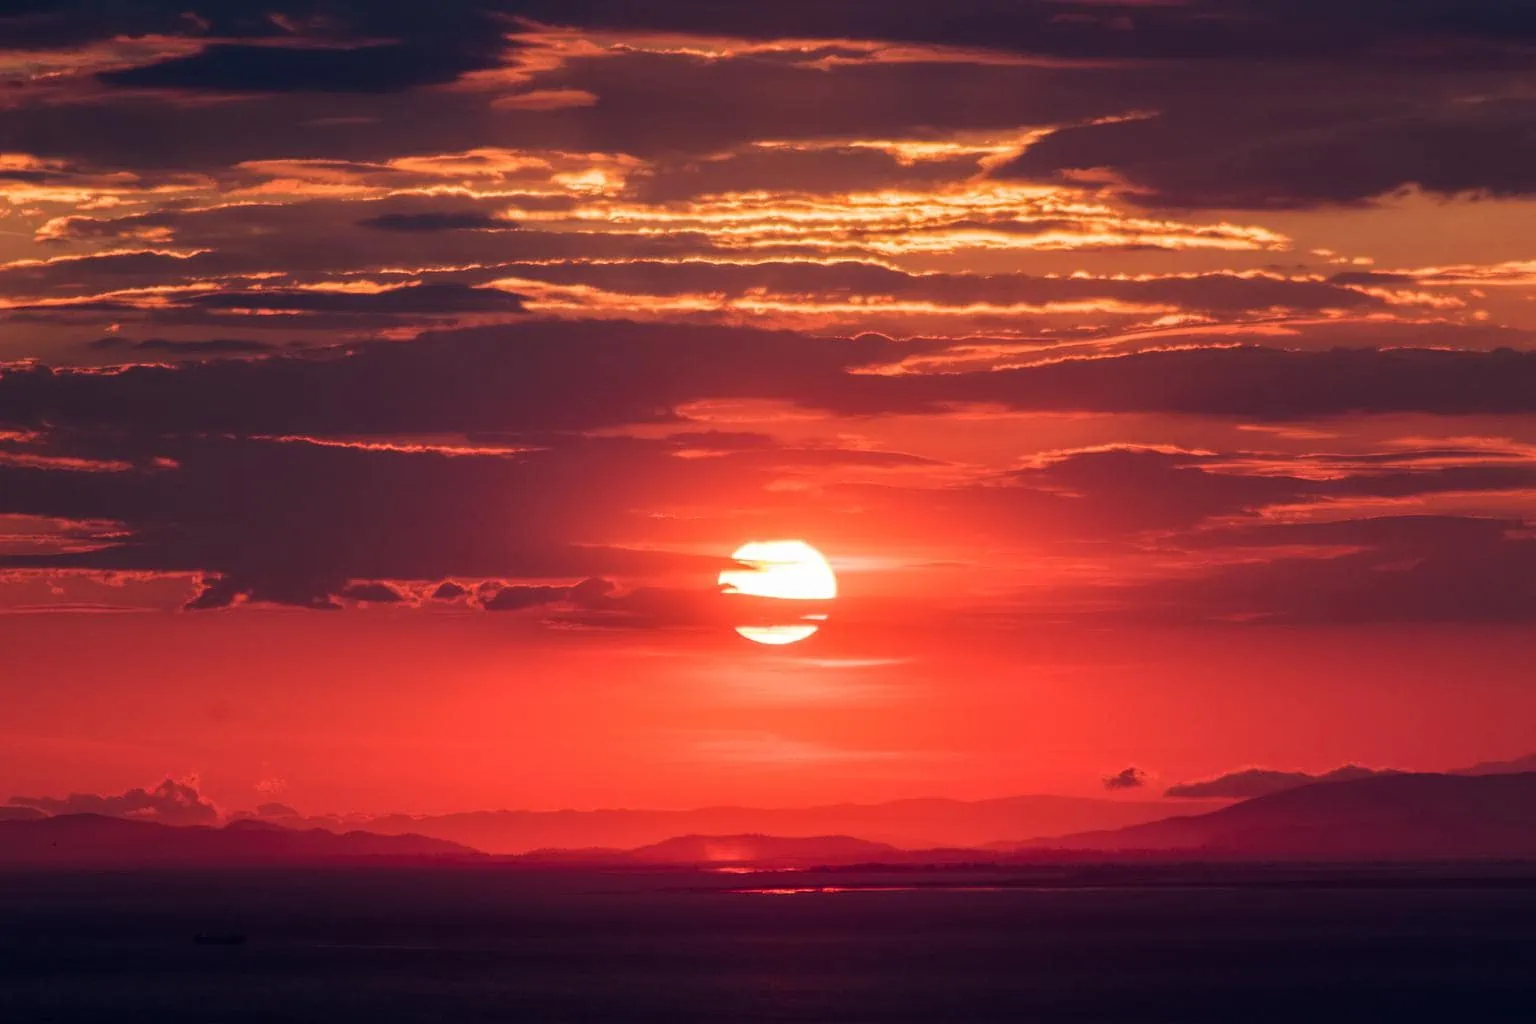
The Golden Hour occurs twice a day, when the sun is low, approaching the horizon, and also moments before sunrise. In both cases, the sky is dyed in those wonderful and photogenic warm tones, making these moments one of the most precious in photography.
Now, the exact time depends on many factors, from the location of the country from where you want to photograph, to the time of year in which you are. Depending on your location, the Golden Hour can last a few moments or several hours, so it is very important to find out the duration and time of sunset where you are, especially if you are traveling.
Apps like PhotopillsThey are very useful to plan the exact moment and the best place to be to get impressive sunsets or sunrises, but also moonrise, the milky way and many other applications.
WHEN IS THE GOLDEN HOUR IN SPAIN?
The Golden Hour even within the same country can vary from one place to another, so it is essential that you find out exactly the best time.
on this websiteYou can know the golden hour in Spain or in any town where you are. Just fill in the field with the place you are interested in, add the date, and then it will return the Golden Hour for both sunrise and sunset, as well as the duration of it.
Great, isn't it? ?

WHEN IS THE GOLDEN HOUR IN MEXICO?
You can also find out the Golden Hour in Mexico through this same website. Put the city you want to search for, the date and voilà , you already have your Golden Hours located.

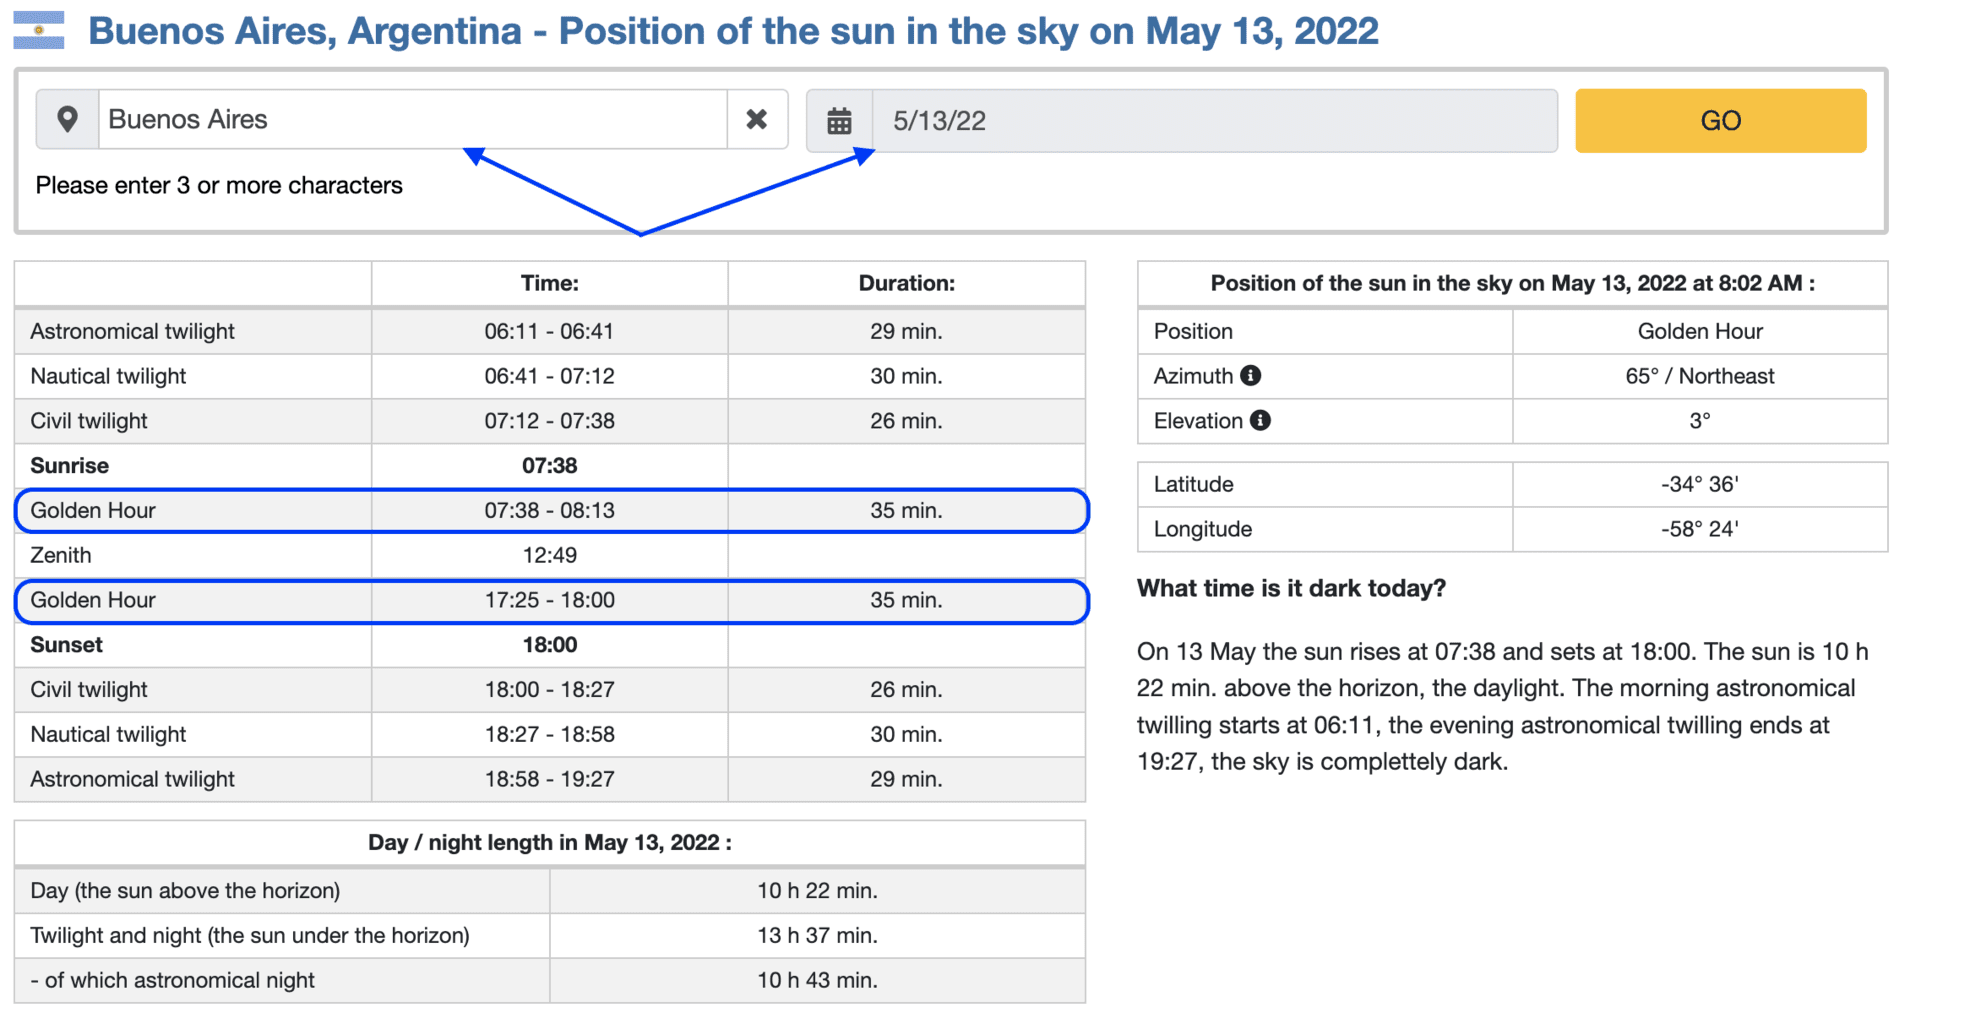
WHEN IS THE GOLDEN HOUR IN ARGENTINA?
If you live or travel to Argentina and want to find out when the golden hour is, follow the same process. Put in the search engine of this websitethe place you want to analyze and next to it the date. Hit “Go” and it will update you what time the Golden Hour starts and ends as well as its duration.
TIPS FOR SHOOTING PORTRAITS AT THE GOLDEN HOUR
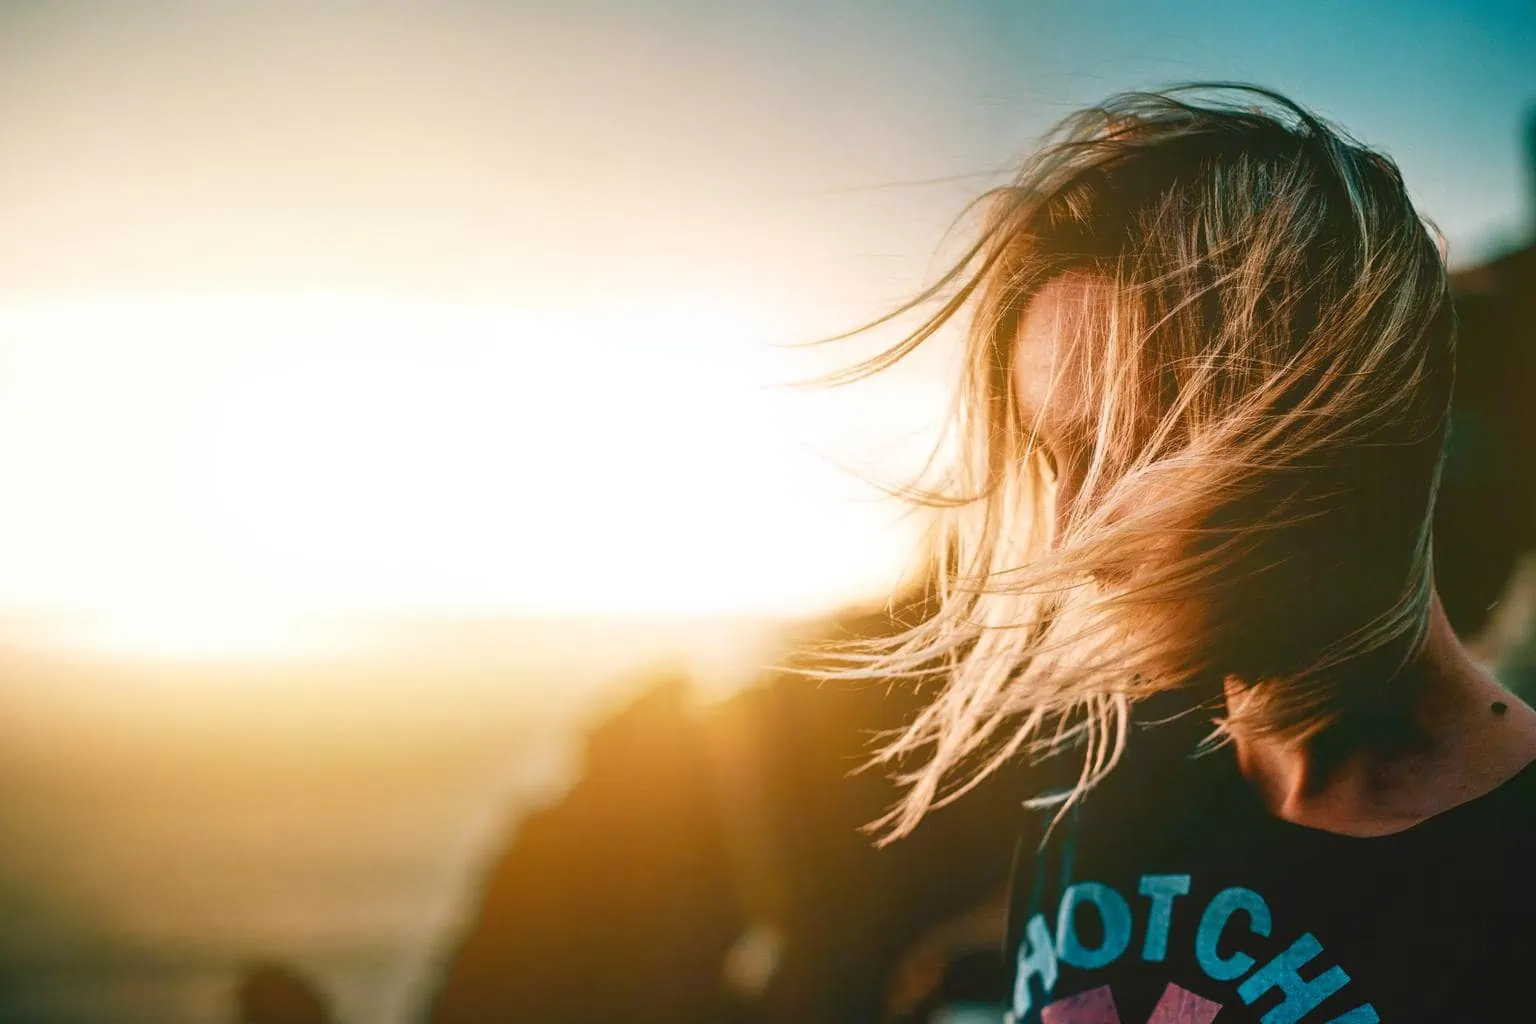
Since the light emitted in those last moments before sunset is very soft and warm, it becomes easy to artistically integrate it into images with just a few tricks.
SELECT THE PLACE IN ADVANCE
If you're going to do a portrait session , it's important to think ahead about where you're going to do it. This way you will be able to anticipate in advance the best place to place yourself, see where to place your model, predict where the sun will rise or set, and so on.
HELP YOURSELF WITH A REFLECTOR
The light that transmits the golden hour is very soft, so it is easier to "control" than other harsh lights. Many times you will not need more than that precious light, to obtain impressive portraits, but it is worth taking some help to have more freedom when framing or positioning your model.
THE SHADOWS
End of day shadows are also characteristic of the golden hour. Since the position of the sun is very horizontal, the light creates long and soft shadows that you can integrate into any of your compositions.
DON'T RUN FROM THE FLARES
You usually get desperate if you forget the parasol at home. Normal, many times the light sneaks through the most inopportune cracks and turns our great image into an image ready for the trash can.
However, in the golden hour, these flares can provide an artistic touch in your portraits. Don't forget your parasol at home, but try leaving it in your backpack for a while, and see what happens ?
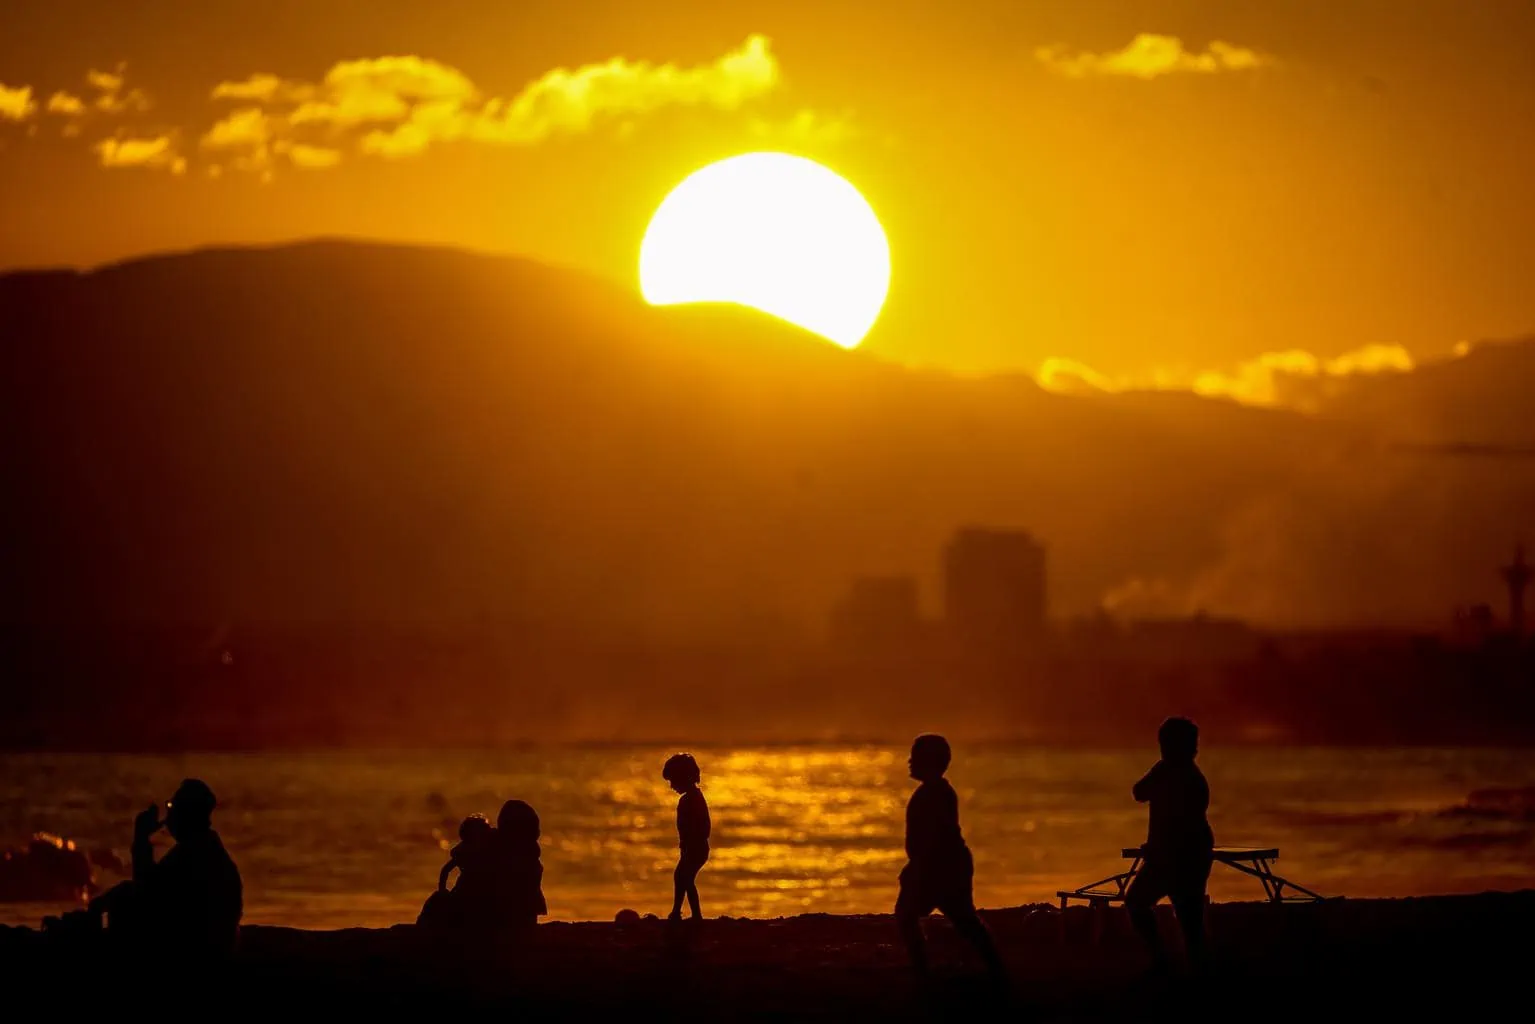
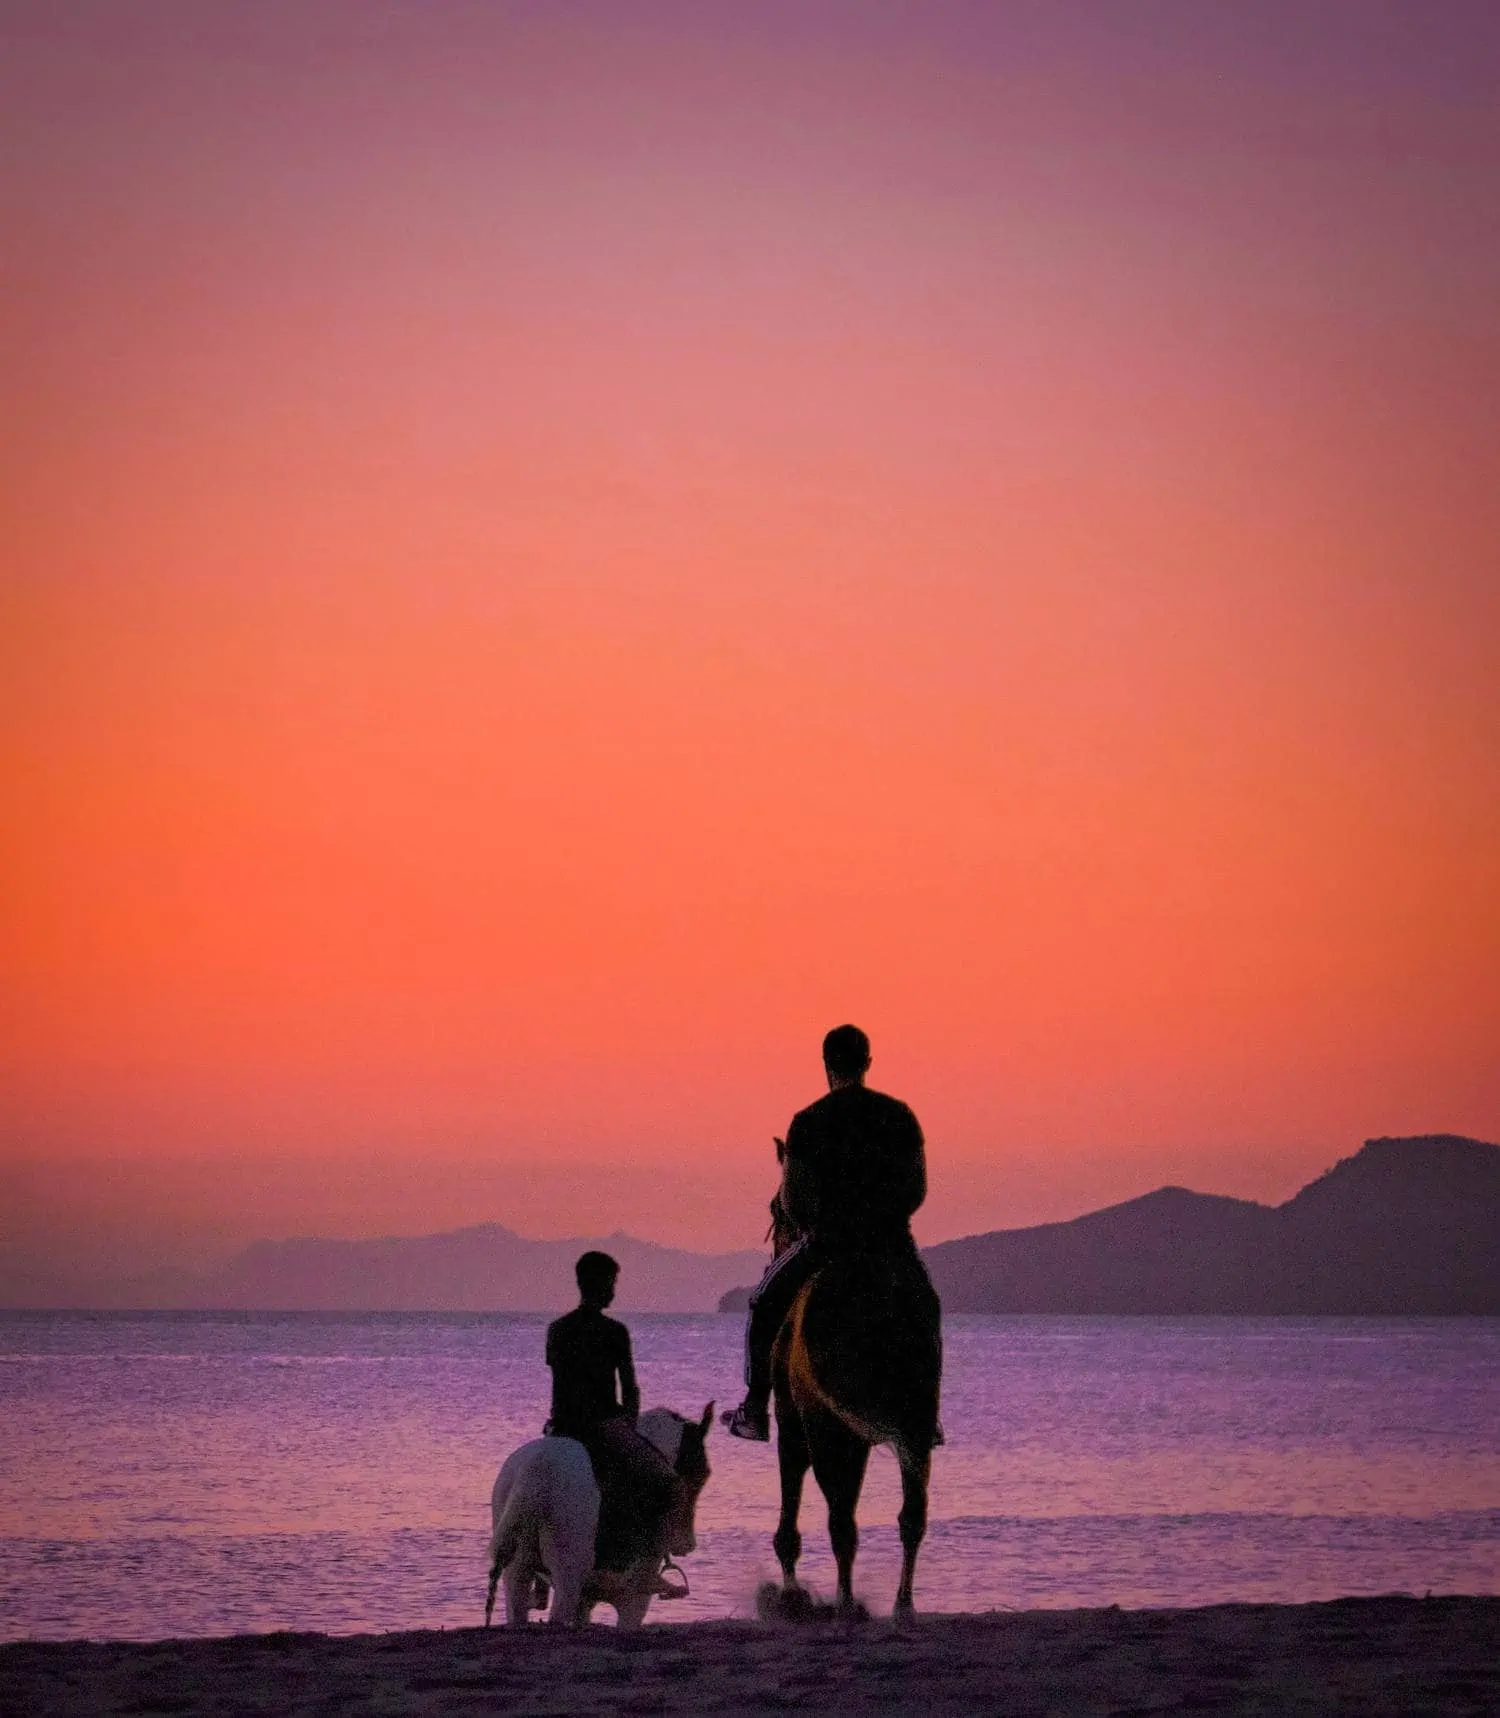
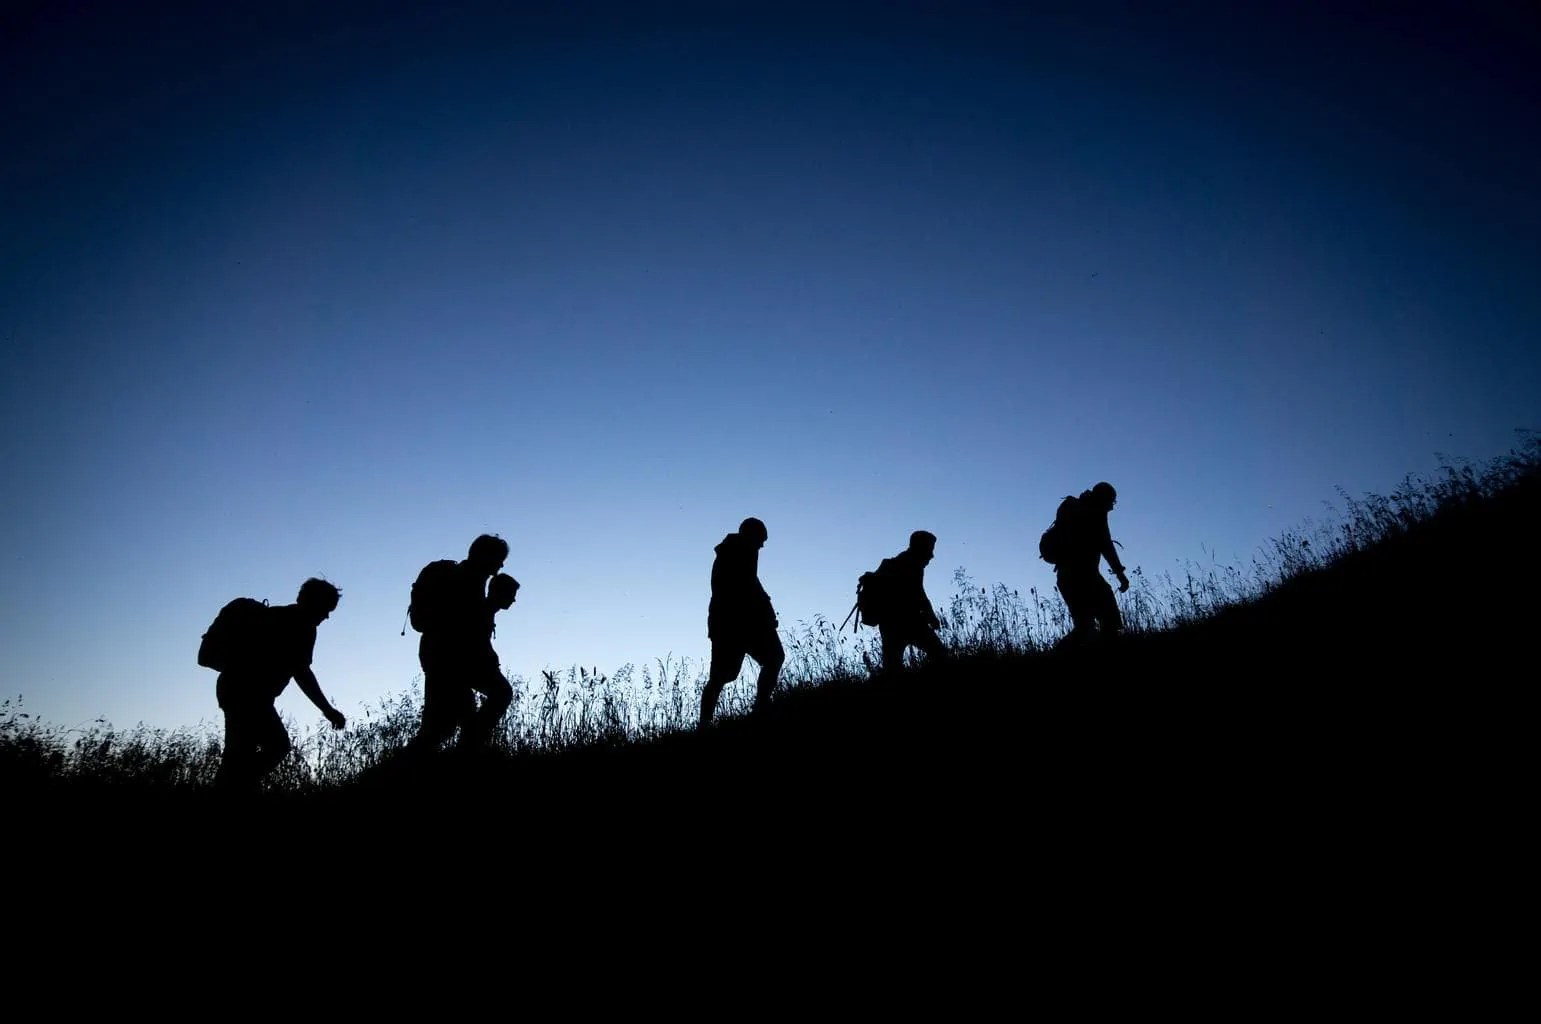
PHOTOGRAPHY SILHOUETTES
It all depends on the exposure , and there is rarely a right or wrong exposure to take a picture. The vast majority of times it depends on the result you want to obtain.
By exposing for the bright areas of your image, you can get gorgeous portraits of silhouettes surrounded by warm golden hour colors.
FIND THE BEST LIGHT
Don't limit yourself to one pose and one angle of light. Move your model, find the best angle, the best light and the best composition.
Do not settle, be original, scroll to find the image you want, because a small variation in any of the above aspects can mean two completely different images.
THE TIME THAT SUITS YOU BEST
If what you want is to take a self-portrait, the Golden Hour is all advantages. It's the time that suits you best, even though you may not usually appear in the photos a lot ? . So once you do it, do it right and take advantage of these magical moments to take impressive selfies .
NOT EVERYTHING IS EXTERIOR
Many times we have talked about indoor portraits and the "trick" of looking for natural light sources by getting closer to windows or doors. For the warm light of the golden hour, it could not be less. We always say that it is the best time to photograph and, by now, you already know that it is true ?
Want a few extra tips for getting stunning Golden Hour portraits? Take a look at this video (in English with subtitles):
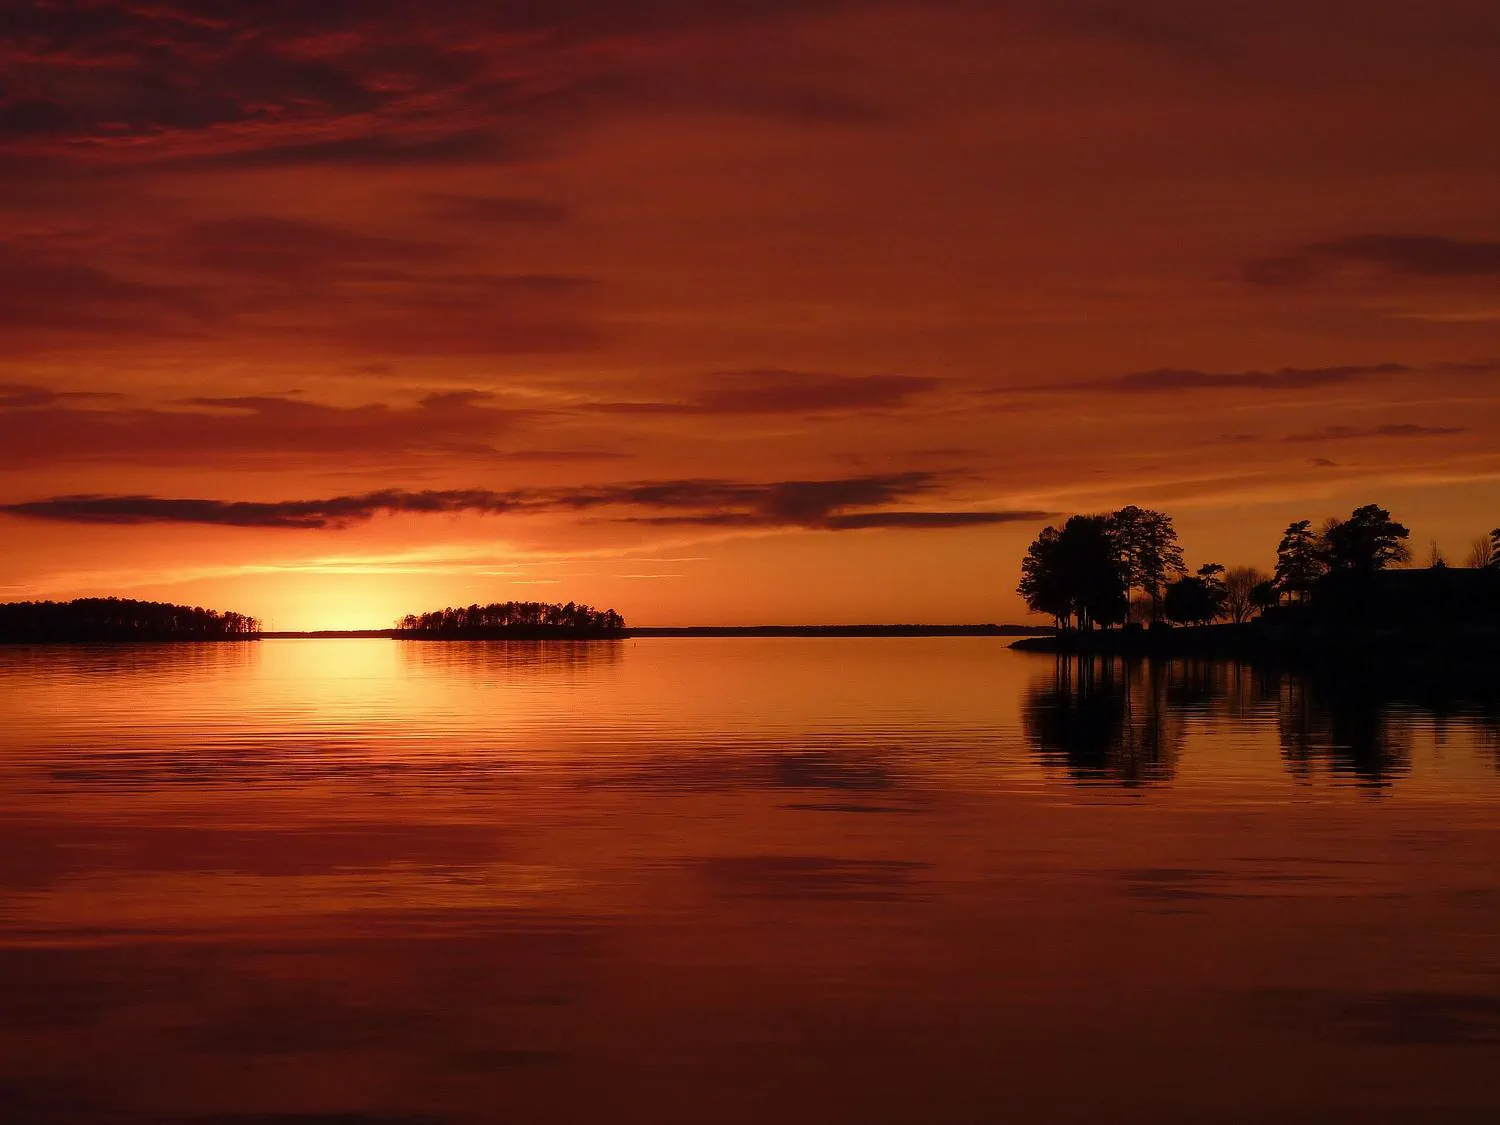
LANDSCAPES IN THE GOLDEN HOUR
Another of the great allies of the Golden Hour is landscape photography . The side light and its play of light and shadow enhance the textures; the warm color tinges the entire landscape; and the sky is saturated with thousands of oranges, pinks, blues, yellows or violets.
Let's look at some tricks for getting great landscape images at the golden hour.
SELECT THE PLACE IN ADVANCE
This time your model is a landscape, so you won't be able to move it. You can only move.
So it is even more important that you know well what image you want before you get there, where the sun will set or rise, what framing you are interested in, if you are going to look for interesting silhouettes to add to your image or moving just a few meters to the left you can frame the sun between those branches...
CAMERA SETTINGS
- Forget automatic mode and set it to manual mode . It is the only way to get a correct exposure . Do several exposure tests until you are convinced that the result is what you want.
- White balance : If you have it set to automatic by default, make sure you deactivate it, it is very likely that the camera corrects the warm tones and that suddenly it does not make any sense that you are in the middle of nowhere, about to get dark, getting cold or tired or tired of waiting. “Cloudy” or “Shade” would be the two options that you should try in this lighting situation (since they respect and accentuate warm colors), and keep the one that most convinces you.
- If you shoot RAW , you won't need to worry about color temperature as you can correct it in post-processing.
NECESSARY MATERIAL TO PHOTOGRAPH THE GOLDEN HOUR
The necessary material is the same that you will need for any landscape photography excursion :
- tripod .
- Filters .
- Flash.
- A wide angle lens (if you have it and if not the one you have).
- Battery and/or spare batteries.
- Warm clothing if applicable.
- Remote shutter release or, failing that, set the camera to shoot by itself, so you will avoid the vibrations that can be caused by pressing the shutter .
INSPIRATION TO PHOTOGRAPH THE GOLDEN HOUR
- Look for textures .
- Give prominence to the sky when it is worth it.
- Look for interesting angles and compositions.
- Look for interesting natural settings .
- Don't always turn your back on the sun . Try to photograph it and insert it into your images
- Play around with different planes in the image to increase depth.
- Find the magic of warm light through a good exposure and make it the protagonist of your image.
- Practice with the rules of composition .
- Skip one of them from time to time.
- Include the silky effect in one of your images.
- Make sure your image has a center of interest .

WHAT IS THE BLUE HOUR?
Blue hour is a type of natural lighting characterized by its cold, bluish hue and intense blue skies. It happens immediately after the golden hour in sunsets, just before the darkness of the sky arrives, and immediately before the golden hour in sunrises, as a previous step from darkness to dawn.
The blue hour is one of the most used to photograph the urban landscape , since it is the contrast of the intense blue of the sky with the first artificial lights of a city, one of the most photogenic places to photograph the blue hour.
In natural landscapes , it is also a widely used moment, especially the moment in which the warm and intense tones of the horizon contrast with the intense blue of the sky.
Although it is called the blue hour, you should keep in mind that the duration of it is quite short and differs from the moment before sunrise to the moment of sunset.
At dawn, the blue hour is only about 30 minutes before it, and at dusk, about 15 minutes after the sun has disappeared behind the horizon line. It will always depend on the geographical situation in which we find ourselves and the time of year.
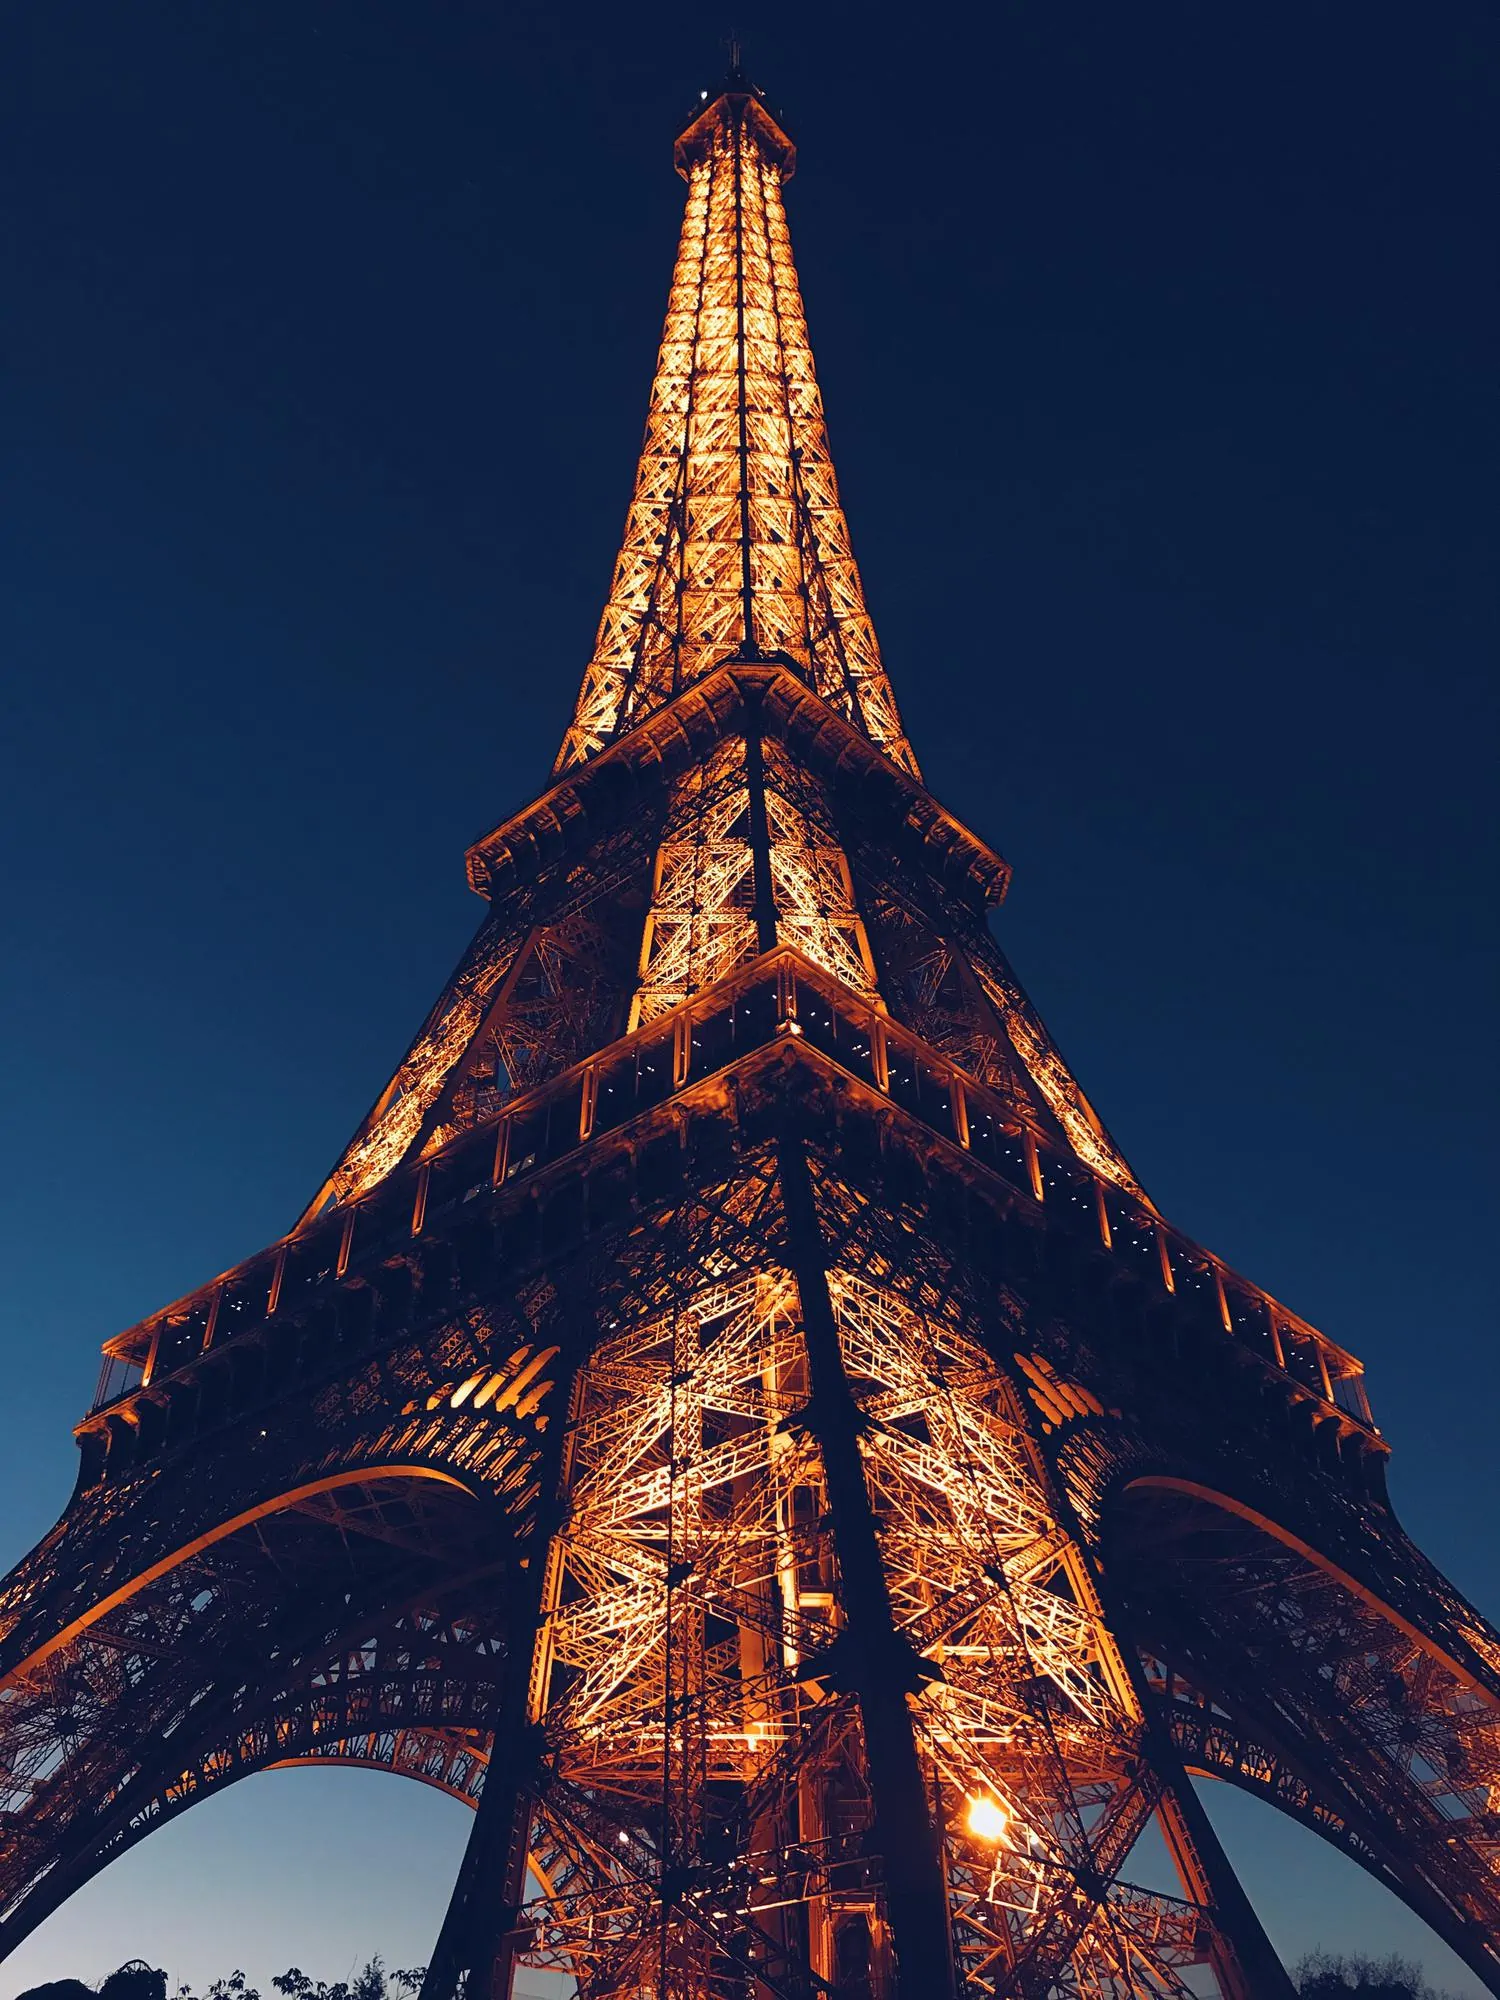
URBAN LANDSCAPE
When the lights come on or are about to go out, the sky is awash in an intense blue color that contrasts with the warm lights that illuminate the city.
This is one of the most photogenic moments you can find in city photography, as the color contrast between the yellow or orange of the tungsten lights and the saturated blue of the sky complement each other perfectly.
CAMERA SETTINGS
- A mix of artificial and natural light , of different color temperatures and intensities in an automatic mode is almost certain to give you an erroneous reading by your camera. Luckily to solve it you are. Forget the automatic mode as we have discussed before for the golden hour. Adjust the exposure manually and perform several tests until you are satisfied with the result.
- White balance: Ideally, shoot in RAW as this will allow you to precisely correct the white balance in post-processing. If you don't use it, you will have to do several tests with the different options available in the white balance of your camera, keeping in mind that options like "shade", "cloudy", or "fluorescent" tend to add warmth to the image. Carry out several tests until you get the option that best suits the results you want, but remember not to set it to automatic because it would tend to "correct" your image by removing cold tones.
NECESSARY MATERIAL
The same as for any landscape photography and the same as for photographing the golden hour:
- tripod . If you do not want to raise the ISO to very high levels and lose the sharpness of your image, it is best to always have your tripod with you in this type of urban landscape photography.
- Remote shutter release or as I mentioned previously, activate the automatic shutter release of your camera.
- A wide angle lens if you have it.
- Spare batteries and batteries.
- Filters.
SOME INSPIRATION
- Long exposure photography : Try combining a splendid blue sky with the trail of light left by moving objects such as cars, motorcycles or trains.
- Look for interesting reflections . Rivers, puddles, water in a glass... whatever comes to mind, give free rein to your inexhaustible imagination.
- Look for interesting lines in your compositions.
- Try that the lines of your buildings do not fall if you do not intend it for some personal artistic reason.
- Try framing horizontally and vertically.
- It portrays the movement, the flow of the cities and the atmosphere of the night that wakes up.
- Do not forget that your image must always have a clear center of interest.
- Look for complementary colors that contrast with each other.
- Be creative.
- Do not miss this blue hour photo gallery to get inspired.
GOLDEN HOUR AND BLUE HOUR: ARE THEY THE SAME?
I guess by now you know the answer. Although both are what we also know as magic hours, and as I have told you, they happen one after the other moments before or after sunrise or sunset, the truth is that they are not the same because they have different characteristics. .
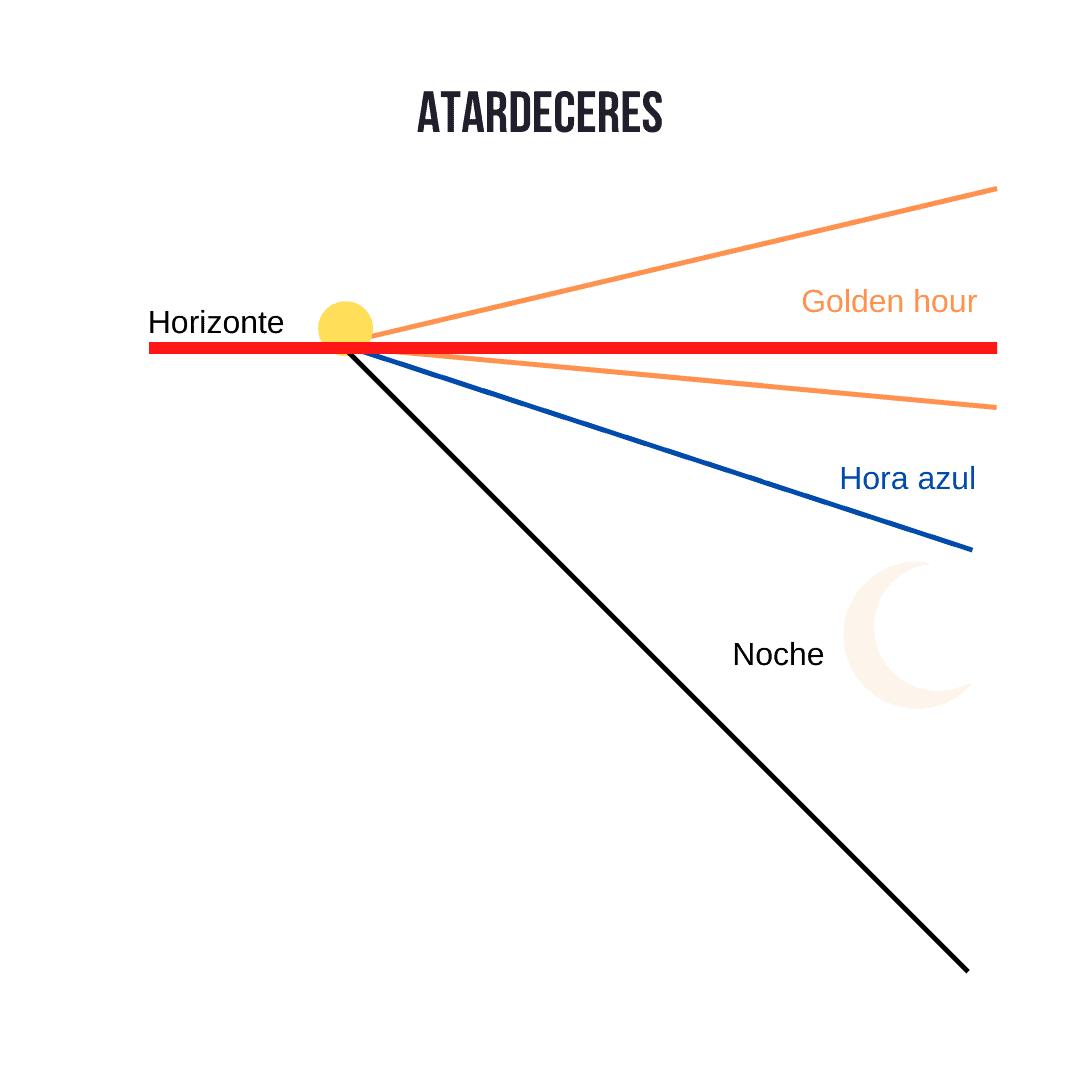
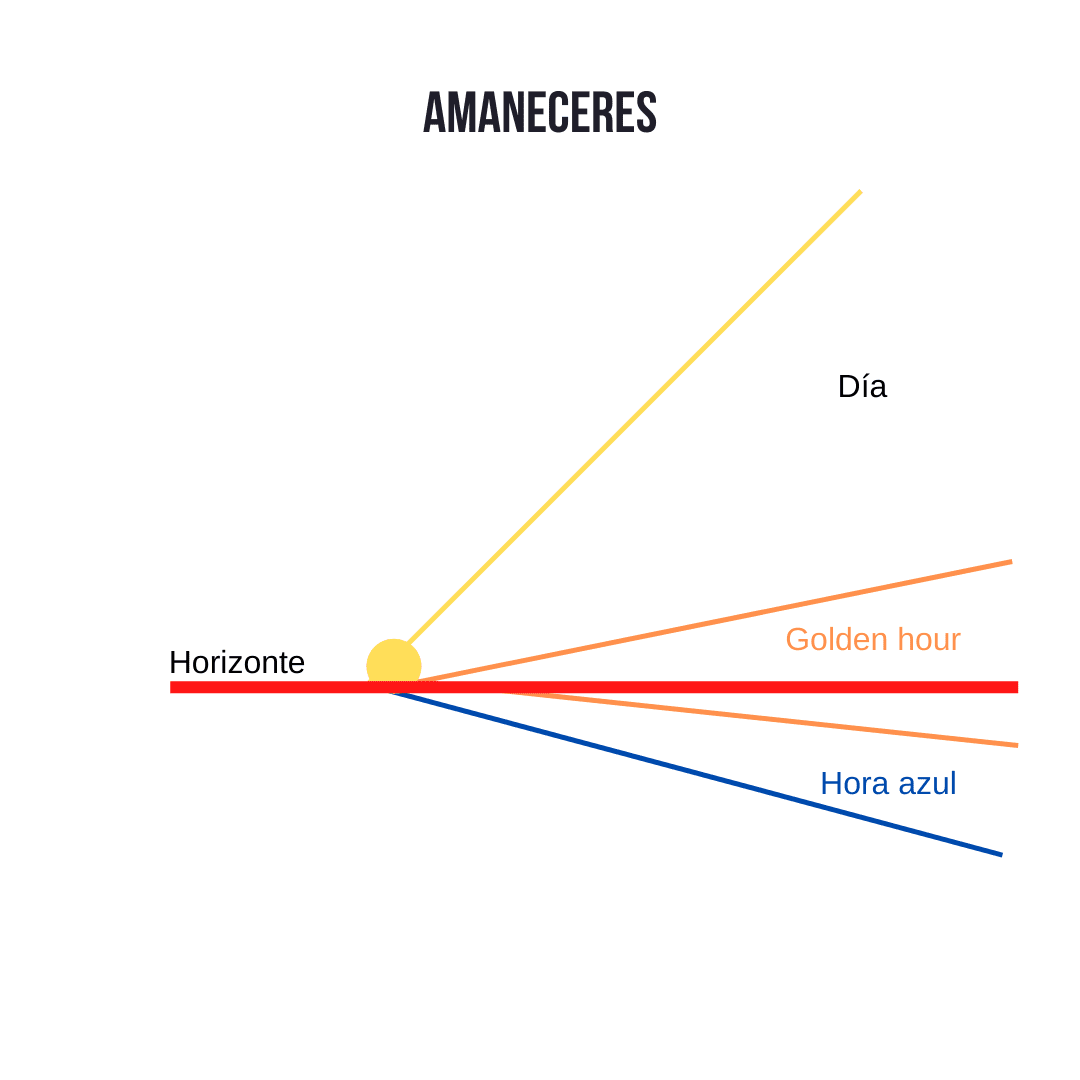
You can see how they succeed each other in the graph below:
Another way of representing the passage from one moment to another is this more linear format that may be a little clearer for you:

As you can see, in a sunrise , we would go from night to a few moments of blue hour that would turn to gold as the sun approaches the horizon and would stay for moments later (generally about 30-40').
On the contrary, in a nightfall , they would follow each other in reverse; we would go from daylight to the golden hour, and a few moments after sunset, we would enter the blue hour until dusk and the loss of natural light completely in the sky.
BECAUSE THEY ARE DIFFERENT?
Although they are both magic hours and you can often find them defined as the same thing, the reality is that they both have very different color temperatures.
The golden hour is characterized by a warm color temperature , and therefore this is the aspect that will dominate in your images. On the contrary, in the blue hour , the dominant light is cold and bluish .
Color temperature in the blue hour:
- Mornings from -6° to -4°
- Afternoons from -4° to -6°
Golden hour color temperature:
- Mornings from -4° to 6°
- Afternoons from 6° to -4°
As the cameras tend to correct the dominant color tones of the image when we work with an automatic white balance , the ideal in these cases is to use a manual mode or, better still, photograph in RAW mode .
CONCLUSIONS
From the warmth of the light to the absolute coldness of its blues, the magical hours are something that, as a good photographer, cannot be missing from your image gallery. But beyond that, it is a moment that as a worshiper of light you cannot stop enjoying .
They are called magical hours for a reason, because they are, because you are going to enjoy photographing those moments like a child, be it in the city or in a beautiful landscape, be it your pet or a still life.
You just need a little patience (not too much), think that they follow each other, think that luckily you should not opt for one or the other, but rather that one follows the other and the other one… You only have You have to be at the right time in the right place and with the enthusiastic spirit that characterizes you and you will see how your efforts will be widely compensated.
Hey, if you've been hungry and want to learn more about lighting in photography and how it influences images, we've prepared this mega guide for you, don't miss it .
