
In today's article I tell you how to create your own preset, as always, very easily and step by step. I also explain what their advantages and risks are and how to import them.
An article with everything you need to know about presets, keep reading!
WHAT IS A PRESET
A preset is simply a set of development settings that you can apply at once, with a single click. Simple, right? The name is still scary, but it is very similar to applying a filter like the one you apply on Instagram or any other application, although with an important difference. Once the preset is applied, you can (and should) continue to apply adjustments.
In addition, the filters are what they are, there is a greater limitation, the good thing about the presets is that you can create your own, which is the main topic of this article.
WHY USE PRESETS
The presets or preset adjustments are a great saving of time and effort. They dramatically improve your workflow , which is reason enough to use them; We already know that most of us don't have enough time to waste it foolishly, right?
On the other hand, the presets can help you to give your work an aesthetic coherence to enhance your own style. They can also help you find that same aesthetic coherence in a specific job or project.
Another utility when creating a preset can be, for example, to automatically correct the distortions of a certain objective.
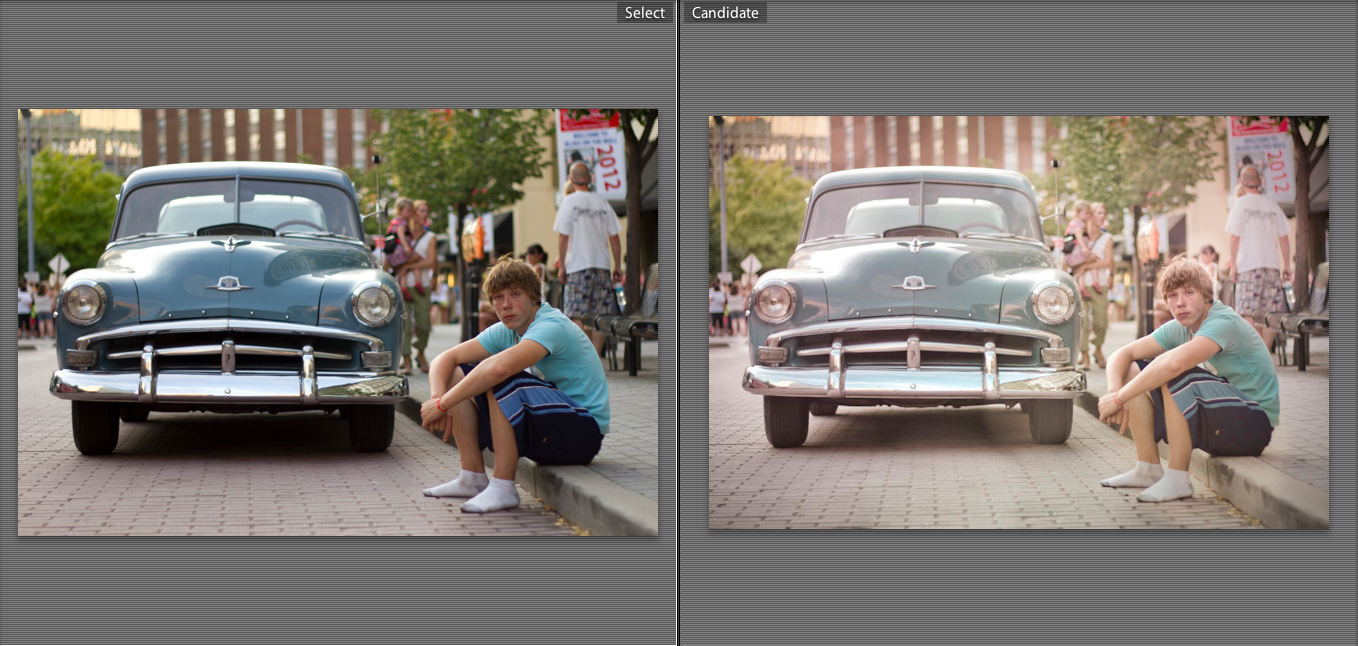
In the following image you can see a comparison of an original image and the result of applying a preset. One click.
MOST COMMON MISTAKES
The presets are very useful, of course, but keep in mind that they are not miraculous either. Let's see what mistakes are usually made with them so you don't fall into their trap ?:
- To think that once the preset is applied, the photograph is ready. Presets are labor-saving, okay, yes, but they don't do it all for you. Once the preset has been applied, keep in mind that they are basic, general parameters, now you, for that specific photograph, with most of the work done (the bulk), you have to refine the details to get the best out of your image. image.
- Apply any preset to any photo. This is the second most common mistake; all presets are not valid for all photos. There are some suitable for one type of photo and others for another type of photo and depending on what you want to express with the image. Or based on what type of image it was created with. Choose the one you want to apply well, because it is about improving your photo, not applying touch-ups without criteria. Having them grouped by folders according to themes will serve as a guide. And I insist, as a guide, not as an immovable rule.
- lose naturalness If you use default presets and also presets that are quite obvious, you can end up losing perspective and naturalness. That's why it's a very good idea to have your own presets with the basic adjustments that enhance your photography but don't make it something completely different.
HOW TO CREATE YOUR OWN PRESETS
Knowing the advantages of presets and their risks, let's now see how you can create your own, you can create as many as you want.
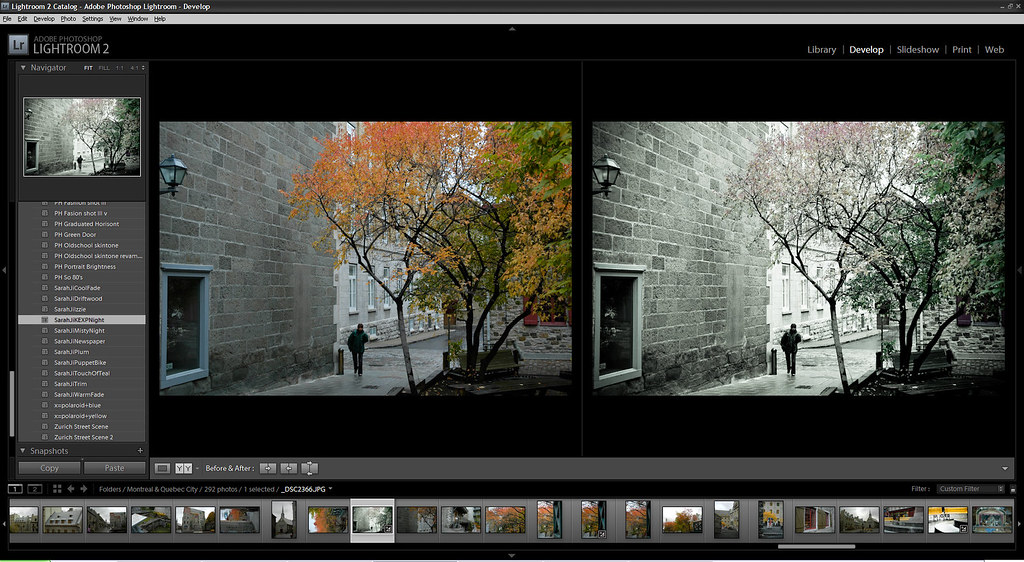
1. CHOOSE THE PHOTO
Choose from the Library module a photo to which you want to apply adjustments, a photo of the type of images you usually take.
2. APPLY SETTINGS
Apply the adjustments that you want to add to said preset, that is, those that you want to apply to certain photos with a single click. In this example I am going to apply the basic settings that I usually use for a quick development. You can see them on the right.
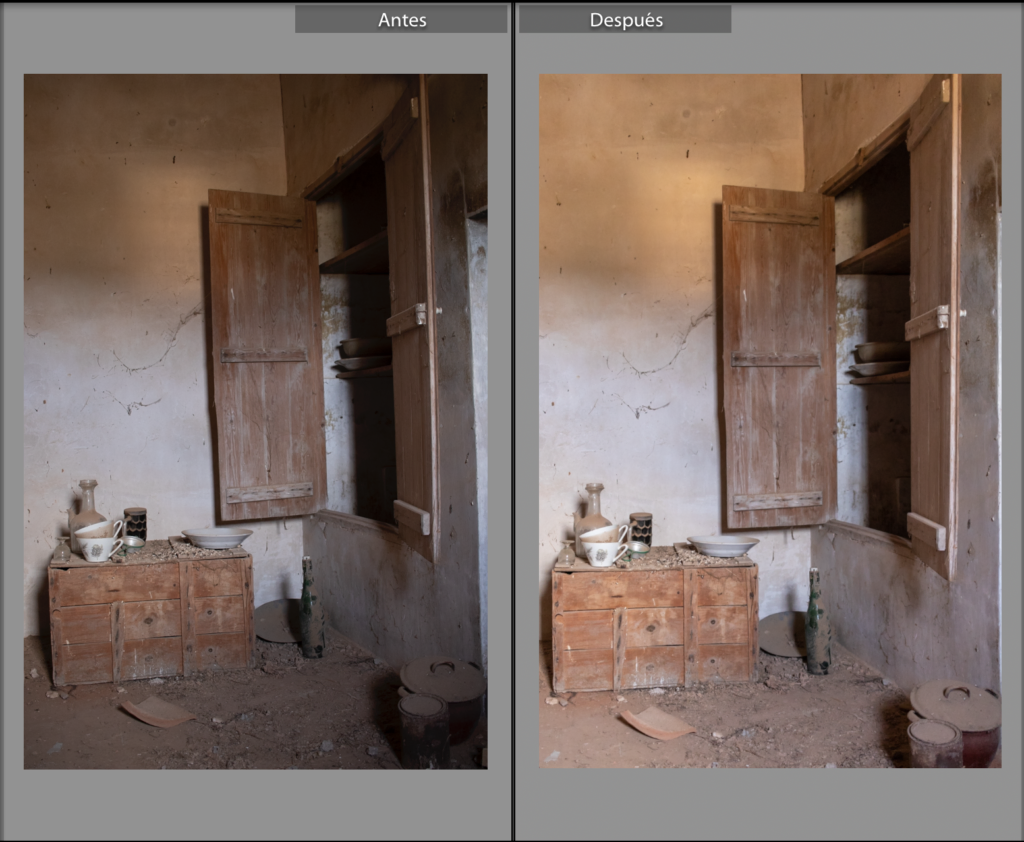
As you can see in the before and after, the photo changes, it comes to life but without major changes, it is a most natural development, although it improves a lot. Here you could apply other types of adjustments if you wanted (Tone Curve, Split Tones, Color…), which does not make much sense is to apply filters because you are not interested in saving the local changes anyway. But you can create as elaborate presets as you want.
3. PRESS «+» AND CREATE SETTING
Next to Presets there is a + symbol, tap it and from the pop-up menu select Create Preset .
4. GIVE IT A NAME AND DETERMINE FOLDER
A window will open in which you will have to give your new preset a name. You also have to place it in the group in which you want it to appear. In my case I leave it in User Presets but you can display the arrows that I point to and choose another folder.
Here you can also select or deselect the settings you want to save. As you can see, the local settings (filters) are not marked.
5. CREATE
If you do not click on the Create button , it will not be saved, a short step, easy but important ?
Now you can find your own preset in the folder you have chosen.
The next time you want to apply these settings, you just have to click on it and all the settings that you have decided to include in it will be applied automatically. Easy, right?
And don't forget to finish the development with the last specific adjustments that the image may need.
HOW TO DOWNLOAD AND INSTALL PRESETS
Whether paid or free , when you find the presets you want to add to Lightroom, you have to follow these steps:
- Download them to your computer and copy them (Control+C, right-click or whatever you prefer)
- Open Path Lightroom > Preferences
- In the popup window select Presets and Select Show Lightroom Develop Presets
- Open the Develop Presets folder
- Paste the presets in it ( Control+V or whatever is more comfortable for you)
- Close Lightroom and reopen it, which amounts to a reset so that the new presets appear when you open it again.
- If you're more of a video fan or have any questions, here 's an explanation from Mario on how to download your presets on Mac and PC.
HOW TO ORGANIZE YOUR PRESETS
Once you have your presets, either created or downloaded, you can move them to the folder you want to keep them better organized. For it:
- Right click on the preset you want to change places.
- Select Move and in the pop-up window select the folder you want already existing or create New group .
- Finally press OK and you will have the preset where you have defined.
PHOTOGRAPHER BLOG PRESETS
If this topic of presets has caught your attention, I encourage you to take a look at the Photographer's Blog presets . 100 presets divided into several packs.
And here is today's article. I hope I have helped you unravel the preset world, which as you can see is not that complicated. The most complicated part is deciding which preset to apply at each moment for each photo, right?
If you found it useful, please share it on your favorite social network. Other contacts will also benefit from this information and I will feel that this invested work has come to fruition. Thank you and see you soon.
