HOW TO CAPTURE PHOTOGRAPHS WITH HIGH CONTRAST OF LIGHT
HOW TO CAPTURE PHOTOGRAPHS WITH HIGH CONTRAST OF LIGHT
How many times have you gone out of energy on a wonderful sunny day, camera in hand, determined to photograph everything around you, thinking that you could not find a better day, with a blue sky and a brighter sun up there ... and has the day been the worst images you have achieved?
Yes, very frustrating, with how pleasant it is to walk under the radiant sun, especially in winter, making us feel the spring ... Well, the truth is that the more sun, the higher it is in the sky, the harder the light it projects , the more contrast you will have between lights and shadows and as a photographer, you are presented with one of the most difficult scenes to photograph: those of high contrast.
WHAT IS THE CONTRAST?
Although there are many types of contrast , color contrast, shape contrast, even meaning, today we refer to the difference between the light zone and the shadow zone in an image.
We say that an image has a lot of contrast, when the difference between lights and shadows is high, that is, we have hard lights and shadows in the same image. On the contrary, a low contrast image is one where there is little difference between lights and shadows, either because the dominant colors do not contrast, or because the light is softer.
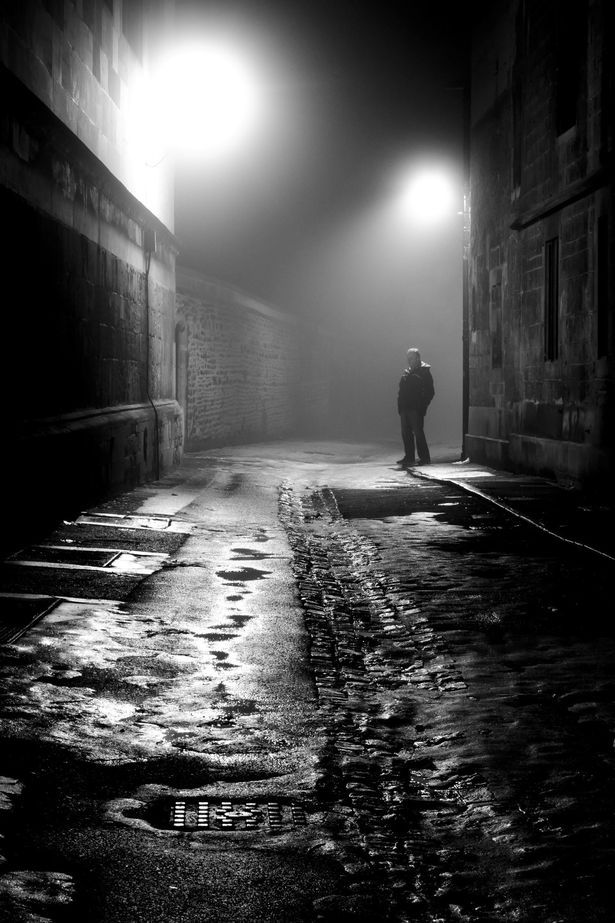
High contrast scene
HOW DO I SOLVE A HIGH CONTRAST SCENE?
Not all high-contrast scenes mean you're going to have a photographically ill day Like everything else, it is a matter of taking advantage of both your team, the stage, and, above all, your good photographic eye.
ASSUME CAMERA LIMITATIONS
Photography is so visual that it is very difficult to avoid what we perceive through our eyes. That is why it is difficult for us to learn to “see in black and white” or to be aware of the situations that our gaze reaches but our team is unable to reach.
For example, the human eye has a dynamic range (the ability to obtain detail in lights and shadows) much greater than that of any photographic equipment.
That is to say, what for us is an easily understandable scene, for a camera with a much smaller dynamic range, it usually means burned or underexposed areas since it is not able to reach both ends correctly. Often we have to give up one end to focus on the other; what we call "sacrificing" lights or shadows
To give you an idea, the approximate dynamic range of a camera is 7 steps between lights and shadows. That is the interval in which it can offer you detailed and correct information about the scene.
FORGET THE AUTOMATIC ...
... And of the pre-programmed versions of the camera (type the sun or beach symbol, etc.). In these types of scenes, the camera will not make good decisions, and nobody better than you to take over
It is best that you configure it in manual and make the appropriate measurements and tests trying to obtain the greatest dynamic range or information possible within the scene.
WHERE TO MEASURE
Obviously it will depend on the results you want to obtain, but the generic way of making the measurement to obtain the greatest amount of tonal information is in the clearest area of the image .
The most recommended mode of measurement is the punctual one , since this way you will be sure to obtain the luminous information of the place that you indicate and not an average that your camera can perform.
HOW TO EXPOSE
Once you have measured in the clearest area of the image, you must expose so that that area that you have chosen, is located in the most extreme area of the lights but without becoming overexposed.
That is, looking at a histogram, that area of lights should be located in the right area of the latter, but without getting out, since in this case it would mean that you are losing information and that, therefore, you are not getting the highest dynamic range Image possible.
SHOOT IN RAW
If the RAW is usually recommended in countless occasions, this could not be less. Since we are talking about trying to keep as much light and shadow information as possible, you will have heard that RAW files are those that retain the most information . This will be very useful in difficult light situations because, although it will not save a poorly exposed image, it can help you a lot to finish improving the lights and shadows in post-processing.
CHECK THE HISTOGRAM
The histogram should be one of your great photographic allies. In situations where the light is difficult, such as high contrast, the ideal thing is that you check the histogram after taking a test photograph and through it, make the corresponding exposure adjustments until you get the best result.
SOME "CLASSICS" OF HIGH CONTRAST
The sunny noon : Zenith, hard light, shadows and lights everywhere, surely you know what I'm talking about
Snow Getaway: Snow White is a great scenario that will drive your photometer crazy, so pay attention to your histogram and don't be fooled. Normally it will force you to overexpose a couple of points.
... Or to the beach: Although it always depends on the type of day (cloudy or sunny) or the time of day (you know that a sunrise is not the same as the sun at 15h), the sand reflects the light in a similar way to snow, so it may easily require you to overexpose a bit.
INDISPENSABLE MATERIAL
Or at least you'll appreciate having it on hand
PARASOL
You already know it, if you want to avoid unwanted entries of light in your optics such as flares or other reflections, do not forget the parasol at home.
FLASH
A good way to combat high contrast scenes is the flash. If you are taking portraits in full sun, it will eliminate unwanted shadows, and will allow you to play with the background exposure (for example, darkening the scene if it is too clear or vice versa).
GRADIENT FILTER
It is widely used in landscapes to compensate for example the passage of light skies to darker areas. This filter is divided into two halves; one that subtracts light progressively or graduated towards the other half that maintains the original light since it is completely transparent.
A GRAY LETTER
They are very economical and effective in helping you measure the light of complicated scenes. Basically it is a neutral gray surface , which allows you to measure on it to achieve a correct exposure (neither bright and white surfaces nor too dark surfaces will thus deceive your photometer).
HDR
The HDR allows, through the taking of several exposures of an image, to obtain all the information of lights and shadows. The usual system is to take a picture underexposing a point, another exposing “correctly” and the other one overexposing a point (although it could be done in several ways).
Through the union of the different exhibitions, we will be able to obtain an image with “the sum” of all the information of lights and shadows collected.
Here is a blog article on how to make an HDR easily and step by step through a user-friendly program. If you decide to create an HDR at your own risk with Photoshop, don't forget the tripod, to have exactly the same frame in all the shots.
JOIN THE "ENEMY"
Not everything is going to be the need to dodge or escape contrast or challenging lights. Hard lights, shadows, silhouettes, contrast ... These are all effects of these types of lights that can give you great images, here are some examples:
Backlights: If you don't know how to unleash your imagination with backlights, check out this article .
Shadows: You can see a complete article on how to photograph shadows here .
High-key photography: And one more here about high and low-key photography, not to say that in this blog there is nothing
And as we always say, the important thing is to practice , especially when the environment presents us with challenges , which is almost always (luckily). That environment that challenges us and motivates us to improve ourselves and be better. It doesn't matter if you need 20 photographs of the same to get your perfect image. It doesn't matter if it takes 2 hours or 2 days or 2 months to understand a concept. Do not believe that you are the only one ;-), the important thing is to learn, at the rate that we feel comfortable, that overwhelms us and, above all, that does not bore us. The more you practice, the more you will solve until there is no light or concept that resists you.
So encouragement and you know, if you liked it, it has been useful and you think someone else might be interested in taking a look at this article, please share it (Facebook, Google+, Twitter) And as always, thank you very much