
Today I am going to teach you how to edit your photos with Snapseed. Because as much as one gets the best possible photos with the smartphone (in this mega guide we tell you how to get it), sometimes we don't get where we want.
Although many people think that a photo is taken with the camera, period, life is full of nuances and this includes taking photos with the mobile camera and editing as we please.
Because that's what the tools are for and that's what art is for, to write it and capture it as one wants.
Either because of the tool, the situation, or our own limitations as photographers (don't beat yourself up, we're learning ?), sometimes our photo is far from what we have in mind.
Luckily we have wonderful editors that can fix a crooked photo, with a lack of light, with an uninteresting framing, etc.
Do you want to learn some tricks to turn a mediocre photo or one on the verge of disaster into a salvageable or even impressive photo? Well stay because this article interests you.
- Mobile editing apps
- How to edit your mobile photos with Snapseed?
- Default Snapseed Layouts
- Other Snapseed Tools
- Edit RAW photos with your mobile from Snapseed?
- How to export your photos with Snapseed?
- How to get Snapseed
MOBILE EDITING APPS
There are many photography applications, today we are going to talk about Snapseed, but in the link you will find a specific section of applications to edit your photos with your mobile.
If you want us to write a more specific article about the different editing applications where we expand the information on each of them, leave us a comment, you know that we like to create material that is of interest to you.
For me, the mobile editing apps I use the most are Snapseed and VSCO (both free). The first one that we are going to talk about today seems very complete and very easy to use.
The second one also offers a lot of tools and filters that are very good for instagraming. If you like this tutorial and want another one for VSCO, just ask ? .
But this of the applications is like the same edition, it is to taste, my advice is that you try them all (or several) and keep the one that is most comfortable for you and offers you the tools you need.
HOW TO EDIT YOUR MOBILE PHOTOS WITH SNAPSEED?
I am going to give you several examples, since there is no fixed formula or magic recipe to edit your mobile photos with Snapseed, but each photograph requires different retouching and each person would edit in a different way.
Today's are some editing examples, which does not mean that it is a correct edition, but the one that I like. It should serve as a guide to understand the tools and (more or less) the steps when editing a photo with your mobile.
From there, the decisions are made by you based on the photo and what you want to have with it.
STEPS TO EDIT A MOBILE PHOTO WITH SNAPSEED
I am going to tell you basically the steps that I would follow with Snapseed. Although, as I said, it will depend on the photo.
Let's see an example that requires almost all the tools I usually use.
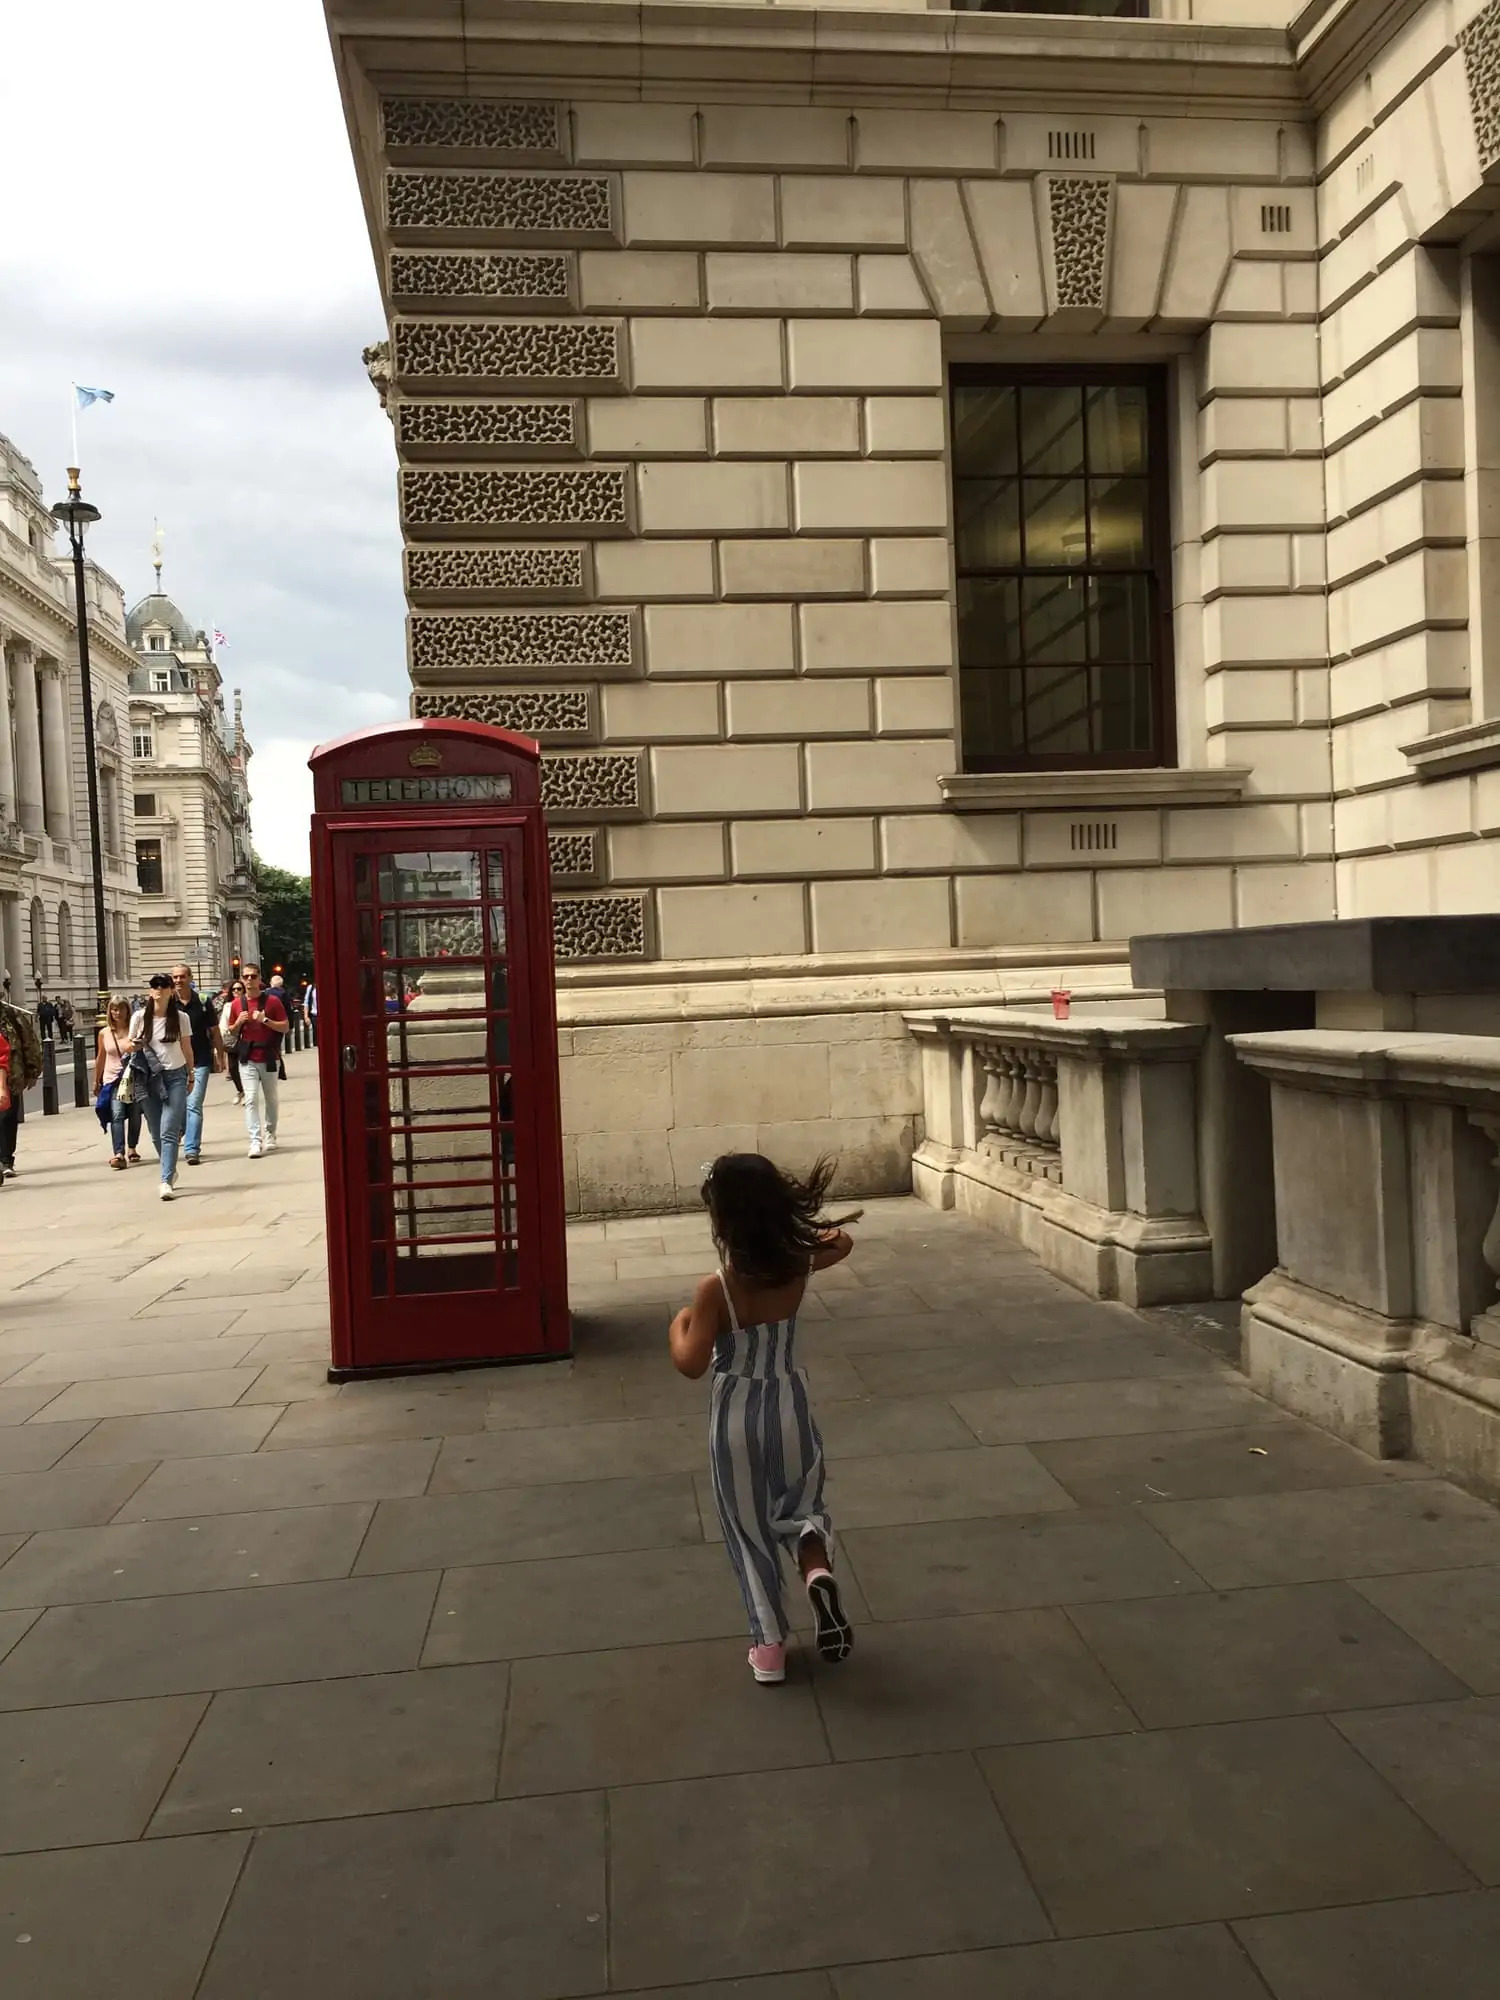
On the right, the original photo, a photograph taken hastily, without time to frame, expose, or anything else.
My daughter started running to take the typical photo (posed) with the booth and I found this moment more interesting and spontaneous. As you can see, the image leaves a lot to be desired.
1. SELECT THE PHOTO
The first thing, once you have Snapseed open, is to open the image you want to edit by clicking OPEN in the upper left corner and selecting it from your gallery.
In the following images you can see the open photo and the tools you have. At the bottom of the application you have a menu with Filters , Tools and Export . Click on Tools and they will all be shown (you have to scroll down to be able to see them until the end, that's why I put them in two screenshots).
2. STRAIGHTEN (AND TRIM)
You can do the cropping step after straightening or at the end of all editing.
If I know what aspect ratio I'm going to choose and I don't have to straighten, I like to do it at the beginning, so I have the image as it will be so I know what touch-ups I have to do.
If you want to make several clippings, for different types of publication or printing, it is better to leave it for the end.
For example, suppose you want to print the photo at 10x15 size (2:3 ratio) but you also want to upload it to Instagram(where the aspect ratio would be 4:5); in this case it is better to edit the photograph and once it is ready, make the different cuts saving the different versions.
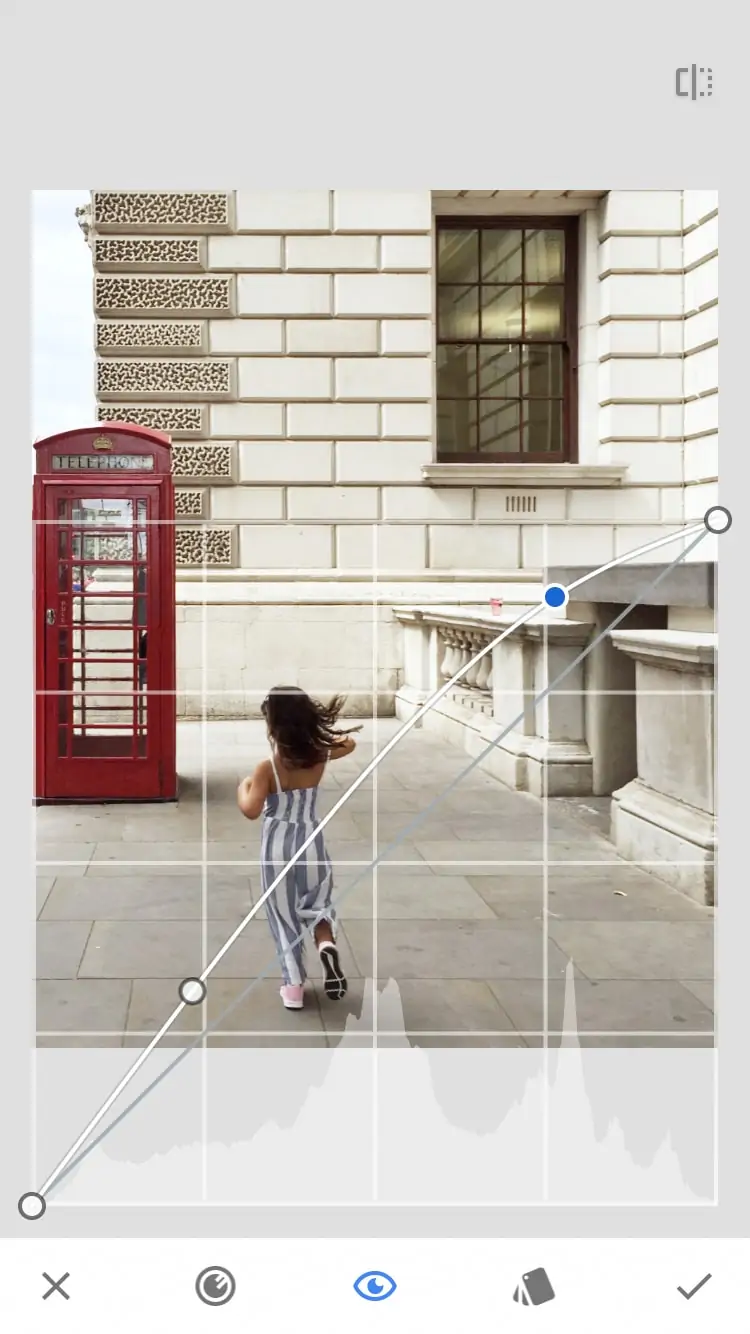
As for straightening the photo, the Perspective tool is the one that surprises me the most in Snapseed, really.
Once you open it, it offers you several options: Tilt (vertically or horizontally), Rotate (to straighten the horizon), Scale and Free .
When there is a building it is perfect and super easy to use to straighten all the lines. Like in this case.
Since with Inclination it did not solve so much distortion, I have chosen to select the Free option . You are pulling the corners until leaving all the lines (vertical and horizontal) straight.
You know, each photo will ask you for a different thing. Be careful with the edges that can leave the gaps blank, black or fill them automatically (depending on the option you have marked).
That's why I recommend you always do the trimming after straightening.
3. MAKE THE BASIC SETTINGS
It's time to adjust the exposure, from Improve photo , if it's too dark you can brighten it (to the right) or lighten the shadows (to the left). If it is too exposed, you can lower the exposure with the brightness and with the touches of light (be careful, with burned areas it does not work miracles).
Here you can also adjust the Contrast to accentuate certain elements and the Saturation to make colors stand out or tone them down.
If you control Curves editing , you also have it in Snapseed (right image). We will talk about them again below.
As you can see, photography changes a lot with this step. They are the minimum adjustments that you should make to all your photos, without being too artificial, of course.
4. WHITE BALANCE
With the white balance you control the color temperature of the image. The normal thing is that white is white and does not tend to any color, but a cold or warm temperature also helps to transmit sensations and it is something you can play with.
I tend to like warmer photos more, but as I was saying, each image and each scene requires a temperature.
With the tool that has the AW icon it is corrected automatically (it doesn't always work). With the selector that marked you in the first image below (click to enlarge), you can select an area of the scene that is white and it corrects it automatically (second capture). If you move it around the image you can also keep the temperature that suits you best for your photo.
Finally, we have the Temperature tool (screenshot 3), with the cursor to the right it becomes warmer and to the left it becomes colder (see examples below).
You can also play with the Hue which is the Tint in Lightroom. To the right it shoots magenta and to the left it shoots green. It can help you correct skin tones. In this case I leave it as it is.
5. CORRECTION OF ELEMENTS
Sometimes unwanted elements sneak into the image, which do not contribute anything. When it is a street or documentary photography, it is not ethical to remove them, for everything else, you are free to do whatever you want with your photo to make it look better.
The glass that was on top of the wall bothered me and I removed it with the Stain Remover tool .
If it is something very small, it is better that you enlarge the image well. You just have to tap on the item to delete and Snapseed does its magic.
Sometimes you don't get it the first time or the second time (or the third time...), but do tests until you get a natural result.
Undo and redo as many times as necessary, have a little patience ? The more borders there are around the element, the more it costs.
If we get fine, it could also eliminate what is on the floor, but as an example, it is worth using the glass.
With this last tweak it works for me. If I hadn't cut, I would do it now and that's it. This is how this quick edition turned out.
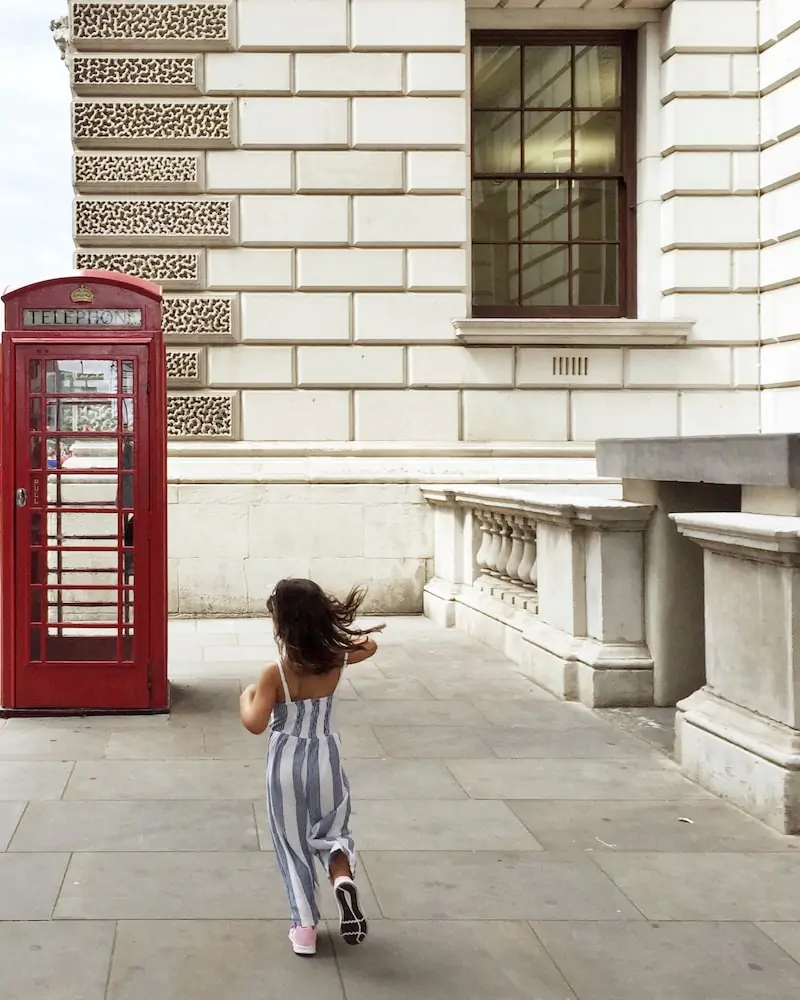
Now let's see the comparison of the original photo (left) and the edited one (right). Change, right? Well, you can do the same thing, it's free and easy.
UNDO CHANGES IN SNAPSEED
And what if you're wrong? If the edition you are doing does not convince you and you want to go back, you have it very easy. You have several options:
- Recover the original: you undo all the changes of one and return to the origin.
- See editions: all the adjustments (or layers) that you have been making are opened (central image). If you click on one of them, three options are displayed (right image), Trash , to delete that specific edition; the Brush , to apply it only to one area, Edit , to re-adjust the touch-ups of that edition or layer.
If at this point you have doubts about whether or not to edit your photos, don't be fooled, the photos you see are not taken directly from the camera, 99.9% are edited or retouched.
And it is that cameras have their limitations, no matter how good they are. But that's what editing tools are for. To compensate and to express just what we want.
Let's see some other example quickly.
Because, I insist, each image requires adjustments beyond the basic ones: Tonal Contrast, Vignetting, Black and White or Blur, are just some of the tools that Snapseed offers and that I have not used in the example above.
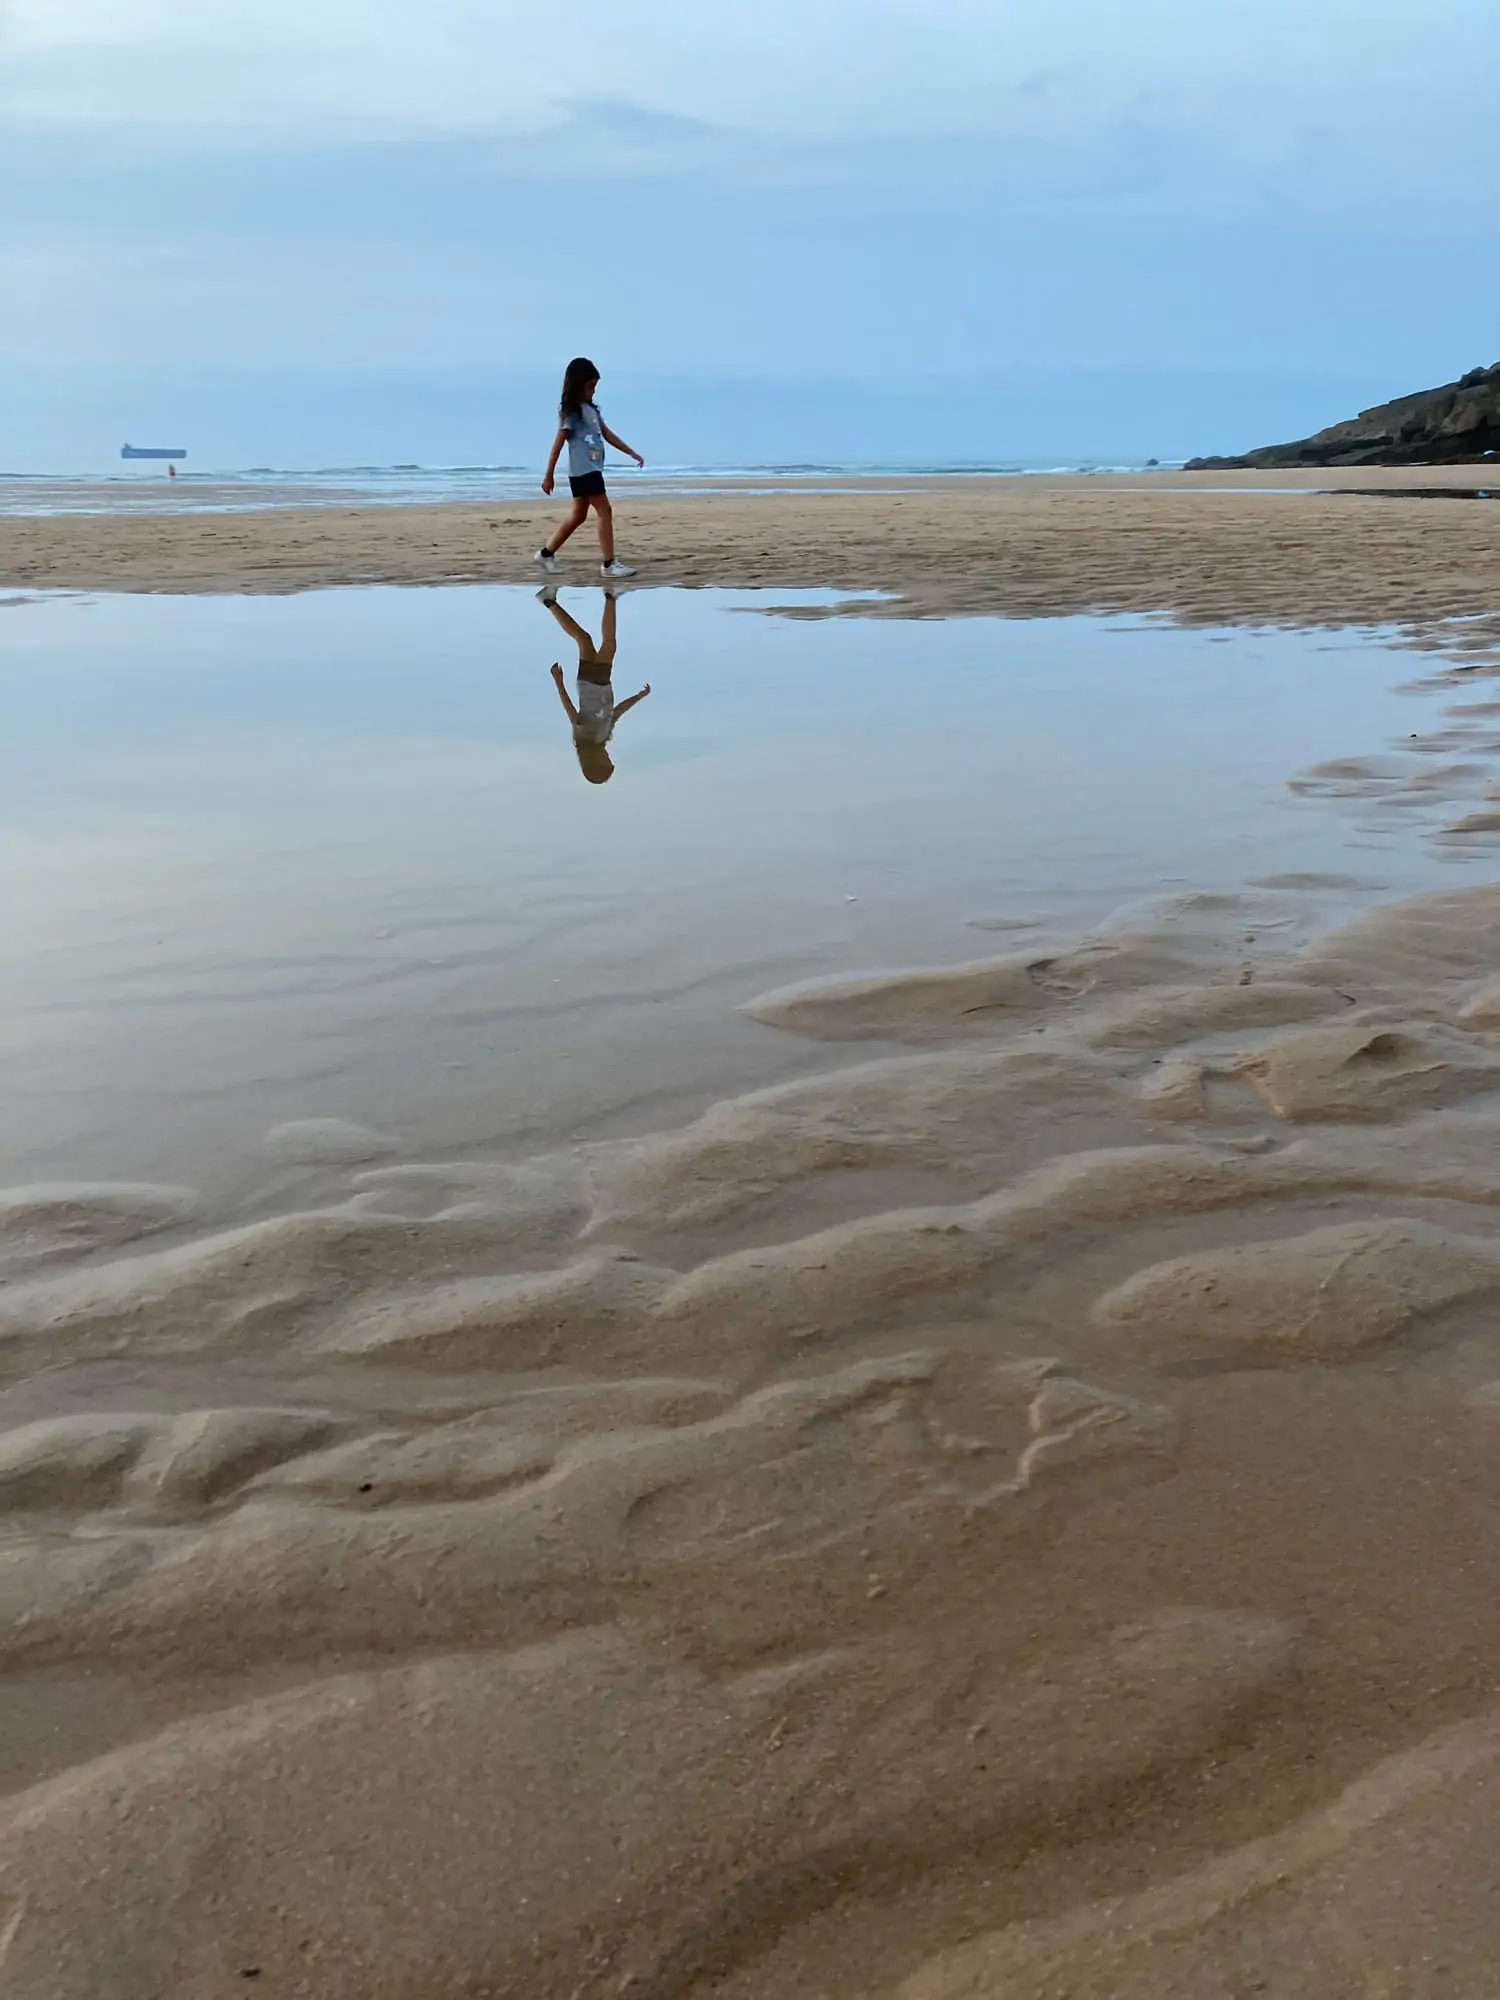
EDIT MOBILE PHOTO WITH SNAPSEED IN BLACK AND WHITE
Let's go now with a black and white image. I am putting each of the steps that I have been taking. I turn it around because I like that dreamlike effect, where the unreal is the real and vice versa. The edition has no limits, only those that have your imagination.

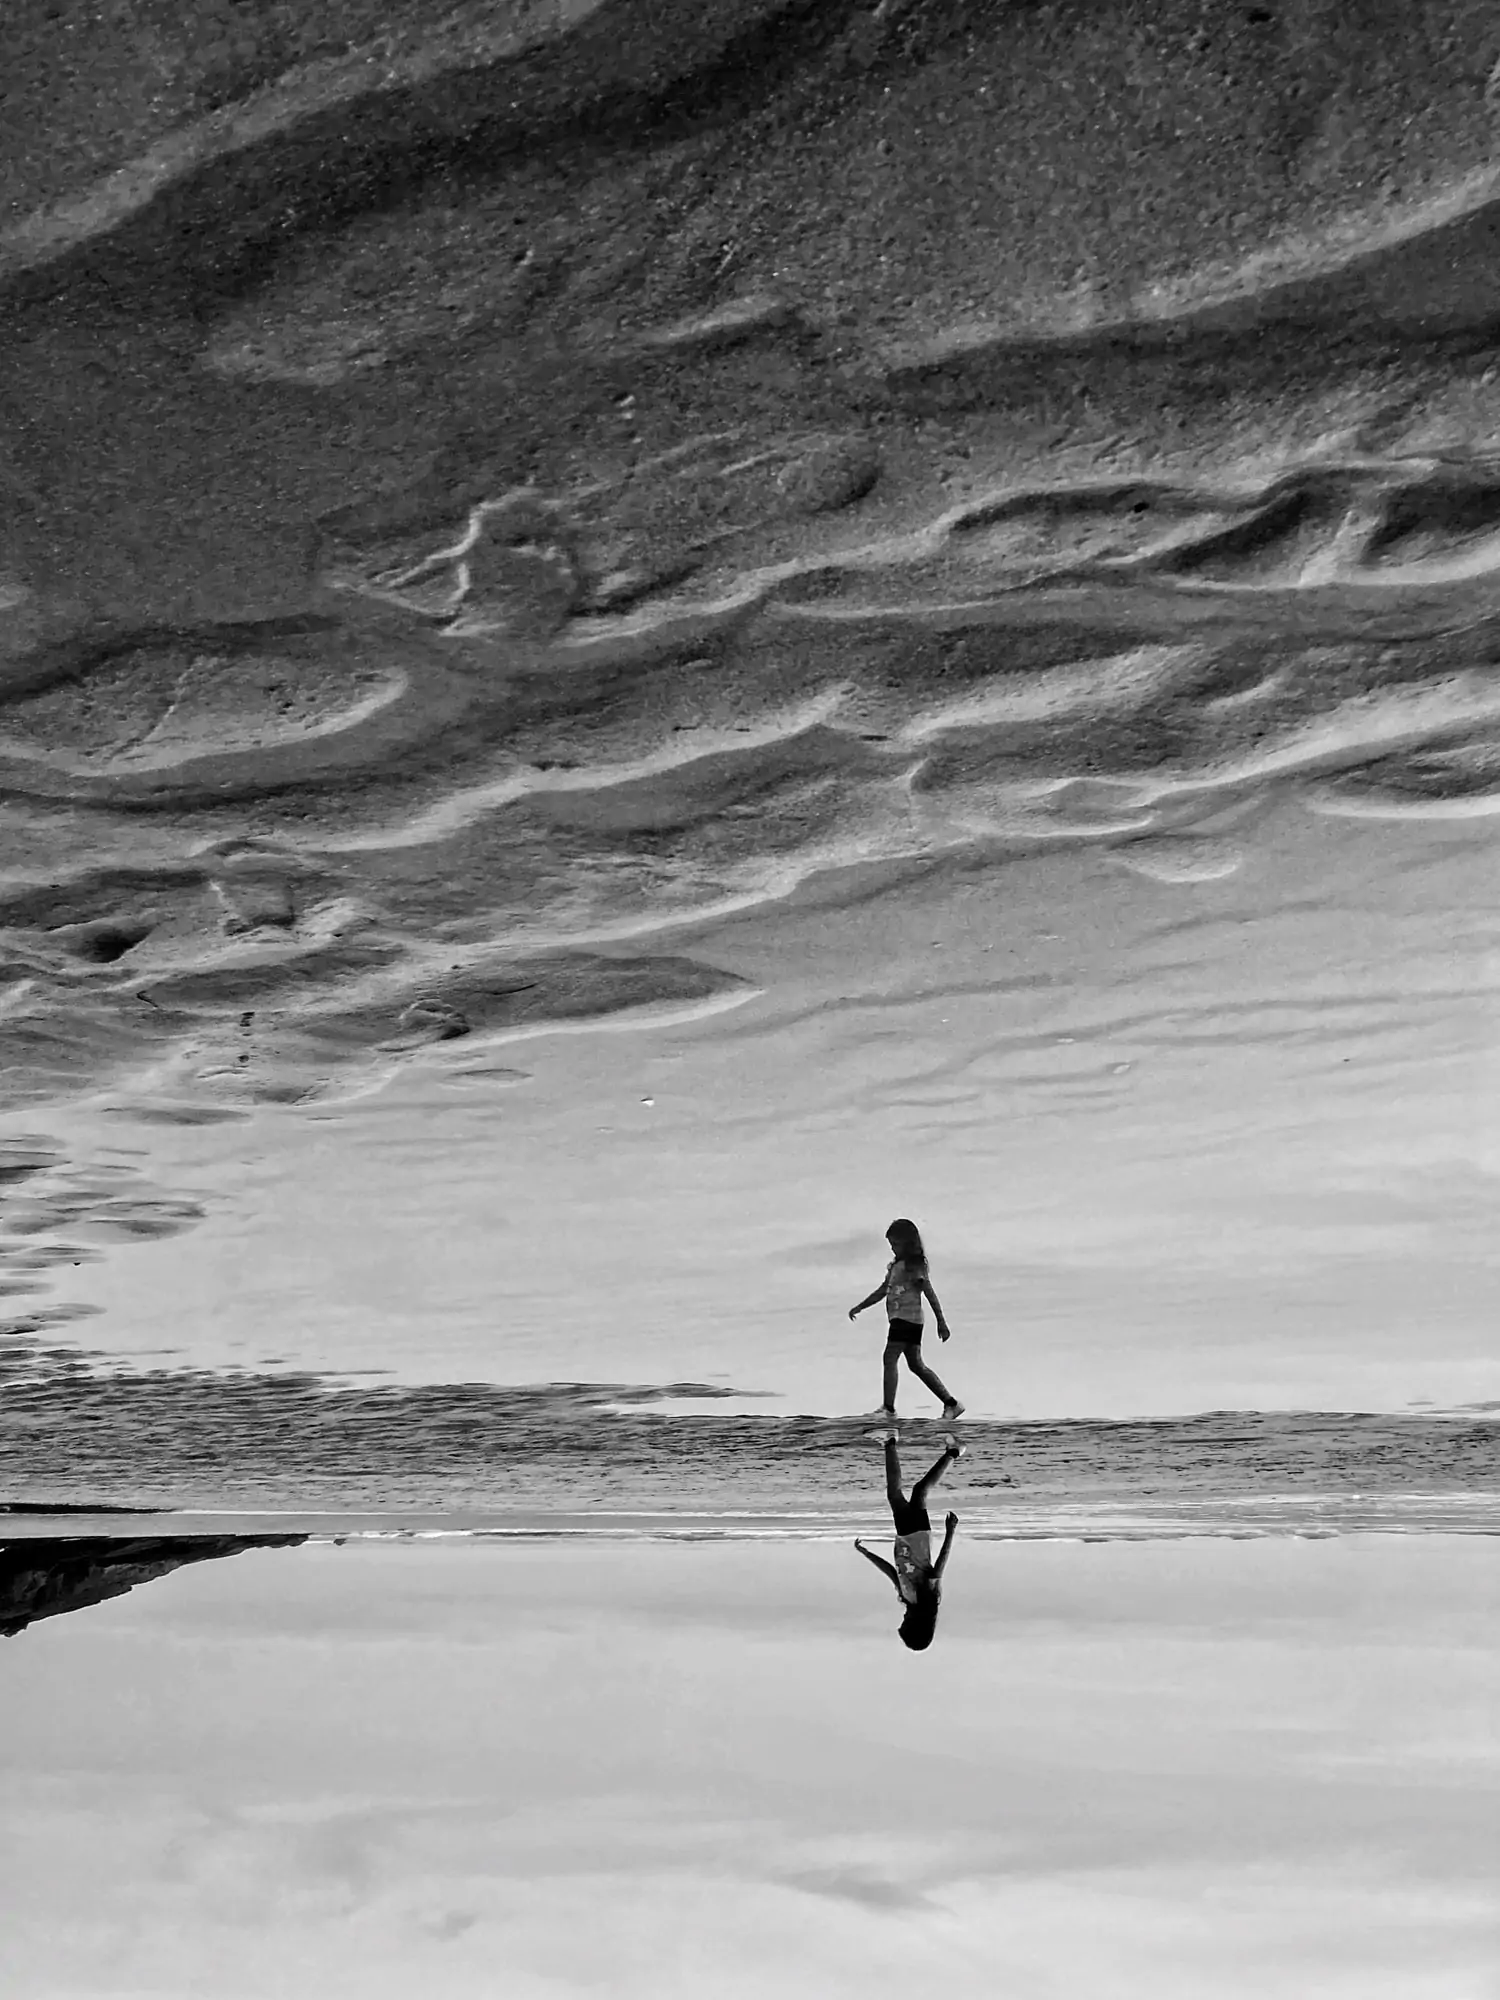
Now let's see the comparison of the original and the final. Can there be other ways of editing? Of course!
As many as people try, and what's more, each of these people can edit the same way in a different way depending on the day, their mood or what they want to convey.
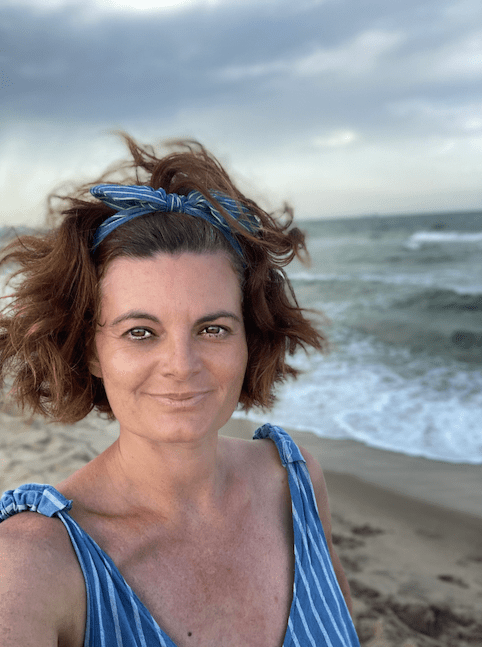
EDIT PORTRAITS WITH SNAPSEED
There are, within Snapseed, specific tools for editing portraits. One is Portrait and the other is Head Pose .
With the first ( Portrait ) you have the following options: Highlight Faces , Soften Skin , and Eye Clarity . You can adjust them in a personalized way, each one independently or use the presets that the application offers and even modify the skin tone. Let's see (click on the photos to enlarge).
Then there is the Head Posture option where you can tilt your face, widen or narrow your smile, or widen your pupils.
I generally don't like to use it but everyone... what is important is what I'm going to tell you next.
DON'T MAKE THESE MISTAKES WHEN EDITING A PORTRAIT WITH SNAPSEED!!
Always remember that within the infinite possibilities the result must be NATURAL.
If you make the skin so soft that it looks like a doll's or the eyes as if you came out of a vampire movie, well no, it's not cool.
Here are two examples of what you should NOT do.
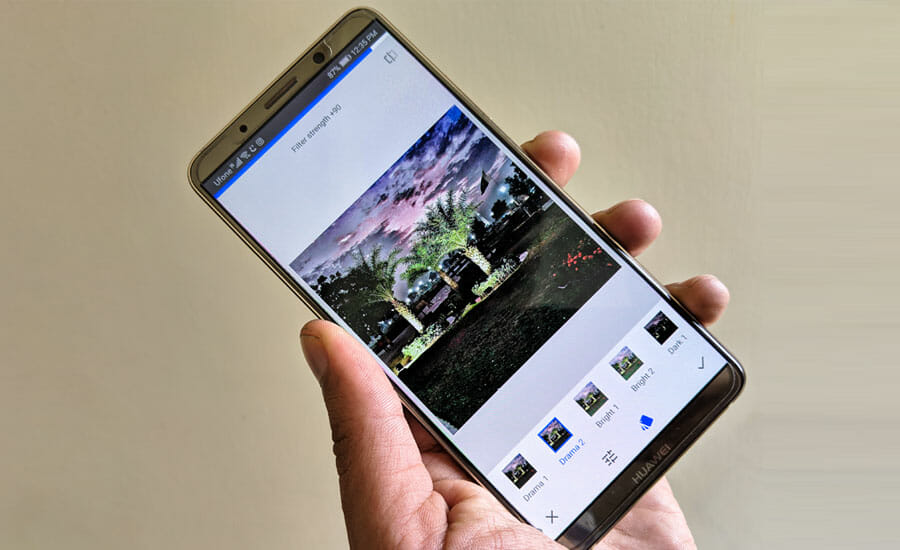
DEFAULT SNAPSEED LAYOUTS
In addition to all the tools with which to edit your photos, Snapseed offers some preset layouts.
To be honest, I don't use them too much, I prefer to be in control of the image and the ones it offers don't excite me.
Especially since it also does not allow you to control the intensity of the adjustment as it happens with the presets or other filters of other editors.
What you can do is apply an input filter and then make adjustments with the tools that we have been seeing throughout the article.
Despite not being a big fan of them, I have tried and used them once, in the end it depends on your tastes and your needs.
In the menu at the bottom of the application you have them as Designs . It's up to you if you want to use them or not and/or when, but you should know all the possibilities. These are some examples:
The Layout that I do find useful is Latest Changes .
When you want to edit multiple images with the same settings, once you edit the first one, your job is done, for the others you just have to apply this preset layout.
OTHER SNAPSEED TOOLS
We have seen the main tools, but this mobile photo editing application offers many more. Inside Snapseed you will find:
MORE ADVANCED EDITING TOOLS
To refine more when editing your mobile photos, Snapseed offers these other tools.
- Selective: to edit by zones (Brightness, Contrast, Saturation and Structure).
- Brush: also to edit by zones, but in this advanced tool it is a brush that you can apply exactly where you want to increase or decrease Light and Exposure, Exposure, Temperature and Saturation.
- Blur: select an area that you want to give prominence and blur the rest.
- Curves: I have told you about her above. If you have an advanced level in editing you will know how to use it. If not, take a look anyway because there are some default settings that can help you. Try them and if they convince you, go ahead.
- Expand: With solid or solid backgrounds, you can easily expand the edges of your photo.
CREATIVE TOOLS (FILTERS)
And if you are more of creative filters you will not lack options. These are the creative filter-like tools offered by Snapseed.
And I say mode because it is not applying the filter and that's it, but within these you can always modify aspects of the filter, which offers you infinite possibilities at a creative level.
- Vintage: a tool to give a retro look to your images with a lot of options.
- HDR landscape: it is not just an HDR filter, because within the tool you have the possibility to customize this effect.
- Noir: Creates a cinematic effect that mimics images created in a dark room. Images washed out in black and white and with muted tones. It offers several preset filters and also the option to adjust Brightness, Lighten, Texture and modify the intensity of the filter.
- Film Grain: In this case, it imitates color films and allows you to modify the level of grain (the analog grain, not the digital noise) and you can also control the intensity of the filter.
- Grunge: add texture to the image, you have a lot of options.
- Retrolux: make your currently taken photo look like one of those printed analogue photos from a bunch of years ago that are hanging around the drawers of your house.
- Drama: a filter to create artistic images with their own style.
- Glamor Shimmer: Adds a soft halo that reminds me a lot of the Orton effect .
By the way, now that we talk about editing filters and so on… do you know our Lightroom Presets ?
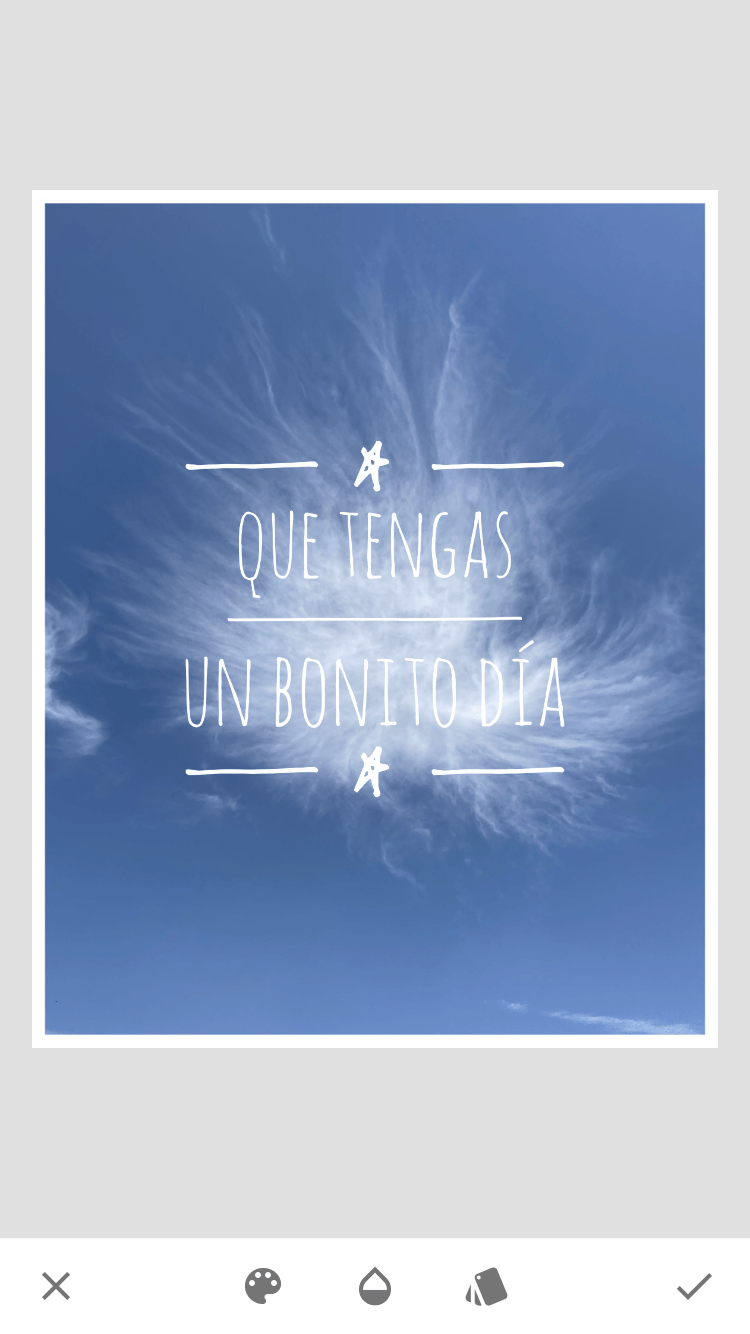
Of course, there is also the possibility of adding text or frames to your images. Ideal for sending an invitation, congratulations or as a memory of a trip, for example.
Frames you have a lot of different options, and text, you can choose typography and design, color and opacity. Here are a couple of examples:
If you have any questions about what a tool is for or any other question when it comes to editing your mobile photos with Snapseed, you have its support page.
DOUBLE EXPOSURE WITH SNAPSEED
I am going to dedicate a specific section to double exposure because beyond editing mobile photos Snapseed offers you this super creative and very easy to use tool with which you can create very different, original and unique images. Even aesthetic images ?
In the link you will find tips to achieve an interesting double exposure, here I give you three examples that I have done quickly to give you an idea.
But here it is about experimenting and playing. It's time to have fun!

EDIT RAW PHOTOS ON MOBILE WITH SNAPSEED?
Yes, it is possible to edit RAW from Snapseed, although there is a catch . It is a matter of compatibility.
With Android there is less of a problem, you can edit the photos from any device capable of capturing in DNG.
With iOS things change, here is a list of compatible cameras.
HOW TO EXPORT YOUR PHOTOS WITH SNAPSEED
Once you've finished editing your mobile photos with Snapseed, you'll want to save them, right? Well, this application offers different possibilities:
- Sharing: You can share directly to Instagram, Facebook, WhatsApp, etc., depending on the applications you have installed on your smartphone.
- Open in…: Allows you to open the photo in another application. For example, send it to VSCO to apply one of their filters if you like them better. I think this option is only for iOS.
- Save: depending on whether you use Android or iOS the options vary. All the info on Snapseed, but on iOS you can save a copy from which you can undo your changes later.
HOW TO GET SNAPSEED
Snapseed is available for free for:
- iOS
- Android
Click on the respective links to download it to your device.
And here is this article that has almost become a guide to mobile editing with Snapseed when it exceeds 3,000 words ?
If you have reached the end it means that you are interested in the topic, I hope that everything is clear to you.
Otherwise, you know, any questions, leave it in comments and we will answer you as soon as possible.
