Using mirroring photos, you can change the perception of the frame and make it more expressive. It is believed that people looking to the right in the picture are perceived more positively than people looking to the left. To the left - as if back to the past. In the landscape and city shooting, the situation is about the same: bridges, rivers, streets going to the right - this is a movement into the future.
But, in addition to changing the perception of the image, using mirroring and copying you can achieve some interesting effects.
Open the image in Adobe Photoshop. Our photo will be opened as a Background layer. And, by default, no changes can be applied to such a layer. This is done on purpose, so that when you work you always have the original frame. In order to make it possible to change the base layer, double-click on the lock icon on the right of the layers panel. This will unlock the layer. Another option is to simply copy the layer and apply all the changes to the copy.
In order to mirror the layer in Photoshop, there are two teams. They are in the menu
Edit / Transform .
Flip Horizontal / “Flip Horizontal” - allows you to flip the image horizontally.
Flip Vertical - Flips vertically.
Let's look at another example that shows how to mirror a layer in Photoshop and achieve the effect of a kaleidoscope.
First, create a copy of the original layer. To do this, you can either select the menu item
Layer / Duplicate Layer ... / "Duplicate a layer ..." or use the mouse to drag the icon of the layer onto the icon of creating a new layer in the layer panel.
Now let's increase the size of the canvas so that all parts of the future "kaleidoscope" are visible.
We will need the menu item
Image / “Image” ? Canvas Size / “Canvas Size” .
You need to set the parameters so that the canvas expands to the right by an amount equal to the width of the original image - we will add a mirror image from the opposite side. Therefore, the settings will look like this:
As the anchor point
Anchor / "Location" we set the left edge of the image - it will remain in place. And they indicated that the width of the canvas should increase by 200% relative to the original width. We will leave the height unchanged for now.
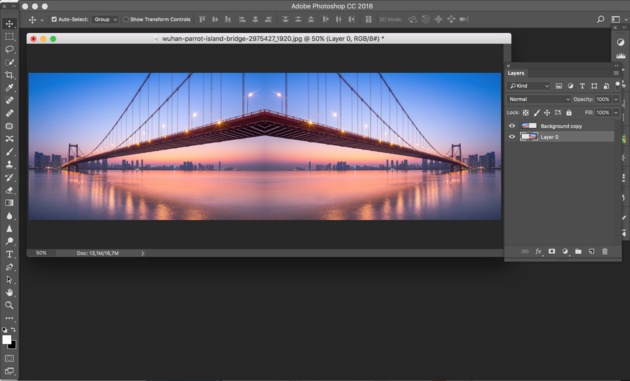
After clicking on the
Ok button and applying all the changes, the Photoshop window will look like the image below.
Make sure that the top layer is active, and mirror it relative to the vertical axis using the command
Edit / Transform / Transform ? Flip Horizontal / Flip Horizontal . Then with the mouse we change the location of the two layers so that they are aligned along one of the edges.
For accurate and accurate positioning, it is convenient to use the keys "Up", "Down", "Right" and "Left" on the keyboard.
Merge the two current layers into one. This can be done with the command
* Layer / "Layers" ? Merge Visible / "Merge Visible" . Increase the size of the canvas in the same way as before, but this time vertically. The anchor point will be at the lower border, and we will increase the height by 200%.
Create a copy of the top layer (which already includes the original and mirrored images). And apply the
Flip Vertical / Flip command to this copy . After that, use the mouse to place the mirrored layer in a new place.
This kind of kaleidoscope effect can be obtained using image mirroring in Photoshop.