In nature photography, rivers, lagoons, and waterfalls are usually excellent elements to include in your photographs. Its jumps and curves draw lines that guide the viewer through the photos while its colors and reflections arouse endless feelings in all those who stop to observe them. Including this type of element in compositions is usually very common, so managing to surprise the viewer becomes more complicated. That is why in today's article you will learn how to break the mold and leave everyone speechless. As? Achieving a silky effect in the water!
By the way, if you want to delve into landscape photography, you cannot miss the mega guide that we have prepared for you with tips, tricks and much more to achieve the most impressive landscapes.
THE SILKY EFFECT IN THE WATER
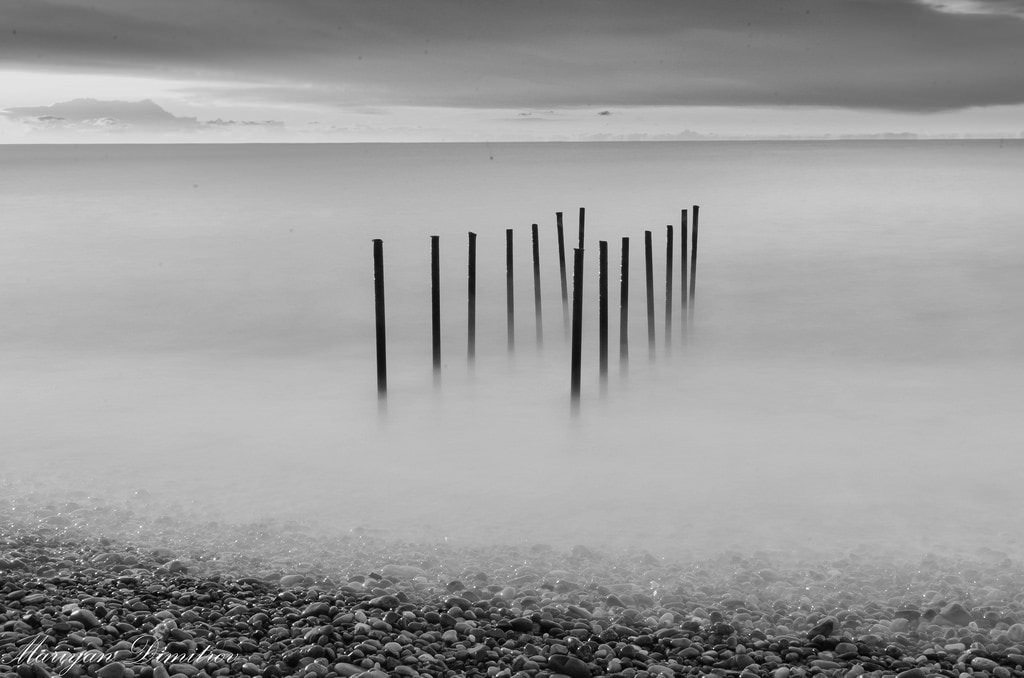
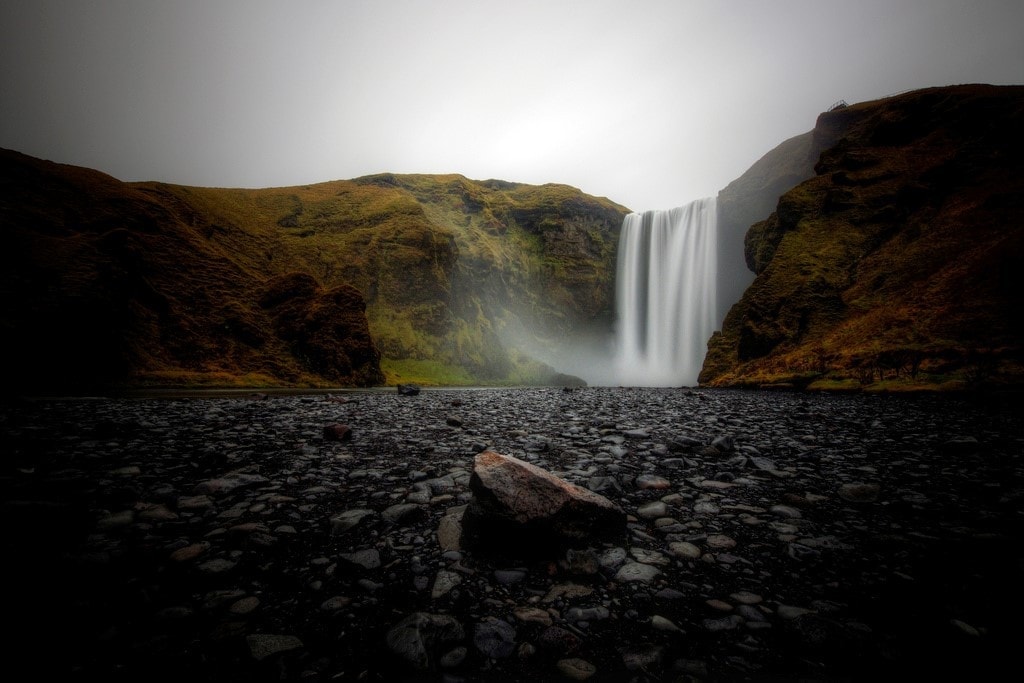
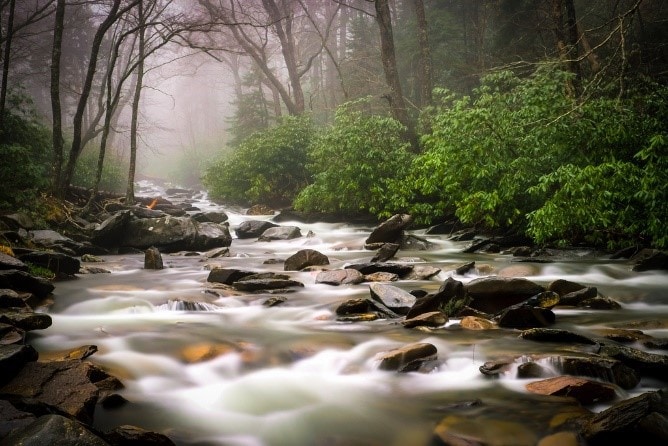
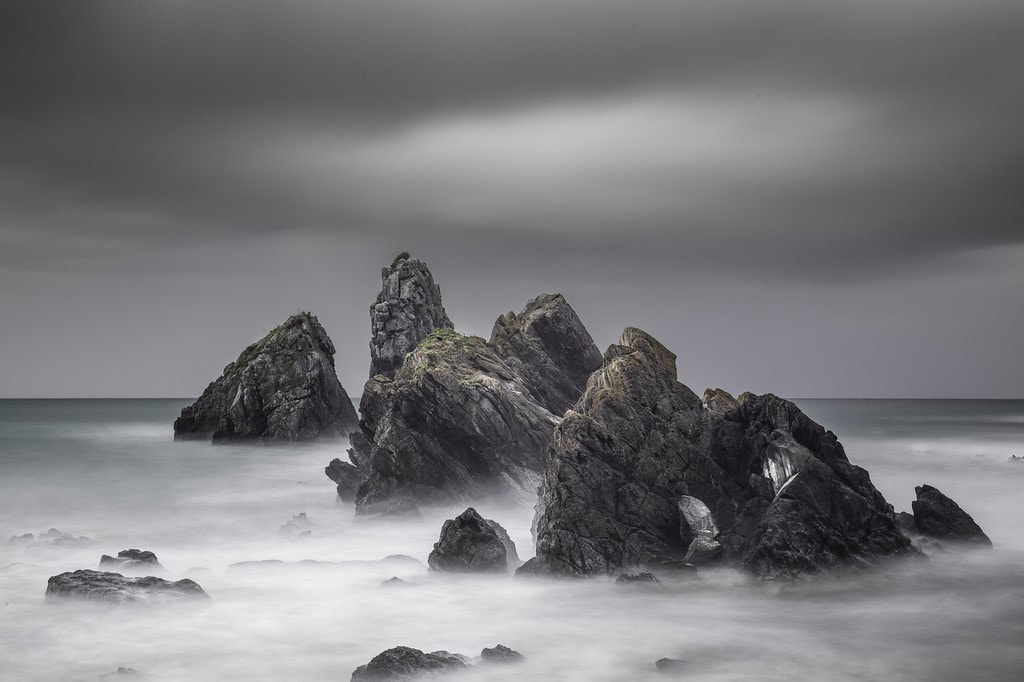
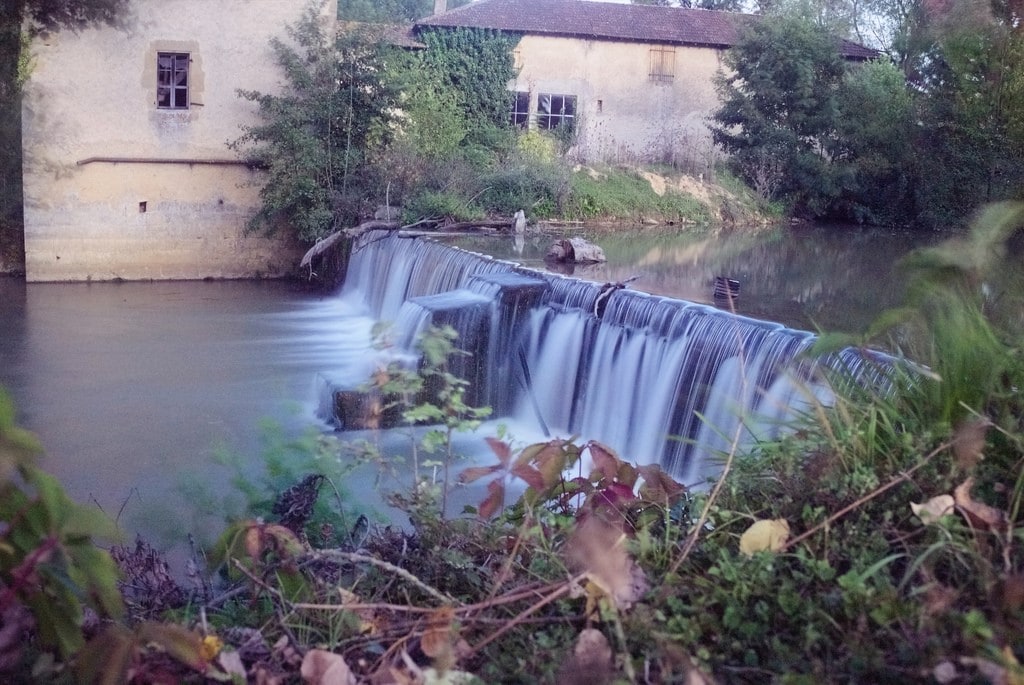
The "silk" effect, as shown in the photograph that illustrates this article, is one that makes the water present in a photograph acquire a soft and translucent texture, as if it were foam or silk that runs along the riverbed. , go down a waterfall or break against the rocks on a beach.
This effect will make your landscape photos more striking and spectacular. Why? In the first place, because it is a strange phenomenon that cannot be appreciated by the human eye but that it is possible to capture in a photograph, that is, it is not a phenomenon that occurs by itself in nature. And, secondly, because it manages to convey serenity and fluidity to the viewer. Keep in mind that transmitting messages and feelings is much more difficult than it may seem to you, and even more so in nature photography.
If you want to get the most out of your photographs, you cannot stop experimenting with this photographic technique (many more techniques in the link) and even less, after you see how easy it is to put into practice.

THE TECHNIQUE TO ACHIEVE THE SILKY EFFECT
As I just told you, getting rivers and waterfalls to acquire that particular silky texture is not complicated at all and only requires (in principle):
- Low (slow) shutter speeds: ie 30 seconds or more, depending on how “smooth” you want to achieve. The longer your camera lets light hit the shutter, the softer the lines that moving water will draw on your photo. This is the main principle that governs this effect: long exposure. If you are not very clear about what it is, I recommend that you read that article before continuing reading this one. It will take a few minutes and will help you better understand how to best achieve this effect. Before you head off deep into a forest in search of a mind-blowing waterfall, make sure your camera allows you to set shutter speeds slow enough: 30 seconds or Bulb mode, which is the mode in which the camera will continue exposing (letting enter light to the sensor) until you release the shutter.
- Dim ambient light: that is, the lighting present in the scene needs to be rather uniform and weak, otherwise it will be more difficult for you to compensate for the excess light with lower ISO sensitivities and closing the diaphragm as much as possible. Remember that between these three parameters (speed, aperture and sensitivity) what is known as the “exposure triangle” is formed. If you did not know the term or do not know the importance of correct metering and exposure of your photographs, take a look at the following article: “ Detailed Guide: How to Correct Metering and Exposure in Your Photographs ”.
- Stability: that is, the use of a tripod or a surface that is stable enough to ensure that, throughout the entire shot, the camera does not suffer from movement or vibration that could ruin the entire shot. Correctly mounting a tripod or holding your camera firmly becomes a fundamental factor in this type of technique or effect if what you want is to achieve very sharp and defined photographs . And if you are looking for one, in this guide we help you find the best tripod for you.
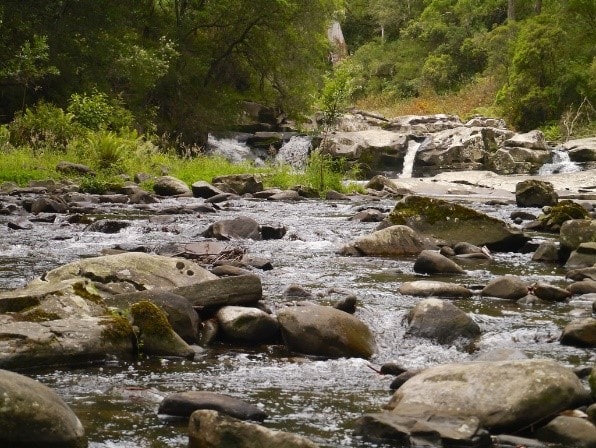
- The place: surely you have already noticed, but this technique works much better in those situations where the water has movement, that is, it becomes much more spectacular as the flow or, the movement of the water is notorious. But be careful, although the water may be your protagonist , do not forget to carefully work your backgrounds in order to give it a favorable framework so that the viewer feels inside the shot. And, as obvious as it sounds, in landscape and nature photography, location is everything, or almost. Before shooting your camera, take some time to review the entire scene, review all possible angles and framing, in order to exhaust the possibilities of this before putting your camera to work.
Now, you won't always be able to take your photos in a dark forest or at sunset on a beach so that the ambient light is as dim as possible. For these cases there is an extremely useful accessory when taking long exposure photographs in situations where the light is much more intense than we would like: the ND or neutral density filter.
NEUTRAL DENSITY FILTER
Neutral density or ND filters are an accessory that cannot be missing in your backpack if you want to achieve the maximum silky effect in your river photographs.
Its operation is simple, these filters considerably reduce the amount of light that reaches the sensor without altering the colors present in the scene. This type of filter is excellent for when, in good lighting conditions, you want to take long exposures.
If it only reduces the "amount of light", it means that, using one of these filters, it will not be necessary, or at least not always, to close the diaphragm of your camera as much as possible in order to compensate for the "excess" light produced of a long exposure, since the filter will prevent the photo from being overexposed.

As I told you in the article: “ 8 Ways to Improve Your Photographs Thanks to a Filter ”:
“I recommend that if you are going to get one of these filters, you buy at least one with 3 diaphragms, since to subtract less light, a polarizer will be enough or combine a polarizer with low ISO and tightly closed diaphragms.
The most frequent neutral density filters are 6, 8 and 10 diaphragms and the most recommended are the glass ones since the gelatin ones tend to reduce the quality of the photographs.”
Beware: By letting less light into the sensor, your camera's autofocus will most likely become unresponsive. I recommend that you manually focus the scene and then add the neutral density or ND filter to it.
Still haven't gotten one? Don't worry, you don't have to spend a fortune on a neutral density filter to start testing. Go to the nearest hardware store and buy the glass that is used to protect the eyes when welding. While you won't get the quality that is possible with a professional filter, you can get amazing results.
You do not believe me? Take a good look at the following photo, it was taken with one of these glasses:
With a little imagination, you can manage to overcome all the obstacles that photography throws at you. If not, take a look at the following article " DIY Photography: How to Assemble Homemade Photographic Accessories " and you will see how to do it in a very simple way.
HOW TO ACHIEVE THE SILKY EFFECT STEP BY STEP
You have already seen what are the main aspects and elements necessary to be able to carry out this technique. Now all that remains is to see how to order the whole process so that you can easily put it into practice:
- Remove the filters so you can set the perfect focus and framing for the shot. (Remember that the ND filter significantly reduces the light entering the sensor, preventing the camera from focusing itself and preventing you from seeing anything in the viewfinder.)
- Walk around the scene and set up the tripod or place the camera in a firm and stable place so that the chances of vibration ruining your shot are minimized.
- Mount the camera on your tripod. (You can do this step before or after having adjusted the parameters for the shot).
- Adjust the aperture of the diaphragm according to the depth of field you want to achieve and seeking to make the best possible metering and exposure. Take a look at the following article: “ Detailed Guide: How to Correctly Meter and Exposure Your Photographs ”.
- Once everything is in place, place the filters that are necessary, whether they are neutral density, polarizers, etc.
- Adjusts the shutter speed to compensate for the lack of light caused by using a neutral density filter and closed diaphragms.
- Shoot! At this point, it would be ideal to have an alternative way to take a photo : a remote shutter release, so that when you press the shutter button you do not inadvertently end up moving the camera.
- Once the shooting time is up (note that if you have the noise reduction option turned on, this step will take almost twice as long), check the resulting photo.
If any adjustments are necessary, start the whole process over again until you get the perfect shot.

6 TIPS TO ACHIEVE THE BEST SILKY EFFECT:
Finally, here are some tips so you can get the most out of this spectacular technique to transform water into silk:
- Leave the automatic modes: as you can imagine, the automatic mode will be completely useless when it comes to taking this type of photography and the semi-automatic modes will not allow you to get the most out of your camera as if you would use the manual mode. Learn to master Manual Mode with this mega guide that we have prepared for you, so that you lose your fear of it and be the lord and master of your photographs without leaving anything to chance.
- Keep the crystals clean: whether they are the lenses of your objective or the filters that you are going to place in front of them, always try to keep them as clean as possible if you want to maximize the quality and sharpness of the resulting photographs.
- Keep the sensor clean: the marks on the optics are not only responsible for the loss of quality of your photos. Dust and particles also tend to accumulate on the sensor and, when working with very closed diaphragms, they will be very noticeable so keeping the sensor clean should also be a priority. How to clean it? Reading the following guide: “ The Complete Guide: Cleaning Tips For SLR Cameras ”.
- Try tele-converters: these accessories, while they can increase the focal length of a certain lens, at the same time, they also considerably reduce the light that reaches the sensor. If you don't have a neutral density filter but you do have a teleconverter, go ahead and use it.
- Turn off noise reduction: If you want to save time between takes, turn off your camera's noise reduction. Because? As you will work with base ISOs, that is, the minimum ISO sensitivity that your camera allows, enabling this option may be redundant. Anyway, if you are patient, leave it active, after all it will only consume battery.
- Water is not everything: you can use this effect to direct viewers' attention to the water, or you can use it to add an extra element that enhances the sensations and messages that your photos convey.
THE RESULTS