
![HOW TO SCAN YOUR PHOTOS? [EASY AND FAST]](https://photographychef.com/wp-content/uploads/2023/01/HOW-TO-SCAN-YOUR-PHOTOS-EASY-AND-FAST.jpg)
Do you need to scan photos ? You have arrived at the best place. In this article I will teach you how to scan a photo. I'll share with you tips, tricks, tools and apps for scanning photos, old and new; with the mobile or when digitizing negatives, etc.
Scanning old photos or taking photos of photos is a perfect option to share them with the rest of the family or to create videos, digital albums, etc.
So, what are you waiting for to start digitizing the photos you have on paper?
HOW TO SCAN PHOTOS WITH YOUR MOBILE
The tool that we usually have more at hand is usually the smartphone and we are in luck because yes, it is possible to scan photos with the mobile.
Before launching into offering you tools and applications, I think these tips and tricks will be very useful for you to get the best result when you scan your photos with your mobile phone:
- Place the photo on a contrasting, plain background. If you put a photo with a white border on a white surface, for example, the tool will have a hard time finding the borders.
- Try that the whole photo is illuminated in the same way, that there is no shadow on an area of the photo or a light source pointing at any part of it.
- The ideal is side lighting, preferably natural, but artificial light will also work for you. The important thing is that you avoid overhead light that creates shadows and/or reflections on the image.
- Do not leave a lot of space around the printed photo. Zoom in on the camera so that it fills most of the frame.
- Place the mobile parallel to the photograph, make it straight; and try not to move it, unless you see a reflection, in which case, turn a little until you see it disappear.
HOW TO SCAN PHOTOS WITH IPHONE
If you have an iPhone, you have different photo scanning options, let's get to know them.
NOTES
The iPhone allows you to scan photos without having to download any extra application. From its native Notes application you can scan documents or photos. This is also valid for iPad or iPod touch.
Here 's how to scan a photo with iPhone from Notes, step by step:
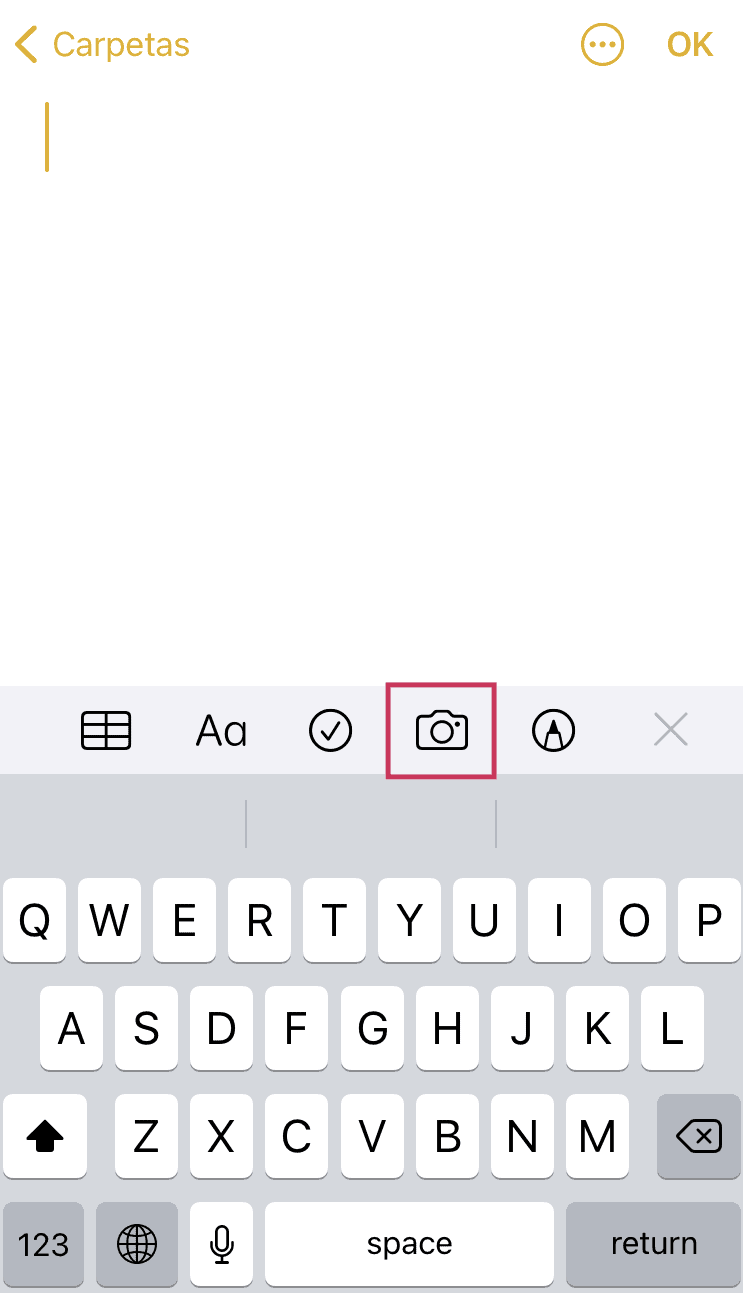
- In the Notes app , create or open a new note and select the button with the camera icon.
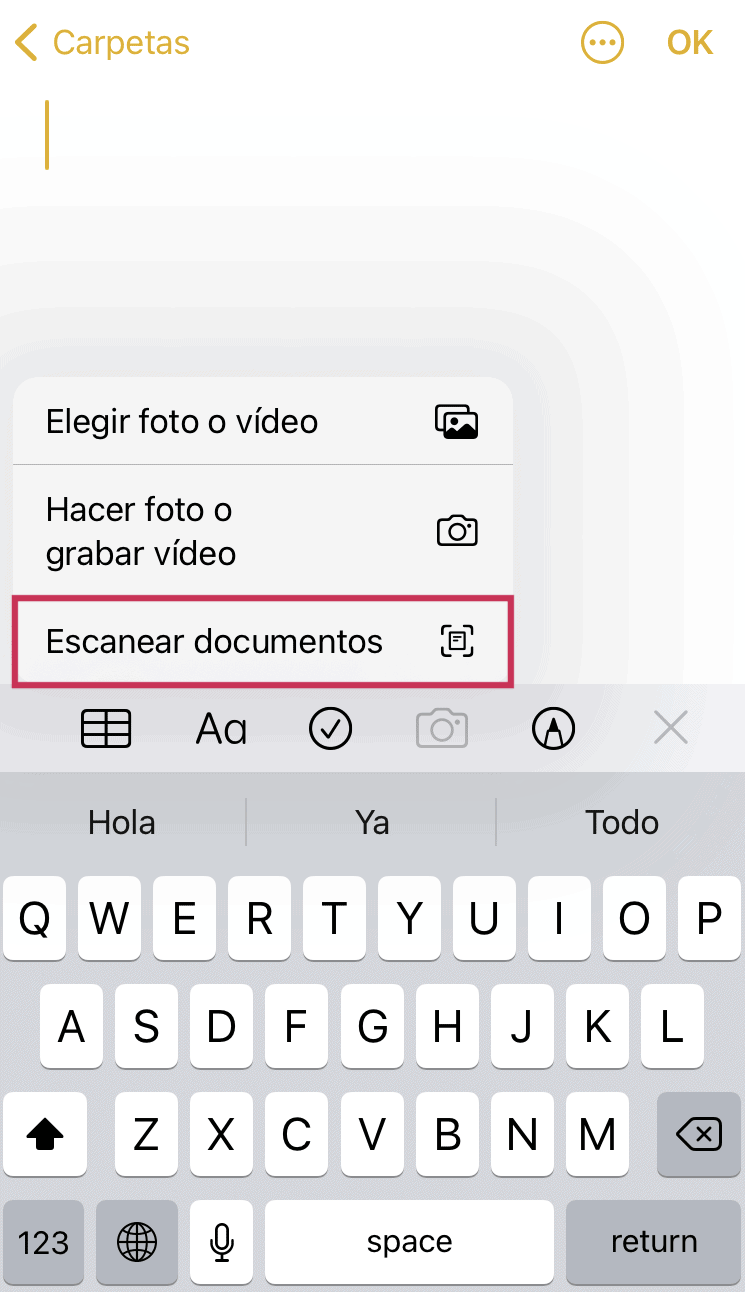
- Tap on Scan Documents .
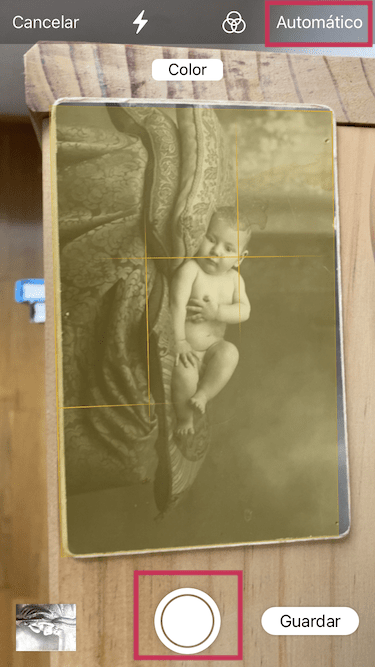
- If you're in Auto mode , hovering the camera over the photo will automatically scan it. To do it in manual if it is in manual you will have to hit the shutter button (the central round button).
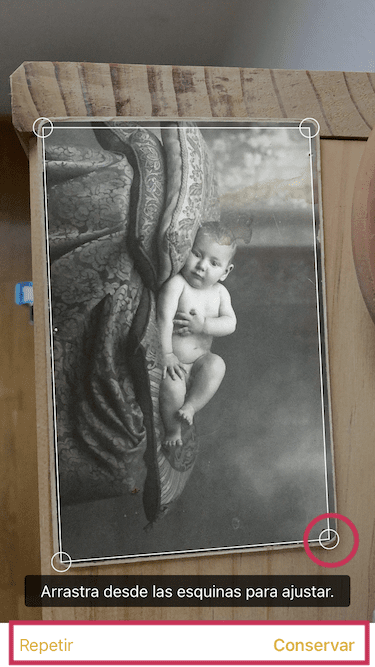
- Drag the corners to adjust. Click Save or repeat the operation if you want to add more copies.
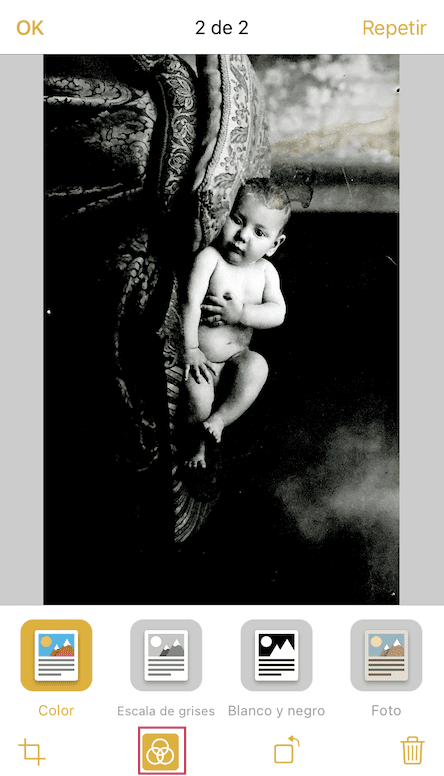
- If you have not selected it before scanning, it will probably appear in the Color option , tap on the filter icon.
- Tap on the Photo option to make the appearance more faithful to the original. Press OK or repeat the process to scan another photo to PDF , in the same document.
As an example, the scan of a photograph of the beginnings of the newborn ?

POLAROID
This application offers a very good level of detail and tells you if there is enough light to take the photo. On the other hand, you have to do the cutting yourself. It doesn't matter for a single photo, if there are many... it still becomes a bit tedious.
Here is an example of a paper photo scanned with Polaroid. The result is quite good, although there is a distortion of the corner lines due to the fact that the printed photo is slightly warped by time.

PHOTO SCANNER: SCAN OLD ALBUMS
Although at first you will see an option with purchases and the request to leave your email, you can continue skipping these steps.
It is very intuitive and easy to use. You have a presentation video with tips to obtain the best results and the application itself indicates the steps. Once it detects the image it does the automatic scanning.

It does the automatic cropping, although you may have to refine it from time to time, it usually offers a quite satisfactory result. If you have to scan many photos it is comfortable.
This is the same photo as before but now scanned with Photo Scanner, the distortion in the corners is also evident.

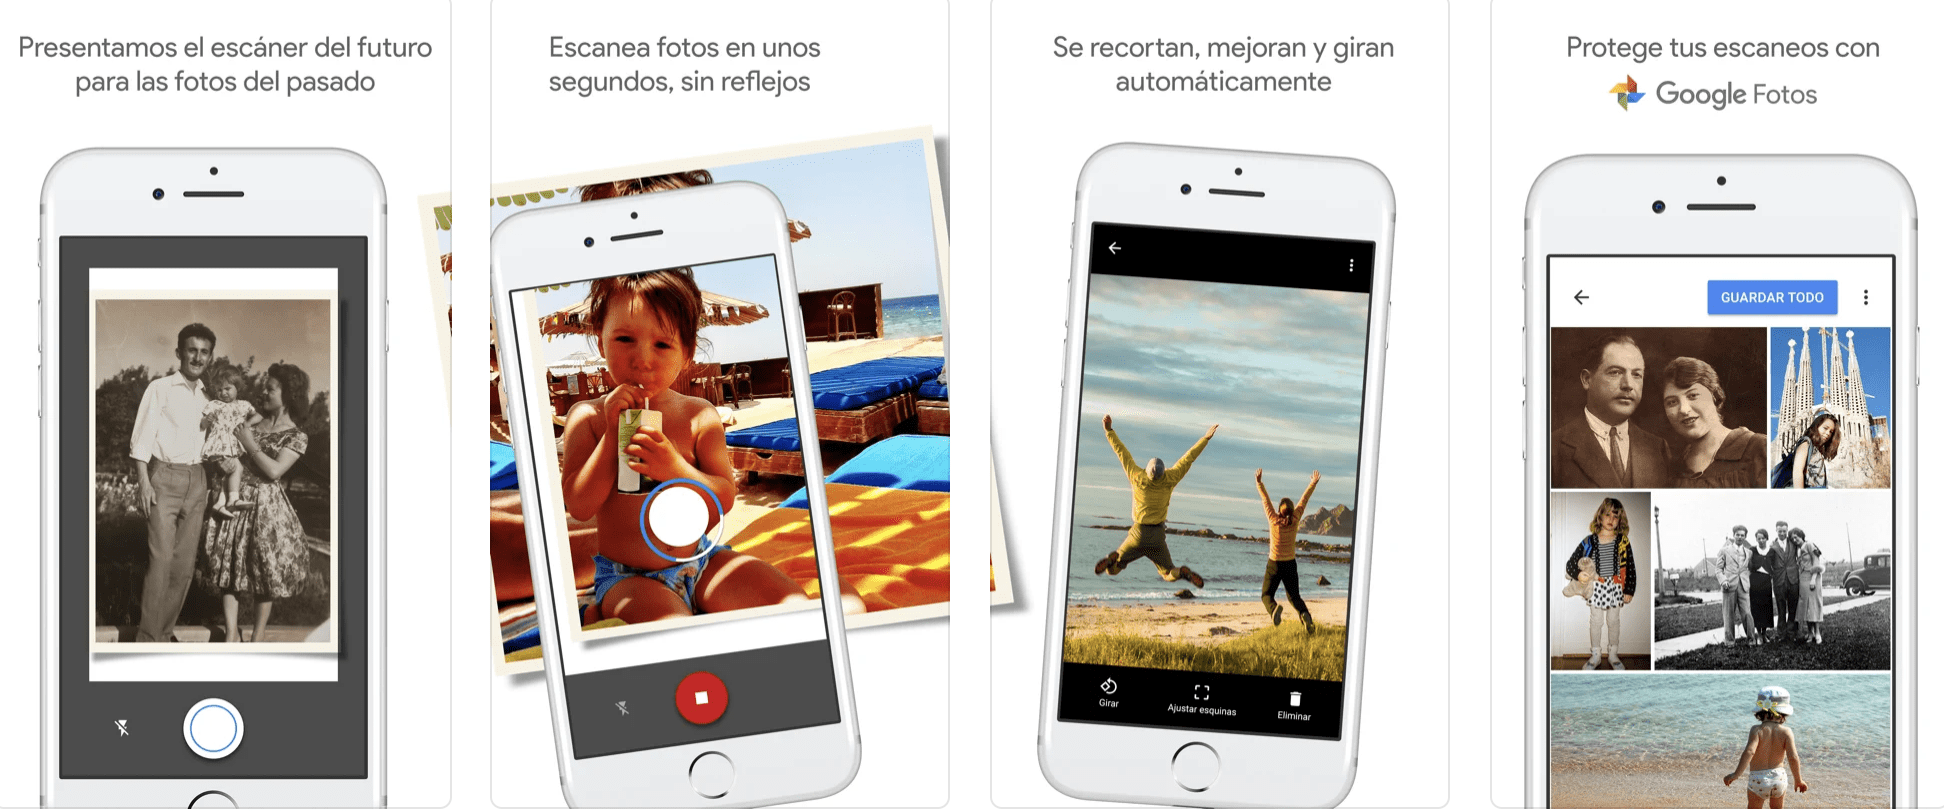
PHOTOSCAN
This Google Photos application is quite powerful, perhaps it does not have the same definition as the previous two, however, it has corrected the distortion of the corners.
This application does not take a photo, but a digitization, once you press the button, four points appear to which you have to move the mobile so that it takes four images successively until the final image is formed.

If you find it difficult with the description, don't worry, it's quite easy, also, when you start the application it offers a short explanatory video and in this other video you can see how it works:
In my case I had to deactivate the flash, not because it left a reflection, which works very well in this, but because it changed the tone of the image a lot, removing the flash has solved the problem.
Below you can see the difference.

PHOTO SCAN APP BY PHOTOMYNE
Another interesting application for Apple users. It is free, simple and intuitive and has good ratings from its users.
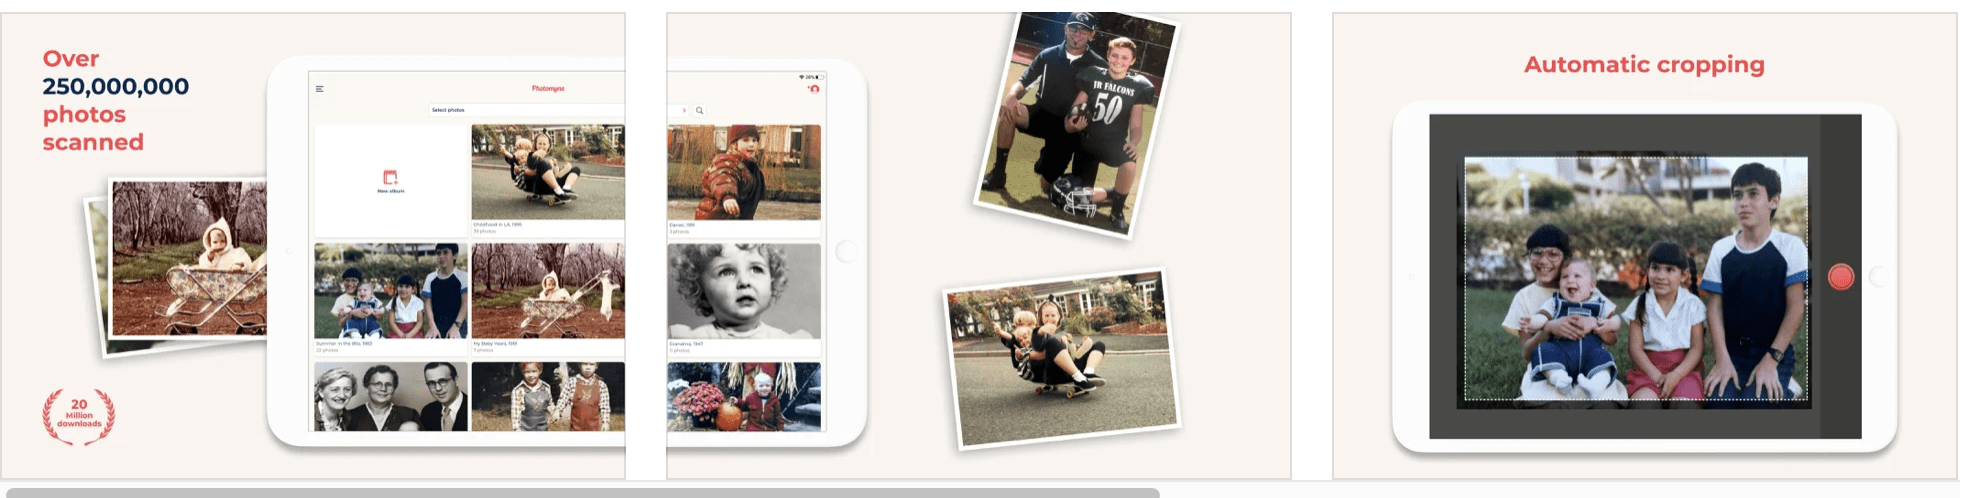
You have to keep the button pressed for about three seconds, try to control your pulse ? . The good thing about this application is that it allows you to colorize the photos, it is not perfect, and in this case it has made up the men and painted some parts of the body blue, but hey, I was surprised to see this color photo. By the way, he has also managed to make the corner lines straight ?


HOW TO SCAN PHOTOS WITH AN ANDROID MOBILE
Now let's see what options Android offers to scan photos with your mobile:
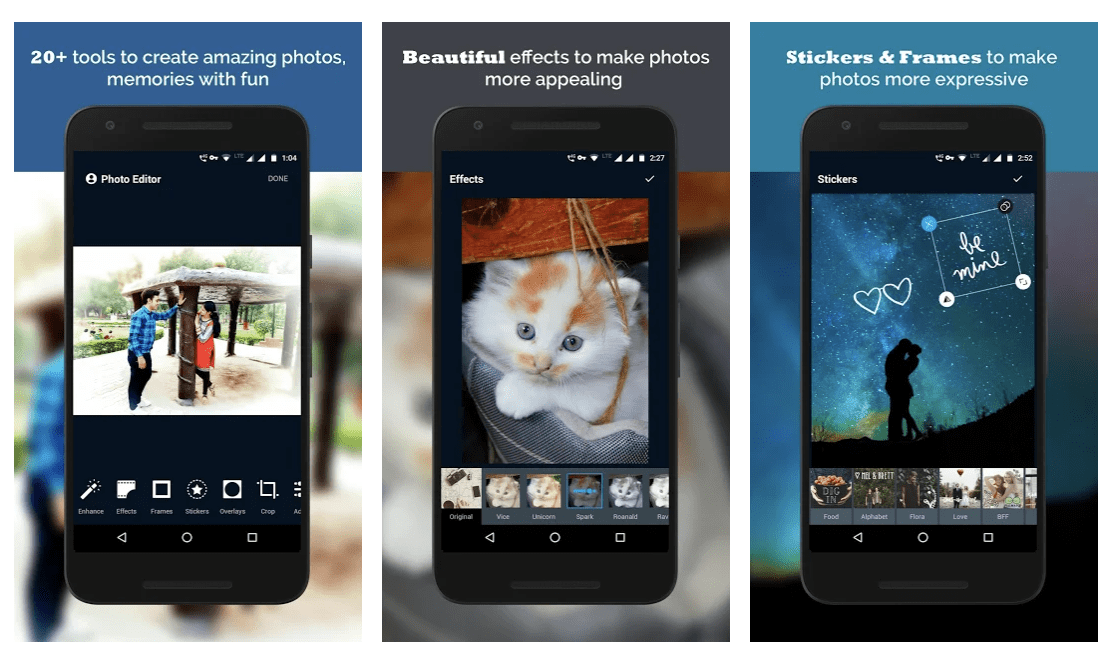
PHOTO SCAN, PHOTO EDITOR – QUISQUEE
Very simple and complete free application, with many satisfied users. Allows scanning and editing.
PHOTOSCAN
A little above I have told you about this application that is also available for iPhone.
It is a very simple to use free application that allows you to scan and save your old photographs with very good results. It has millions of satisfied users, and of all the ones you can find, it is the best.
SCAN PHOTOS ONLINE
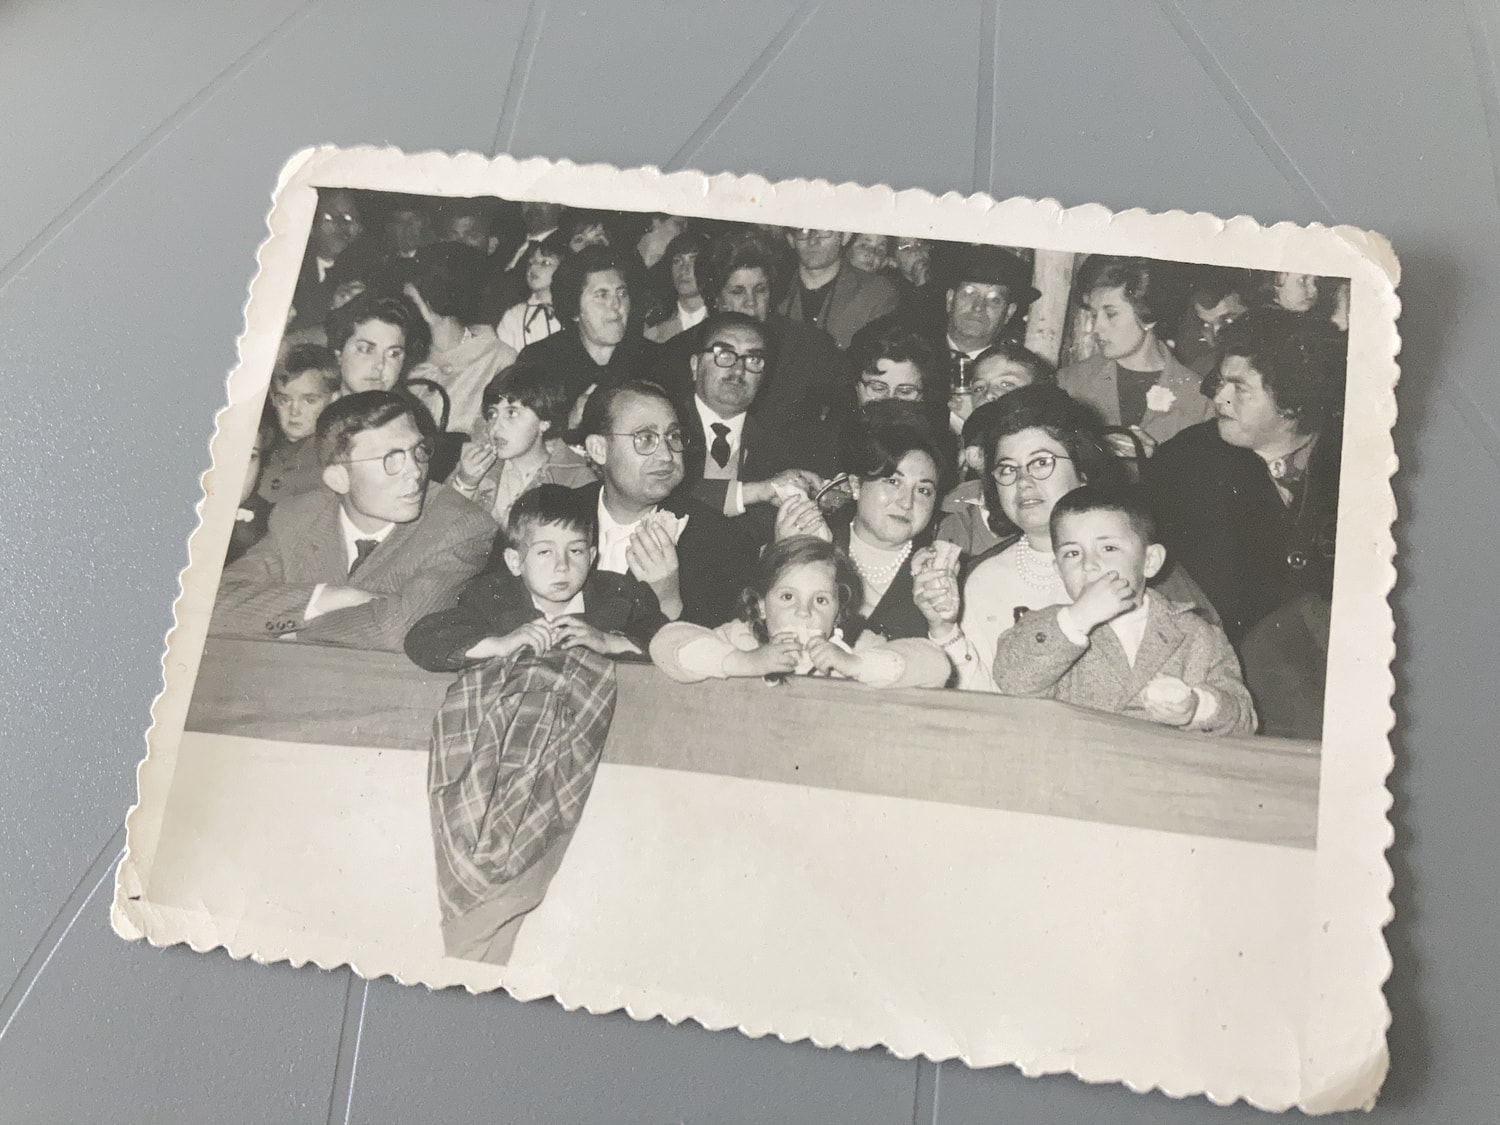
Has it ever happened to you that you have been sent a photo of a photo that you had nowhere to take it: crooked, with a lot of space around it, etc.? Like this one for example:
Well, luckily, there is a tool called OnlineCamScannerthat fixes this mess (as they say in my land).
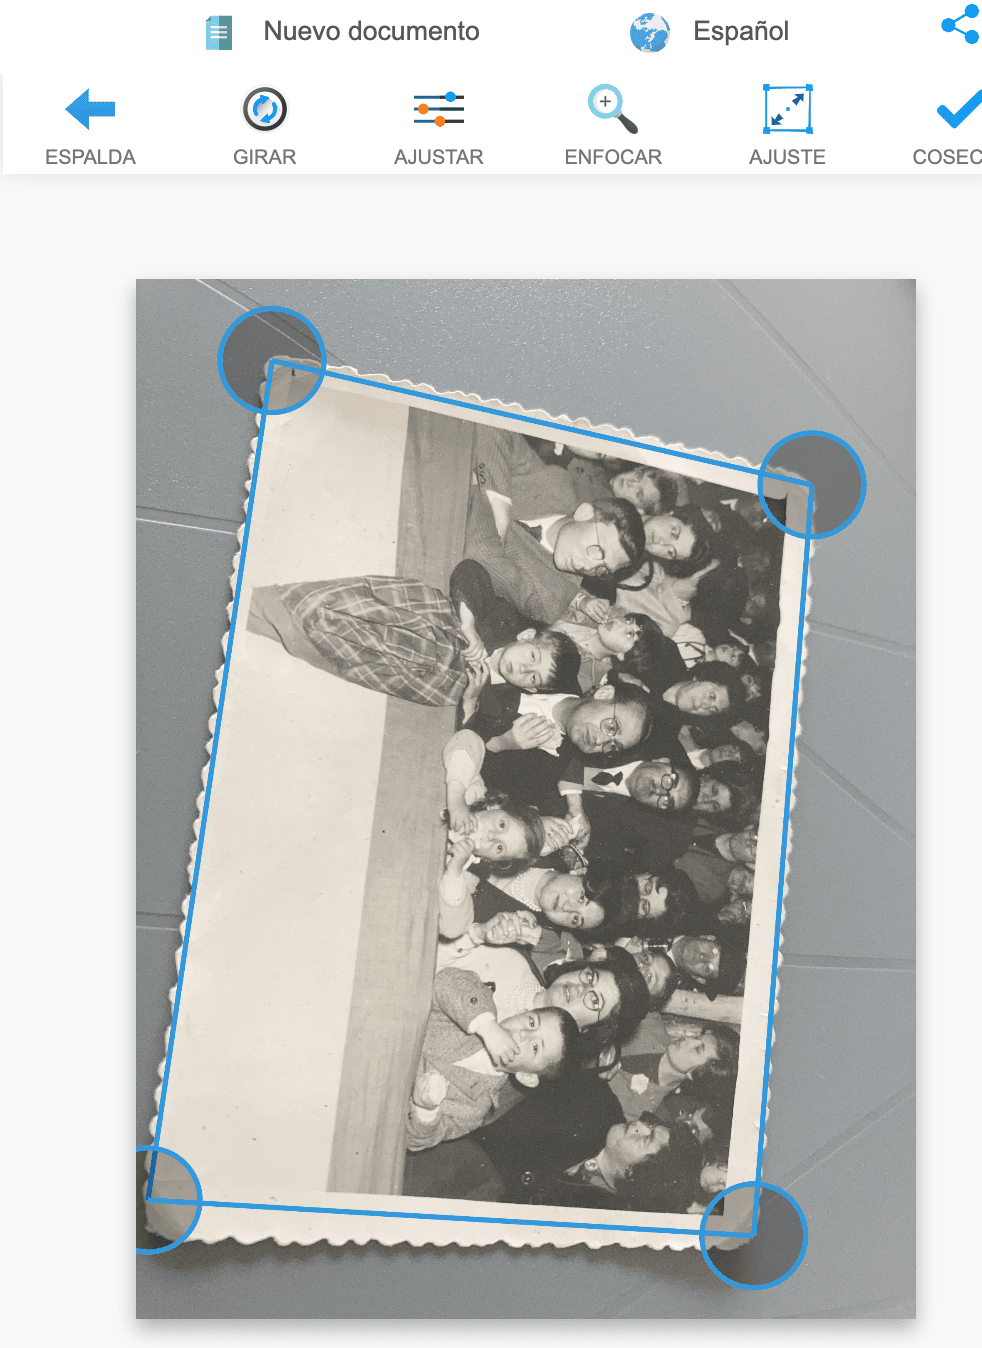
Once you enter the application, upload the photo, drag the blue corners to the corners of the photo and then select the Original option in Effects so that it is not viewed as a document but as a photo and ready to Download . It gives you different download options: PDF, JPG or PNG.
In this gallery I summarize the steps to do an online scan :
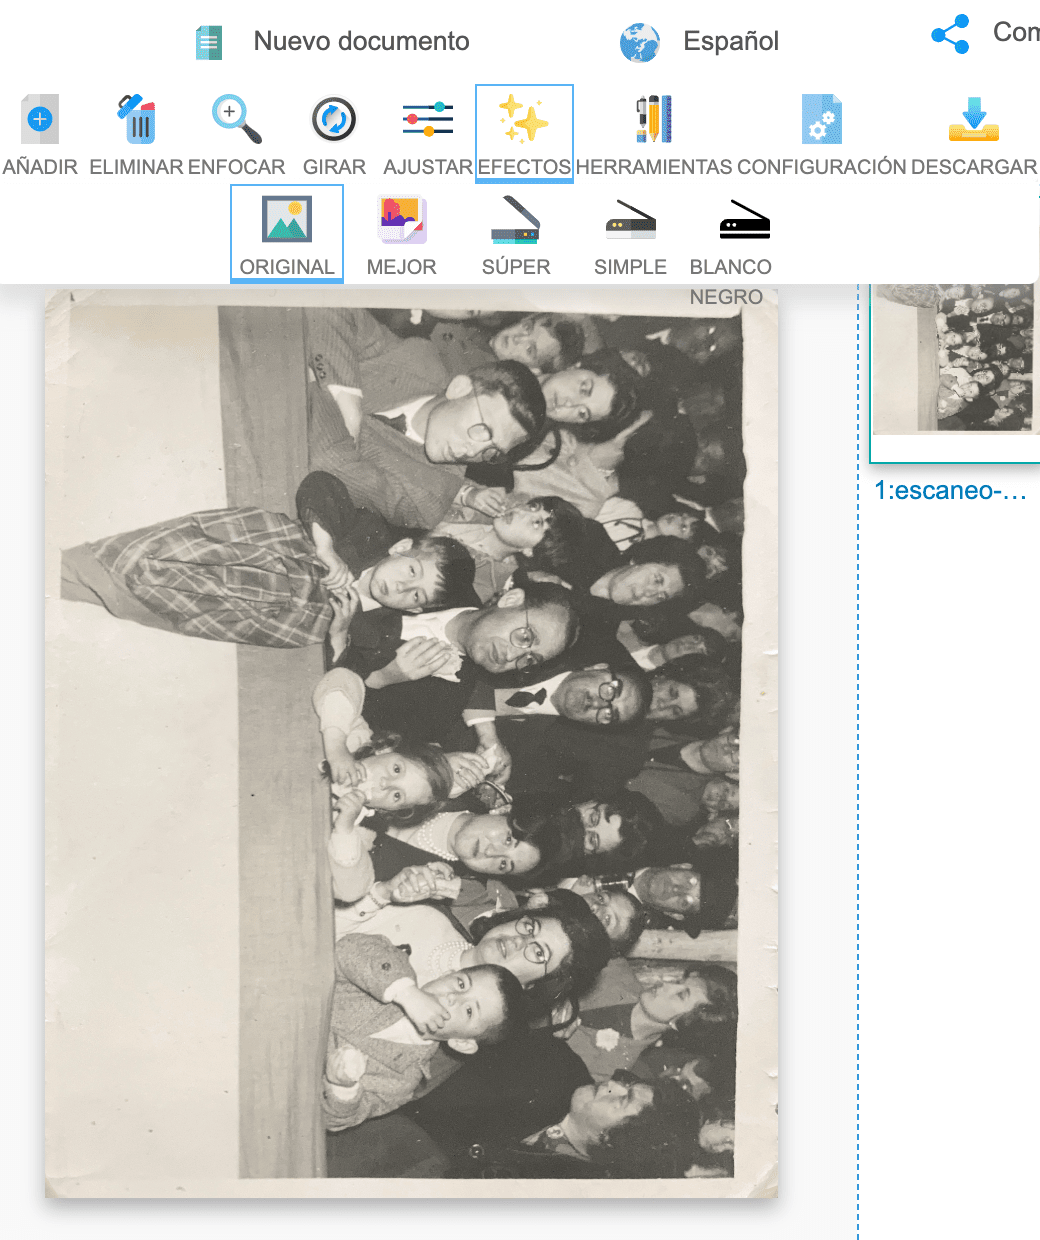

The result is quite satisfactory as you can see:

OPTIMAL RESOLUTION FOR SCANNING PHOTOS
If you use a scanner, the optimal resolution for scanning your photos is 300dpi. In this way you will get a resolution that is as similar to the printed photo.
But keep in mind that if the photo has a lot of texture or grain, a high resolution can also capture this grain, so you may want to lower the resolution. In this case, it is best to try until you find the most satisfactory result.
HOW TO SCAN NEGATIVES
If what you have found in the trunk of memories are not positives (photos) but negatives, do not panic, I have some free options to scan negatives that can come in handy:
Photo negative scanner ( Android): Another free tool with which you can scan your negatives in a super easy way and with quite good results.
Film scanner pro ( iOS): To digitize negatives, this time for Apple users. By simply taking a photo of the negative in question, the camera converts it into a positive, and can also adjust the general tone of the image or the contrast. It's free, so try it and see if the result convinces you ? .
FilmBox ( iOS )/ Android): Personally it has given me better results than the previous one, it is easy to use although it is recommended to scan with a white background (you can use thisthat they recommend from the app).
Keep in mind that with these applications you will not get high quality photos. If you want a higher quality result I recommend a photo scanner like this oneor like this other.
HOW TO TAKE PICTURES OF PHOTOS
Although we have seen several applications to scan photos, doing it with your camera will allow you to obtain a higher quality in the final result, especially if you have good optics.
To digitize your old photos, there are several very important aspects that you must take into account:
- Use a flat surface to place the photograph and, if possible, a neutral gray tone or similar, so that it does not affect the exposure of the image (even if you later cut that background).
- Find a place with ambient natural light . No artificial lights or spotlights to illuminate because they could generate reflections in your photo. A place where the sun does not enter directly but has enough light, would be ideal. You can draw the curtains or take advantage of cloudy days if you have too much light.
- Stand perpendicular to the image. So there will be no distortions. You can put the images on the floor or climb on top of a chair. The important thing is that all the areas of the photograph are at the same distance from your camera, so position yourself right above it and make sure that it is so. You can help by activating the grid on your camera to see the lines and a tripod to stabilize the equipment and keep it always in the same position.
- Another important aspect is that you watch your shadow. If you are practically on top of the image, you may inadvertently cast a shadow on it. You can keep turning until you find an angle where this does not happen or use the tripod and the remote shutter release .
- It uses a medium diaphragm aperture. The ideal would be to know the sweet spot of your lens to achieve the best possible sharpness. The sweet spot is usually 2-3 stops above the maximum aperture of your lens.
- The shutter speed must be fast enough so that the image does not blur one bit.
- Use the lowest ISO value that allows you to get a correct exposure, we are trying to get as sharp as possible. Remember that at high ISO values, noise in the image increases.
- Try to leave little margin on the sides, so you will not have to crop the photo and you will avoid the loss of quality that this entails. Get as close as possible, but be careful with the approach ? .
- Adjust the exposure well. You are not in a hurry and it is very important, everything you do well when taking the photograph (framing, exposing...) will prevent you from having to retouch it and therefore add some loss of quality.
- Be careful with the white balance. I recommend that you shoot in RAW format if you can, not only because it will allow you to correct the white balance without problems, it will also help you to preserve the highest possible quality if you need to touch up the lights, slightly crop the image, etc.
- Last but not least, use a suitable lens. A fish eye is not the most recommended for taking photos of photos ? . I recommend a "normal" or standard focal length; a 50mm would be ideal. If you have the king of goals or the prince of goals , it's time to put them to work ? .
STORE SCANNED PHOTOS
It would be of little use all the work of scanning your old photos one by one, if you later lose all the work due to a damaged memory card, an oversight or an error. When you have them scanned, I recommend that you send them directly to the cloud and to an external hard drive.
iCloud , Google Photos, One Drive, or Dropbox are good options. You can see here the photography applications in depth.
