
![HOW TO TAKE GOOD PHOTOS: 10 BASIC RULES FOR A CORRECT PHOTO [UPDATED]](https://photographychef.com/wp-content/uploads/2023/01/HOW-TO-TAKE-GOOD-PHOTOS.jpg)
It is sad to invest money in a good SLR camera and not be able to get more than unsuccessful, ugly and disastrous photos, one after another, due to naive neglect of basic photography rules, rules that every photographer, no matter how beginner, should know. Today I bring you a series of simple technical photography tips and some very basic rules that will tell you how to take good photos, or at least correct ones, the kind that satisfy the eye From there, making them spectacular will depend only on you. At least the rules will be on your side.
If you want to delve into photographic composition and learn all the tips and tricks in this mega guide that I have prepared for you.
BASIC PHOTOGRAPHY TECHNIQUES
As I told you, these are the first steps that you should know when it comes to knowing how to take good photos. From here it can only get better.
1. THE RULE OF THIRDS
This rule is very simple but has tremendous power in the way we visualize the photo. It consists of mentally dividing the image into 9 equal parts (by means of 2 horizontal parallel lines and another 2 vertical ones) and then placing the subject at some point of intersection of the lines. This photo illustrates it perfectly:
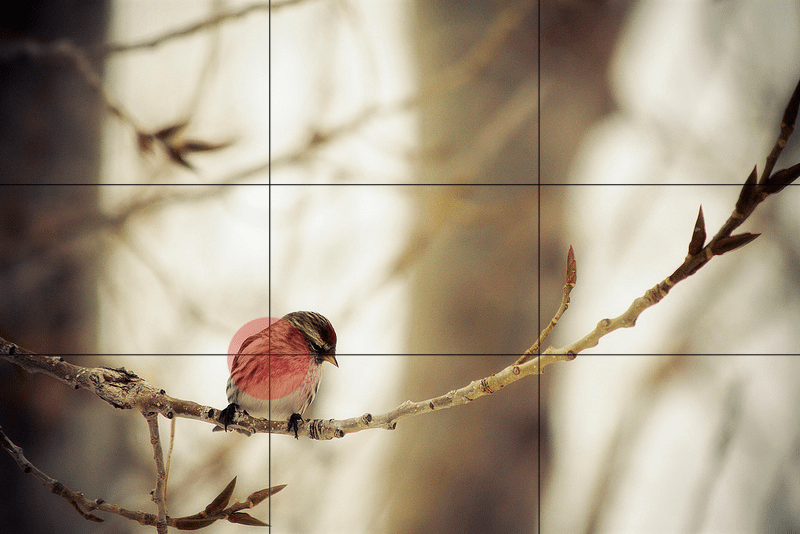
As you can see, the photographer has placed the bird at the intersection point in the bottom left of the frame. Any other point of intersection would have been worth us equally.
This in photography is called strong points. They are points that especially attract attention and give the subject greater interest and prominence.
2. THE LAW OF THE HORIZON
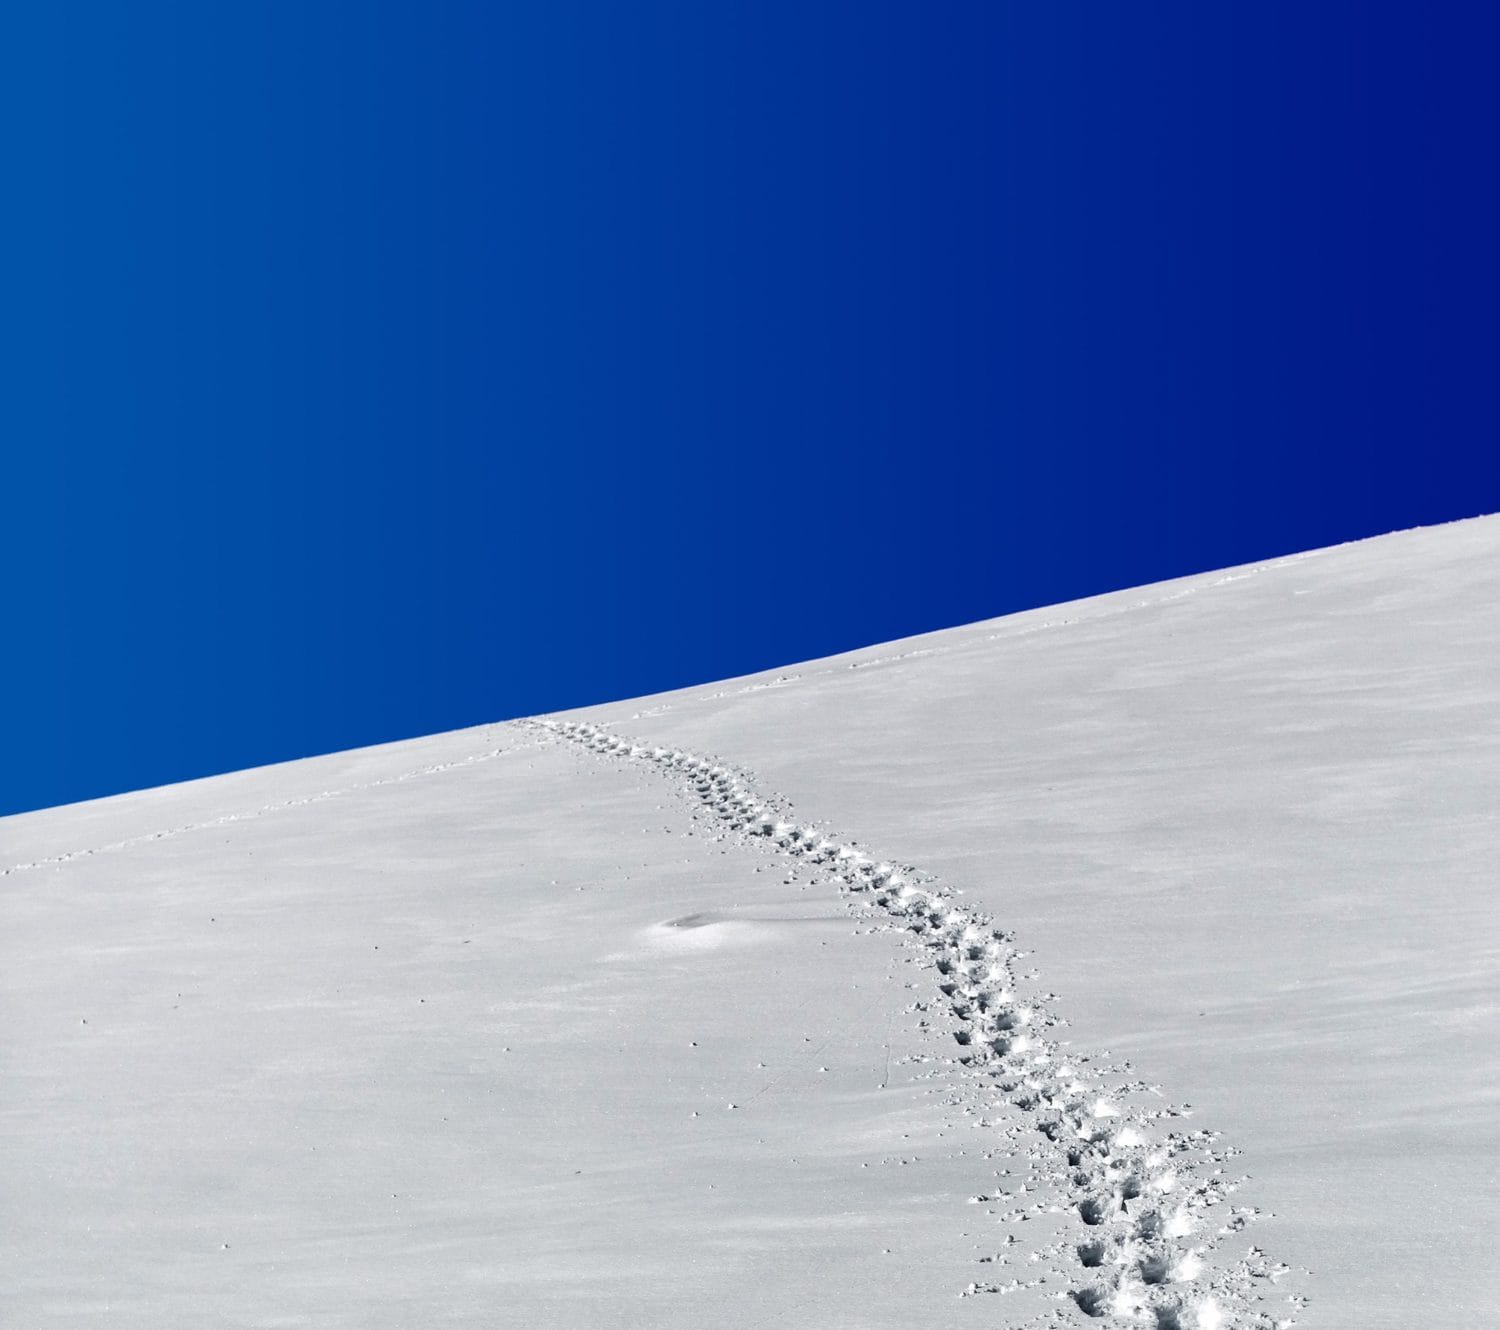
Useful to know how to take good landscape photos. When you are composing a photo, before shooting imagine 2 parallel horizontal lines dividing the photo into 3 equal parts. This is applicable in both landscape and portrait modes.

If you want the sky to be of special interest, place the horizon on the bottom line. If, on the other hand, you want to give more importance to the terrestrial landscape, place the horizon on the second, upper line.
Simple as that. As you will see, it is not by far one of the most complex photography techniques, and yet it is really effective.
3. STRAIGHT HORIZONS
Speaking of horizons. It is one thing to include a skewed horizon with the clear intention of creating tension with a diagonal, and quite another to inadvertently leave a skewed horizon. The first well-executed case is usually attractive, the second disastrous. You can spoil an image that you have invested a lot of time in.

4. EXPLORE NEW ANGLES
Experience photography by shooting your camera from bold and unusual angles. For example, take a photo of yourself in the rear view mirror of the car (only when you are not the driver, please) or capture the image of some historical building reflected in a puddle of water.

5. APPROACH YOUR SUBJECTS FEARLESSLY
Haz fotos de muy cerca a objetos pequeños. Captura detalles y rellena el encuadre. Incluso podrías enfocarte exclusivamente en el detalle obviando el resto del objeto. Los resultados suelen ser muy llamativos.
Esto es especialmente útil cuando existen muchos elementos distractores alrededor de tu motivo que lo único que hacen es estorbar en la escena y desviar la atención.
6. ADOPTA LA ALTURA DE TUS SUJETOS PEQUEÑOS DE EDAD
Si quieres saber cómo hacer buenas fotos de niños, ponte de cuclillas o de rodillas, intenta bajar y colocar la cámara a la misma altura que la del niño o animal que quieras fotografiar, así transmitirás más realismo y el impacto será mucho mayor.
7. UTILIZA EL FLASH EN EL EXTERIOR
Para retratos, utiliza el flash en el exterior. Aunque haga un día especialmente soleado, el flash ayuda a prevenir las zonas de sombra que ocupan la cara de la persona por llevar por ejemplo gorro o algo que proyecte sombra o porque el sol esté encima o detrás de la persona fotografiada. Lo mejor para evitarlo es forzar el flash. Se llama flash de relleno, y su finalidad no es iluminar la oscuridad, sino rellenar la cara del sujeto de luz para que ésta resulte uniforme con lo que la rodea.
Este mismo efecto también lo puedes conseguir con un reflector.
8. CONSIGUE UNA BUENA EXPOSICIÓN
Uno de los consejos técnicos de fotografía más básicos e importantes que te puedo dar es que te asegures una buena exposición. Una foto subexpuesta o muy oscura se debe evitar tanto como una foto quemada o sobreexpuesta.
Encuentra el punto justo de luz, los modos semiautomáticos de tu cámara te ayudarán a lograrla, y el histograma a saber si está bien expuesta.
En esta comparativa puedes ver una foto subexpuesta (arriba) y sobreexpuesta (abajo).
Y ahora la misma foto expuesta correctamente:
Es importante no confundir clave alta y clave baja aquí. Por ejemplo, la siguiente imagen está tomada en clave baja, aunque esté oscura, no significa que esté subexpuesta, puesto que lo que se quiere mostrar está correctamente expuesto.
9. GET A SHARP PHOTO
When I talk about sharpness, I don't expect you to achieve professional sharpness, but a minimum. To achieve a correct photo, you must ensure that your subject does not move (unless you do it intentionally) and that it is well focused, even if you blur everything else.
The following image, besides being a good example of overexposure, is a perfect example of a blurry photo. If you look closely, the girl who should be the protagonist of the image is out of focus, while the plants to the right of her are.
In this other image, however, you can check that it is not moved or out of focus, although the background is.

And the golden advice if you really want to know how to take good photos…
10. SHOOT RAW
Make your photos RAW, especially when you're trying to take good photos, not just throwback photos of your uncle's birthday. No, those photos in which you put a lot of care, in which you don't mind investing time developing in front of the computer to polish them and get the best out of them.
It is not that it is the solution of how to take good photos, but this format preserves all the elements of the image (colors, light, shadows, saturation) and allows, through post-processing, to move them at will. That is to say, it allows, having captured a correct photo from the beginning, that you can achieve a much better one in developing. Taking a photo in JPG produces a final photo in which we would have no more room for modification. (More on the pros and cons of shooting RAW, here .)
