
Infrared photography is the one that allows photographing one of the light spectrums between 700 and 1,200 nanometers, not visible to the human eye. Its first use was military, however, this photographic technique is widely used at a scientific and artistic level. Of course, this last aspect is the one that interests us in the blog and the one that I want to show you today. Perhaps you think that taking this type of photography is really difficult, but nothing is further from the truth, if you want to know how you can launch yourself to achieve your first infrared photography in a simple way, I invite you to make yourself comfortable and continue reading.
WHAT CAN YOU PHOTOGRAPH?
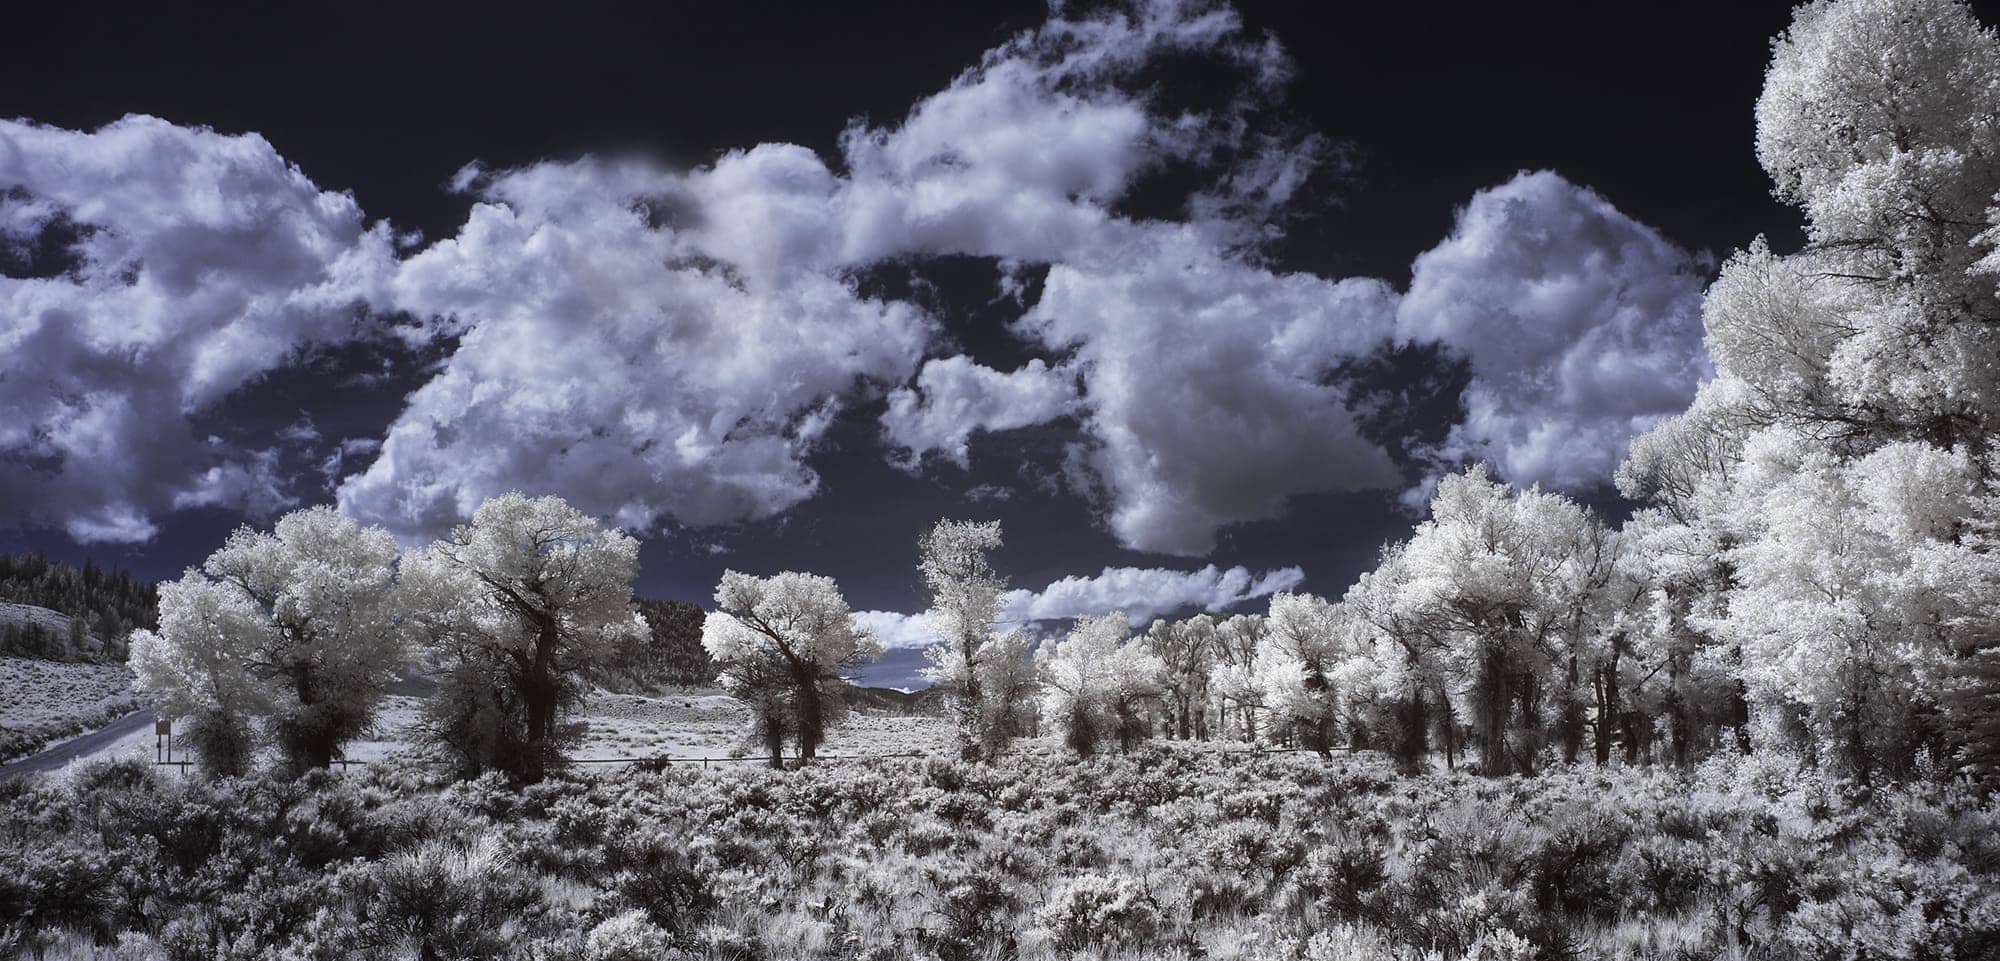
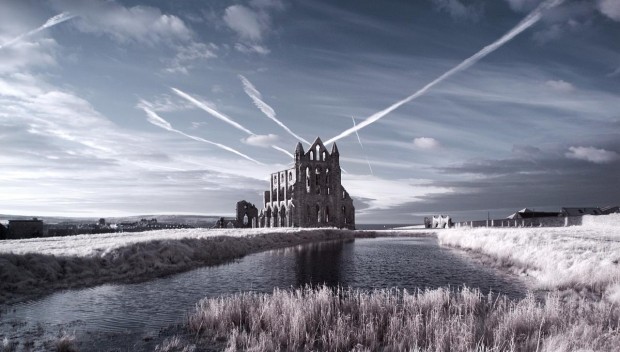
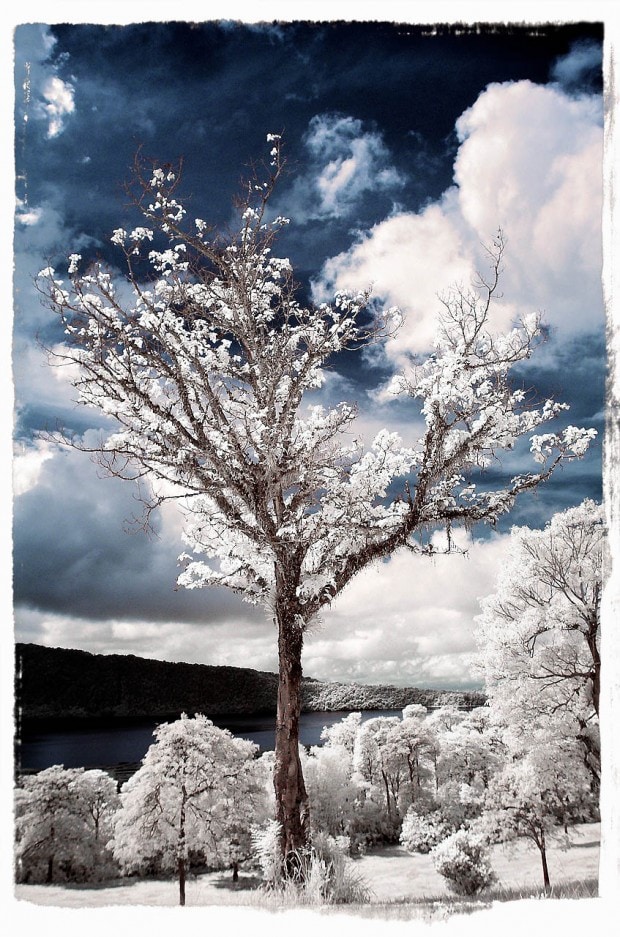
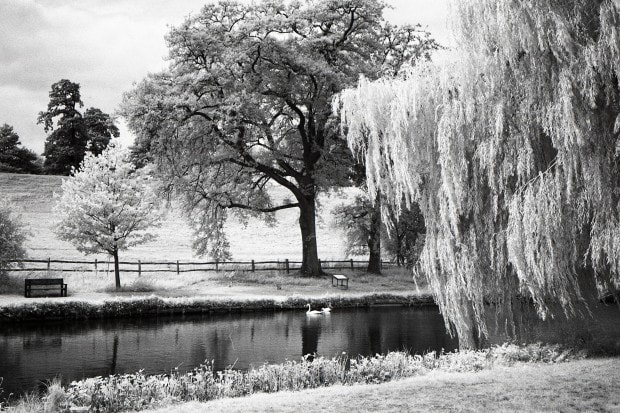
In principle, whatever you want, but landscapes with a lot of vegetation and very green, with sky and/or water are the reasons that will look best with an infrared filter. You can also include some architectural element, which will look great. Be careful with photographing a landscape that only contains green because it will not be attractive at all, look for a nice composition, some contrast or, as I mentioned before, some architectural element. The composition is as important or more than in any other type of photography. Here are a couple of examples.
WHAT DO YOU NEED?
- Your camera, I know, this is very obvious, but don't forget it at home ? . As for the objective, I recommend the 18-55 mm, since not all objectives work.
- Tripod. You'll be shooting a long exposure, so a tripod is essential to keep the camera steady.
- Remote Switch. If you don't have it, don't worry, you can use your camera's timer to avoid any vibration when shooting.
- infrared filter. What this filter does is block the visible light spectrum and let only infrared light through. A filter with which you can obtain very good results is the HOYA R72, with different thread sizes and that can be attached to the lens just like any other, such as a polarizer . Other manufacturers are Heliopan, Wratten, Cokin, B+W or Tiffen that offer a wide catalog of IR filters. Your camera may be adapted for this type of photography, if so you would not need the filter.
- The desired conditions (not essential). A lot of vegetation (better varied), that there is no wind so that it does not move, if there is water to capture the reflections much better and clouds to achieve more attractive skies
STEPS TO TAKE YOUR INFRARED PHOTOGRAPHY
1. Look for the reason. I have already told you at the beginning what type of image is the best with the infrared filter, so you should look for what to photograph to obtain more attractive results and with that magical or fantasy point that these images have.
2. Put the camera on the tripod. The exposure time will be very long and you need a lot of stability. Frame the scene before placing the filter, because when you place it you will not see anything. This filter is very opaque and you will see everything dark. That is why it is important that you frame and make your composition before putting it on.
3. Put on the filter. And don't be scared when you see that you can't see anything, I warned you in the previous point ;), so you don't have to bother looking... that's why framing and focusing first ? .
4. White balance. You have two options, do it manually, for which you must bring your neutral gray or white card, but you can check the results in situ , or shoot in RAW mode with an automatic white balance and adjust it during processing.
5. Adjust the ISO. Although you may be tempted to increase the ISO to capture more light, this is not recommended due to the high level of noise you would get. The ideal is to put it as low as possible, although without going below 200, better between 200 and 400.
6. Overexpose your camera. How much? It is best that you do several tests, because it will depend on the light you have. But a guide is that when you take a photo, check in the histogram that there is nothing in the extreme right part, in that little piece it must be empty so that burned areas do not appear.
8. Put the camera in manual mode and focus. You could also do it automatically, but much better if you focus manually, so you can ensure the result.
9. Use a medium aperture . Set your camera's depth of field between f/4.5 and f/9.
10. Exposure time. It will depend on your camera, the filter and the light you have. That's why you will have to work with the famous "trial-error" technique ;), sorry, I can't give you a magic formula, I can only tell you to start for example with 4 seconds and readjust according to the results.
12. Shoot! Since the exposure time is very long, any slight vibration of the camera can result in a blurred photo. It is for this reason that I recommended the remote shutter release. Anyway, if you don't have one, you can set your camera's timer and the photo will be triggered once your finger is away from the little button ?
Do not panic! You are going to get a rather red image, it is normal. Now is the time to make some small adjustments with an editing program.
INDICTED
With the following adjustments you will achieve that your "red" image becomes an infrared image:
- You must be in RGB mode ( Image > Mode > RGB Color )
- Go to the channel mixer ( Layer > New Adjustment Layer > Channel Mixer… )
- Select the Red Output Channel and in the Source Channels adjust the following values: Red 0%, Green 0% and Blue 100%.
- Select the Blue Output Channel and in the Source Channels adjust the following values: Red 100%, Green 0% and Blue 0%.
- You can also modify the greens if you wish.
- Create a new Adjustment Layer for the levels ( Layer > New Adjustment Layer > Levels… )
- Select the Red Channel and move the sliders so that they cover the full range and repeat the same actions for the Green and Blue Channels.
- Increase the contrast (this step is optional).
You can also try converting them to black and white, because it creates a lot of contrast and you can get really nice images.
CREATE INFRARED IMAGES FROM YOUR COMPUTER
As you have seen, it is not that difficult. But there is another way to achieve this type of images (I couldn't tell you if it's easier or more difficult, each one's tastes come into play here) what I can assure you is that it's more comfortable ? because you won't have to move from the chair. You only need a photograph, your computer and an image editor.
I leave you a couple of links that explain how to do it.
GALLERY
If these images have not convinced you to try this type of photography, perhaps this wonderful gallerycheer you up
Do not despair, it is not a difficult technique but like everything it takes time to learn. It is true that some values you will have to readjust a few times, yes, once you get the hang of it... there will be no one to stop you!!
