In today's article I am going to explain how to put a watermark on your photos, or what is the same, add a signature to your image.
What is this signature for?
Well, it helps anyone to know the authorship of the image and, in theory, so that they don't "steal" it, because it's almost as easy to remove the mark as to put it on. Although the main and most justified reason is advertising.
Eye! Nor is it necessary to be obsessed and to place a signature in the middle of any photograph that covers the entire center of interest and allows nothing to be seen. Many times we become so obsessive that the only thing we do is spoil the photo. Keep all these things in mind when inserting your signature.
It is just an advice. Today I am going to tell you how to do it step by step, I am going to make it very simple, just as they had to explain it to me, that some people find these things more difficult than others So you won't be able to say that you don't know do it.
I am going to explain (with images) the steps to add your watermark in Photoshop, although you can do it online with any editor. The advantage of doing it in this program is that it is worth doing it once and automating it to save work on the rest of the occasions, and it will always remain the same.
Otherwise you'll have to do it every time and it's easy that it doesn't always stay the same, either because you don't remember or because you put a font that is only specific in that editor, for example. The good thing about this is that if you do it like this, you can also "customize" the signature so that it blends in with the rest of the image and doesn't stand out as much (see image below). As you can see, everything has its advantages and disadvantages.

HOW TO PUT A WATERMARK ON YOUR PHOTOS, STEP BY STEP
Now yes, we are going to see step by step how to insert the watermark with Photoshop, verify that it works and record the action to do it with the rest of the images automatically.
1. Create file
To do this go to File > New . Once the dialog box is open name it and set it to 800×600 pixels and Background Content Transparent and hit “OK” .

2. Insert text
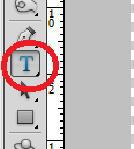
Select the Text option in the menu on the left and write the name.
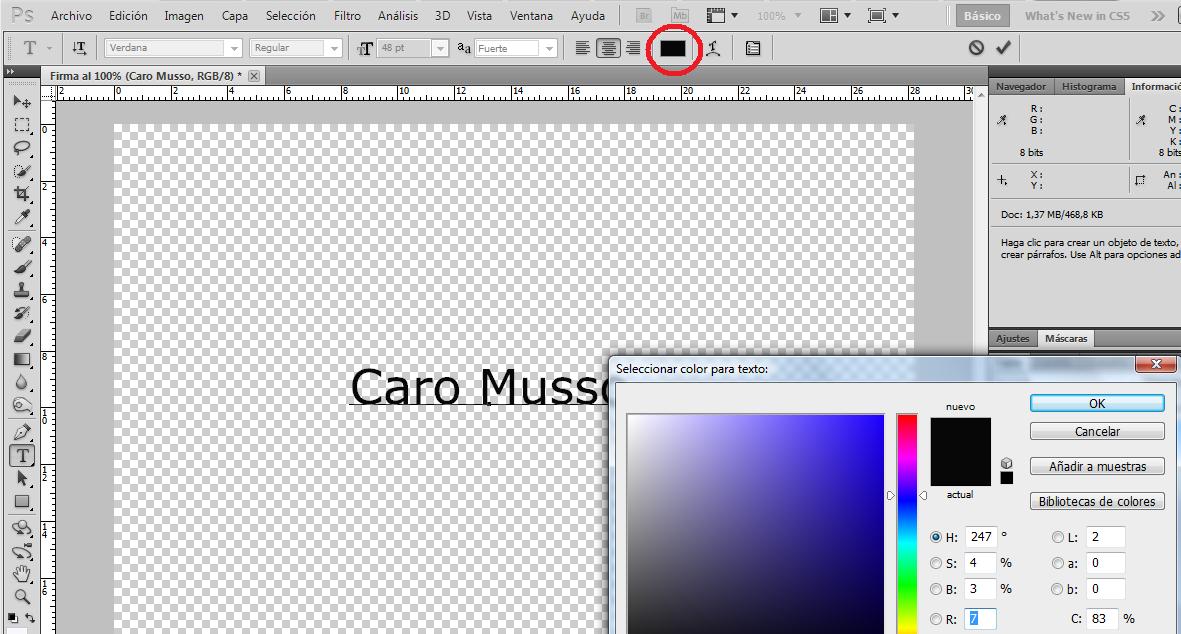
To change the color, select the text with the mouse and go to the change color option. Choose the color you want for your watermark and press “OK”
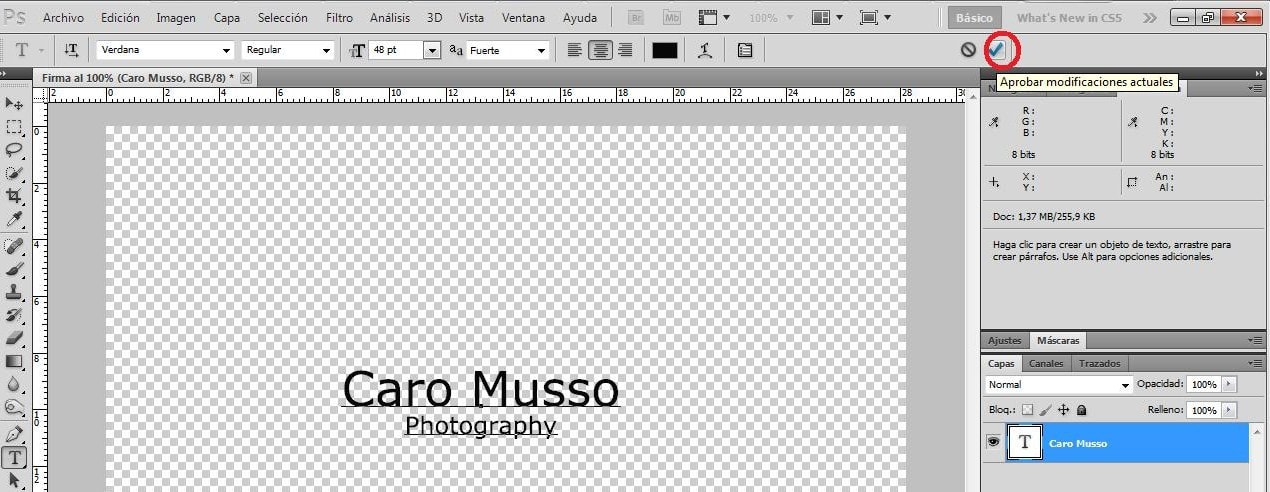
Choose the font you want. You can also add a second line (this is optional) to put your business name, web page... or whatever interests you. Add the text in the second line with an Enter , change the font size to differentiate the name from the rest and use the “ALT+↓” combination if you need to separate the second line from the first.

3. Validate
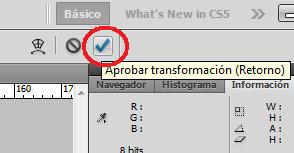
Once you have it to your liking, validate by clicking the icon that you have indicated in the image with a red circle. You already have the signature done. The next step will be to make some adjustments so that the fingerprint or signature looks good when inserted.
If for whatever reason you have not set the background transparent when creating the document, deactivate the eye in the "Background" box to make it transparent.
4. Cut
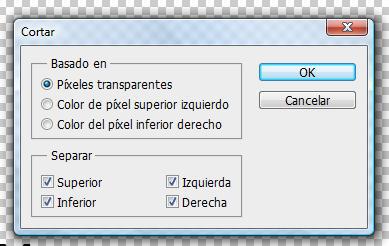
Go to menu > Image > Cut and a dialog box will open where you have to click the option "Based on... Transparent pixels" and activate all the boxes of the "Separate" option (See image). When you hit "OK" the image will be adjusted to the part that contains information.
5. Save
From the menu choose File > Save As and a dialog box like the one below will open. Name the file and save. It is important that you always have the file saved in the same place to be able to automate this action. Later you will see why.
6. Place
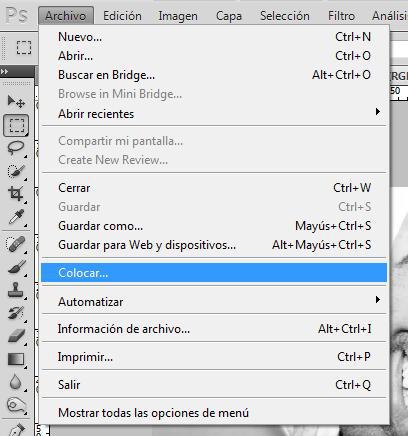
Open the image in which you want to insert your watermark and go to the menu: File > Place. Look for the file created in the folder in which you have saved it and click on "Place"
Your signature will be in the middle of the image, as in this example:

Now you can reposition the signature where you want with the mouse by dragging…

... or automatically. To do this, use the combination "Ctrl+A" to select the entire image and the buttons that I box in the following image will be activated. With them you can place your signature above, below or in the corners with a click. Choose the place where you want the mark to be and press “Ctrl+D” to deselect it.
With “Ctrl+T” you will activate the free transformation and by dragging a corner with the mouse you can make the signature bigger or smaller, as you prefer. Once this is done, validate at the top right on the icon that I underline in the following image.
HOW TO AUTOMATE THE WATERMARKING PROCESS
You already have your watermark (or watermark as it is also said) created, now what we are going to do is record this step so that you can do it automatically with all the images you want.
1. Delete layer
To do this, delete the "Signature" layer (or whatever you named it) by dragging it to the trash can or by clicking on it with the right button: delete.
2. Create new action
Go to menu > Window > Actions
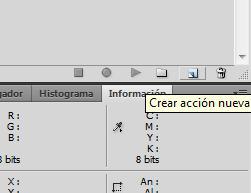
Create a new action on the shaded icon in the following image:
A dialog like the following will open. Name it and hit “Save” .
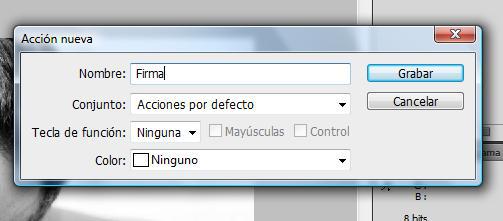
With this gesture you activate the recording so that Photoshop remembers the steps you take from now on.
3. Place watermark
Put your watermark back by clicking on the menu > File > Place > choose the signature document and click on «Place» . It will always look for the file in the same place of the recording, that is why it is important that it is saved in the same location.
Validate and since it will have appeared again in the center, to reposition it where you want go to menu > Selection > All and align the border with the buttons of the second figure.
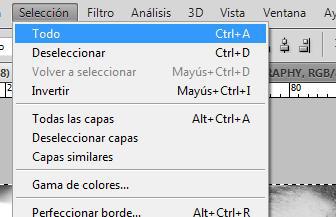
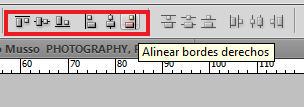
To deselect go back to menu> Selection> Deselect or with the combination “Ctrl+D”
Once this is done, modify the size to your liking with “Ctrl+T” and dragging a corner with the mouse. Validate the changes and with "Control" and the arrows you can move the mark to separate it from the borders. When it is right where you want it, stop recording on the button that I indicate in the following figure.
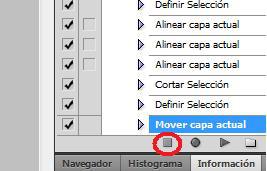
To check that it is executed correctly, remove the signature layer and press play to make it run. Now you can open another image, select the Signature action (or whatever you called it) and press play to execute it.
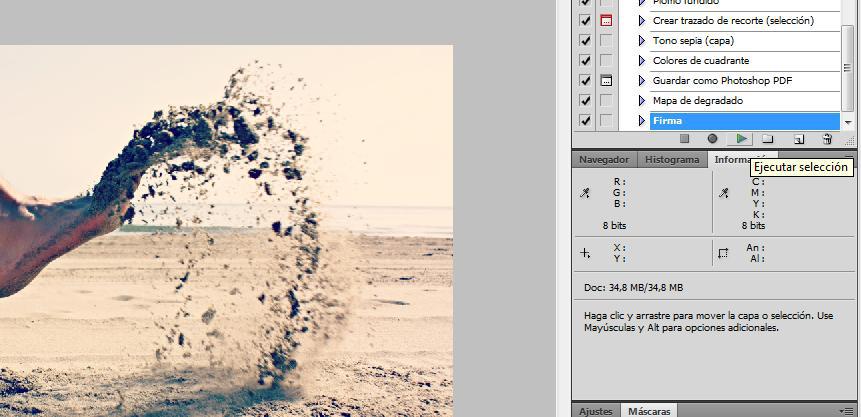
And the watermark will be inserted into the new image:

You already know how to put your watermark (I have inserted a text, but this can also be applied with your logo or an image that you want). Remember that it is not always good to abuse it, it can cause indigestion or, as we are talking about water... drowning


