INITIATION IN THE WONDERFUL WORLD OF INSECT PHOTOGRAPHY
INITIATION IN THE WONDERFUL WORLD OF INSECT PHOTOGRAPHY
Part of the GREATness of the world around us lies in the infinitely small things in it. There is a whole underworld of shapes, textures and colors that very few have been fortunate to know very closely.
As one of the purposes of photography is to capture testimonies, provide evidence of how wonderful this world is and disseminate the beauty of the small things that surround us, today I invite you to join me on an expedition in which we will convert a protagonist insect.
WHY DO WE LIKE TO PHOTOGRAPH INSECTS?
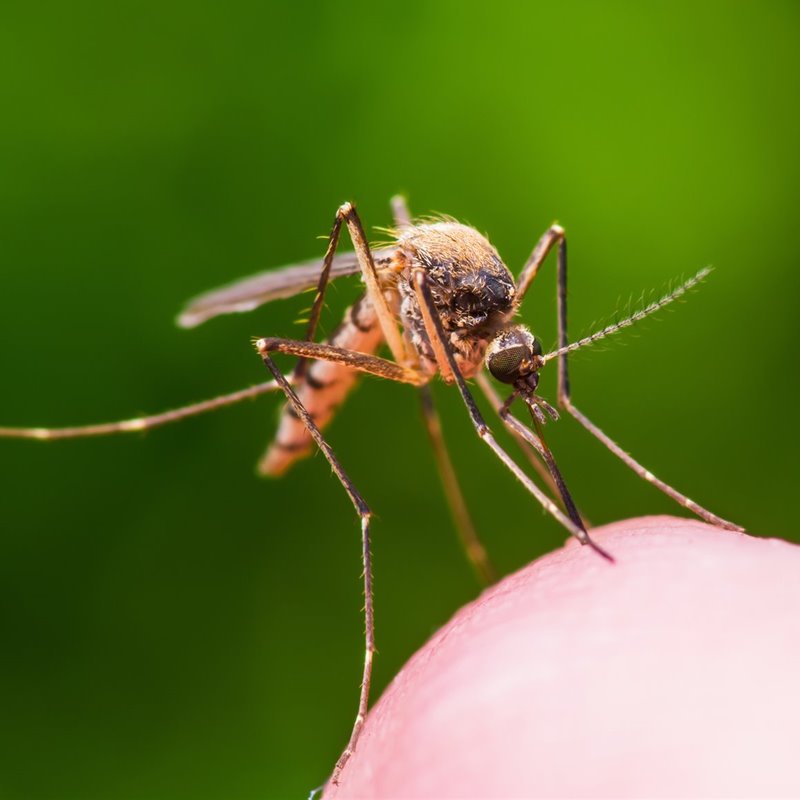
Insects are a good subject of photography. They offer spectacular compositions naturally. Both its attractive color combinations with which nature has endowed them, as well as its complexion and physical form worthy of a science fiction film, make insects one of the best subjects that a photographer can portray.
Photographing insects is interesting, too, in the sense that it makes us a kind of explorers looking for small expressions of the beauty of this Mother Nature. The sensation of returning from a photographic expedition and being able to show the world the face, face, eyes and "armor" of a creature that few have seen is extremely gratifying. They do not have to be rare or endangered species, or insects that nobody has seen before. Simply get a good portrait of a ladybug or a working ant in full swing. Any insect or tiny being is likely to arouse the interest of the viewer.
Walking on the water
TOOLS
To photograph full-blown insects, you mainly need an SLR camera (if you don't have one here, here are some recommendations ) and a good Macro lens.
There are alternative or complementary accessories, such as extension tubes, Macro filters, etc. They are cheap alternatives. If there is no other remedy they can be used, but if you can directly count on a Macro objective I assure you that the result will not be the same ( some recommendations of Macro objectives here ).
If all you have to do is with a compact camera, no problem. Great results can be achieved with this type of cameras too, shooting in "Macro" mode. The only thing is that the Macro results of a SLR have no point of comparison.
ILLUMINATION
If you are taking Macro photography seriously, an accessory that I would recommend is the flash. There is a type of flash specially designed for insect photography, called the ring or circular flash. It is a flash just in a circular shape, it is usually placed near the target, usually surrounding it, to cover the entire body of the insect evenly.
The main benefit that a flash of this type allows you, apart from the fact that the tiny subject comes out well lit, is that it gives you absolute freedom to play with the shooting speed of your choice. You can use a high shooting speed without fear that the photo will be underexposed. Remember that shooting at relatively high speeds helps avoid falling into a blurry photo.
Community
PLACES TO LOCATE INSECTS
I am going to give you some clue but if you want to do it really well I recommend you do with an insect guide, or one specialized in the insect that interests you, and study a bit the behavior, times and places where the type of insects is usually sighted what interests you. If you look at Google or Wikipedia there are a ton of articles on the subject.
As a starting point I can tell you that dragonflies and hookahs love water, so if you are interested in portraying them go to a pond or lake and start from there. On the other hand, butterflies and bees enjoy feeding on flowers, so look for them there, in any public park, garden or green area where flowers abound.
TIPS AND TRICKS FOR PHOTOGRAPHING INSECTS
Shoot from the same height: Do not shoot your insect photos from above, helicopter view type. You will get a much more vivid and real photograph if you shoot from the same height as the insect. Also, remember that you are making the little insect a protagonist, so make your prominence noticed, photograph it from the same height.
It highlights its interesting elements: Think about what elements, parts of your body or aspects of your activity make the insect interesting and try to highlight them through the composition. If it is a butterfly try to highlight its thin trunk while feeding on the flowers. If it is an ant, capture it in a work and activity pose, pushing a granite maybe or transporting food.
It is like going fishing. Be patient: Insect photography tests the most patient of men. If you are going on an excursion, you have to go mental There will be days when you are lucky and can portray many insects, and others when you return home with very few photos or even none. These bugs are very unpredictable. At times and depending on the insect, it will seem very collaborative and will be photographed. Other days you will not be so lucky and you will run after each insect without getting a single decent photo. Not to mention the moment «How good, I'm home, I take a shower and enjoy my photos on the computer»to take you later authentic clicks. In insect photography it is very typical to return home with 200 photos and end up saving only 4 and erasing the rest due to lack of quality, blurred, underexposed, moved, unfocused photos, etc.
Be patient.
Walker
WHEN IS THE BEST TIME TO PHOTOGRAPH INSECTS
Generally and with rare exceptions, spring-summer is the ideal time to photograph these types of living things. It is recommended to leave early in the morning or towards sunset / sunset as they are times when daylight is still soft, which will greatly benefit your photo.
On the other hand, in the early morning the insects are less active and have less predisposition to flee, take advantage of that moment since as soon as they begin to warm up with the first rays of sun they are filled with joy and there is no one who catches them anymore.
SETTINGS FOR PROPER INSECT PHOTOGRAPHY
All the preparations and all the effort you have invested can go to waste if you make a mistake in the camera settings. This is like everything else, it is worth trying, experimenting, and learning on the fly, every day, every situation and every type of light will require slightly different adjustments. Even so, I would like to give you a recommendation of more or less "generic" adjustments that will serve as your starting point. Then you modify as you like.
In principle, it is advisable to shoot in Manual mode (M) or at most Semimanual with Opening Priority (Mode A in Nikon cameras, Av in Canon and other brands).
If you are going to use a Macro lensit is recommended to throw between f / 11 and f / 16. With other non-Macro objectives, the choice of aperture is already a freer subject for each one, if you want a general approach strips with smaller apertures (high f / value), and if you want to achieve a clear focus only on part of the body of the insect (eyes for example) you use a larger aperture (f / small value).
The shooting speed will depend on the light conditions. If you take the picture in the early morning or in the afternoon you will necessarily need to shoot at high speeds, starting at least 1/400. If it is at noon I would go down to 1/100 as a starting point.
Obviously have the ISO value to the minimum possible, unless you need more light in which case turn it up slightly.
As general advice I recommend that you study the settings used by other photographers and try to imitate. Flickr is full of pictures of insects that can inspire you in both composition and adjustments. You already know that the trick to see the settings of a photo on Flickr is to add the meta word to the address of the photo. For example, to see the settings for this photo: https://www.flickr.com/photos/paulobrandao/3557927430/ simply add goal at the end, as follows: https://www.flickr.com/photos/ paulobrandao / 3557927430 / goal
Is all for today. I hope you find in today's article a foothold from which you can introduce yourself to the wonderful world of insect photography. Remember that you only learn when you practice. Reading does not make you wiser or more knowledgeable about topics. Practice is what will make you great.
Beautify and compress CSS files for an optimized website. Try the free online tool by HTML Cleaner.