ISO sensitivity in photography is one of those settings that, although you use it daily and one photo at a time, you may not fully understand how it really works.
In a scene with low light, if you don't want your photos to come out blurry, almost instinctively you will raise the ISO and voilà , all your problems will be solved.
But is that really so?
In today's article, we'll explain what ISO is in photography and shed some light on this setting that doesn't get all the attention it deserves.
After all, the quality of your photos will depend on it. You can not lose this!
Before continuing, let me recommend the mega guide that we have prepared to teach you how to photograph in Manual Mode and that you can lose your fear once and for all.
In this way, controlling the ISO will be a piece of cake.
WHAT IS THE ISO IN PHOTOGRAPHY?
The ISO in photography refers to the sensitivity of the camera sensor when it comes to capturing light. It is a scale that determines the degree of sensitivity of the sensor of a digital photo camera with respect to the light that is projected on the sensor.
In analog photography it is the sensitivity of the film used to record the negative of a photograph.
The higher the ISO number, the greater the ability to capture light, the lower the value, the less ability to capture said light.
When you double the ISO value, that is, you go from, say, ISO 100 to ISO 200, you need half the light to achieve the same exposure.
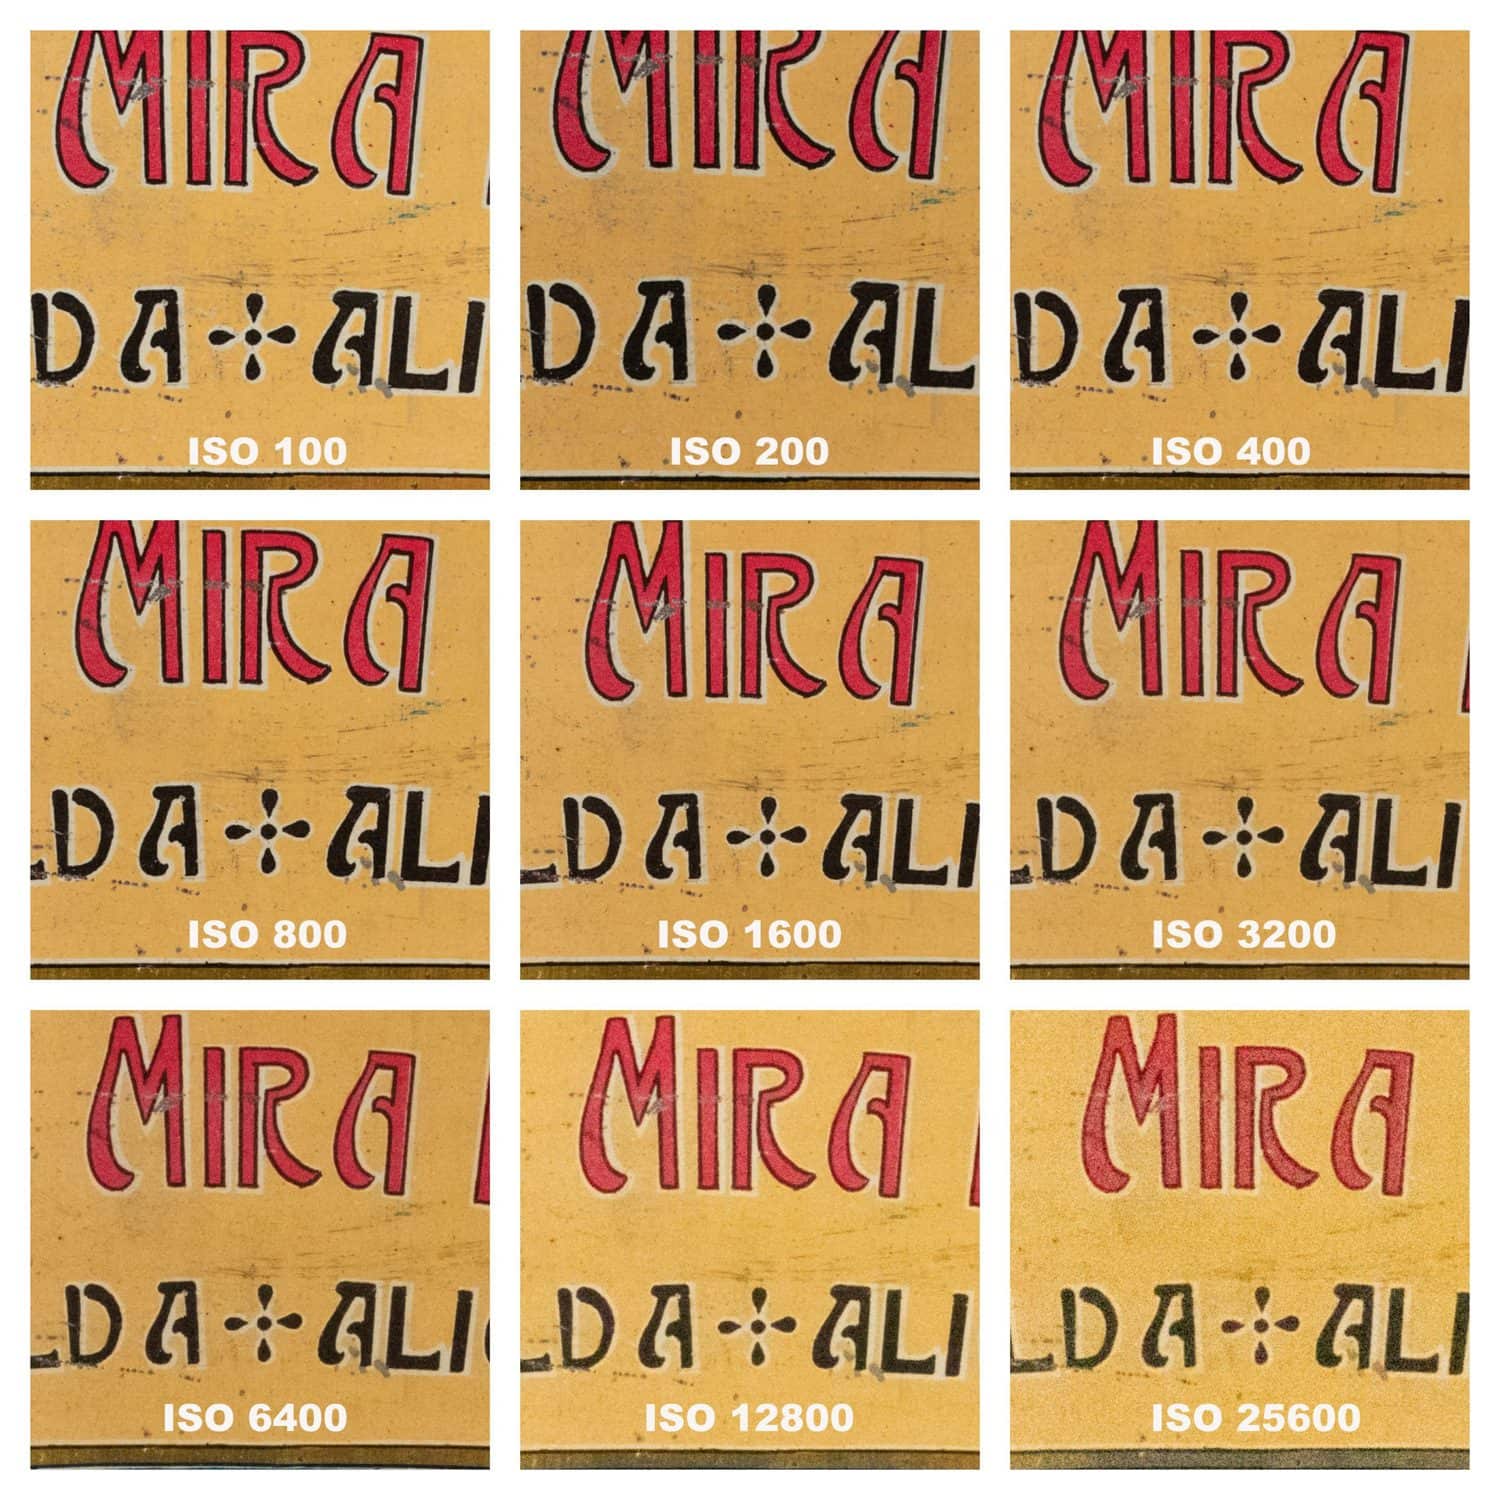
In this example you can see, with the same shutter speed and same aperture, how the image turns out by changing the ISO value.

Let's take a closer look at it.
Light is the fundamental seasoning in any recipe for a good photograph, without it there will be no possible photo.
ISO sensitivity is something like the value that indicates the “ amount of light ” your camera is capable of capturing in a photograph.
This concept has been inherited from analog photographydespite not having much relationship with what it was before and what it is today.
In analog photography , it was not (and is not) possible to adjust the ISO sensitivity from the camera as in the era of digital photography, instead each photographic film corresponded to a different ISO value.
Therefore, it was not possible to adjust the ISO from one photo to another without changing the film completely.
The sensitivity of these films corresponded to the amount of "silver halides" (something like today's "pixel size") with which said film was made.
The size of each halide crystal on the film indicated the sensitivity and graininess that can be seen in developed photographs.
Today, with digital sensors, silver halides are history (at least for digital photography) and while the name is still used and analogue photography still exists, the concept totally changed with the digital revolution.

So, the ISO sensitivity of the sensor measures the reaction of the sensor to a certain level of light in the scene.
This sensitivity is inversely proportional to the amount of light present: the "more light" there is in the environment or scene, the lower ISO sensitivity you can or will have to use and vice versa.
Seems simple, right?
WHAT DO THE ISO ACRONYMS MEAN IN PHOTOGRAPHY?
The name ISO corresponds to the initials of the organization that gave rise to it: "International Organization for Standardization" or international organization for standardization, that is to say that, as its name indicates, said value is nothing more than a standard adopted worldwide.
HOW DOES ISO SENSITIVITY WORK IN PHOTOGRAPHY?
In order for you to understand how the ISO of your camera really works, it is necessary that you first understand how the sensor of the camera works, since the ISO depends on how it captures the light to transform it into a beautiful digital file.
Your camera's sensor is that little chip that turns your vision into reality.
It is in charge of transforming the light that reaches it into a photograph.
Just as the film, as I just told you, is made up of silver halides, the sensor is made up of thousands of photosensitive cells that transform the light that passes through the lens.
Upon receiving light, each cell transforms it into electrical current and, after being processed in the brain of your camera (its microprocessor), a digital file is generated, "the photo", which is stored on the memory card.
The sensitivity of each of these cells is fixed and corresponds to the lowest ISO value that your camera (sensor and processor) are capable of processing.
But if the ISO sensitivity is fixed, how can I increase it at the touch of a button?
Actually, the "sensitivity" of these cells is not being increased since it is fixed, but what is being amplified is the electric current or "signal" that they emit.
If you are photographing a scene where lighting is low, when you "amplify" the signal from your sensor cells, you will not only "boost" the light that managed to reach it, generating a bit of noise, but you will also amplify the signal from your sensor cells. those cells that have been “empty of light”, generating even more noise.
This is where the hated “noise” is born.
The higher the ISO sensitivity you use when taking your photos, you will not only get clearer photos but also noisier ones.
In the example below, we've kept the same exposure so you can see the effect of raising the ISO value on noise level.
WHAT IS NOISE IN IMAGES?
Surely, what has become clear to you from the previous explanation is that the higher the ISO, the greater the noise, especially in the darkest areas.
Noise is the side effect you'll get from turning up the “gap” before taking a shot.

There are three situations that will cause noise to appear in your photos:
- Signal amplification: this type of noise is generated, as I just mentioned, by amplifying the signal from the cells in charge of transforming light into electrical signals, that is, by raising the ISO value. This noise is called electrical or electronic.
- The temperature: in addition to noise by amplification, the temperature of the sensor will also generate noise in your photos. If you take long exposures , or shoot in bursts, the sensor will overheat, which will end up generating the well-known “thermal noise”.
- Post- production: when a photograph is underexposed, trying to "lighten" it on the computer will generate noise. The computer will not be able to recover the data that your camera has not been able to capture, so it will "invent" information where there is none, generating noise.
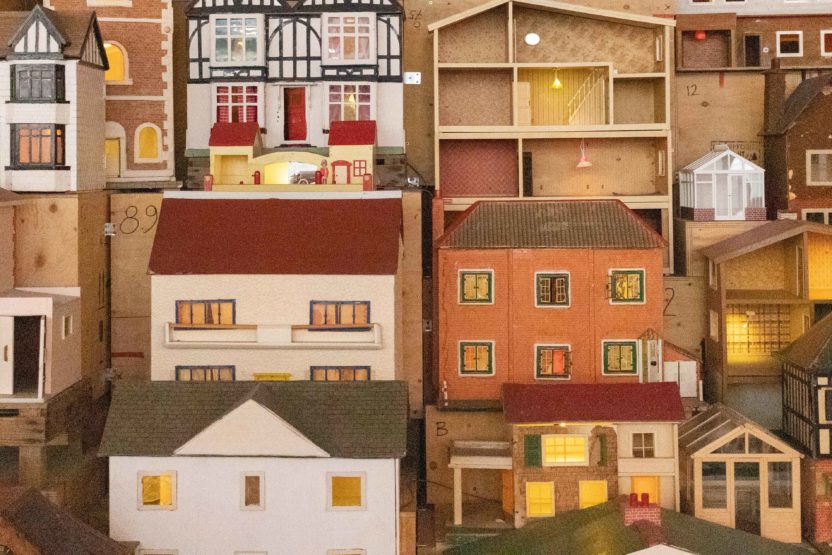
The way in which noise is present in your photographs varies in shape, size and quantity depending on the causes that originate it, the model of your camera, the size of the sensor, etc.
It can be imperceptible or so obvious that it ends up ruining the quality of your photos.

However, sometimes it's better to have noise than no photo.
The objective does not always have impeccable sharpness.
There will be photos or moments in which it is more important to capture the moment despite having noise.
Then there is the issue of the grain, which is often confused but is a different issue.
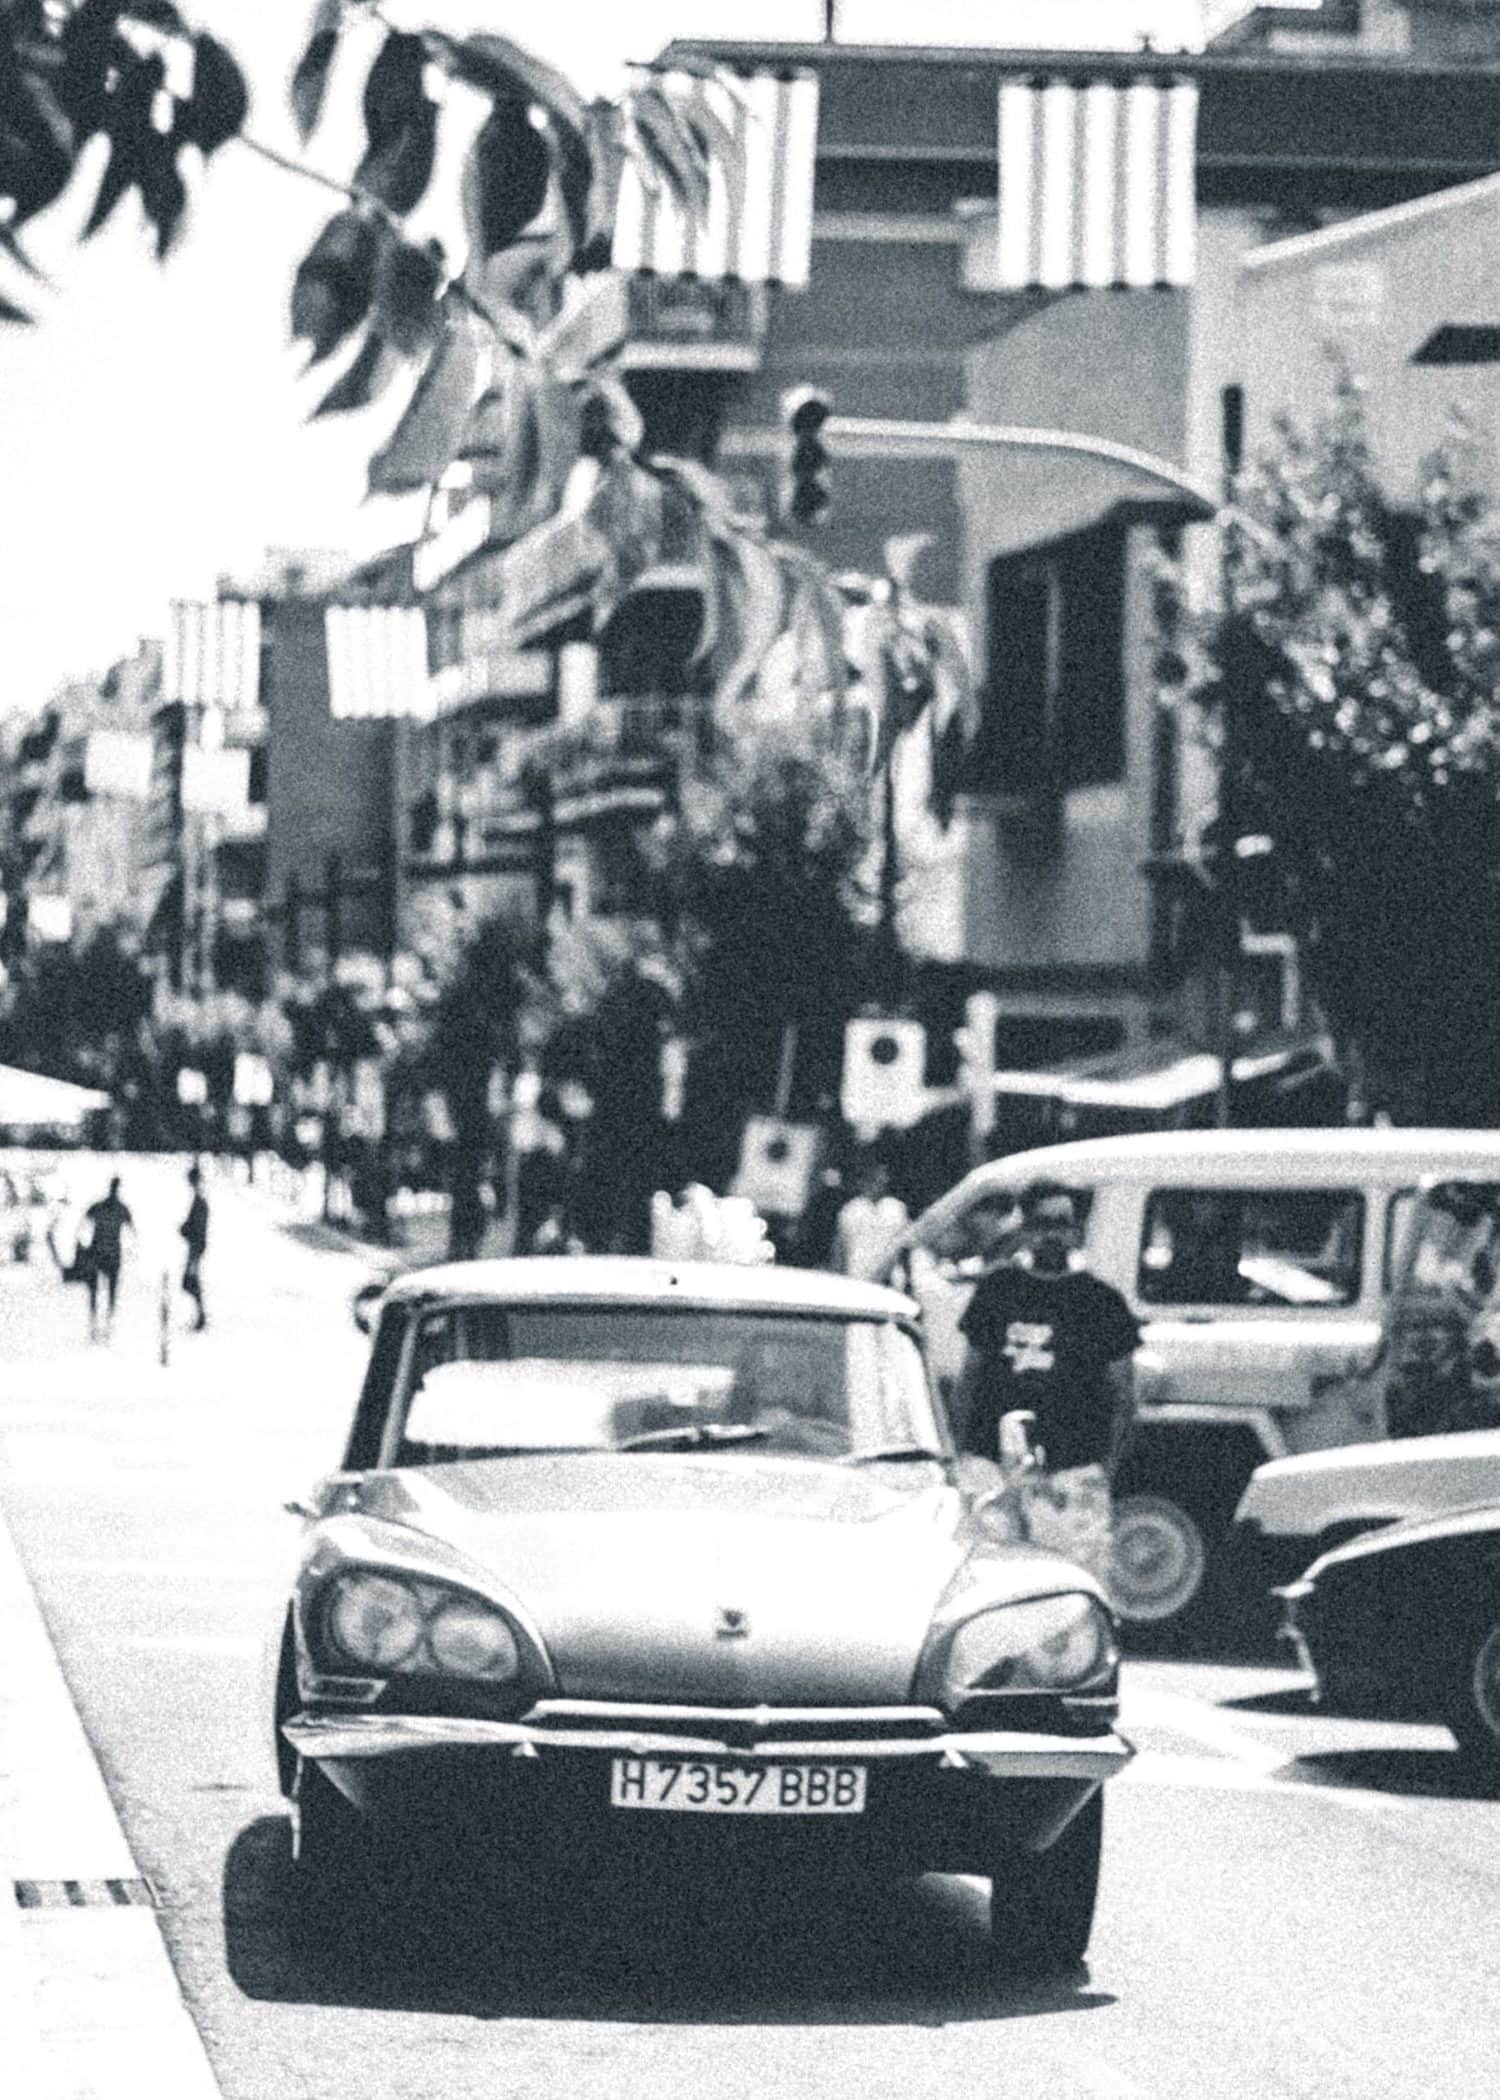
Inherited from analog photography, it is added with an aesthetic or creative intention. To add a touch of nostalgia or emulate another era, among others.
Here is an example in which we have put enough grain to give you an idea.

HOW TO AVOID NOISE IN PHOTOGRAPHY
Here are four ways to reduce noise in your photos:
- Keep the ISO as low as possible. "As low as possible" does not mean always keeping it at its minimum value, but adjusting it to the limit of what the lighting conditions of the scene allow you. First try to compensate for the lack of light by slowing down the shutter speed or opening the diaphragm. But of course, always depending on what you want to achieve and transmit with your photographs.
- In the absence of light, add it. If you can't compensate the exposure by using the shutter speed or by opening the diaphragm to the maximum, you can try adding more light sources in order to improve the lighting and remove your worst enemy, the darkness from the scene. As I mentioned before, the noise is more noticeable when the darkness is poor.
- Avoid the heat. Just as the temperature of the sensor adds noise to your photos, if you give it a breather between shots or do not take too long exposures, you will not only be able to keep this source of noise at the margin (or to a minimum), but also, You will increase the useful life of your equipment.
- Expose correctly. The key to all photography, in addition to its concept and message, is its correct exposure.
HOW DO YOU ACHIEVE PROPER EXPOSURE IN PHOTOGRAPHY?
ISO sensitivity is one of the three factors that define the exposure of a photograph.
The other two are the aperture and the shutter speed .
These three form what is known as the exposure triangle.

As you can imagine, in order to keep the ISO constant (as low as possible) without altering the balance of the exposure triangle, you must make a correct measurement of the available light with the ISO that you have set, in order to adjust the shutter speed. shutter speed and aperture ( depth of field ) you want to achieve.
- The shutter speed will allow you to convey the sensation of movement or completely freeze a scene.
- Through the depth of field you can completely blur a background (achieve a good bokeh ) or, obtain a lot of depth of field to photograph impressive landscapes .
These two elements, as you may have noticed, allow you to add compositional elements to your photos, unlike ISO sensitivity, which will only allow you to capture scenes with low lighting.
You can get lower noise photos by using a higher ISO sensitivity if you correctly meter and expose your photos than if you choose a lower ISO sensitivity but the metering and exposure is not correct.
When you have to correct the exposure on the computer, you will end up adding more noise to the photo than if you had used a higher ISO from the beginning but with a correct exposure.
Take 5 minutes to analyze the following graph:

The green line marks the values to obtain a correct exposure of a certain photograph.
If you want to obtain a shallower depth of field (greater blur) you must compensate for the “extra light” that your camera will capture by increasing the shutter speed (Go from 1 to 2).
This will happen to you if what you want is to freeze the movement.
Now, if what you want is to achieve a greater depth of field (greater sharpness) and continue on the green line that marks a correct exposure for our fictitious photograph, you must compensate for the lack of light resulting from closing the diaphragm, decreasing the shutter speed. shutter (Go from 1 to 3).
In this way, you will not be able to freeze the movement, but you will gain a lot of depth of field, very useful, for example, in landscape photography.
Now, if you wanted to achieve a correct exposure but keep the diaphragm very closed in order to obtain enough depth of field (f/16) and, at the same time, use a speed of 1/100, the only way for you to achieve correct exposure is by increasing the ISO sensitivity (ISO 800).
The red line marks the new correct exposure. (Go from 1 to 5).
On the contrary, if with the same values you also wish to use a very low ISO sensitivity, the only thing you will achieve is an underexposed photograph (Go from 1 to 4).

WHAT ISO SENSITIVITY TO USE?
The tendency to keep ISO sensitivity as low as possible is just that, a tendency.
Remember that the light will vary from one scene to another, so in each one of them, you must make a good measurement and adjust the ISO value so that you can obtain the photograph you are looking for.
On the other hand, some cameras support high ISO values better than others.
It is important that you know your camera and see how it behaves according to the different values.
To do this, nothing better than to carry out a test, the same photo changing the ISO and see at what values the noise appears.
Forcing a photograph to use a very low ISO sensitivity will only cause, by under or overexposing your photos, when you edit them, you end up introducing even more noise than if you had set the ISO a little higher.
The key to combat noise is correct measurement and exposure. Never forget!
TIPS TO USE THE ISO CORRECTLY IN YOUR PHOTOS
Now that you have read all the theory regarding ISO sensitivity, or all that may interest you at this point in your life as a photographer, let's review some tips and tricks that will be very useful to take everything you have learned to the practice:
1. THE ISO TO THE MINIMUM POSSIBLE
Always try to use the minimum possible ISO sensitivity, that is, the one that allows you to take the photograph you are looking for and according to the current lighting that allows you an optimal exposure.
Not the minimum value of the camera.
In this way, through a correct exposure and an ISO as low as possible, you will reduce noise considerably.
2. EVALUATE ALL THE VARIABLES
Before you set out to raise the ISO, try to see how you can avoid it by adjusting the other two variables that define exposure: depth of field and shutter speed.
Do not rule out the use of a tripod if necessary.
3. KEEP AN EYE ON THE EXHIBITION
Always before shooting, remember to correctly measure the light present in a scene.
Never give up on exposing correctly just by “increasing the ISO sensitivity”.
It may seem like an easy way out to increase the ISO, but if you take the trouble to expose correctly, the quality of your photos will improve considerably.
4. DON'T BE AFRAID OF NOISE
No matter how hard you work to try to minimize it, don't be afraid of noise.
In many situations it will be impossible for you to eliminate it, either because of the camera you are using or because of the low light in the environment.
Never stop taking a picture, even if the noise is more than you would like, after all, you can ultimately reduce it later with some editing program on your computer.
5. ALWAYS SHOOT RAW
As I just told you, you can always try to reduce the noise in your photos using an editing program.
You will get better results if you work directly on the digital negatives than if you do it on the JPG.
The RAW format saves much more information since it is not compressed, which will allow you much more margin than a JPG.
You can review all the advantages of shooting RAW in this article .
6. DON'T USE AUTO ISO
Although almost all cameras allow you to set the auto ISO selection option, I do not recommend you use it for two reasons:
- Your camera will never make better decisions than you when it comes to choosing the best possible settings.
- The cameras are set up to measure light as if everything in the scene is neutral gray (an average of light and dark tones) so when measuring the sensitivity to use, it will also average and in most cases you end up with wasting a lot of potential of your sensor to capture all the tones it is capable of, both dark and light.
7. NEVER UNDEREXPOSE
As I mentioned before, it is better to raise the ISO sensitivity and generate a little more noise than to use a lower ISO and then correct the exposure on the computer.
No matter how good editing programs are, they will always generate noise if the shot has not been correctly exposed, so expose correctly and always towards the lightest tones.
8. DEFINE YOUR NOISE TOLERANCE (AND THAT OF YOUR CAMERA)
Beyond all the information you can obtain by reading this or other articles published throughout the Internet, the one who defines the optimal ISO is you.
You should consider two things:
- What is the maximum noise you are willing to tolerate?
- Do you know how your camera works at different sensitivities?
The key to mastering ISO sensitivity lies with you: as I told you before, do as many tests as possible with your camera to find out how it works and how it processes noise.
Once this is done, you will be in a position to know what is the optimal ISO with which you should work in each of your shots.
As always, the key to everything in photography is you: you make the decisions, you plan the shots, you define the composition, you define what is tolerable and what is not.
You are the owner of your own creativity.
The key to success in photography, always, is you.
FINALLY, LET'S DEBUNK A MYTH
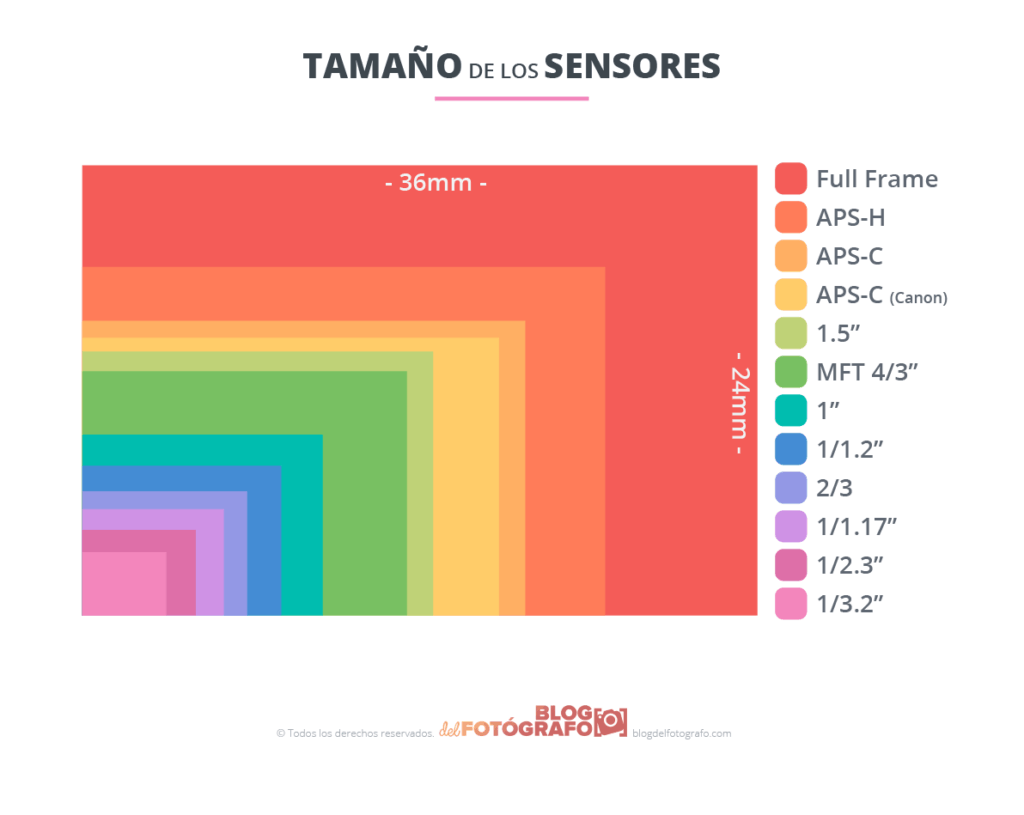
Don't think that because your camera's sensor is small, you won't be able to get great photos without a lot of noise.
The small sensors are not noisier, or yes, but not because they are not capable of achieving noise-free photos, but because the ISO sensitivity that the manufacturer assigns to them is not really such.
What I mean by this? Do you remember that I told you that the ISO was a standard?
Well, all cameras, regardless of size and sensor type, work to the same standard even though it's not valid: comparing ISO 800 of a Full Frame camera to ISO 800 of an APS-C sensor camera is just as valid as comparing pears with bananas.
“Small sensors have a noise level similar to a larger one for the same amount of light”
LET'S DO SOME CALCULATIONS
The crop factor of an APS-C Nikon sensor, for example, is 1.5 compared to its Full Frame pair. In other words, the Nikon Full Frame sensor is 1.5 times larger than in an APS-C camera.
This crop factor is well known as it is generally applied to calculate the effective focal length of a lens .
A 200mm lens on a full frame is equivalent to an effective focal length on a Nikon camera with a 300mm APS-C size sensor (200*1.5=300).
Now, this crop factor must not only be used to calculate the equivalent focal length, but also must be used to also calculate the equivalent effective ISO sensitivity.
An ISO sensitivity of 800 on a Full Frame Nikon is equivalent to an ISO of 350 on an APS-C.
If you take a photo in both Full Frame and APS-C with those ISO values set, the noise level will be the same under the same amount of light in the scene.
ISO IN APS-C * CROP FACTOR (1.5)²
That said, comparing ISO 800 of a Full Frame, which is the standard, against ISO 800 of an APS-C is comparing very different things.
With the same amount of light and using equivalent ISO sensitivities, no matter the size of the sensor, the amount of noise will be the same.
That is why the smaller sensors seem noisier, although in reality they are not, only that the ISO sensitivity of one and the other must be converted to be comparable.
If you've made it this far, you've just read over 3,000 words on how to use ISO correctly.

![ISO IN PHOTOGRAPHY: HOW TO USE IT CORRECTLY [UPDATED]](https://photographychef.com/wp-content/uploads/2023/01/ISO-IN-PHOTOGRAPHY.jpg)
