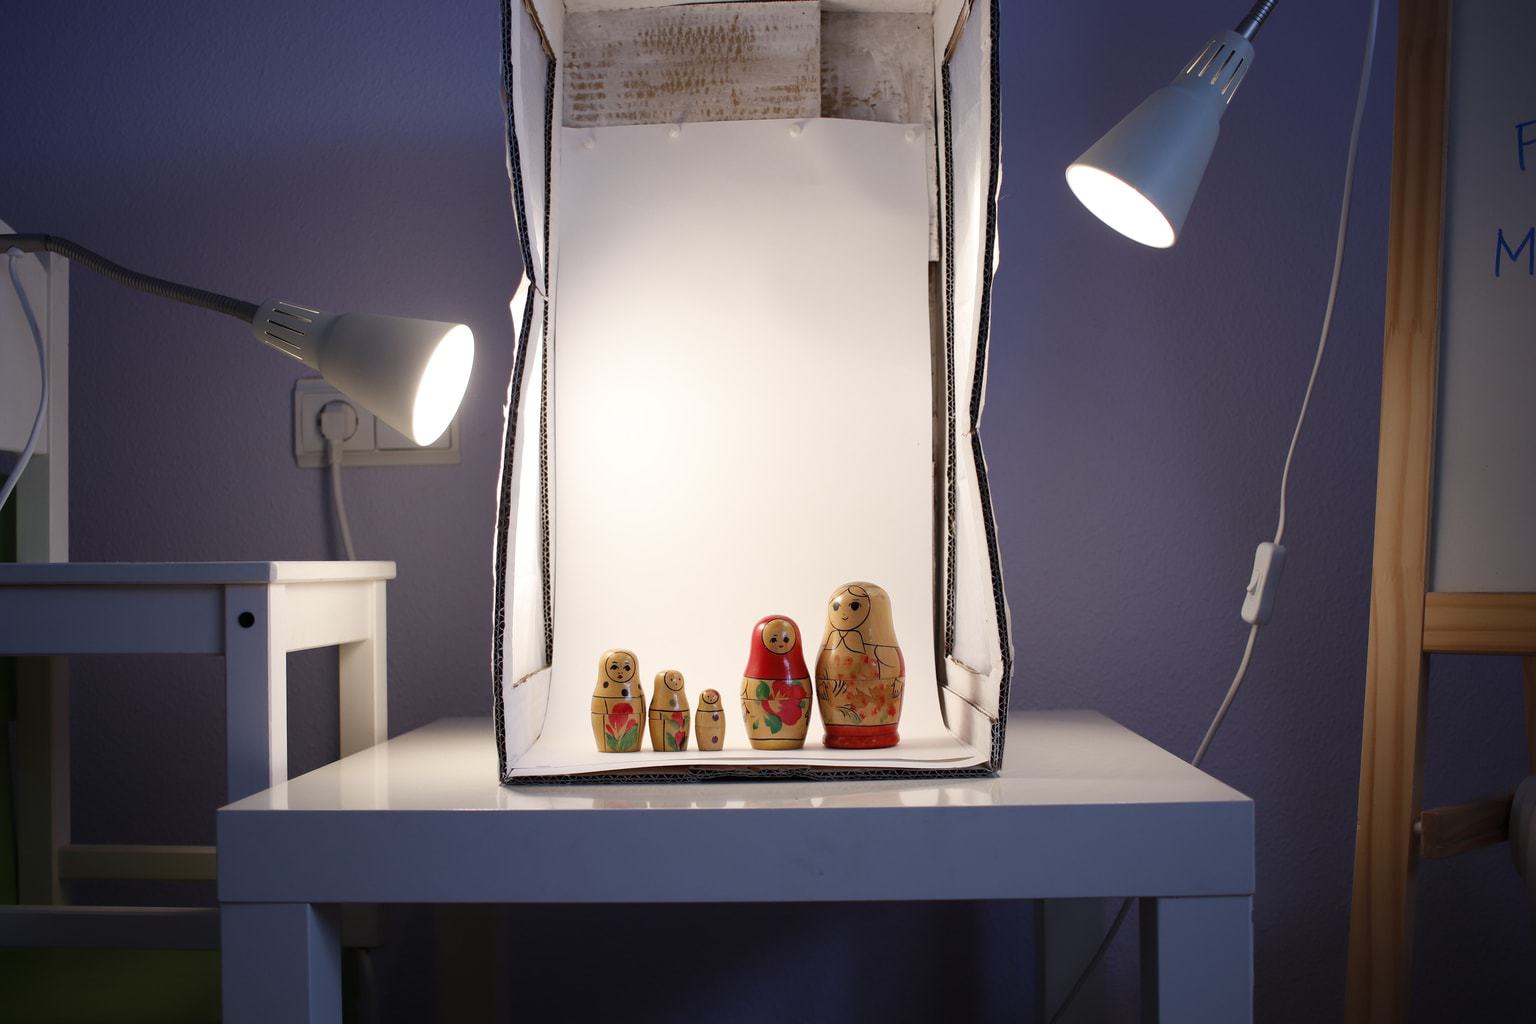
In this article I offer you a tutorial so you can build your own light box easily and very cheaply.
We will go step by step and I will illustrate the process with photographs. You will see how simple it is.
I am also going to give you some options so that you can buy a light box of very good quality and at a very cheap price, in case you want to buy one already made.
WHAT IS A LIGHT BOX?
Here's a photo for you to see, but basically it's a photo accessory (see all here with buying tips) that serves to light your objects softly and diffusely.

Before getting into the subject, I want to recommend this mega guide that we have prepared for you with everything you need to know about lighting in photography, with tips, tricks and much more.
WHAT IS THE UTILITY OF A LIGHT BOX?
A light box is mainly used for product or still life photography . Although it also works for any photography that you want to experiment at home with diffused light. Of course, with objects of small or medium size ;).
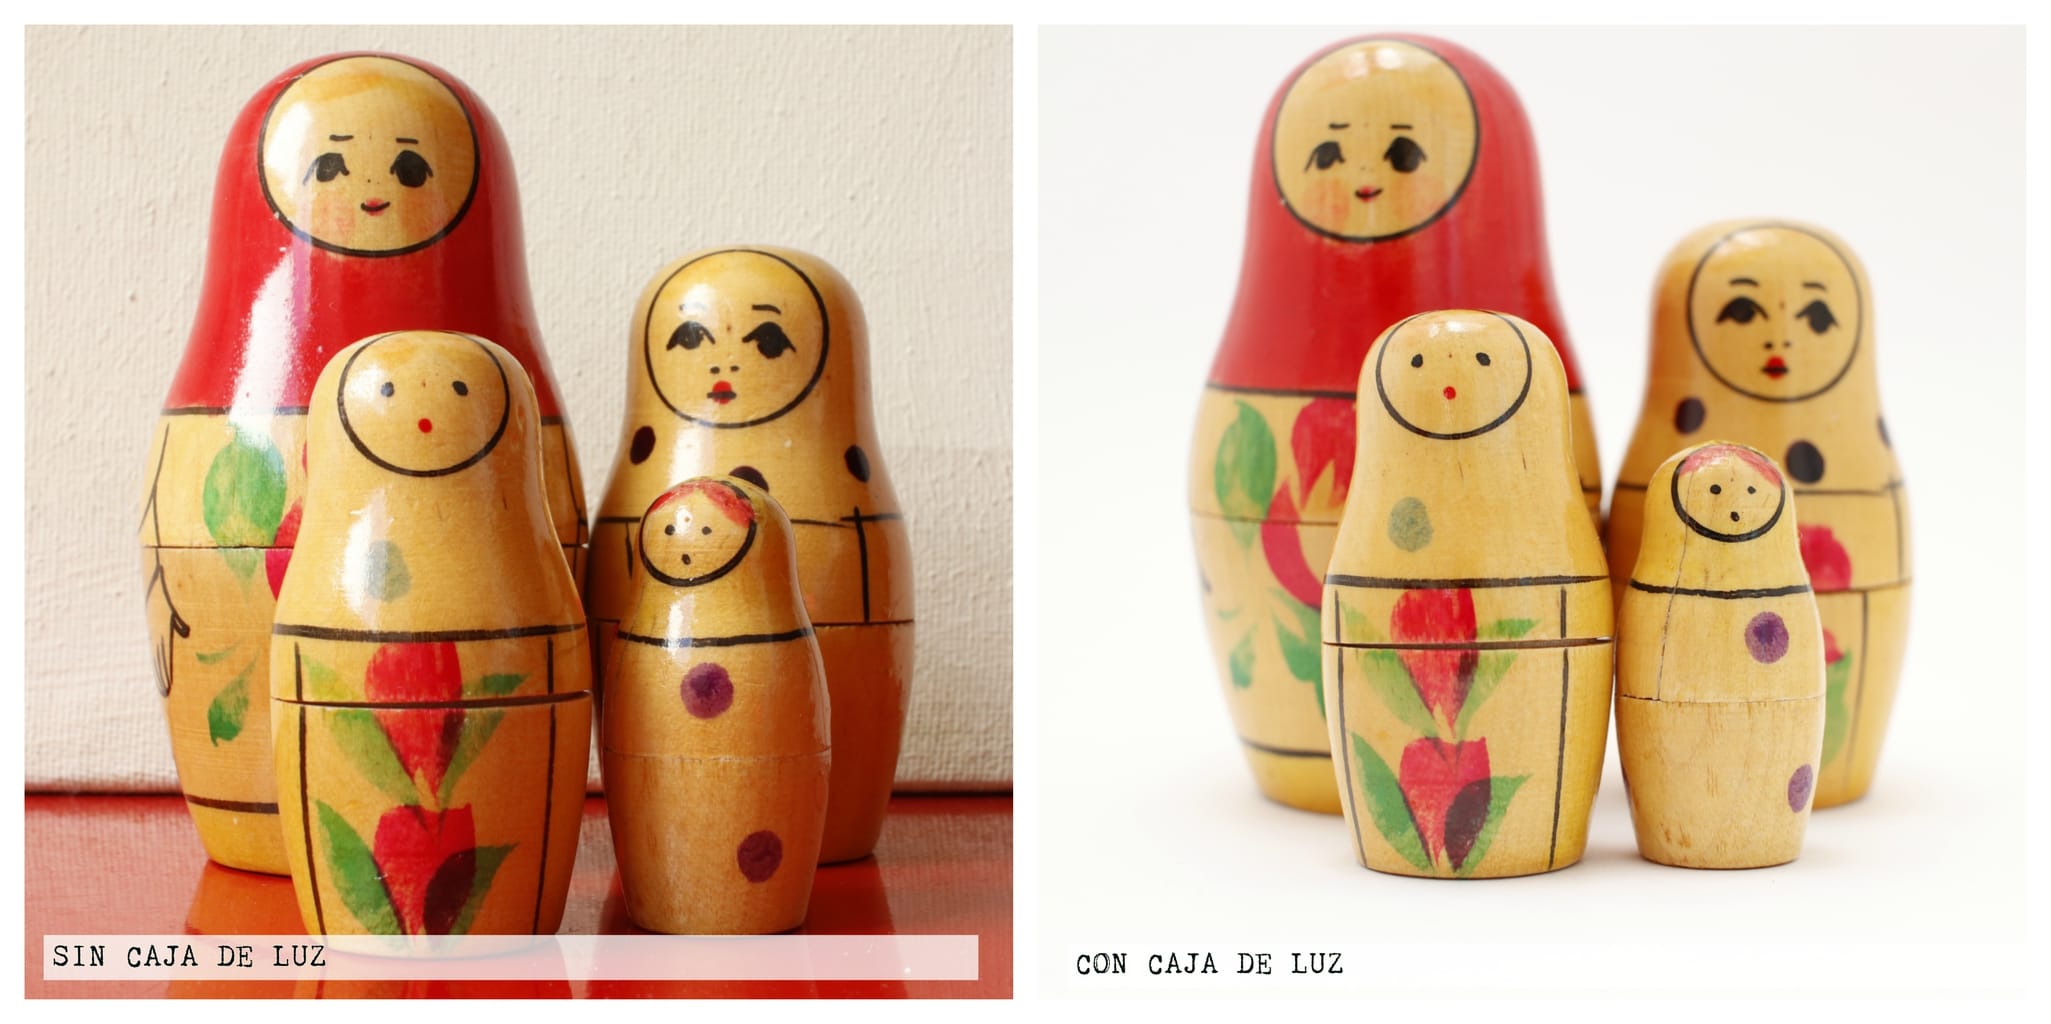
If you have ever wondered how you can get a photograph of an object in great detail, with such white backgrounds and so well lit, this is the answer. Maybe you think that only a professional can achieve something like this, but it is not the case. A light box is enough for you (and the basic knowledge of photography, of course ? ).
MATERIALS TO BUILD A LIGHT BOX FOR PHOTOGRAPHY
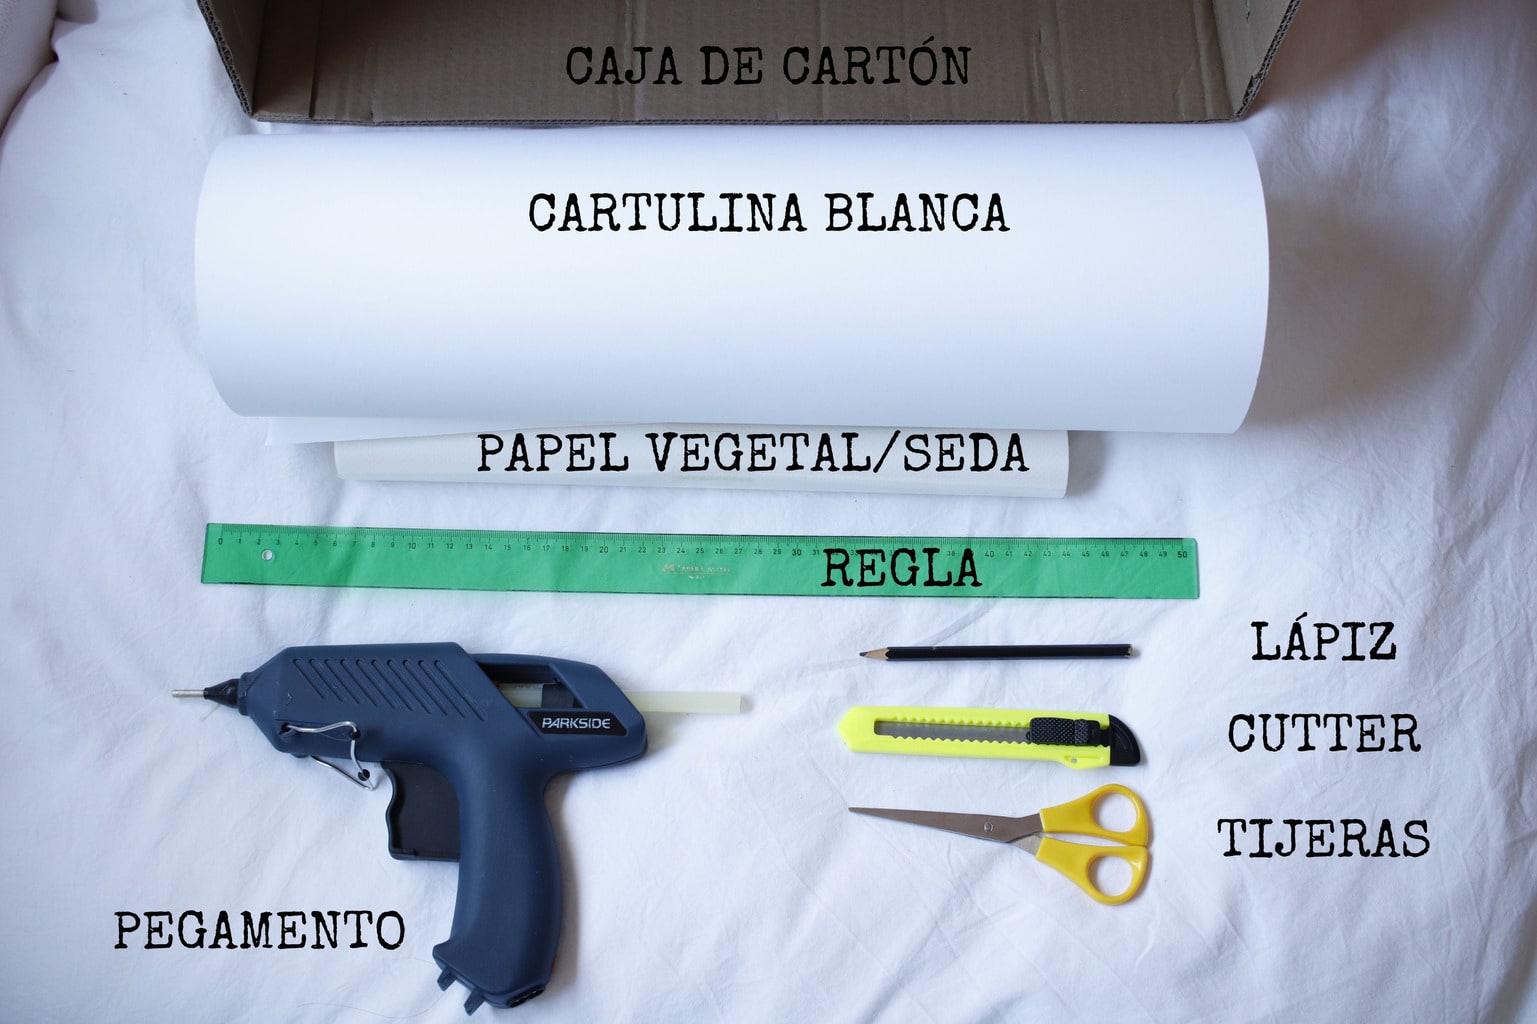
You will need the following materials, as you will see, some are not essential and others may vary according to your tastes, preferences or availability:
- Box (the size will depend on the size of the objects you want to photograph).
- tracing paper. Any material that lets light through and is white will do. Tissue paper can also work for you, although it is still more fragile and spoils sooner. If you have a white cotton t-shirt to throw away, it can help you. You can also use parchment paper.
- White paint (optional). I recommend it because in this way it reflects the light (in addition to being more beautiful), although it is not essential. The choice is yours ;).
- Cutter/Scissors. To cut the box, the cutter is more comfortable, for the rest… the scissors.
- Glue. Here you can use normal glue, from a heat-sealing gun or adhesive tape, either insulating or bodybuilder's tape.
- Pencil
- Rule
- White cardboard
- White insulating or bodybuilder tape (optional). It can be used to stick the paper on the windows or to "beautify" the edges.
- Thumbtacks (optional). To put the background.
STEPS TO BUILD YOUR PHOTOGRAPHY LIGHT BOX
As I told you in the introduction I am going to explain it to you step by step so you don't get lost. I am one of those who need everything well chewed, and that's how I like to explain it, because I hope I'm not the only one ;).
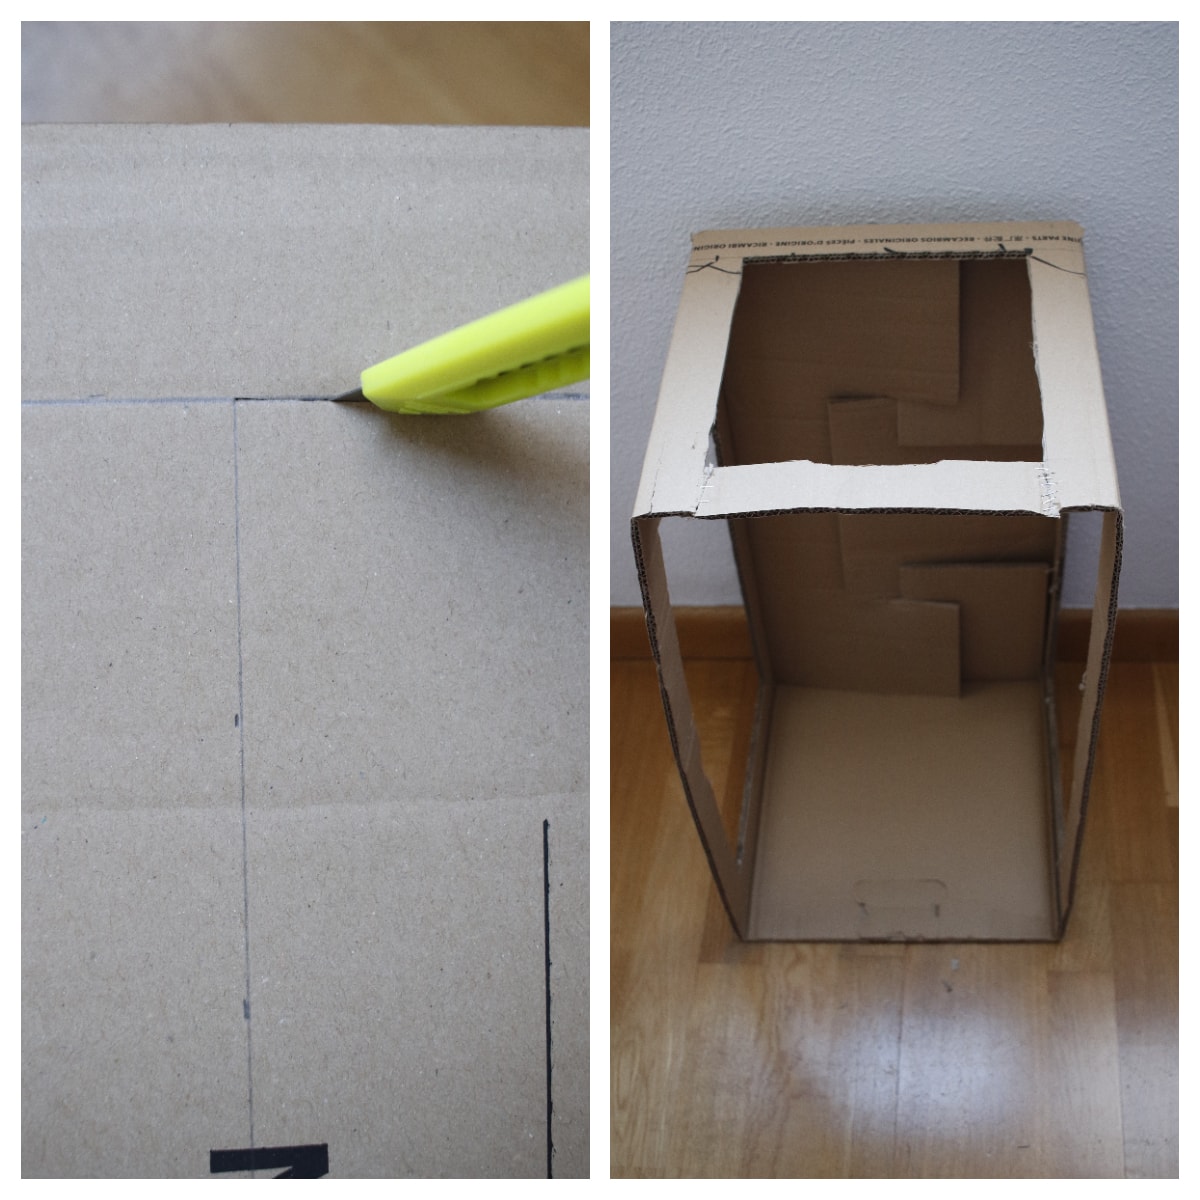
1. MARK A FRAME IN THE BOX
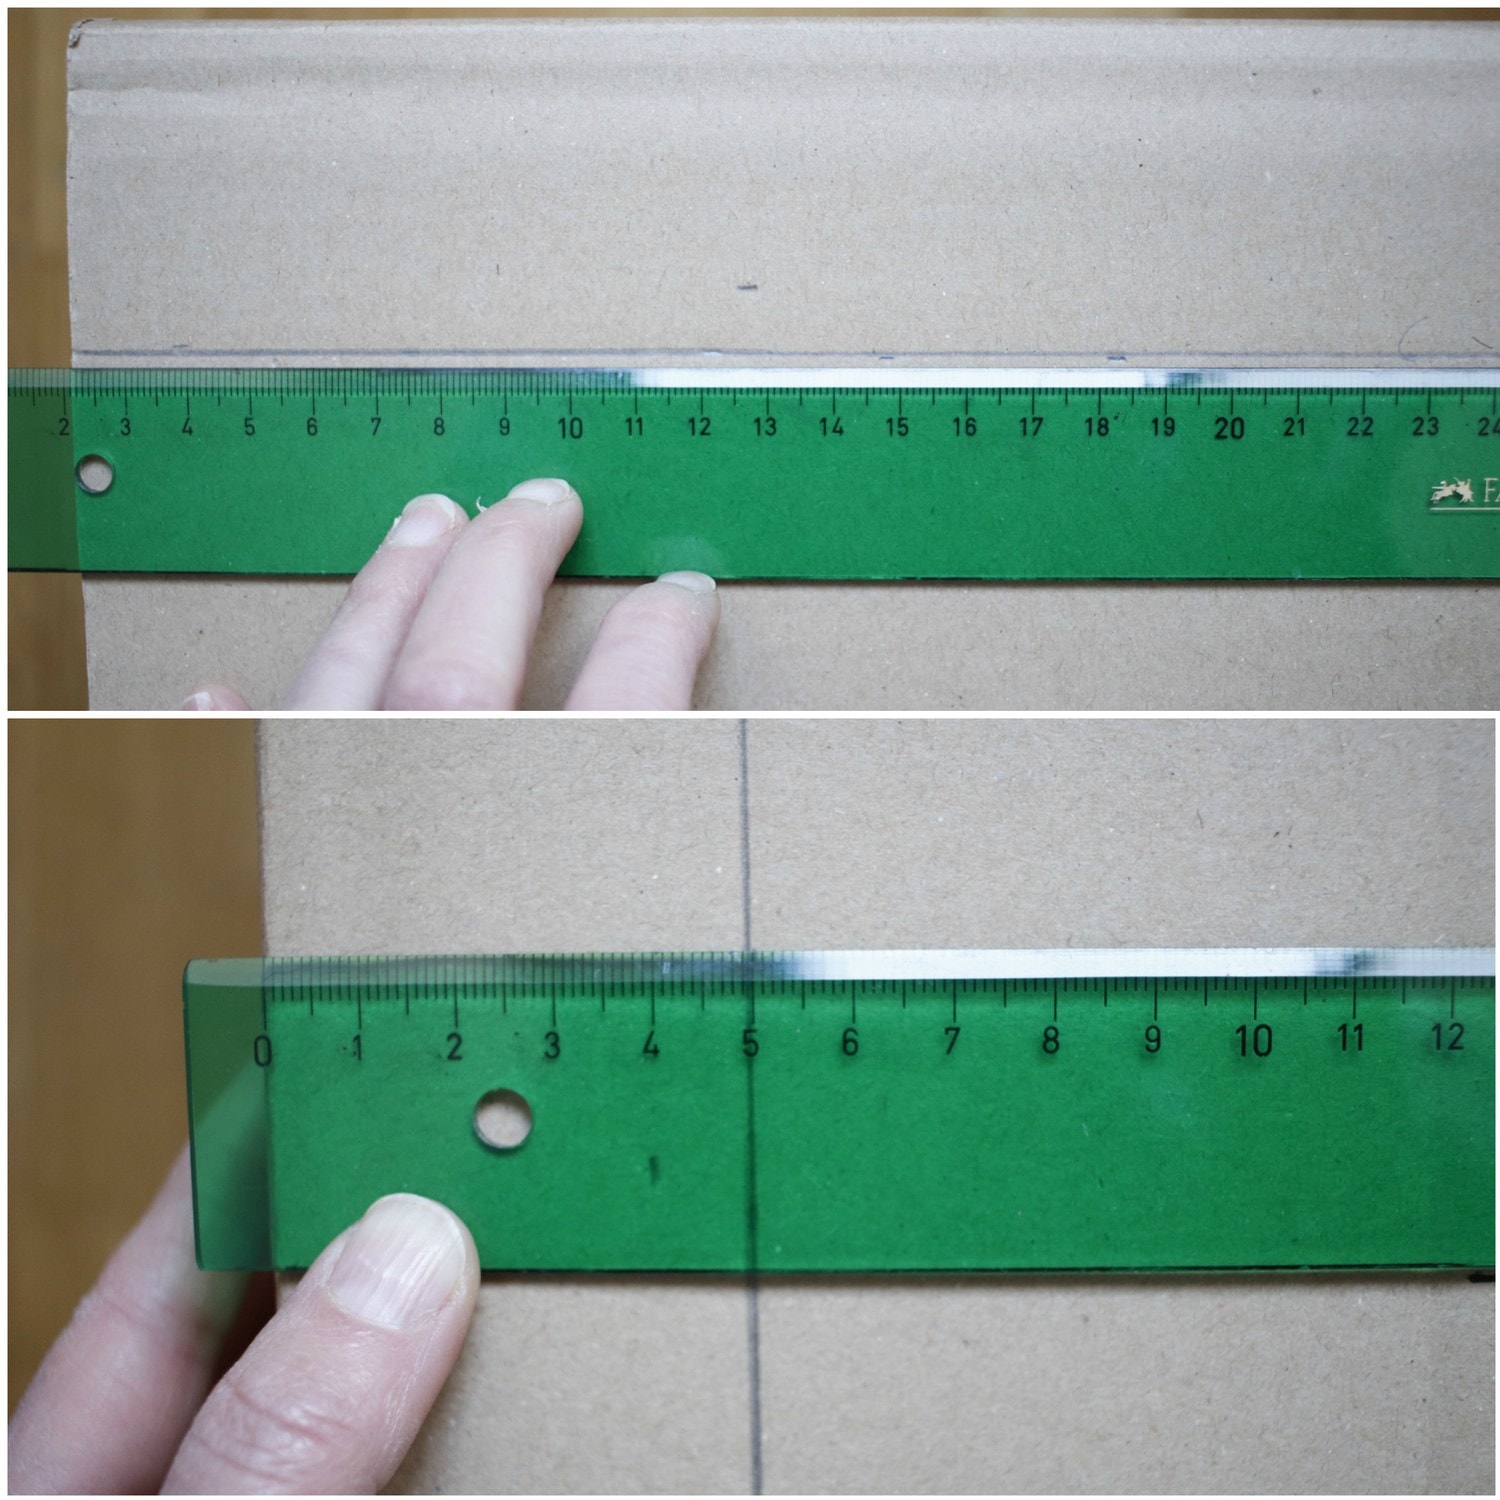
On the lateral sides and on the upper part, mark a frame of about 4 or 5 cm with the ruler, from the edge inwards. This also depends on the size of the box. If it is too small, the frame will be narrower.
2. CUT OUT THE FRAMES
With the cutter, cut along the line and remove the excess cardboard. You will have some windows like these.
3. PAINT THE INSIDE OF THE BOX WHITE
This way it will not only look prettier (which is a point ;)), but it will reflect light better. This step is optional, if you are going to cover the entire interior with fabric or paper it is not necessary. And on the outside... to taste, if you want to paint it and make it more beautiful, it's all yours;). And another thing, you don't need to paint the background and the base because the white cardboard will go, if you look at the photo you will see that I have not painted it (I have only cleaned the brush on the cardboard; P).
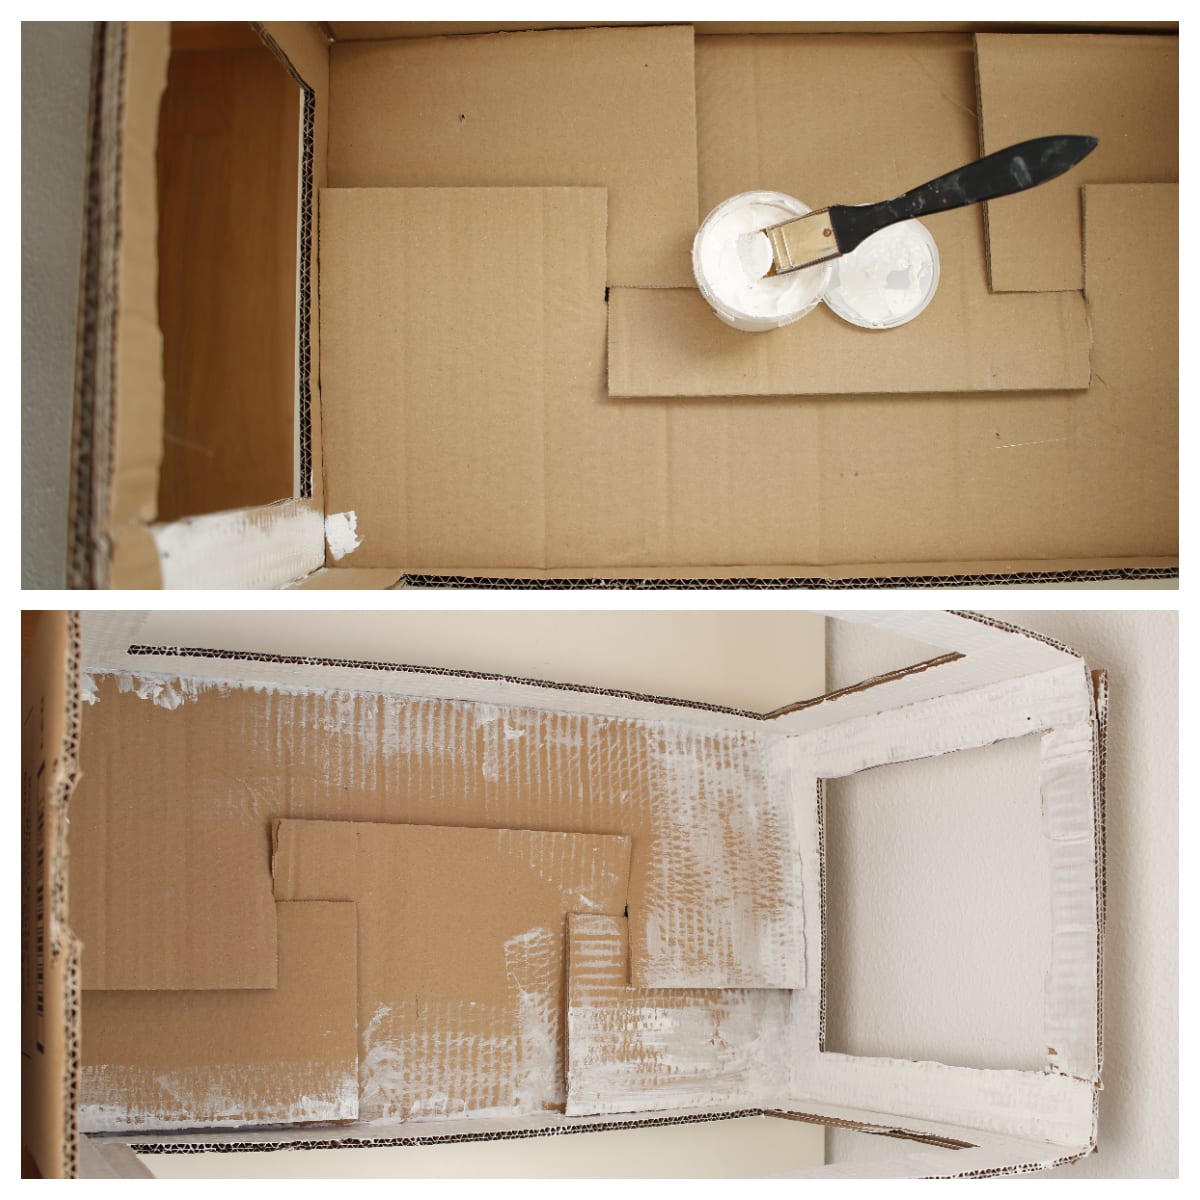
4. PUT THE PAPER
Or the fabric, whatever you chose. You can put it on the outside if it is more comfortable for you, or put it on the inside covering the entire interior, so no cuts will appear in the photos. You can stick it with electrical tape or with normal glue or heat seal. If you use fabric, try to tighten it well. The same if it is a paper with little body, such as tissue paper. When it was time to glue it, I have been pulling on each side to tighten it as much as possible. Then trim the excess edges.


It will look something like this (you can tell that the glue hasn't dried yet, right? ;)):
5. PLACE THE BOTTOM CARDBOARD
Measure the width of the box and cut the cardstock to size. You can stick it with glue or put it with thumbtacks in case you decide to change the background from time to time. As you can see (red arrow) I have not placed it right on the edge, but my box was very high and the cardboard did not reach the edge of the base, so the cut was visible in the photos.
(Note to self-advice: choose the size of the box well ? ).
Let the cardboard fall on its own, do not fold it so that it sticks to the bottom, so the fold will not show in the photos. Better have that curve. I have put a white cardboard, but you can also put one of another color or even a fabric. Everything will depend on the background that interests you the most for your photography.
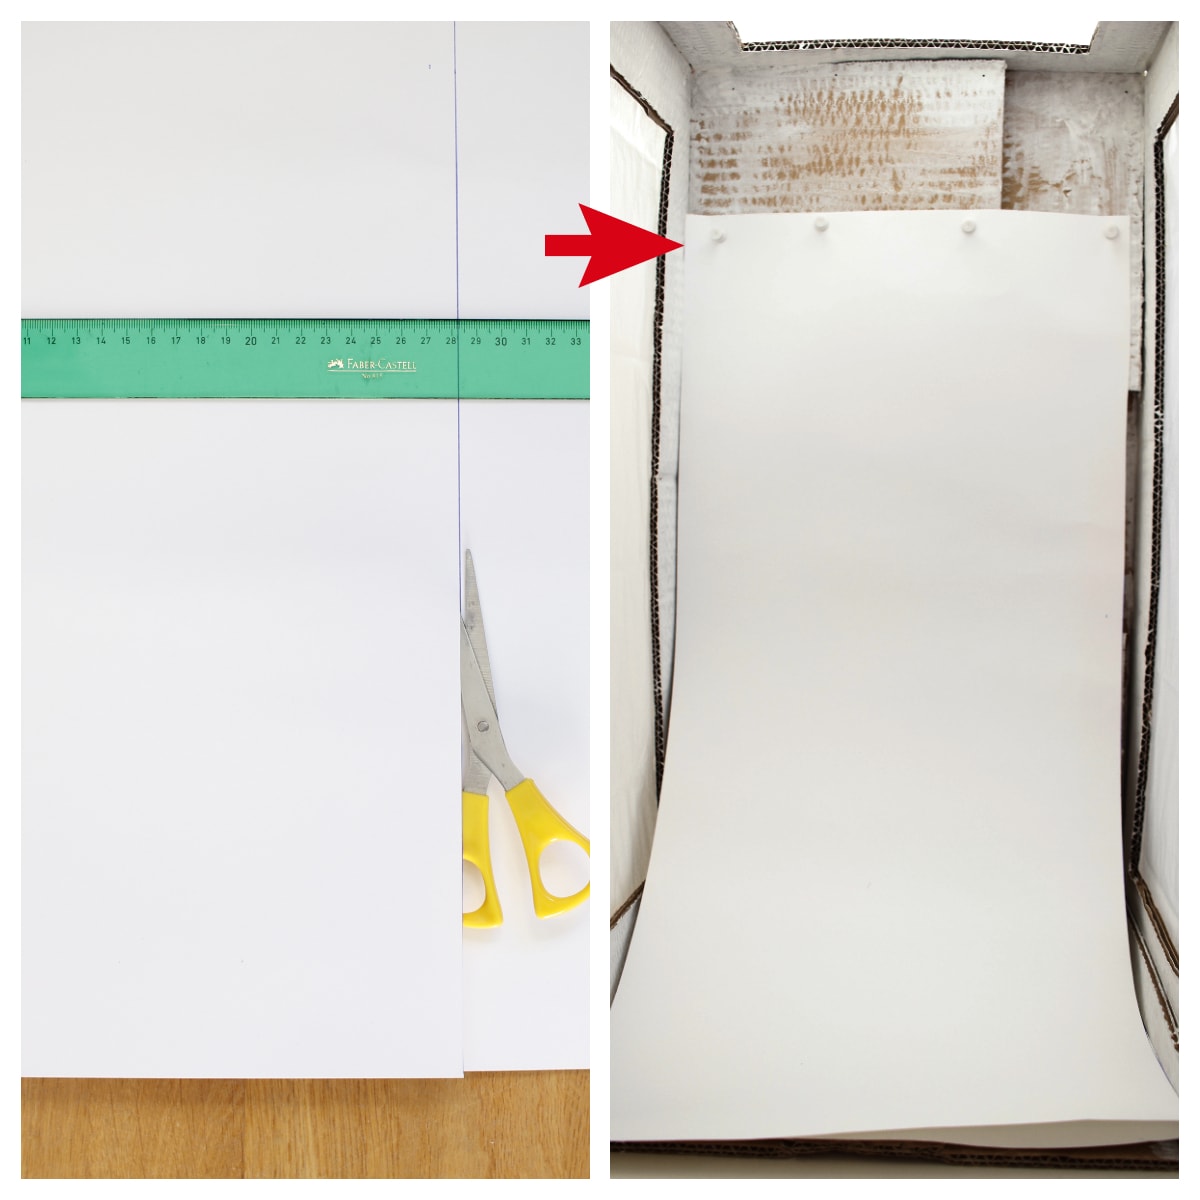
You already have your box ready! Mine has turned out like this, I'm sure it looks better on you, it depends on how good you are at handicrafts or DIY and on the patience or time you dedicate to it.
But in this case, the important thing is not that it's pretty, but that you can get the photos you want, that it's functional, so don't worry about perfection ;).

EXAMPLES OF PHOTOS TAKEN WITH HOMEMADE LIGHT BOX
Here's an example, first without the lightbox, then with the lightbox. This test is performed in natural light, under a window.
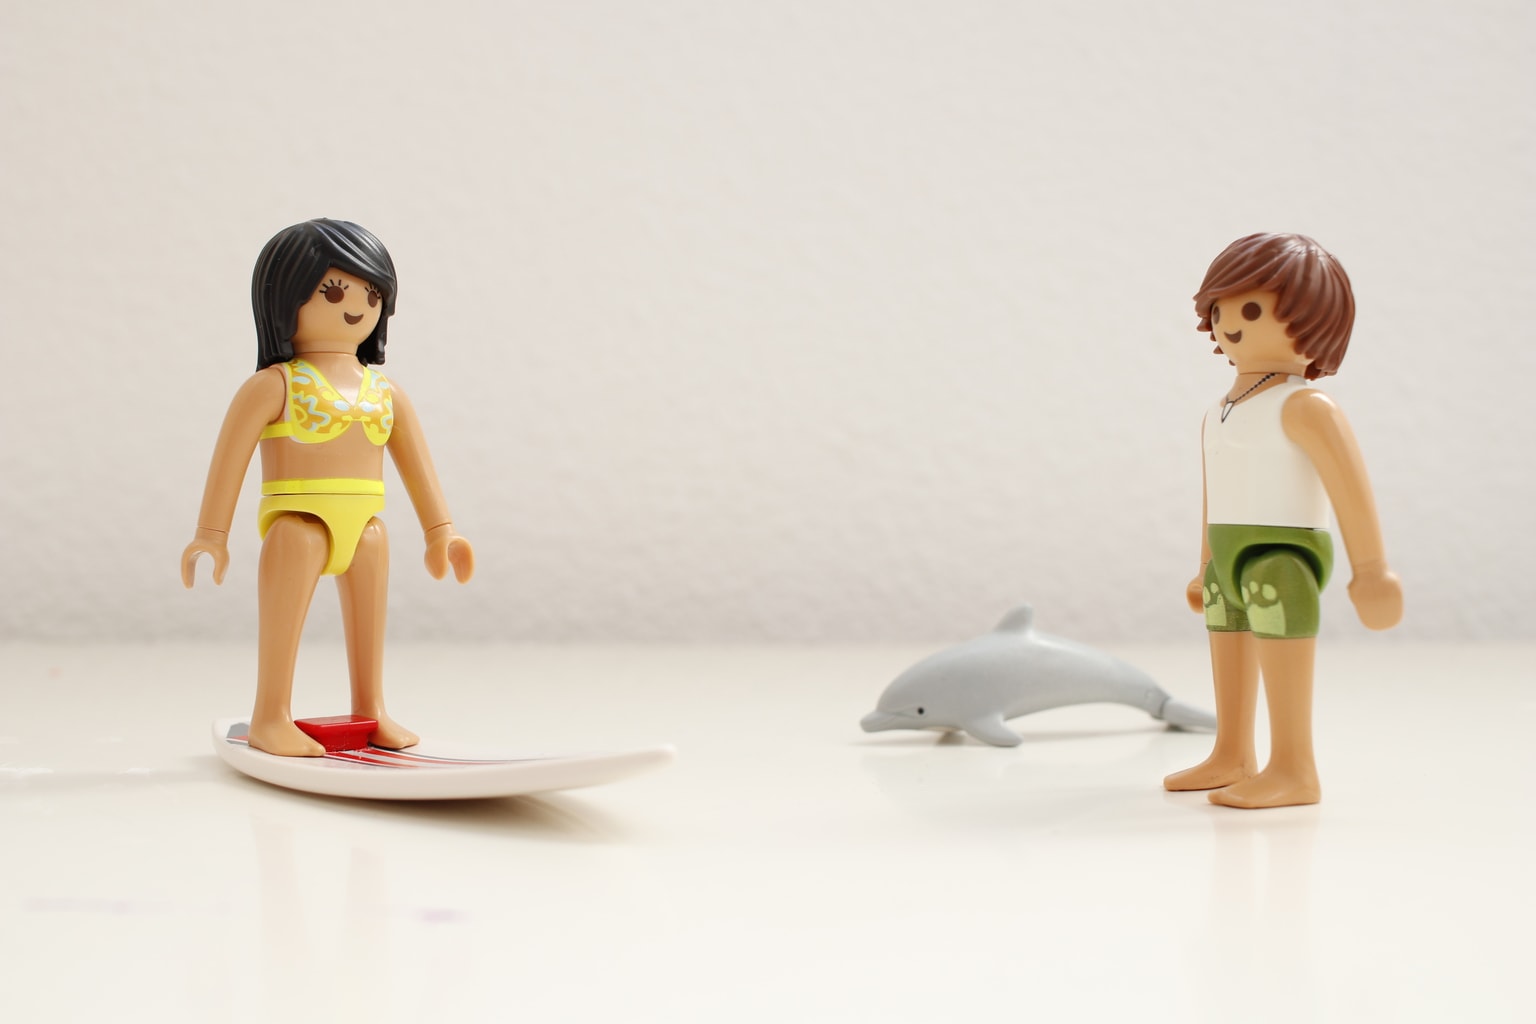
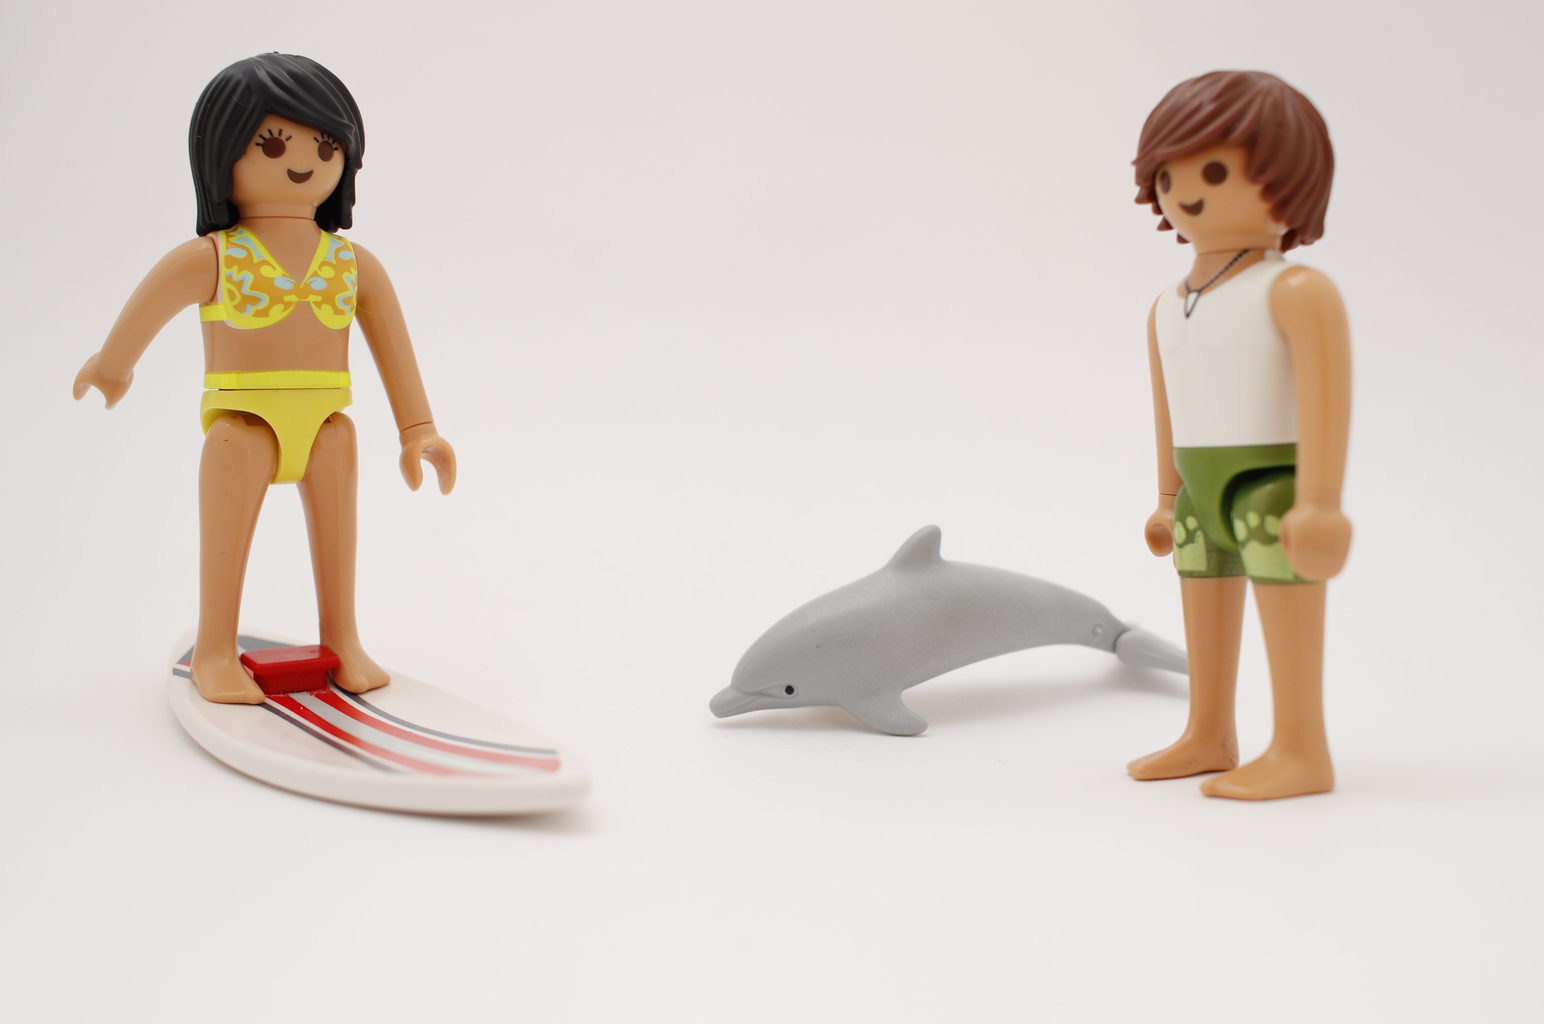
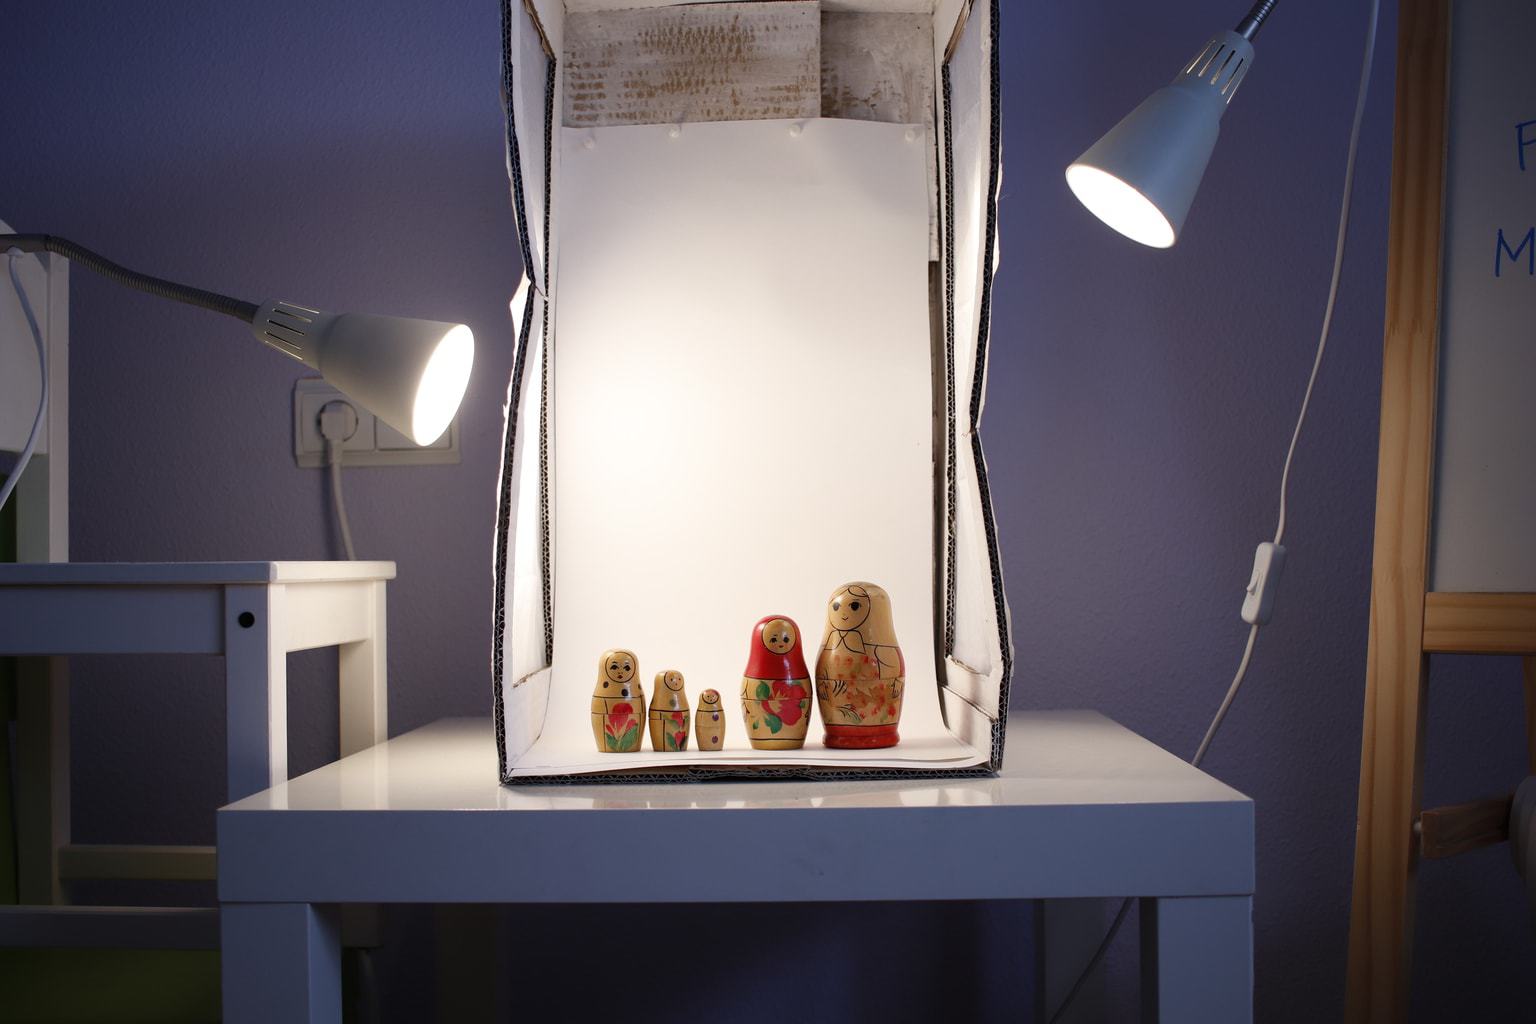
But of course, the softbox isn't just for when you have great natural light, right? When the light is rather dim, place spotlights on each side, as in this example.

BUY LIGHT BOX
How about too much work? Short of time? Crafts not your thing? Well, nothing happens either. If you are interested, you have very affordable light boxes.
For example, this mini that comes with lightincorporated.
Or this other laptop that includes four backgrounds of different colors:

In mini size you also have this other option:

And for larger objects and more professional use, there is this larger one:

YOU DARE?
Now that you've read the article, do you want to have yours? You have already seen that it is very, very easy. And if you decide to buy it, there are also economic options. Your product photos will look like movies and you will be able to practice lighting with any object you have at home in a "mini-studio".

