
![PLANT PHOTOGRAPHY (EVERYTHING YOU EVER WANTED TO KNOW) [UPDATED]](https://photographychef.com/wp-content/uploads/2023/02/PLANT-PHOTOGRAPHY-EVERYTHING-YOU-EVER-WANTED-TO-KNOW-UPDATED.jpg)
The photography of plants and flowers can be really frustrating, you come across a beautiful specimen, worth admiring and displaying, and you capture it with your camera. When you get home and download the image to your computer, you realize that all the beauty has vanished, why?...
This is one of the great frustrations of the photographer, especially in the beginning. But don't worry, in this blog we work to avoid heating your head. In today's article I will tell you the secrets to get the most beautiful and impressive photos of plants. And if what you want is to delve into nature photography, this is our most complete guide, with tips, tricks and lots of inspiration.
- Equipment for photographing plants and flowers
- Where to photograph plants and flowers
- When to photograph plants and flowers
- How to photograph plants and flowers
- Curiosities about plant photography
- Useful Links for Plant Photography
- You and the environment when photographing plants and flowers
1. EQUIPMENT FOR PHOTOGRAPHING PLANTS AND FLOWERS
In addition to a camera preferably with Manual Mode, you will need the following equipment. They are not essential accessories, but they will help you get more impressive and creative photos.
OBJECTIVES FOR PHOTOGRAPHING PLANTS
Ideal lenses for the best plant photos would be a macro, telephoto, and wide angle. (If you have doubts about the types of objectives or what you should take into account when buying one, for example, refer to this mega-guide )
- Telephoto lens: it will help you isolate your specimen from the background, leaving the latter completely blurred and highlighting the plant. See how the background blurs with the TV.
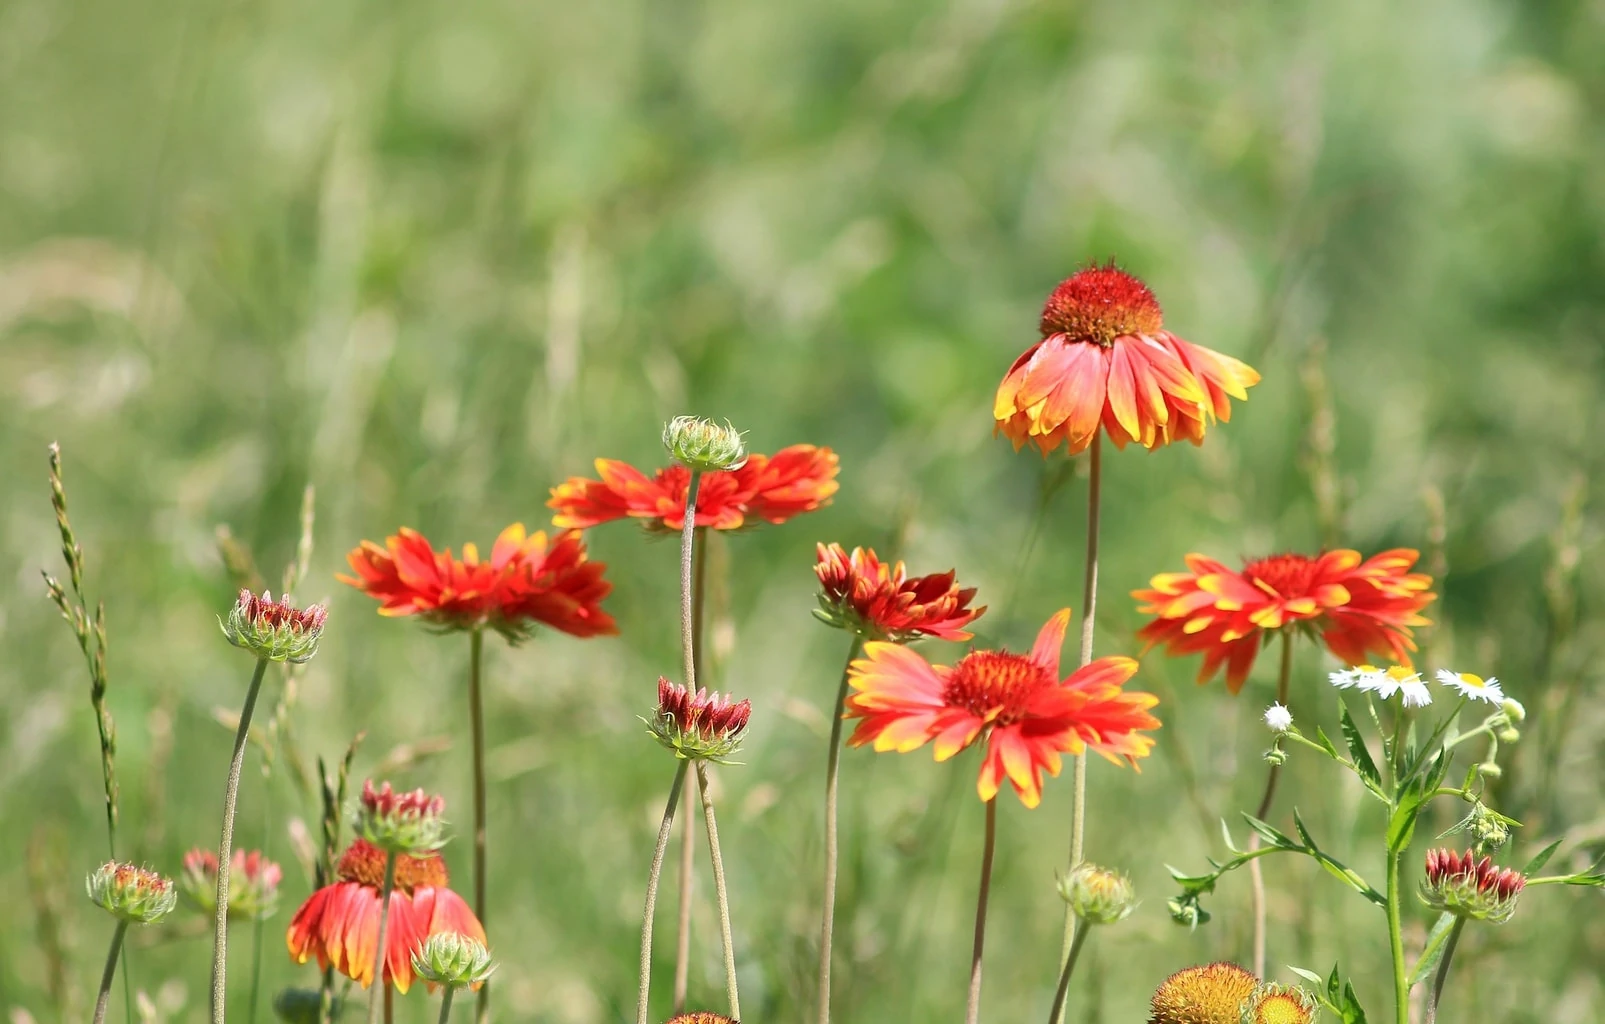
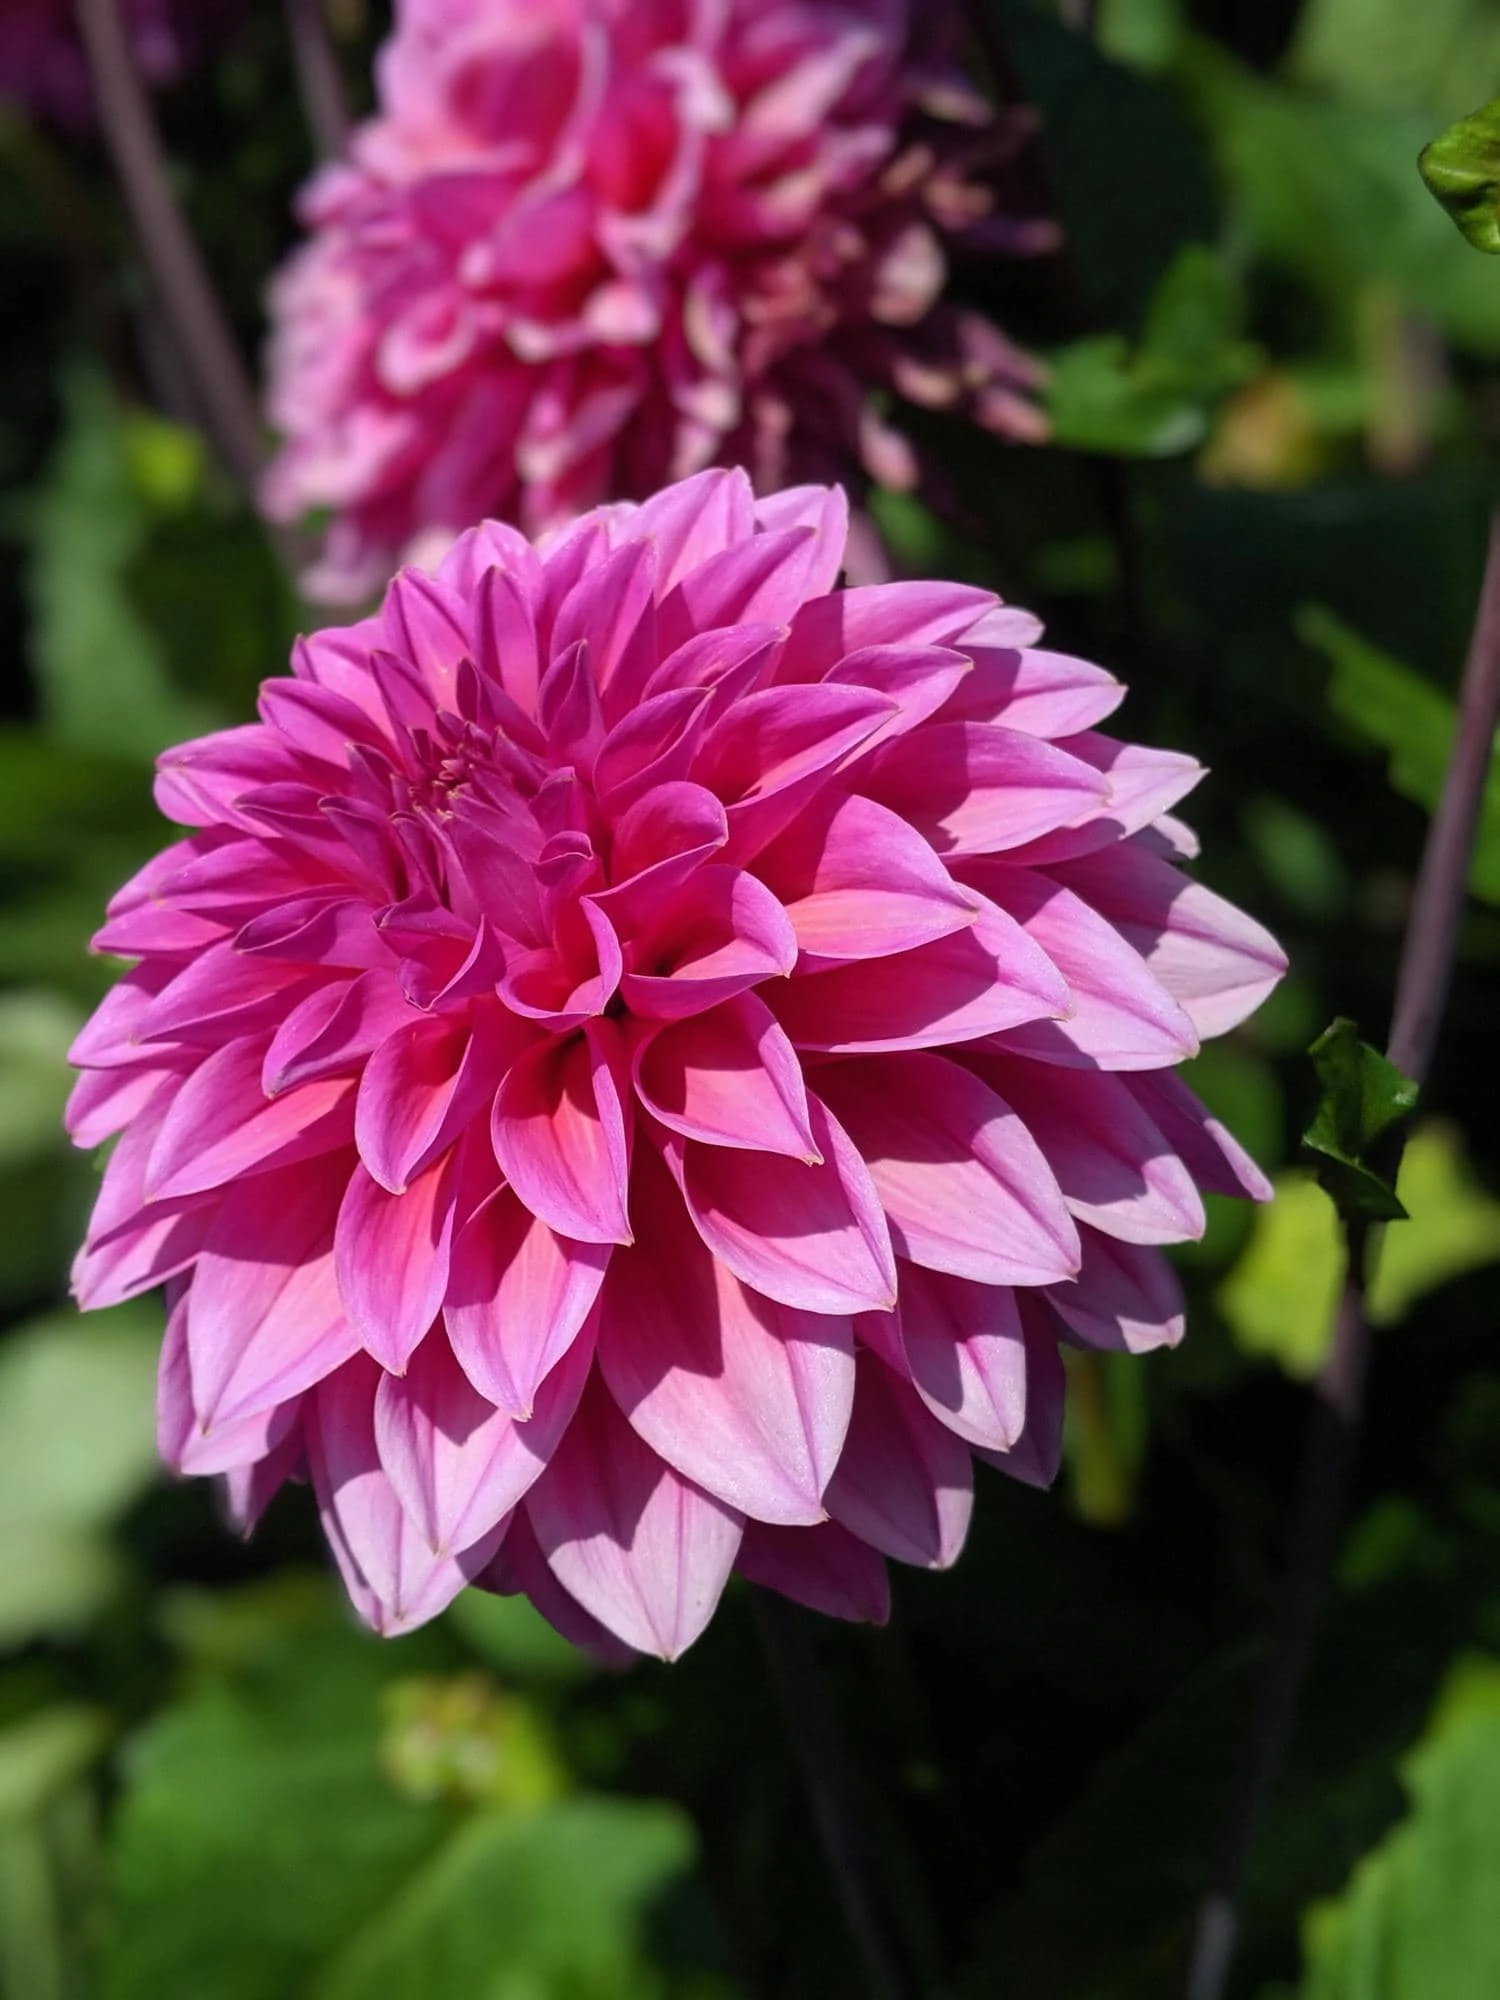
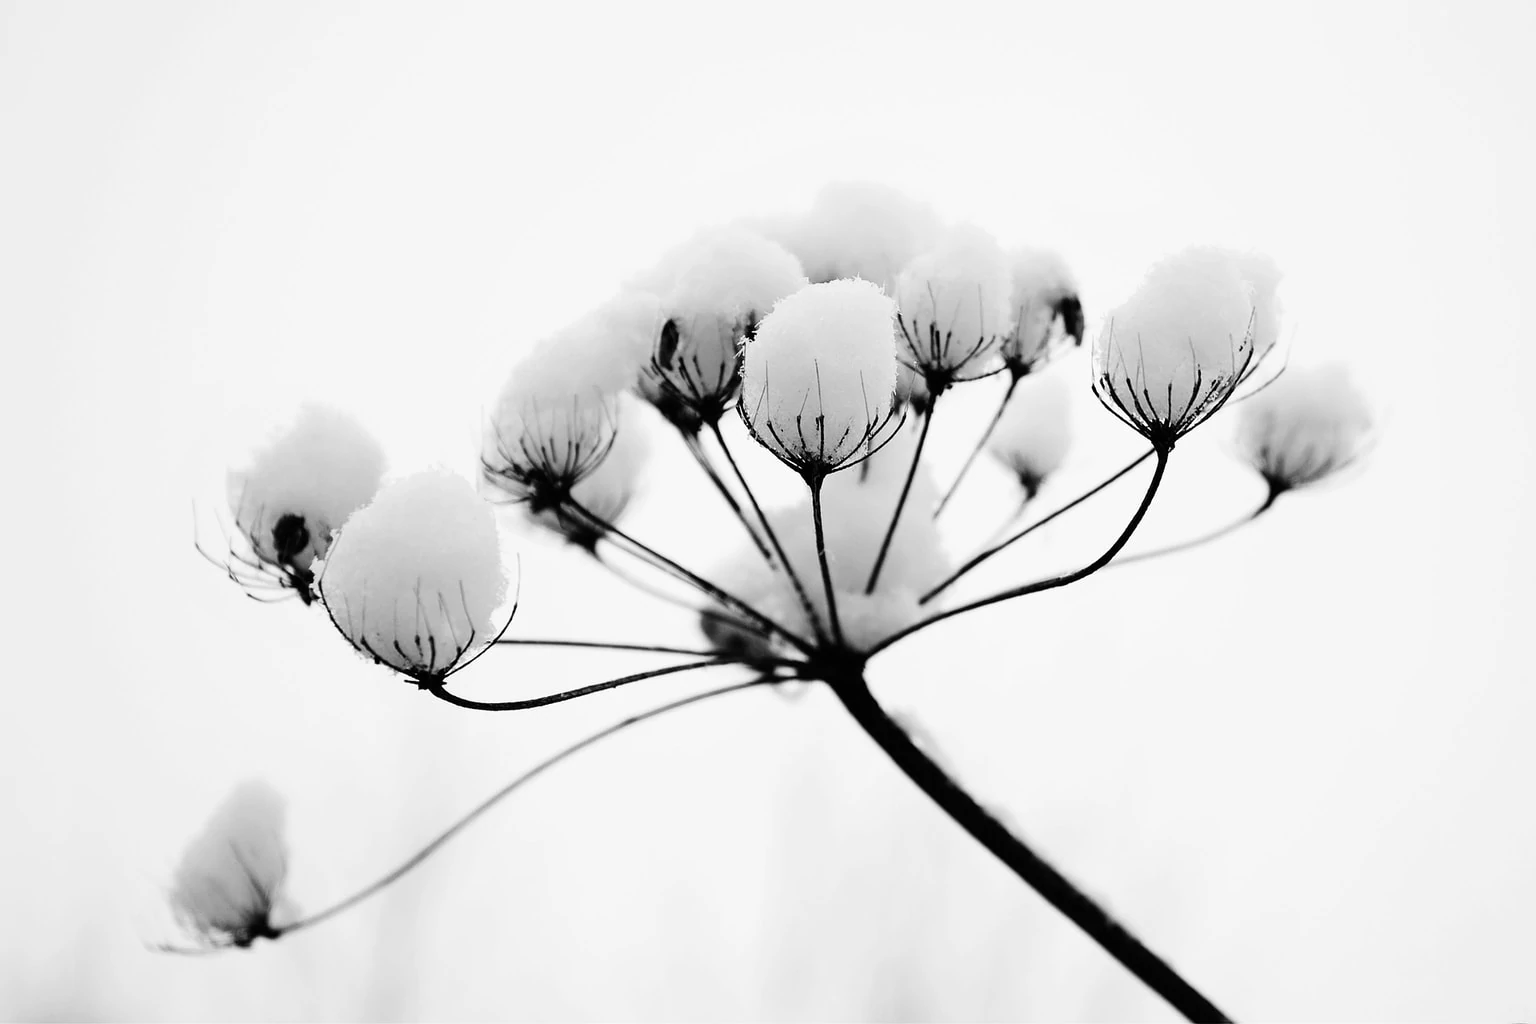
- Macro: A plant is an ideal subject for any Macro lens. Generally, with a normal objective, you will not be able to focus at a distance of less than 50cm (approx.), but thanks to this type of objective, you will be able to focus at really short distances, being able to highlight all the small details of the flower or plant body. With the macro you can capture all its tiny details. Look at the following example. (If you don't have a macro lens and can't invest in one or don't want to, for whatever reason, you'll be interested to know that there are some cheaper alternatives out there. )

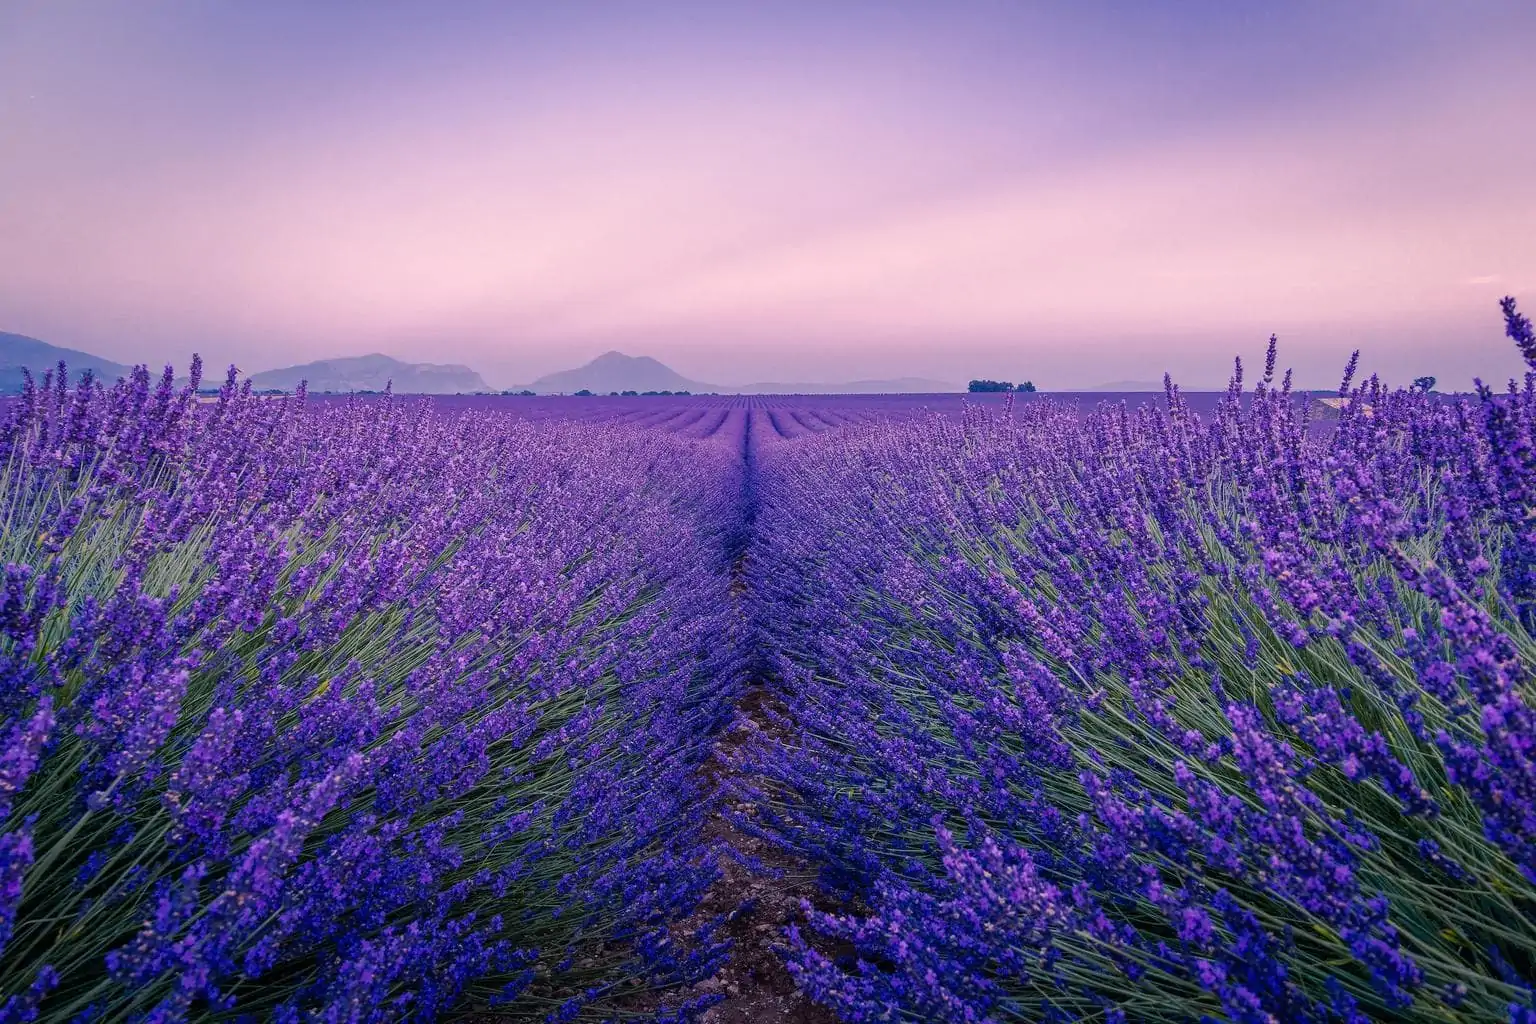
- Wide Angle – When you want to capture a field of flowers, you need a wide angle to capture more of the scene. Around 14-18mm can be a good option.
These are the ones that are considered ideal, but the good news is that they are not the only ones with which you can do plant or flower photography. Here are two examples of flowers photographed with a 24mm and a 50mm.
-
24mm -
50mm
Don't let the goal stop you. If you can't choose, take photos with the one you have. It can determine what kind of photos you take, but it should never limit you when it comes to going out and taking photos of what you like.
TRIPOD
One of the main problems that arise when taking photos of plants is jitter (or what is the same, that the image comes out shaky). To avoid this effect, it is best to use a tripod (if you are thinking of buying one, I recommend that you read this guide with purchase advice and recommendations ).
The ideal for these cases is one that has easy articulation and that can be adjusted at a low level, at the same level as the plant.
A trick , for very short or small plants you can rest your camera on a bag or sack filled with rice or similar. (Take a look at this DIY photography article , in it you will discover how to make a homemade tripod and other accessories).
And if, in addition, you shoot with the timer or with a remote release, you will avoid any movement, no matter how small, produced when you press the button. You can also use, failing that, remote shooting through the mobile application.
FLASH
It will be of great help when there is not enough light or to fill in the shadows when the opposite occurs, when the light is very intense. The internal flash does not usually give very good results, if you have no choice but to use it, I recommend that you diffuse its light by wrapping it with a white tissue paper, for example.
If you have the option of using an external flash, so much the better. In macro photography, the most used is the ring. But this is already if you like macro and/or plant photography so much that you don't mind investing in something very specific.
REFLECTORS
They serve to fill in the shadows and make the light reach where it does not arrive naturally. You can use the typical reflectors or get hold of aluminum foil, the inside of a tetrabrick or white cardboard, to give a few examples; Any object that reflects light will do.
CARDBOARD
The background is very important, we will talk about it later, but take note because a cardboard, white, black or a color that harmonizes or contrasts with that of your plant, can get you out of more than one trouble.
WHERE TO DO PHOTOGRAPHY OF PLANTS AND FLOWERS
If you want to find exotic specimens like these, you will have to travel to New Zealand or Canada.
-
US and Canadian Eastern Trumpets -
New Zealand giant fern
However, you don't have to travel that far to get photos of exotic or native plants. Is there a Botanical Garden in your city or country? In places like this you will find an immense variety of plants without having to travel or look through the countryside for rare or showy specimens.
You can also use a nursery, a florist or a university faculty with botany subjects that have gardens for your study. This carnivorous plant was photographed in a Botanical Garden.

WHEN TO PHOTOGRAPH PLANTS AND FLOWERS
By now you know how important light is in photography, and in this sense, you should also know that a very sunny and cloudless day is not exactly the best time to capture images of plants.
Because? Because this type of light causes a lot of shadows and brightness that cause details of what we want to photograph to be lost. Contrary to what you might imagine, for this issue and what plants are normally expected to convey, a cloudy day is much more appropriate when the light is much softer and will be distributed much more evenly. If you want to know what I mean by hard light and soft light, take a look at this graph and the following images:
And it is that one light and another transmit very different sensations. Look at the two images below and think about what each of them transmits to you.
By their nature, never better said ? , plants and flowers look better with a soft light that helps transmit that peace and calm that plants usually provide.
This does not mean that you cannot achieve great results with a hard light, everything will depend on the drama that you want to print to your image or what you want to convey.
Other moments that are not at all advisable are windy days, as it is one of the biggest enemies of this type of photography. Any movement caused by the air will spoil your photo. If necessary, to combat it you can use a mat or cardboard to protect your plant from the wind. Another trick is to shoot in bursts and then discard the shots that don't work for you. This is useful if the wind is not very strong and constant, of course.
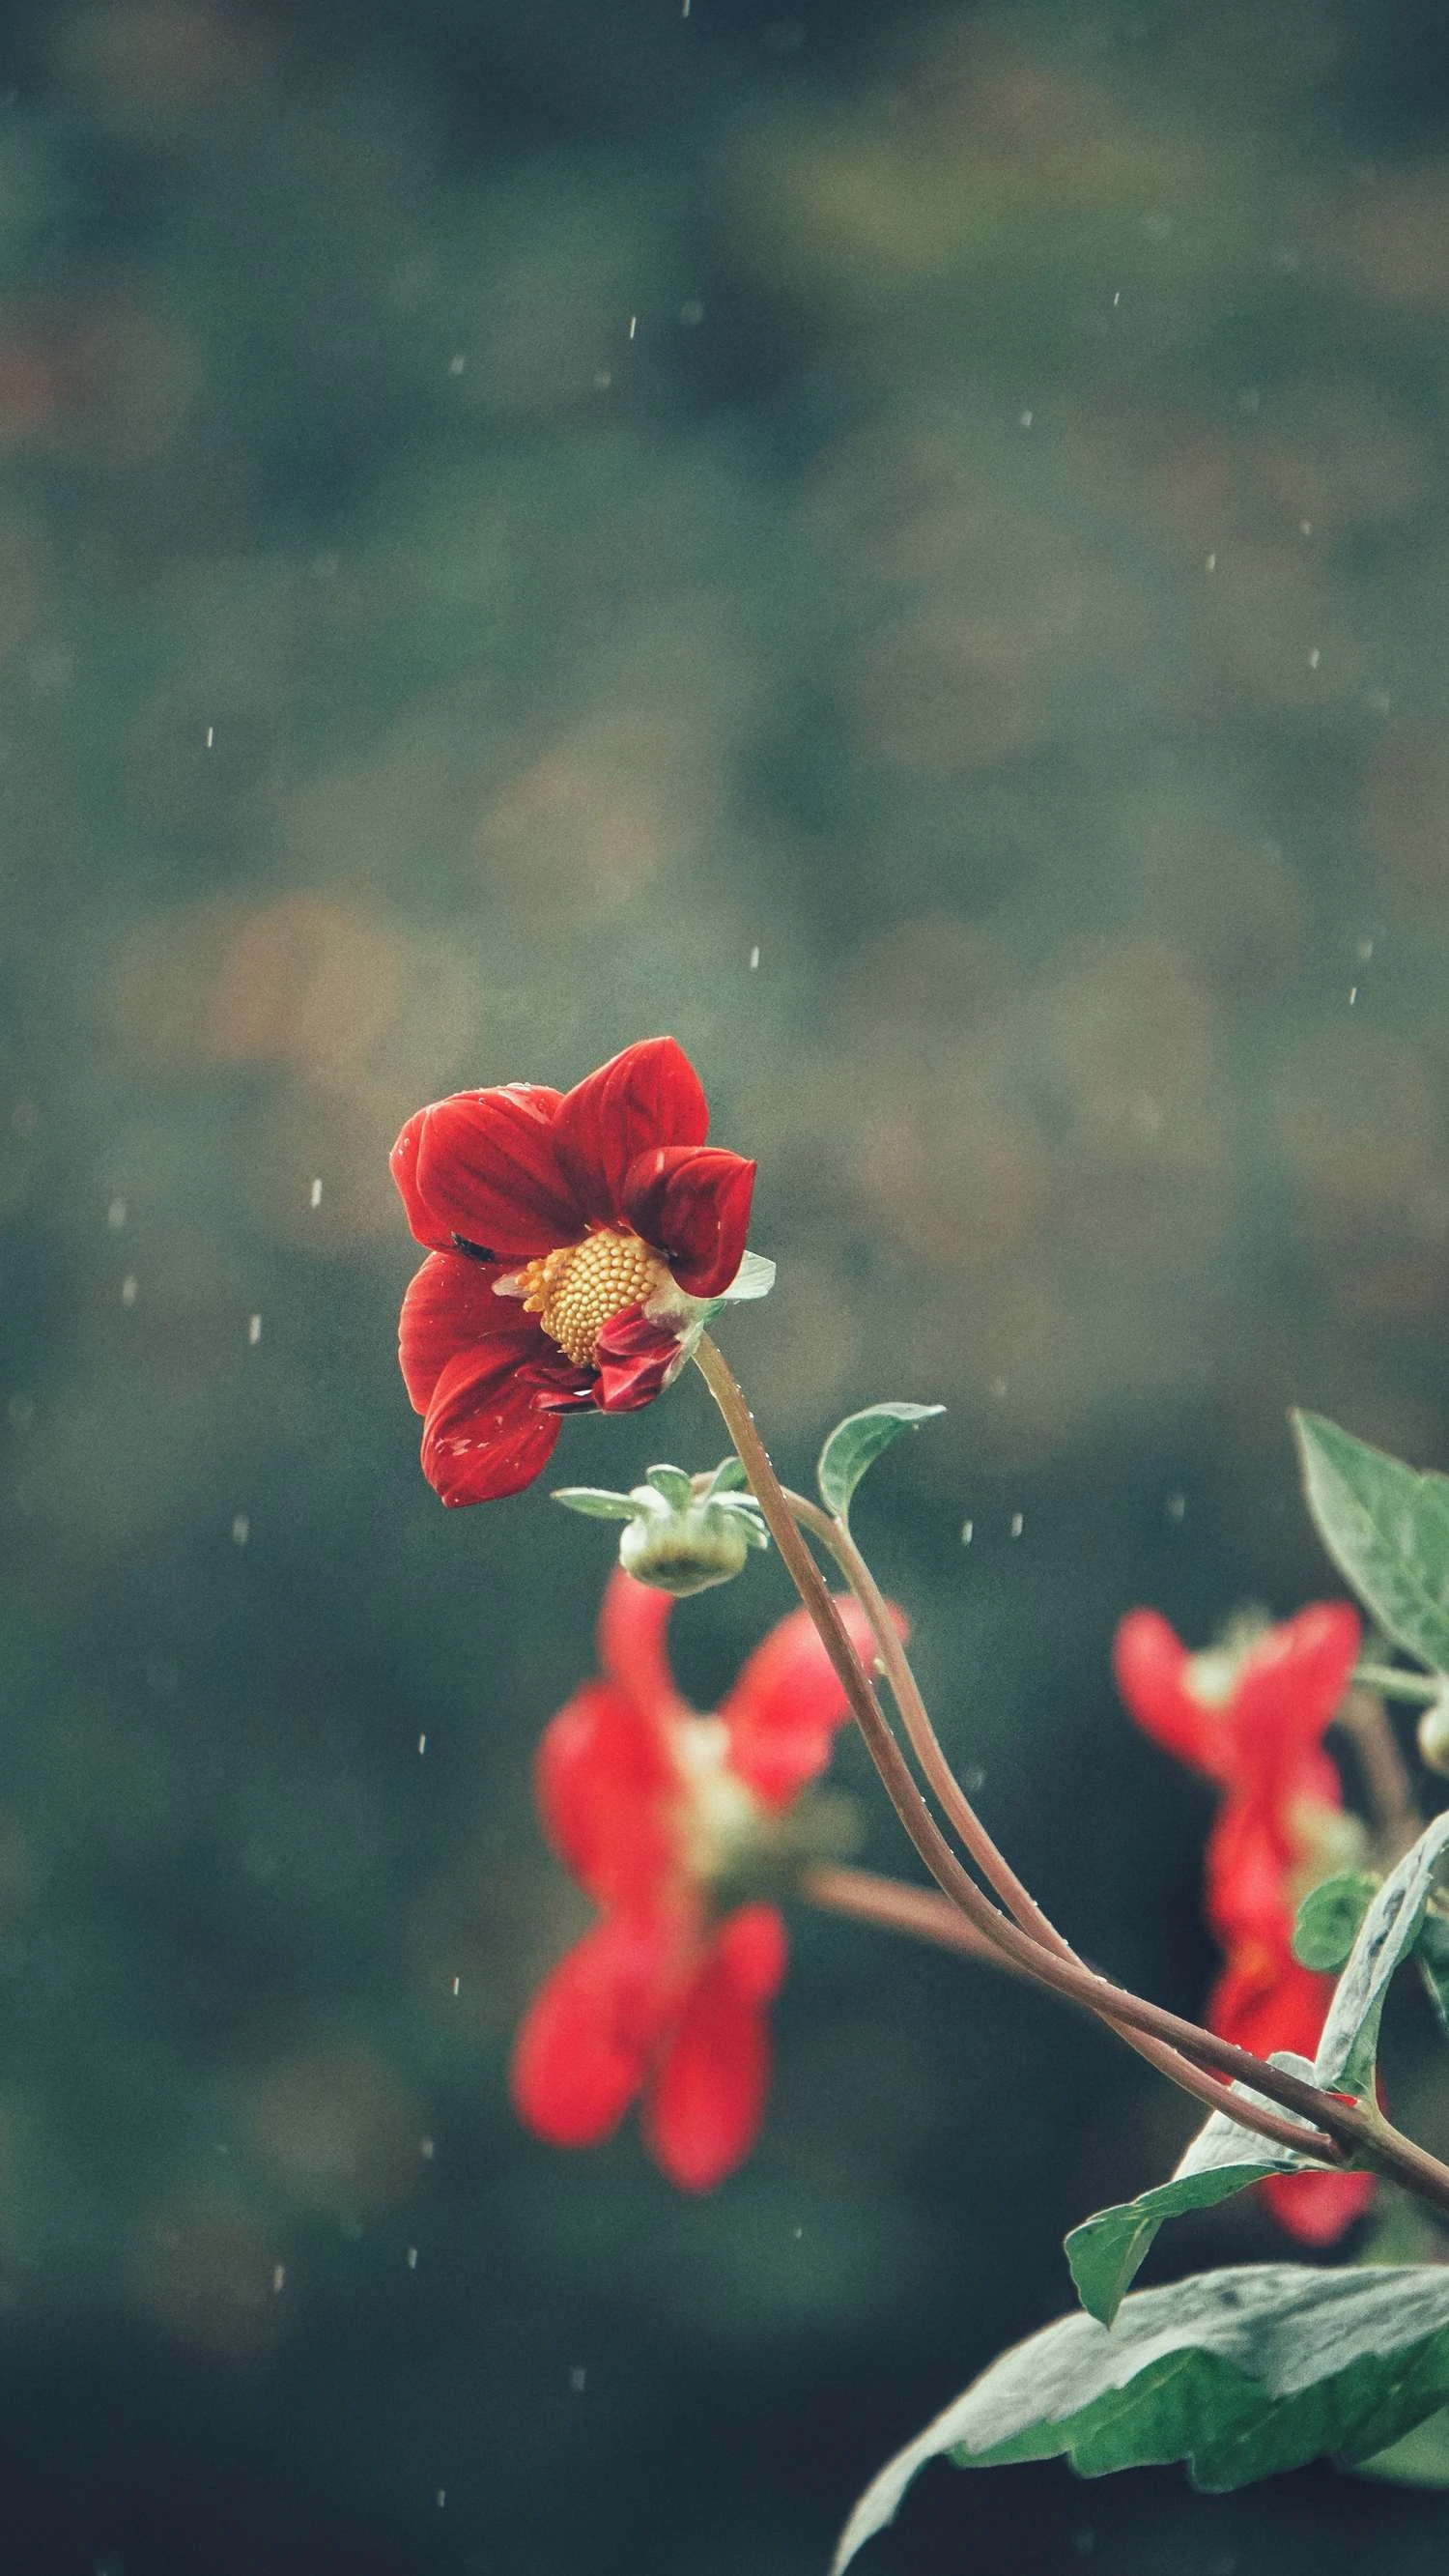
And, even if you have your doubts, rainy days can be a good opportunity. If you don't believe me, read this article with tips for photographing in the rain to convince yourself or look at the following photograph.
THE BEST TIMES TO PHOTOGRAPH PLANTS
In summary, the best moments to take photography of plants and flowers are:
- At dawn: it is one of the perfect moments for several reasons. First, it is not windy, your biggest enemy when it comes to photographing plants. Second, the light is perfect, you will get soft lighting without the need to fill in the annoying shadows that you would get in the central hours of the day. Third, it is very likely that you can take advantage of the dew drops that give flowers a special shine.
- A cloudy day: throughout the day you can shoot without worrying that the light will be too harsh and create those annoying shadows that we mentioned before.
- After it has rained: you will not have to get up early to find dew on the flowers and you may find yourself with a gift from heaven called a rainbow .
- At sunset on a sunny day: if you take the photos at sunset you will get wonderful backlights where the silhouette of the plant stands out, the transparency of the petals of a flower or you will achieve golden reflections on the edges of the plants, achieving a beautiful effect.
HOW TO TAKE PHOTOGRAPHY OF PLANTS AND FLOWERS
Next, we are going to dive into how to photograph plants, through the recommended settings, composition and some very simple but effective tricks.
SETTINGS FOR PLANT AND FLOWER PHOTOGRAPHY
Although each circumstance and each type of photo requires certain parameters, and there is no secret formula, these are the settings that we recommend you start with when photographing plants and flowers:
- Shooting mode. Photography in Manual Mode or in Aperture Priority Mode.
- Opening. Use a large aperture if you want to blur the background, or a shallow depth of field . If you're looking to shoot a field of flowers or multiple plants that look sharp, you'll need to use a higher f/-number. If you are still not very clear about all this, do not miss this video:
- Shutter speed. If it is windy, you will have to resort to high speeds. If you get into creative mode, you can shoot slow speeds to photograph movement. The trick to getting sharp photos is to always use the 1/focal length formula. That is, with a 200mm focal length, the ideal is to photograph at least 1/200s.
- ISO. Shoot with a low ISO value for better sharpness. If you need more light, better modify speed and aperture. If you don't mind noise for the type of image you want, don't be afraid to bump up the ISO.
- RAW format. To get the best out of your capture, definitely shoot in RAW. If you are going to go beyond editing, then better in JPEG.
- If you're using an SLR and have the option, block the mirror so that when you get up it doesn't cause shake.
- Stabilizer. When you do not use a tripod, it is recommended that you activate it. Now, with the tripod, better deactivate it or it will reduce your sharpness.
- Light measurement. With homogeneous lights you can use an evaluative or center-weighted metering. In the event that you photograph with high light contrast looking for dramatic or high contrast images, better spot metering.
- Approach. Simple focus and focus priority. If you have trouble focusing automatically, try manual instead.
COMPOSITION IN PLANT PHOTOGRAPHY
Look for an attractive composition . Use all the compositional resources at your disposal to highlight your plants and flowers. The good thing in these cases is that the plants, if not for the wind, don't move (and in this case they won't go very far either ? ). Which means you can take as long as you want to study the composition because the scene is not going to change. These are some of these resources that you can use.
- Rule of thirds. Place the center of interest on one of the strong points of the image following the rule of thirds.
- Negative space. Make your copy stand out more by leaving a lot of space without information around it.
- Natural framing. Use natural frames so that your plant is the absolute protagonist and directs the gaze.
- Selective focus. With a wide opening, it focuses the gaze on a point in the image.
- Perspective. Shoot from various angles for different results. Look for an attractive angle, that surprises.
- Horizontal or vertical framing? The perspective of the human eye is horizontal, so photos taken horizontally will appear very "natural" and pleasing to the eye, especially when it comes to fields of flowers. But on certain occasions we may be interested in photographing a plant or a flower vertically, since it gives it much more prominence, makes it seem much more important and unique. In addition, vertical framing is associated with growth and dynamism.
- Isolate the plant or the flower? You have two options, capture its surroundings, for example an insect or a beautiful butterfly that is putting on its boots or isolate the flower. Sometimes we forget about these beings that can give a lot of life to plant photography. And if you choose to isolate the plant, focus on the details, on the texture, the petals, the colors; Highlight what you like.
- Background. It is essential that when taking photos of flowers you avoid distractions from the background. This should be as diffuse and uniform as possible, otherwise you will detract from your image. If you can't get rid of the distractions, you can use black, white, or colored construction paper. The first one will help you create a more dramatic effect, with the white one you will get poster images. Think about what you want to transmit and play with the cards and the color in the composition . You can also use the sky as the background if it is blue with attractive clouds, just change the perspective and shoot “ant-eye view”. Forget to include it if it is a gray day because it will make it less attractive, unless you have a specific intention.


You may be wondering, how do I avoid these distractions? Here are some effective methods:
- Put away distractions if they are easy to eliminate (an empty bag of pipes, a chair, a ball, shoes, etc.).
- If you can't get the unwanted element out of the way, change the shooting angle, this will cause the background behind the flower to change.
- Play around with the lens focal length (zoom) until you find a position where there are no more distractions.
- Move the flower by hand, a little, and very carefully.
- Blurs the background by reducing the Depth of Field.
TRICKS TO TAKE PHOTOGRAPHY OF PLANTS AND FLOWERS
- Choose the appropriate time based on the result you hope to obtain. If you can't choose the schedule and you have to photograph some plants in harsh light, you can use the fill flash, reflectors and diffusers or photograph the plants you find in the shade. Practice shooting at different times of the day to compare the results.
- Follow these tips to get very black backgrounds or very white backgrounds .
-
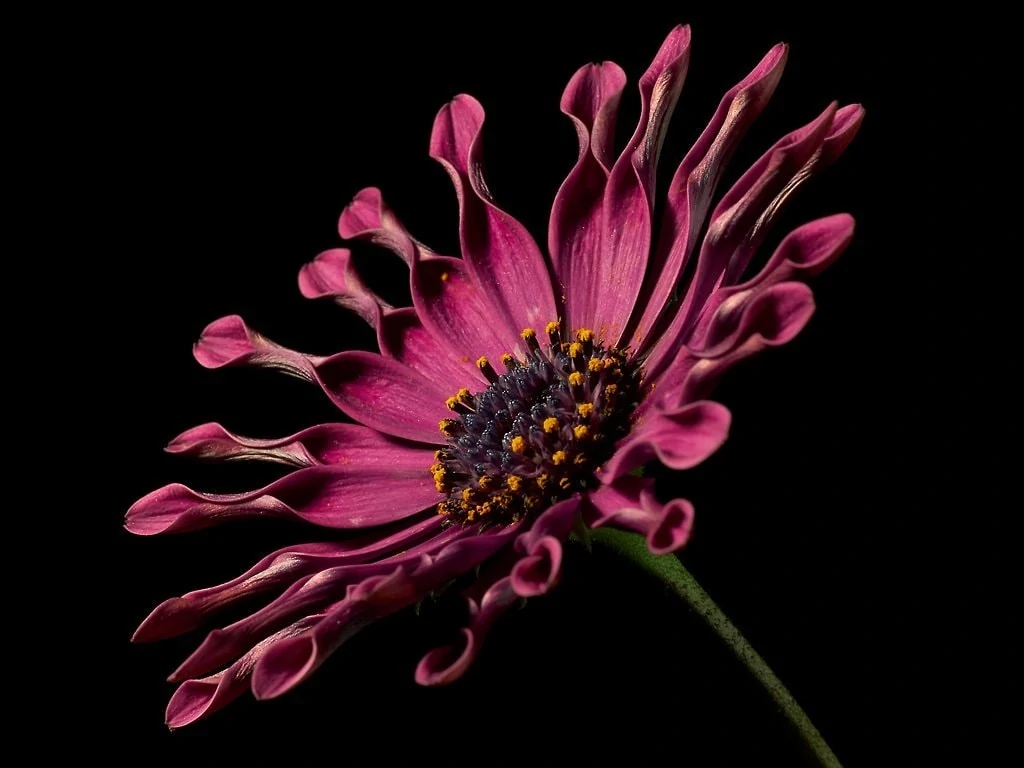
Black background -
White background
- Always carry a notebook and a pen to take notes, the names of the plants, where you found them, etc.
- Take advantage of the dawn dew or raindrops. If you have run out of rain or dew, don't worry, there is an easy solution, use a sprayer with water and spray your specimen ? (never spray on insects that are in or around it).
- Dare to experiment with black and white. A beautiful plant or flower photograph does not necessarily have to be in color, you can get a really beautiful image in black and white.
- Hold the camera well. If you're not using a tripod, make sure you hold the camera correctly and firmly to prevent camera shake.
- Bokeh. Get beautiful bokeh by placing a very shiny object (with glitter, sequins, etc.) behind your plant and using a large aperture.
- Be very patient and run away from the rush. In photography in general and in this one in particular, it is best to go slowly. Take your time, analyze the light, the location, the flower, the different angles, the background, and when you are clear about what you want, start shooting without fear. Practice a lot, change the objectives and try as many angles as you can. Do not despair at the first change. It might be a little frustrating at first, but if you keep practicing and get the hang of it, you'll feel great satisfaction!
- Look for the best specimens, sometimes there are more damaged flowers, either by human action or by the action of nature, find the "most beautiful in the place."
- At home. To photograph your plants or flowers at home, all the tips that I have been giving you are useful, but also write down these:
- Move the plant or flower closer to the window.
- If the light is direct, place a white tissue paper on the glass or a curtain to diffuse the light.
- Move the plant away from the wall if it is gotelé. Or use funds to your liking.
- With the mobile. In this mega-guide you will find all the tips and tricks for photographing with your mobile phone , however, I will leave you with the most basic:
- Find a place with good light.
- Don't use the zoom.
- Shoot with the native camera, without filters.
- Always use the rear camera, not the front for selfies.
CURIOSITIES ABOUT PLANT PHOTOGRAPHY
Did you know that the first illustrated book in history was a book of plants based on the herbariums of the botanist and photographer Anna Atkins??
There is a photographer who has dedicated himself to photographing what he considers the aura of plants. His name is Robert Buelteman.
Karl Blossfeldt (1865-1932)He was a German photographer who dedicated his life to photographing plants and flowers with results of enormous beauty. In fact, very recently his images have been used in an advertising campaign for a well-known cosmetics and perfume firm.
USEFUL LINKS FOR PLANT PHOTOGRAPHY
- Royal Botanical Garden of Madrid
- website about botany: with a lot of information on plants, plant families, photos, a forum... and above all with a very complete glossary of plants.
- Hiker's Guide:In case you set out on the roads in search of your specimens, some extra tips.
- Flowers and plants:digital magazine about flowers and plants.
- green guide:guide to flowers and plants
YOU AND THE ENVIRONMENT WHEN PHOTOGRAPHING PLANTS AND FLOWERS
Finally, I beg you to be respectful of plants. They are the "heritage" of planet Earth, they are living beings that we must care for and pamper. Retract them, but do not damage them, neither to them nor to their environment.
I will never get tired of repeating that if you don't practice you don't learn. Words are carried away by the wind, erased by memory or lost in virtual space, but practice is what solidifies knowledge, what makes you learn. Find your camera and put into practice what you have read here.
Mario's Extra Tip!!!: Don't go on a photo tour with your partner, don't go with your cousin, don't go with your mother, don't go with your grandfather, don't go with your closest friend. go alone. ? Don't laugh, he's serious. Spending some time taking flower photography and going out with a friend or acquaintance are not compatible. Your companion will get bored, tired, tired of waiting so long for you. You, on the other hand, will be in a hurry, you will shoot 2 or 3 photos quickly and in any way and you will continue on your way so that your loved ones do not despair.
