
Product photography plays a very important role in the world of advertising, understand advertising as the way to publicize a product and generate in the viewer the desire to buy it.
When we talk about product photography, we can include any product: food, jewelry , drinks, clothing, accessories, medicines, etc.
Today I am going to give you all the keys to get a perfect product photography, be it for your own website, for your social networks, for a friend or for a client.
Keep this mega guide well because I am going to try to make it very exhaustive and I am sure that at some point it will be useful again. And if you want to explore other photographic genres, don't miss this other guide . With that said, let's get started .
WHAT IS PRODUCT PHOTOGRAPHY?
Product photography is the visual representation, with a camera, of an object in the most attractive and favorable way possible, generally for commercial purposes. What product photography pursues is to publicize a product with the ultimate goal of selling or marketing it.
PRODUCT PHOTOGRAPHY OBJECTIVES
These are the main objectives pursued by product photography:
- Arouse the viewer's interest in a product.
- Make the viewer feel that they know the product without having to see it.
- Represent an object in an attractive as well as reliable way.
- Make him buy it.
Keep in mind that the more quality the image has, the more chances the product has to be sold.
PRODUCT AND ADVERTISING PHOTOGRAPHY
Product photography is oriented, as I have already mentioned, to create an attractive and reliable image of a product with the ultimate goal of being sold. It is an important part of advertising photography and on many occasions one cannot be understood without the other.
Advertising photography, however, covers a broader field in which an image of the product itself does not necessarily have to appear. So in that sense, in general product photography is advertising, but advertising does not always have to be the photography of a product.
Now that we have it more defined, let's go with the team that I recommend.
RECOMMENDED CAMERA FOR PRODUCT PHOTOGRAPHY
The best camera to get into product photography should have the following characteristics:
- With the possibility of working in RAW format.
- Manual mode.
- With option to exchange objectives.
- Have a good size sensor.
- Live View mode.
Don't know what is best for you? This is my personalized camera recommendation for you. And if you want to know more about various models, here is the BdF camera encyclopedia with all the digital cameras you can find on the market.
WHAT IS THE BEST LENS FOR PRODUCT PHOTOGRAPHY?
The best lens or objective to photograph products is, from my point of view, a fixed lens that is as bright as possible. For many reasons.
ADVANTAGES OF A FIXED LENS FOR PHOTOGRAPHING PRODUCTS
- They are usually very bright.
- They are much cheaper than zooms with a similar brightness.
- They are well built and are more resistant (they have fewer elements than the zoom).
For product photography I recommend focal lengths from 50mm to 100mm, for example:
- The King of Objectives : the 50mm f/1.4.
- Or, failing that, the Prince : 50mm f/1.8.
- A 100mm f/2.8 macro lens.
ADVANTAGES OF A ZOOM LENS FOR PHOTOGRAPHING PRODUCTS
- They are more versatile.
- You cover more focal lengths by investing in a single lens.
- If you have the budget to invest in a bright zoom, they can be a good option for product photography.
- You usually buy your camera with a kit lens so, once you have it, try to take advantage of yours in the best possible way .
To choose a lens, look at aspects such as brightness, diaphragm blades, minimum focusing speed and, of course, your budget. Within this guide you will find all the tips to choose the best lens for your camera (and get it right) .

RECOMMENDED ACCESSORIES
The best accessories for product photography are mainly:
- A light box: very effective, simple and economical. It will work great for small objects with simple compositions. You can even make your own light box by following these steps.
- A white background: without a doubt, the white background is one of the most used in product photography.
- A black background: another very recurring and necessary background to have among your accessories.
- A tripod: it must be robust, with few sections in the legs and with an interchangeable head. Check out the complete guide to buying a tripod if you're interested in getting one.
- A handheld light meter : This is the most accurate way to control the exposure of an image.
- At least one continuous light source.
- An external flash .
- A couple of windows for light.
- A letter of gray .
- Polarizing filter to avoid unwanted reflections.
- an acrylic tableto generate creative reflections.
- A remote shutter release.
- Tables, wood and other supports on which to place your products.
- A portable photo studioIt can be very useful if you have already decided that this type of photography is your thing.
Now, these are the recommended accessories, my advice is to go for it even if you don't have anywhere near the material that I recommend. That is the ideal, but you can get many of these accessories at home by investing very little money. That later you discover that this is the passion of your life, because you will scratch your pocket ? .
HOW TO ILLUMINATE A PRODUCT PHOTOGRAPHY?
Lighting is one of the most important aspects of product photography, and to which you should dedicate more time and learning. Learn to create volume, to avoid reflections, to get a good exposure or to create a reaction in the viewer simply by shaping the light.
The first thing you should ask yourself is what result you want to obtain. An image with a lot of contrast? Soft and warm? Flat or deep? What do you want to convey with it? What should your product talk about? Represent it mentally and write down the results you want to obtain. Then use everything in your power to get it.
Let's see the main characteristics of lighting to be able to apply them to product photography.
- Natural light is still a type of lighting to take into account when photographing a product. If you have an environment with good lighting, take advantage of it, this light is very photogenic and does not require investing in too many accessories. The drawback is that it changes from time to time, so you must learn to know it well and be quite fast.
- Artificial lighting allows us to control the light whatever the time of day, which makes it easier, therefore, to dedicate all the time we consider necessary to photos.
- Keep in mind that one does not exclude the other, they are perfectly complementary and one can make up for the other's deficiencies.
- With both types, you need to consider the quality of the light: it can be soft (large light source relative to the subject) or hard (small light source relative to the subject).
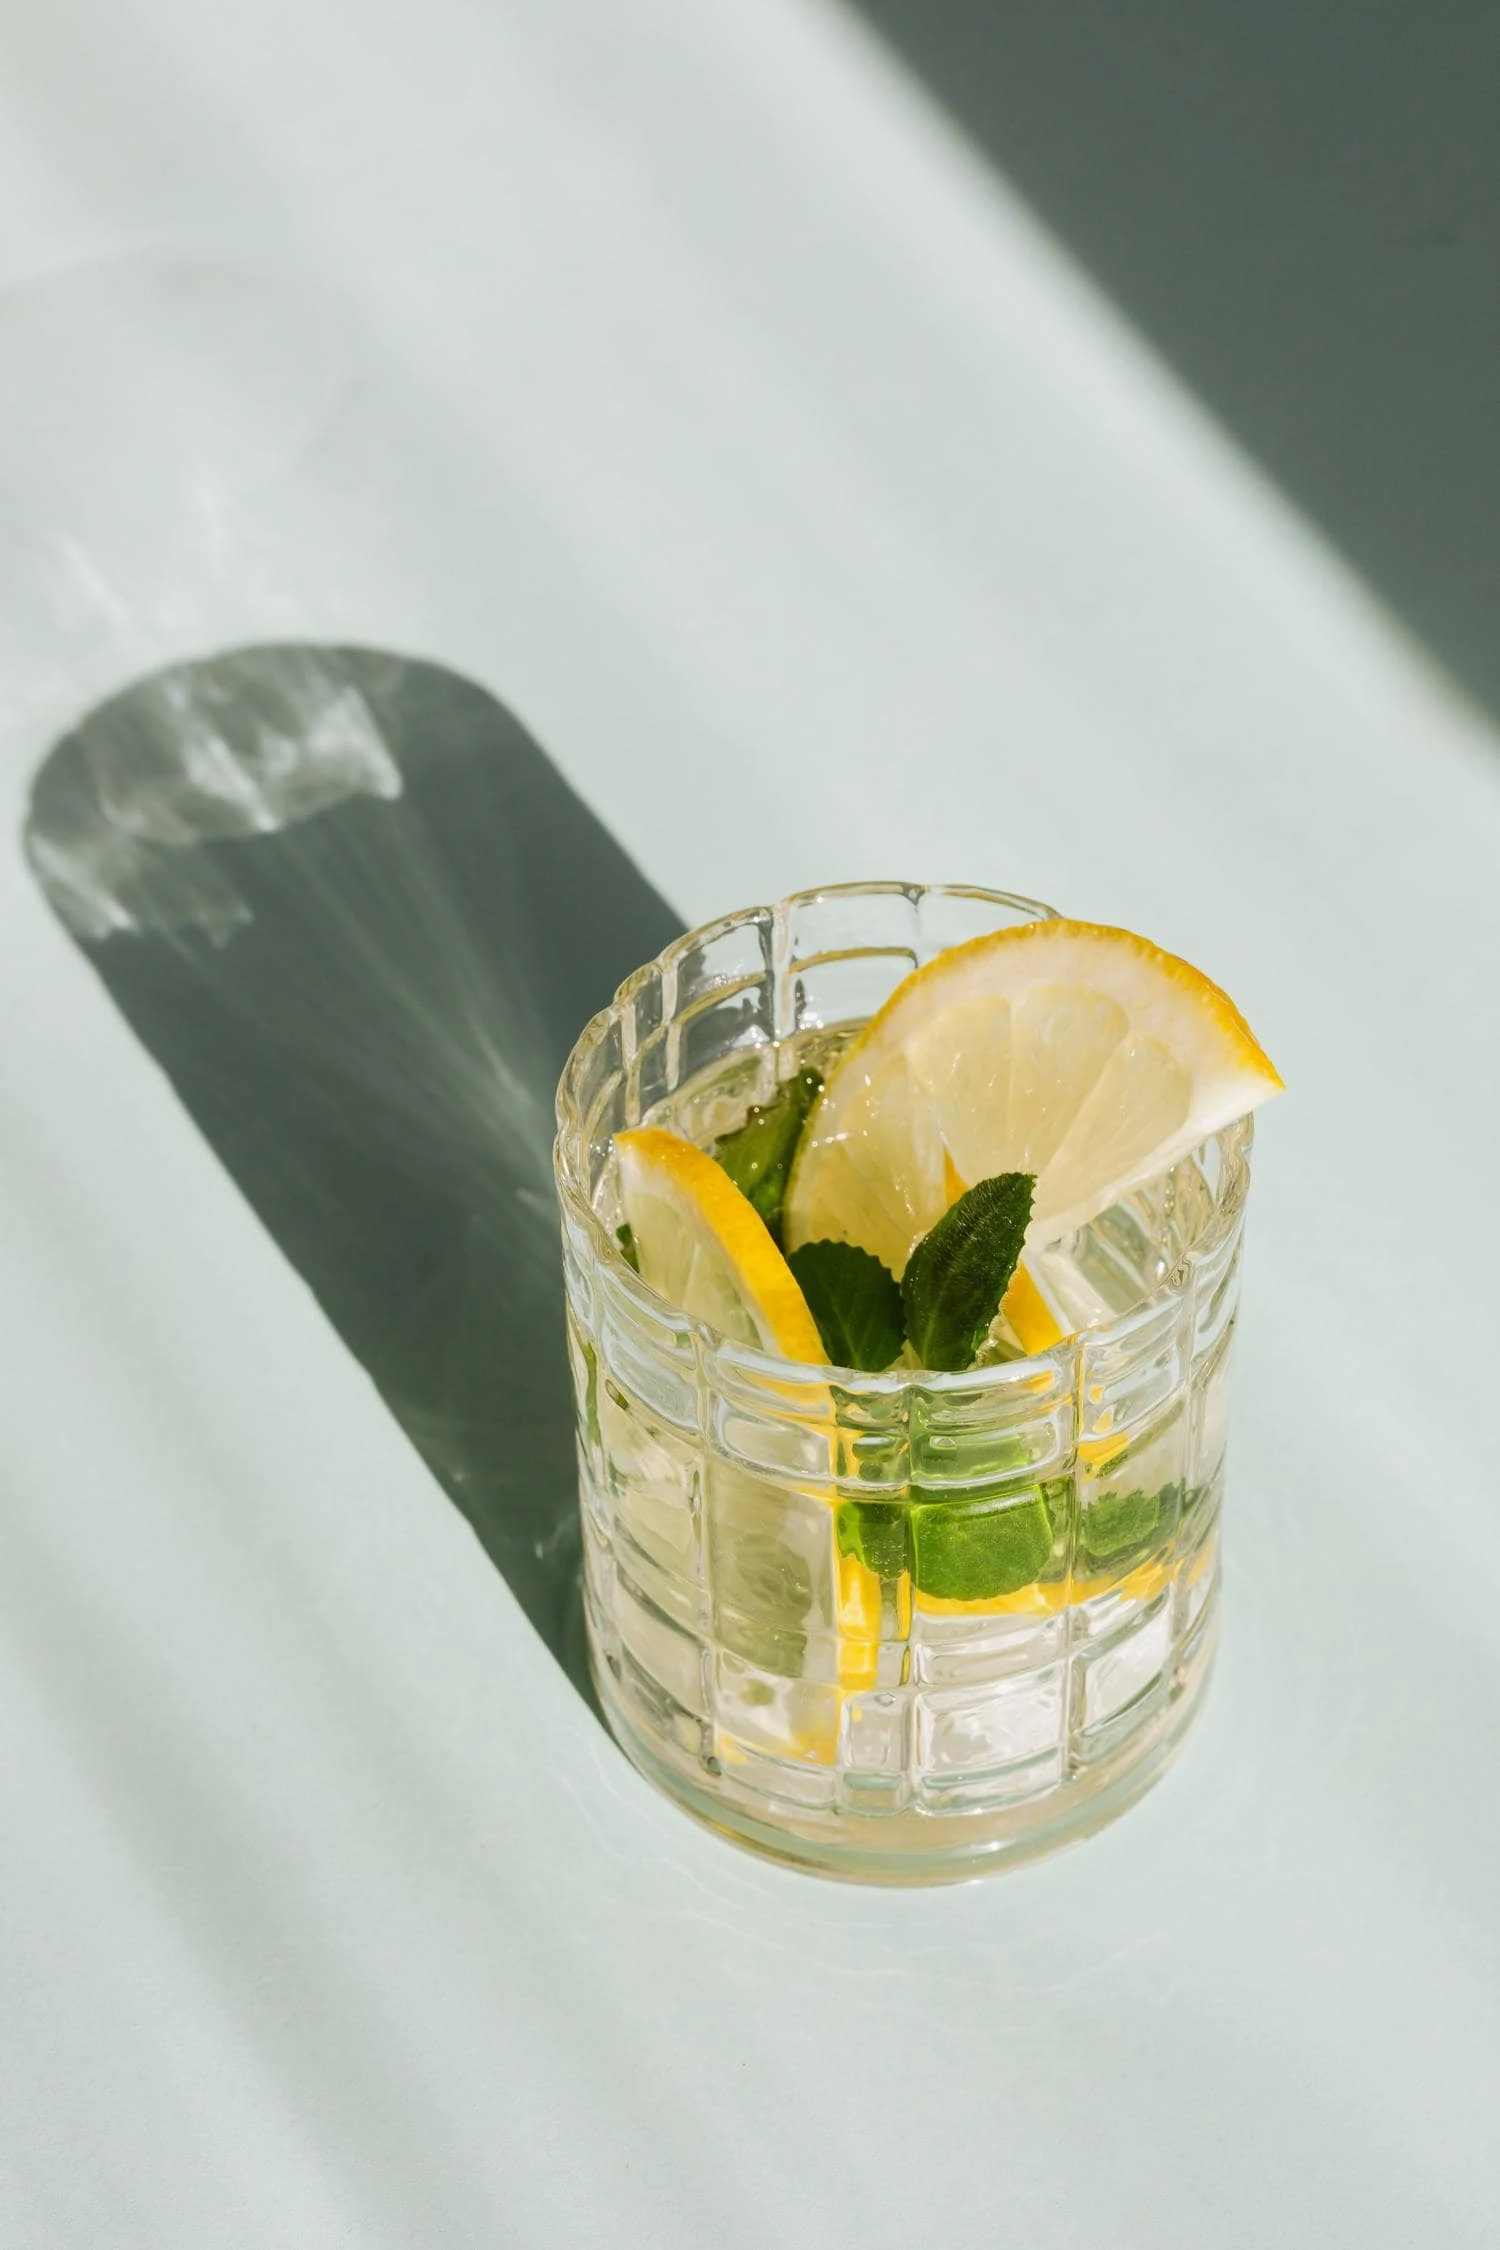
- Soft or diffused light is ideal for still lifes, it generates few shadows (for example, the light of a cloudy day).
- Hard light is ideal for highlighting shapes and high contrasts. Sunlight at noon would be, for example, an example of hard light.
- Another characteristic of light that you should know is how light behaves depending on the direction from which it is projected onto the object:
- Front light: the light falls on the object from the front and generates very flat images with hardly any texture or shadows, while being more descriptive.
- Side light: the light is placed on one side of the object, forming an angle of 90º with the camera. The result is an image with high lighting contrast between the illuminated side and the unilluminated side. Increases textures and volume. To tone down the dark side, you can use a reflector.
- Ambient or background light: It is the natural light that surrounds the object. In the studio it is usually imitated by bouncing the light off the ceiling or using an overhead light source.
- Semilateral light: the light falls at an angle of about 45º. This lighting marks the textures and generates a sense of depth. It is one of the most used light schemes.
- Contour light: it is used at an angle of about 135º and serves to highlight textures, emphasize perspective and outline the object.
- Backlight: Light is coming from behind the subject and therefore in front of the camera. The contrast in this case is extreme between lights and shadows, losing most of the information about the object beyond its shape or silhouette.
- Fill light: serves to fill in the shadows that a light source may cause.
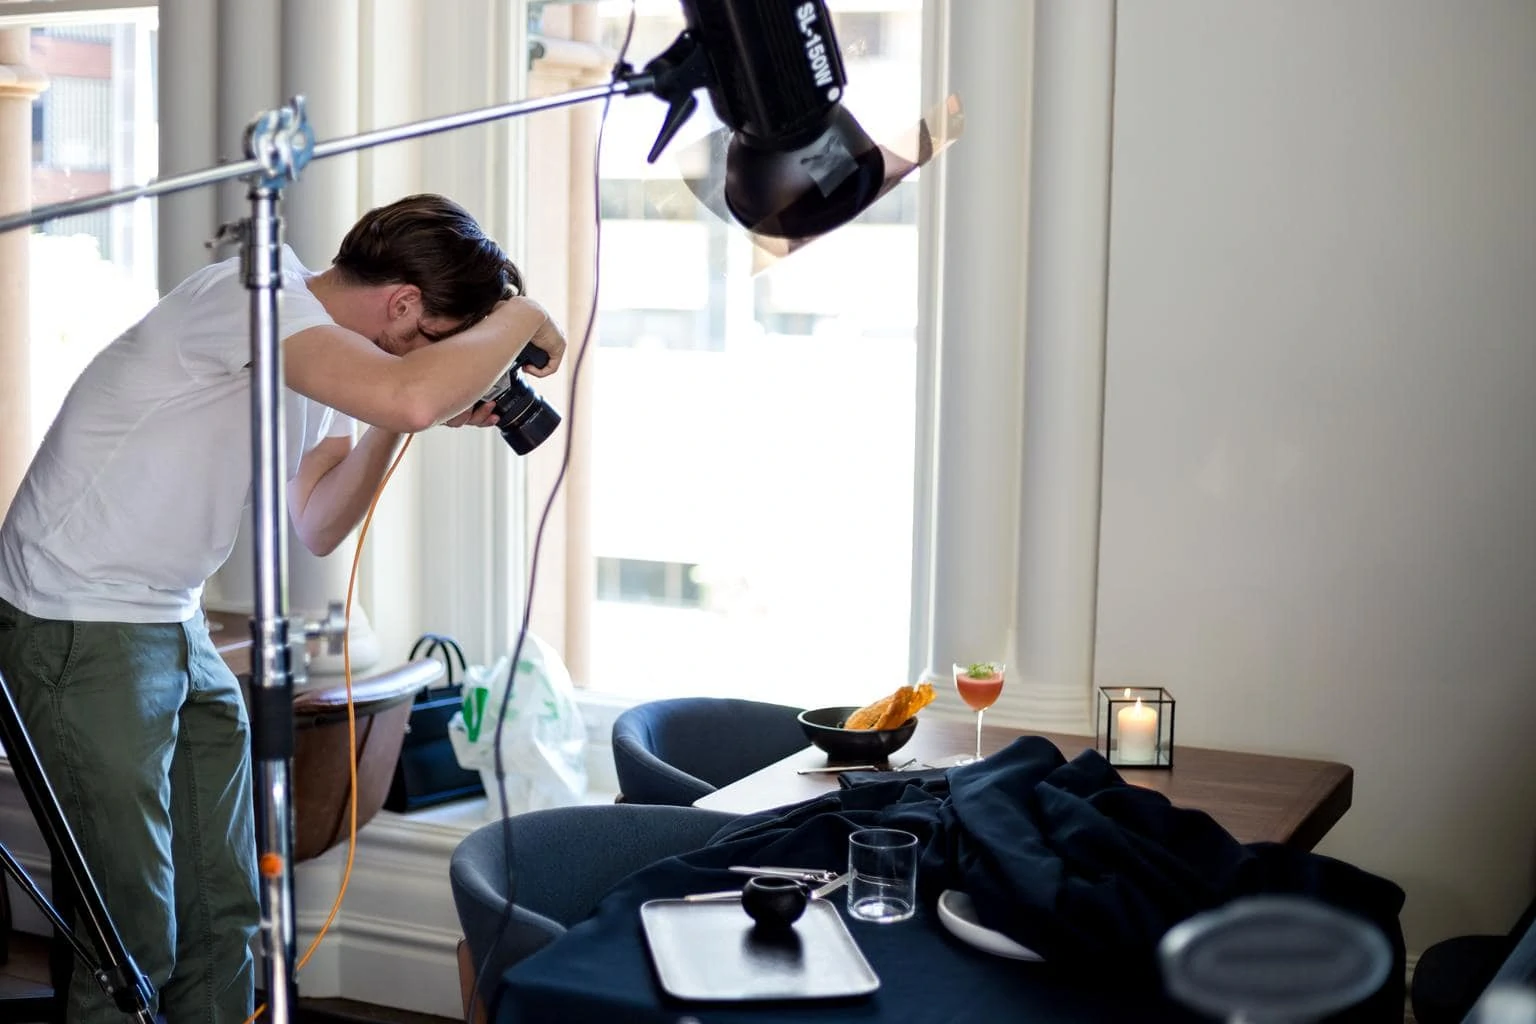
HOW TO DO PRODUCT PHOTOGRAPHY AT HOME?
When we see images as well worked as product photographs tend to be, we may think that neither we nor the material will be up to the task.
Nothing is further from reality. Product photography is a great candidate to be worked on at home. You do not need large spaces or large investments in accessories to get started. In fact, beyond a camera, an object, a tripod and light, you don't need more.
I leave you with a video that not only shows you how you can photograph a product, but also does it with completely homemade lighting and accessories ? .
Having seen the video, I leave you with this article on still life that will surely also help you with your home product photographs . Oh, and if you need inspiration, don't forget to go through this other article with 15 still life images to inspire you.
PRODUCT PHOTOGRAPHY WITH WHITE BACKGROUND
The white background is one of the most used in product photography. If you want to make a white background really white , you must take several things into account:
- Obviously you will need a white background ;).
- Make sure it's well lit.
- Controls the white balance.
- Work in RAW.
- You have just adjusted the white in the development.
- Separates the object from the background (so no shadows are cast on top of the background).
- Open the diaphragm to blur the background if necessary.
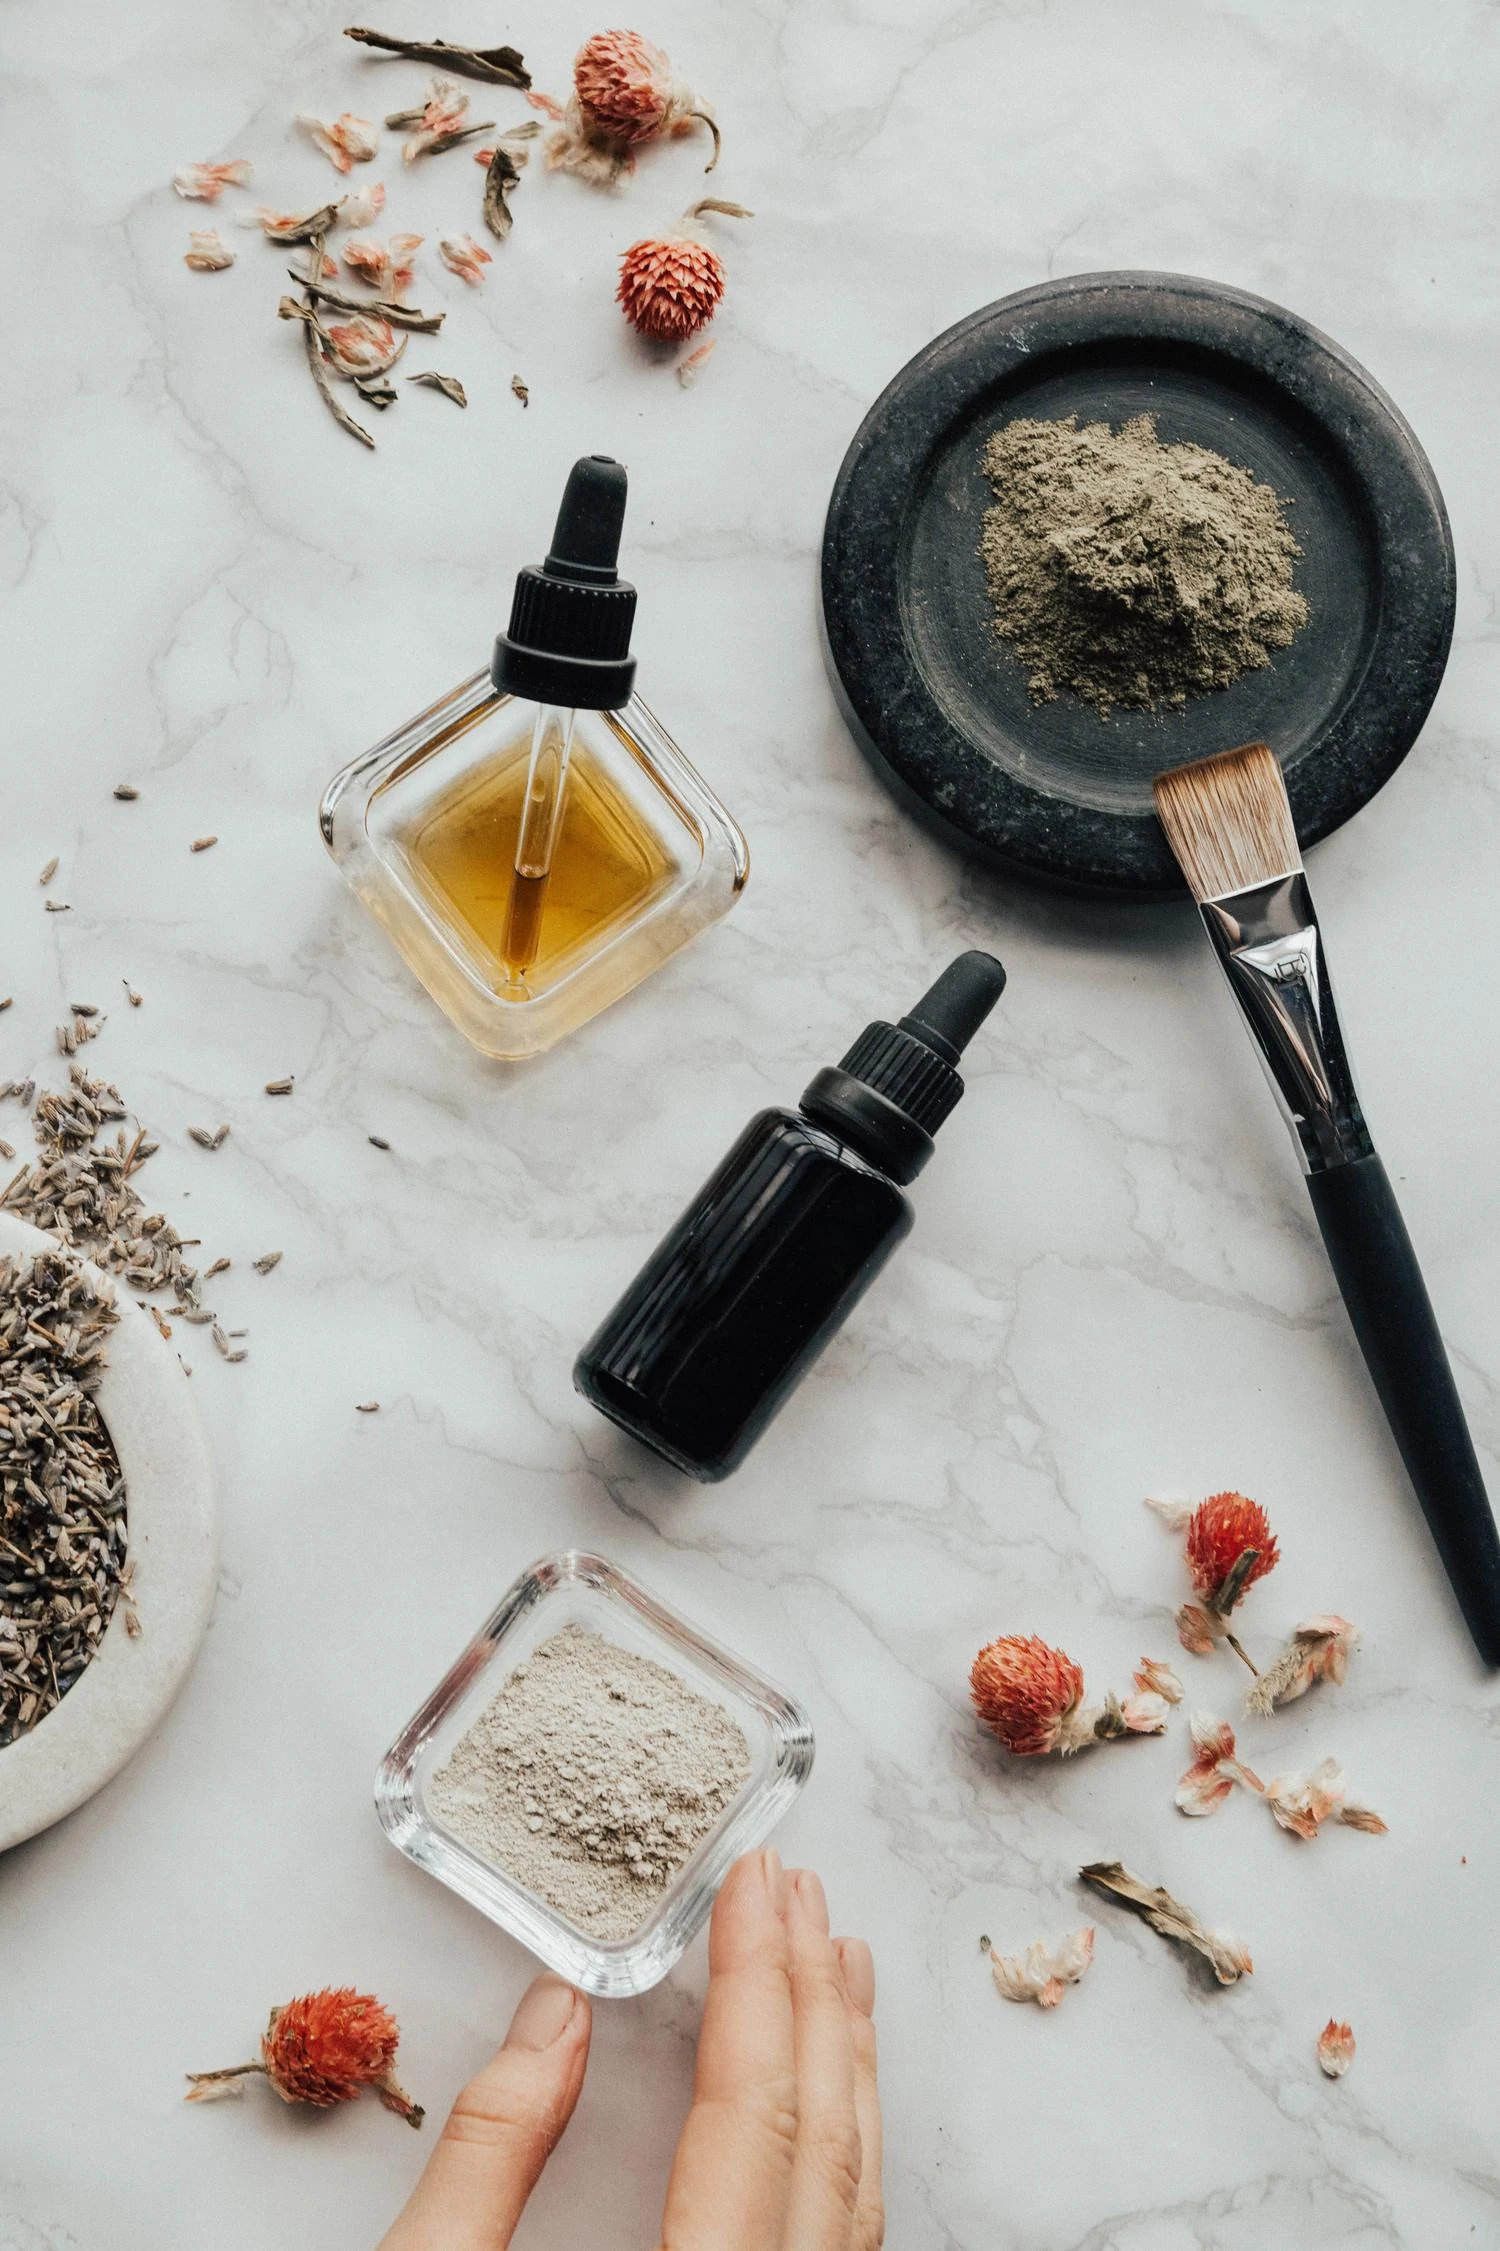
The white background is associated with purity and freshness, which is why it is usually used for food, objects with intense colors, or everyday objects such as personal hygiene products, makeup, technology, etc.

WITH BLACK BACKGROUND
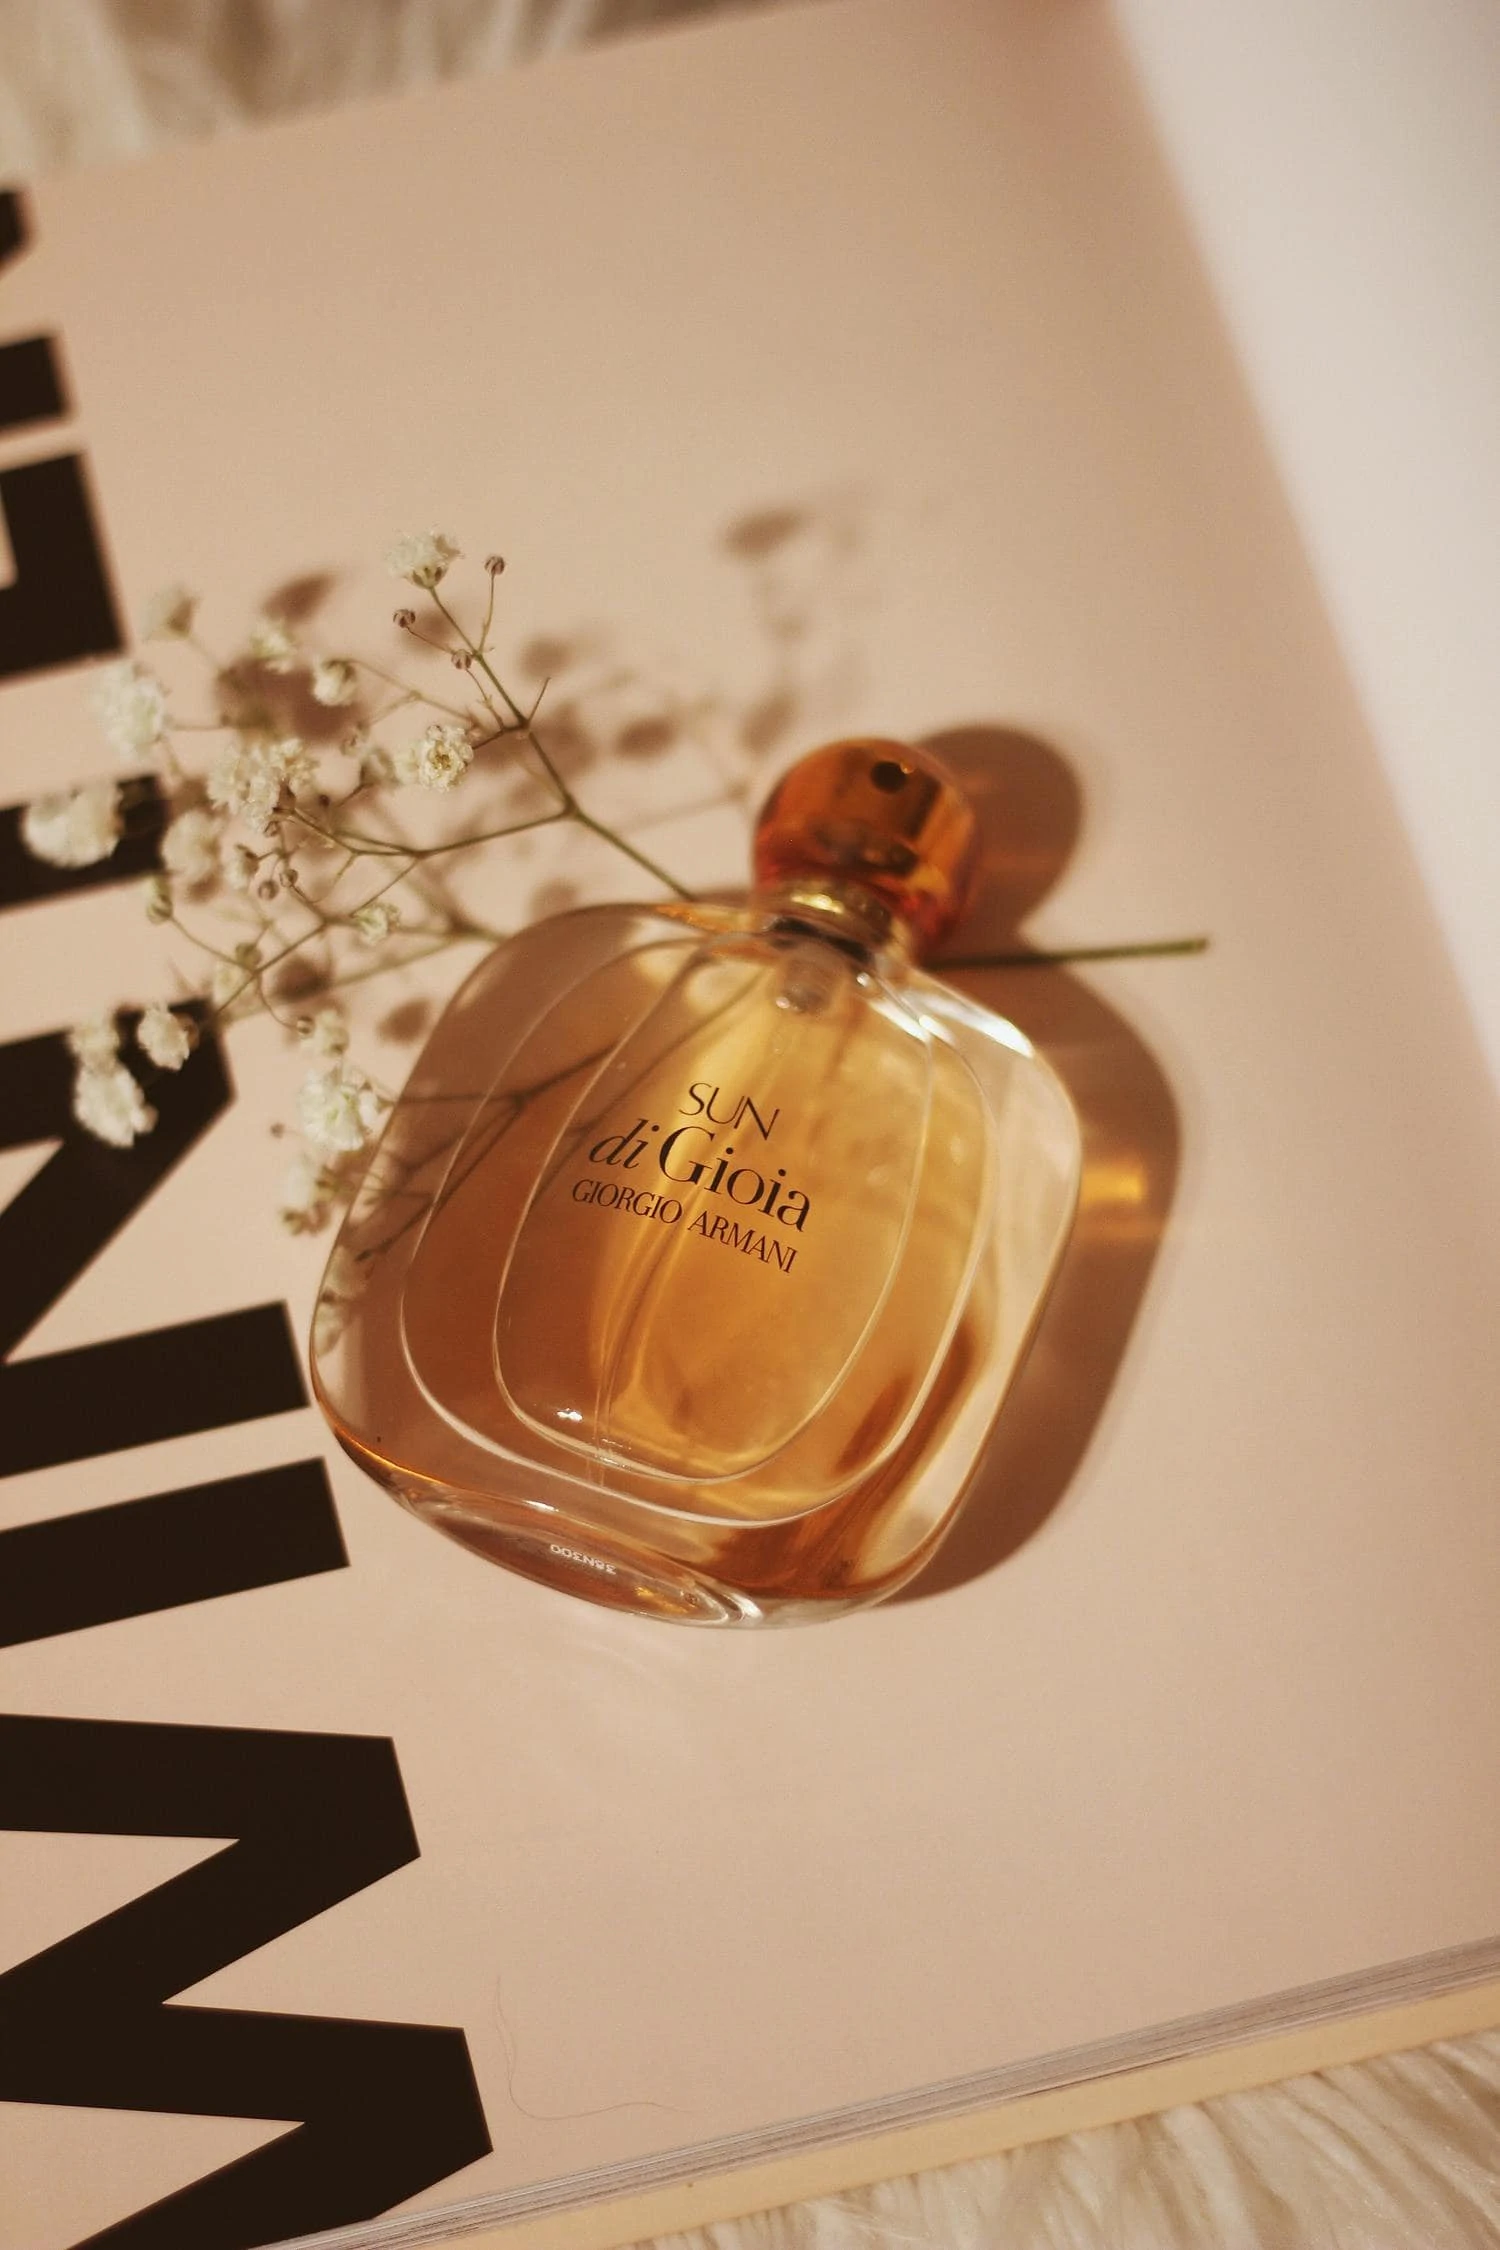
The black background in product photography is associated with elegance, luxury, retrospection and exclusivity. It is ideal for watches, transparent products such as liquors, perfumes, glassware and, in general, those objects that we want to give an air of exclusivity.
Now, to get a black background that is really black you must take into account:
- Moves the object away from the background.
- Or move the lighting closer to the subject if you can't move it away from the background.
- Close the diaphragm.
- Reduce the exposure time to turn off the background.
- Use a low ISO to maintain sharpness.
- Work in RAW.
- You have just adjusted the blacks in processing.

BASIC SETTINGS FOR PRODUCT PHOTOGRAPHY
Each image will need its own settings depending on the result you want to achieve. However, there are some general adjustments that can be useful in most of your product photography:
- To master product photography it is essential that you learn to master manual mode.
- Always use the lowest possible ISO value. You will gain sharpness.
- A tripod is essential to reduce any possible shake.
- For the same reason, you use a remote shutter release , pressing a shutter causes small movements. Failing that, set the camera's remote shutter release.
- If you have any questions about sharpness , here are the most common questions and answers .
- Always work in RAW format, it is essential to obtain the best possible results in editing your photography.
- Uses the aperture of the diaphragm to control the depth of field or area in focus in the image. Remember that if you want to blur the background, you must open the diaphragm (low f/ value).
- Keep in mind the minimum focus distance of your lens.
- Control the white balance manually.

PRACTICAL TIPS FOR PHOTOGRAPHING PRODUCTS
Beyond the technical part, you cannot lose sight of these other tips for photographing products:
- The product must be in perfect condition. If it is food, it must look impeccable; if it is an object, it must not have scratches or fingerprints or any type of dirt.
- Secure focus via Live View mode , if you have it.
- If you can connect the camera to your computer, it is a very good option to better analyze the image.
- Always observe the histogram of your image, do not trust the image on the screen.
- To create a reflection under the product, use an acrylic table or similar.
- Try never to reflect yourself in the product. You can do it by moving away from it and getting closer with the help of a telephoto lens or by changing the point of view.
- You can help yourself with a polarizing filter to reduce reflections (although it will reduce the sharpness of the image, especially if it is not of good quality).
- Use a diffuse light for reflective objects and a hard light for objects with a matte finish.
- Control the exposure and focus, the more perfect the image on camera, the better the final result.
COMPOSITION IN PRODUCT PHOTOGRAPHY
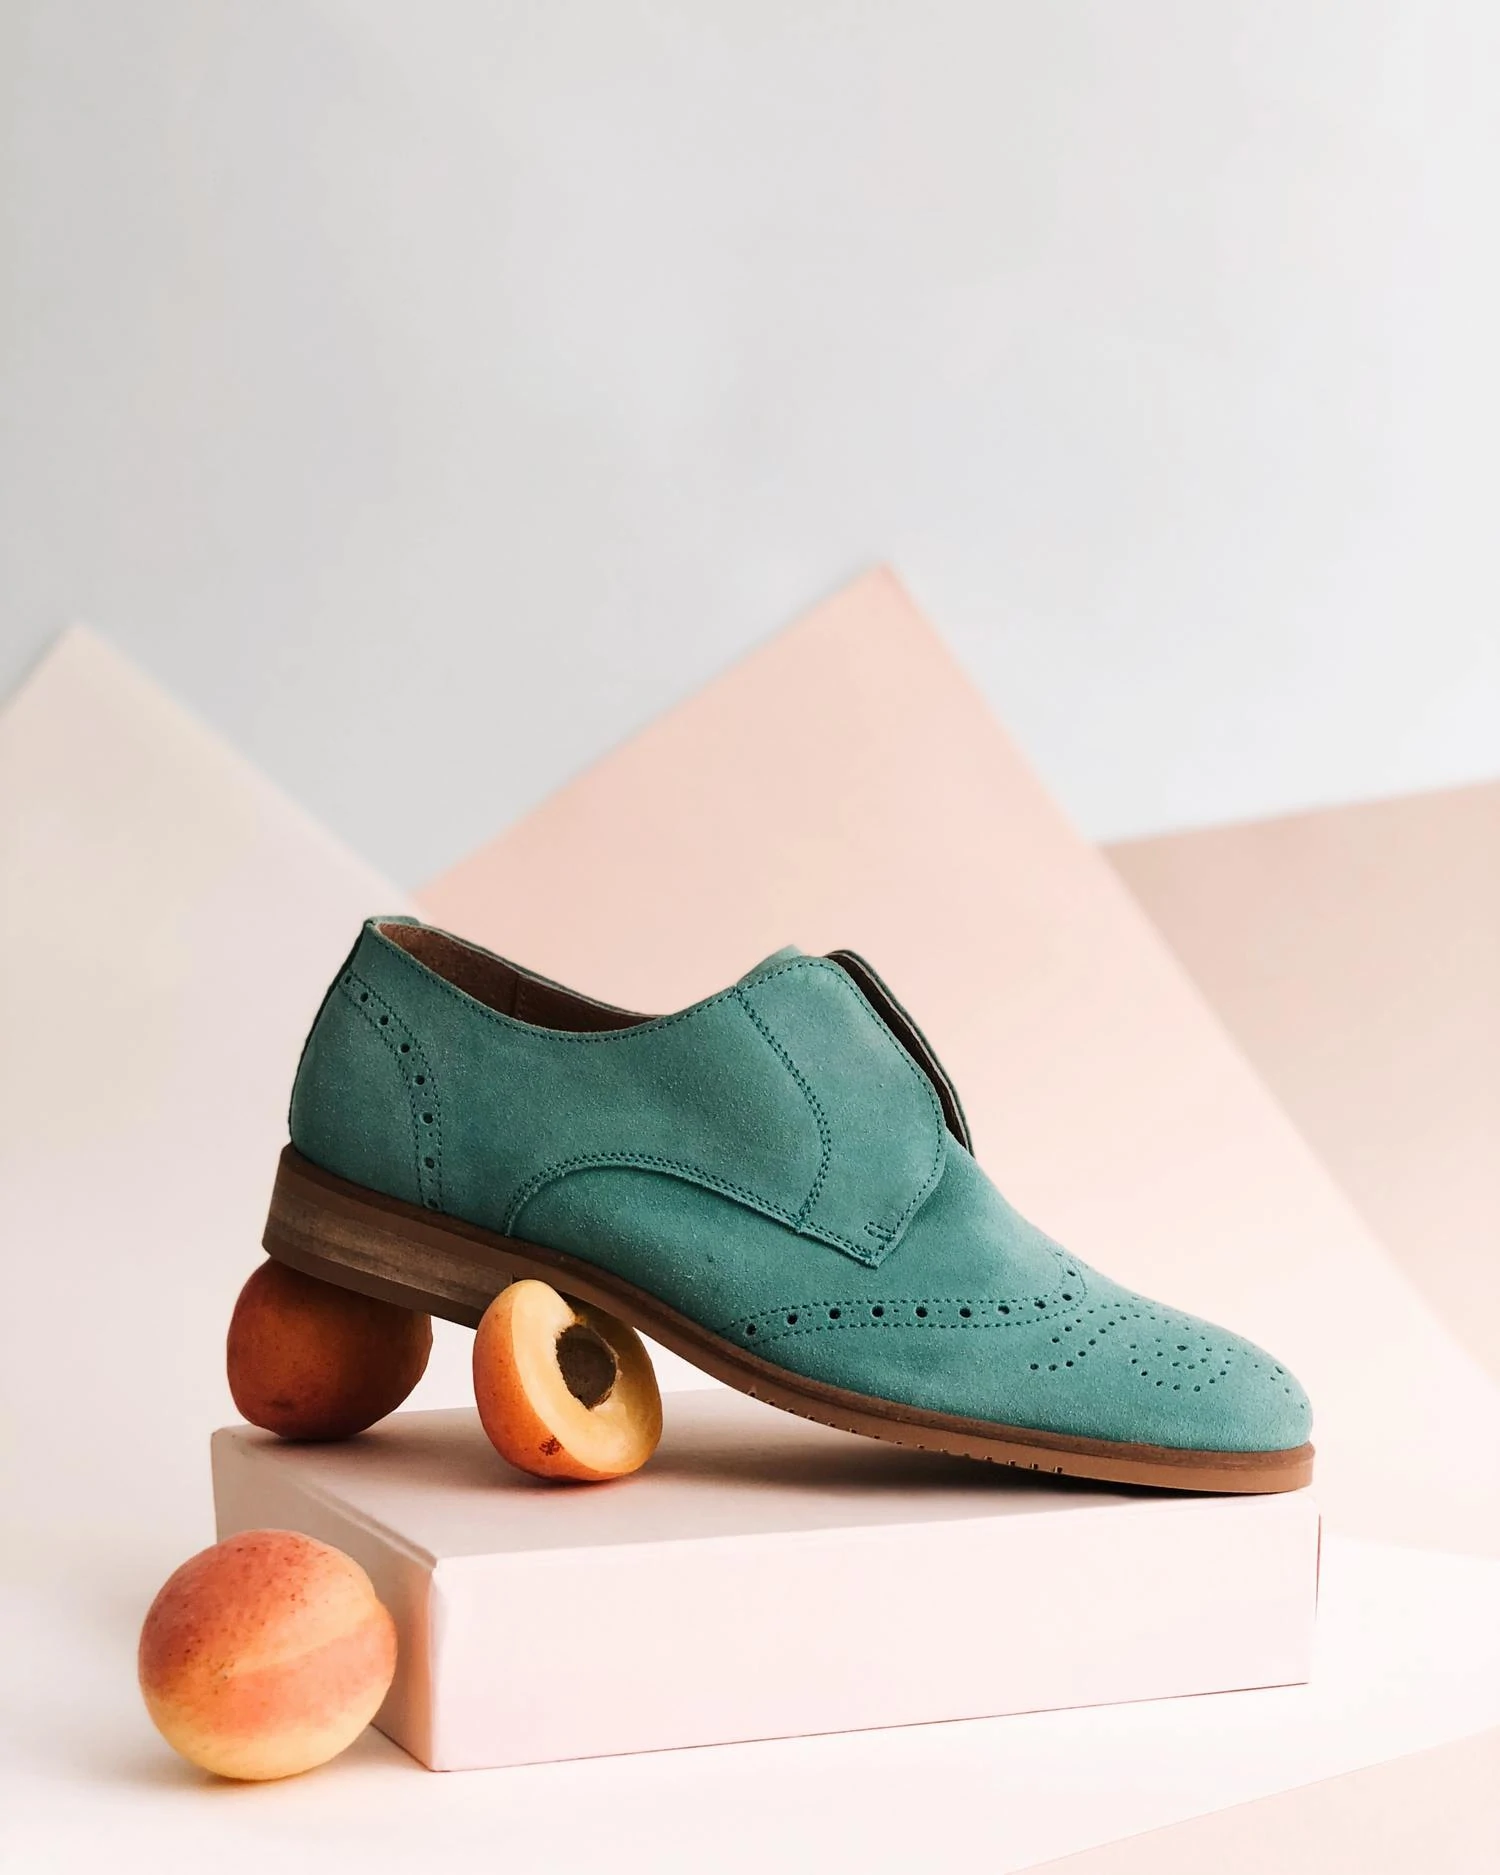
The arrangement of the elements in the frame form an essential part of the narrative discourse of your product photo. Composition is key:
- Tell a story: all images should suggest a story, product images too. Through the lighting, the arrangement of the elements, the props and the color, our image must speak to the viewer.
- The human element: helps tell the story and is interesting to the whole image.
- The point of view: where you place the camera in relation to the object, and at what angle, can radically change the image.
- The rule of thirds : where in the frame you place the object as well.
As a creative idea related to composition, you are also interested in learning about knolling , a photographic concept widely used in product photography.
I recommend that you immerse yourself in our guide on photographic composition that will clarify and expand all the information you need to know about composition in photography.
COLOR IN PRODUCT PHOTOGRAPHY
Learning to master color in composition is essential if you want to work with any product. Taking into account the primary colors, the complementary ones, how they create contrast between them or complement each other or what each color transmits, is essential in product photography.

PRODUCT PHOTOGRAPHY AND HIGH SPEED
Shutter speed is a very interesting creative element for your product photos. Take a look at this article to learn how to use flash for high speed photography.
PRODUCT PHOTOGRAPHY FOR INSTAGRAM AND OTHER SOCIAL NETWORKS
The good thing about this type of photo is that it does not need extreme quality as other types of product photography for professional purposes for magazines or catalogs do.
- Keep in mind the square format of Instagram when composing your image.
- Do not upload any image that you are not 100% sure of.
- Create a niche, be consistent with your style and your images.
- Take care of the colour. Vibrant colors attract more attention and are more successful (red, yellow, etc.).
- The more impact, the better reception by the viewer and better positioning in Networks.
- Composition is key to help read your photographs.
- A good story is essential, it brings the product closer to the viewer through it.
- Create simple but direct images.
- Also use the networks to inspire you.
- Experiment with aesthetic photos .
In addition, we have these other tips for you to succeed in the networks with your product photography that will come to you from the movies.
HOW TO EDIT A PRODUCT PHOTO
Editing in product photography is an art and today one does not exist without the other.
- Do it precisely, increase to 100% as many times as you need to check the adjustments you are making.
- Take care of the color: it must be faithful to the original object.
- Correct the white balance if necessary.
- Adjust the focus if necessary.
- Correct highlights and shadows.
- Cut whenever you need to.
- Corrects possible lens errors such as vignetting.
- Adjust the lines if some distortion has been generated.
- Remember, above all, that your product photography must be faithful to reality.
RECOMMENDED BOOKS
If you want to expand your knowledge about product photography, I recommend the following publications:
- Product and advertising photographyby Miguel Merino Arias (Photo Route)
- Learn to photograph products like a proby Martí Sans (GG)
- Foodie: The feast of photography and gastronomic stylingby Raquel Carmona Romero (PhotoClub)
- Lighting For Product Photography: The Digital Photographer's Step-by-Step Guide to Sculpting with Light (2nd Edition)by Allison Earnest.
- The Art and Style of Product Photography (Wiley Photography)by J. Dennis Thomas.
Product photography is a great way to learn photography in its widest spectrum: composition, lighting, color theory... and all without leaving home. Is it true that when you finish this mega guide you see yourself capable of taking your first steps in product photography?
Let me tell you, to finish, that the main accessory you need to launch yourself into product photography is… yourself. If you have the will and are really interested in the subject, don't wait any longer. Do not wait until your photographic equipment is "complete", do not leave it for when you change your current camera for another. If you are going to photograph products, I think you should start now. You don't start doing this overnight, it's a whole learning process. As you practice, you learn. If you don't practice, you don't learn.
