Macro photography is exciting. It is not necessary to try it for its results to impress you, but if you try it, it is another story. What happens is that macro lenses are inaccessible to many pockets and are not as versatile as other types of lenses that in the end you end up amortizing in one way or another. This is why many photography enthusiasts view macro images with healthy envy and a desire to try one day (perhaps in another lifetime). If this is what happens to you, I have good news, very good, there are alternatives to macro lenseswith which you can obtain wonderful results with a minimum investment. You do not believe me? Keep reading and you will find out, you do not lose anything, right? And if what you want is to delve into nature photography, this is our most complete guide, with tips, tricks and lots of inspiration.
THE CHEAP ALTERNATIVE TO MACRO LENSES
You may be thinking that the solution is to use the automatic mode of your camera that points to macro and get very close, but no, that is not possible. The objectives have a minimum focus distance below which it is impossible to focus, therefore, to achieve small objects or subjects of heart-stopping sizes, or to try, any objective is not worth it, because the minimum you try to get closer, you will not be able to shoot. To solve this, you can use a specific lens, but we already said that it is too expensive, or use one of these two great inventions that you can buy for a few euros ? We are talking about reversal rings and extension tubes. If you have ever been drawn to macro photography, you have no choice but to keep reading to find out about them. They are your salvation!
Of course, before continuing, you cannot believe that you will obtain the same results in terms of quality as with a macro lens, that is a drawer, if that were the case, nobody would buy a macro and they would not manufacture them, right? But if you just want to try, play, experiment and have fun, don't hesitate, don't invest (at least for now) in a macro lens, better do it in one of these two alternatives.
INVESTMENT RINGS
Inversion rings, as their name suggests, are a photographic accessory that inverts a normal lens, that is, they make it possible to turn it around. It is a ring that serves as an adapter so that you can place your lens upside down, it is fixed to the body of the camera by screwing on the front, where the filters are placed and the internal part of the lens is exposed. In this way, the minimum focusing distance is reduced, that is, it allows you to get much closer to the subject, so that it reaches the sensor with a much larger size.
FOR WHAT PURPOSES CAN INVESTMENT RINGS BE USED?
Short focal length lenses allow for a closer focusing distance, therefore more magnification. That is why it is used a lot with the 50mm and if you have a focal length between 50 and 28mm, great. It is best to use it with a fixed focal length that is usually brighter as well as having better quality, although it is often used a lot with the kit lens (18-55mm). Here is an example of an eye taken with the 18-55mm reversed.
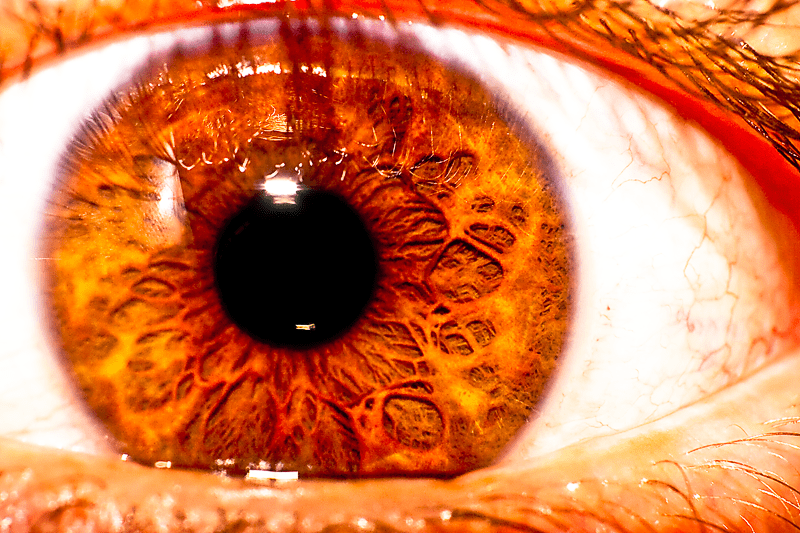
You also have the possibility of using it with a telephoto, attaching the telephoto lens to the camera, and then the inversion ring with the other lens inverted. This last option offers you the advantage of being able to modify the aperture of the diaphragm, because simply with the ring and the lens inverted you cannot, because the connection with the camera is lost and this is an inconvenience, since the depth of field is affected . If you use only the ring and the inverted lens you have to shoot with the maximum aperture of the lens.
TO KEEP IN MIND WHEN USING AN INVESTMENT RING
- It is recommended to protect the objective , since the internal part of it is exposed. You can do it with a 12mm extension tube or build a type of protector (only suitable for very handymen ? ). To transport it, always use a lens cap of those that are put on the mount.
- Be careful to choose a ring with the diameter of the lens and compatible with the brand of the lens.
- It better be metallic , if the target breaks it will fall to the ground with its corresponding consequences ?
- Since you can't use the camera's automatisms because by inverting the lens electronic contact with the body is lost, you'll have to shoot based on trial and error and without being able to control aspects such as the aperture or without information from the light meter, for example. In fact, you will have to work with the maximum aperture of the lens, therefore with a very shallow depth of field. If you have the possibility of using an old lens with an iris ring to adjust it manually, great, although it is not easy to have it in your equipment, you can get it second-hand at a good price. A good option if the bug is biting you a lot ?
- If you finally have this option and can modify the aperture, it is better to use small apertures, because when you get very close to the object or subject, the depth of field is drastically reduced.
- For use with moving motifs they are better than the extension tubes that we are going to see right away.
HOW MUCH DOES AN INVESTMENT RING COST?
You will not believe it but its price is between 10 and 15 euros. It seems like a joke that you can do macro with this price, right? Well it's not. Here are some examples.
GALLERY OF PHOTOS MADE WITH INVESTMENT RING
How about I put you some pictures taken with an investment ring? Nothing better than some example photographs to see the result. It is true that the body and the lens count, as does the person who captures the image, but the important thing is to see the possibilities offered by this small and very cheap object.




EXTENSION TUBES
They are tubes that stand between the camera body and the lens, thus varying not the focal length, but the minimum focus distance, that is, reducing the distance at which you can shoot. In this way, when you get closer, the objects or subjects you photograph will seem much larger, or what is the same, the effect that is achieved with macro photography.
There are three types of extension tubes:
- homemade. This option is for the do-it-yourselfers, because it costs almost the same to make it than to buy it, now, if you are able to do it (there are a lot of tutorials on the web), the satisfaction of achieving a macro with a gadget built with your own hands… that is priceless!
- Tubes without electronic communication. For the practical ones who are not good at DIY, nothing happens, you can find these tubes for a reasonable price already manufactured. But just like homemade ones, they don't have any kind of electronic connection to the camera, so they don't allow you to change the aperture, unless you're lucky enough to have an old lens with an aperture ring around to change it manually. You can find these tubes from 15 euros.
- Tubes with electronic communication. This is the most sophisticated option among the inexpensive alternatives to macro lenses. It is also a tube (extender) but in this case it does have communication with the body and allows you to make adjustments that the other alternatives do not. It's also a little more expensive, although I don't have it like a macro ? You can get them for 4 or 50 euros, for example this game for Nikon or Canon.
FOR WHAT PURPOSES CAN THE EXTENSION TUBES BE USED?
The most important thing is to use it with very bright lenses and it is better that they are between 35mm and 85mm. Remember that fixed focal lengths offer more quality. You can also attach them to a macro to achieve higher levels of magnification.
Both options can be combined and the extension tubes can be used with the ring and the objective inverted. You will get an even larger image, although yes, the more objects you put between the sensor and the subject, the more quality the photo will lose.
PHOTO GALLERY MADE WITH EXTENSION TUBES
Again, you better see examples of what you can achieve with extension tubes, so here's a mini gallery to whet your appetite:
ADVANTAGES AND DISADVANTAGES OF EXTENSION TUBES
The advantages over the reversing ring are that you can maintain communication (with the “fancy” option) and that depending on the number of tubes and the combinations you use, you will have a greater range of focus distances and magnification.

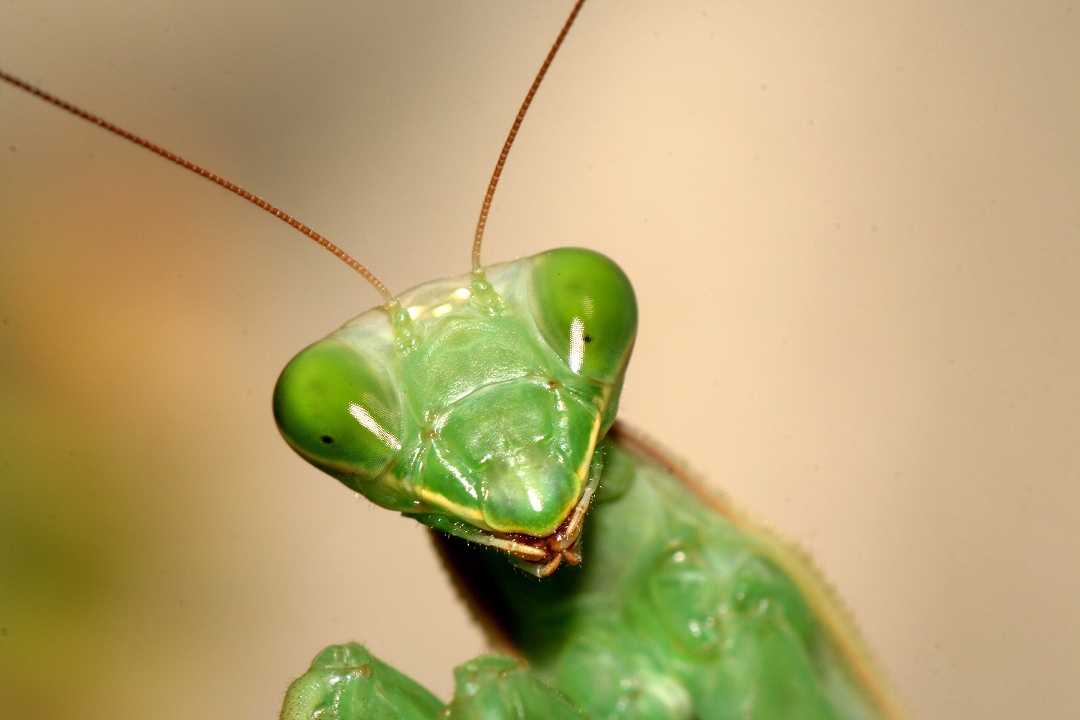


The drawbacks, that they receive less light and are more bulky than the ring. Also, these are not recommended much with moving objects, because you have to get closer to the subject than with the ring and the bugs will get scared.
THINGS TO CONSIDER WHEN USING ALTERNATIVES TO MACRO LENSES
THE LIGHT
In macro photography light is very important. When you use alternatives to macro such as extension tubes or reversing rings, this is reduced, so you will have to compensate by shooting outdoors when you have a lot of light or with a flash. If you use a flash, make it an external one that allows lighting from positions other than the front. It is also highly recommended to use reflectors and diffusers to avoid annoying and unsightly shadows.
THE MOVEMENT
Here everything is magnified, not only the size of your subject, but also the movement, that of your hand and that of the subject you are portraying. That is why I recommend that you use a tripod as far as possible, and if you also shoot remotely , even better. A slight vibration when you press the button on your camera can greatly vary the result.
THE QUALITY
I insist, do not expect to obtain the same results as with a macro lens because you will not achieve them. With these macro alternatives you will find deficiencies, vignetting, decreased luminosity, color alterations... It is for what it is, to get started, experiment and have fun. But it is that for these prices you cannot ask for more!
If you found it useful, don't keep the info and share it, you're doing us all a favor, the team, your contacts and the tiny beings who are looking forward to being featured on a social network ? And if you try it, please! we want to see the results! Thank you and see you soon!


