
Do you know what stop motion is? You may not be very clear about the name, but surely you have seen a video or film made with this photographic technique that draws from both photography and video.
I am going to tell you what it consists of and how to make your own videos with your camera or with your mobile. You will no longer have excuses to activate your creative muscles.
WHAT IS STOP MOTION?
A stop motion video is an animation created frame by frame whose objective is to simulate the movement of static objects through a sequence of still images.
To achieve this effect, also known as volume animation, a photo is taken, the object is moved a little, another photo is taken, the object is moved again a little, and so on.
We will see in detail how it is done shortly, but if it seems like a new technique to you, I am sorry to disappoint you, it began to be used more than 100 years ago.
Here is an example from 1916:
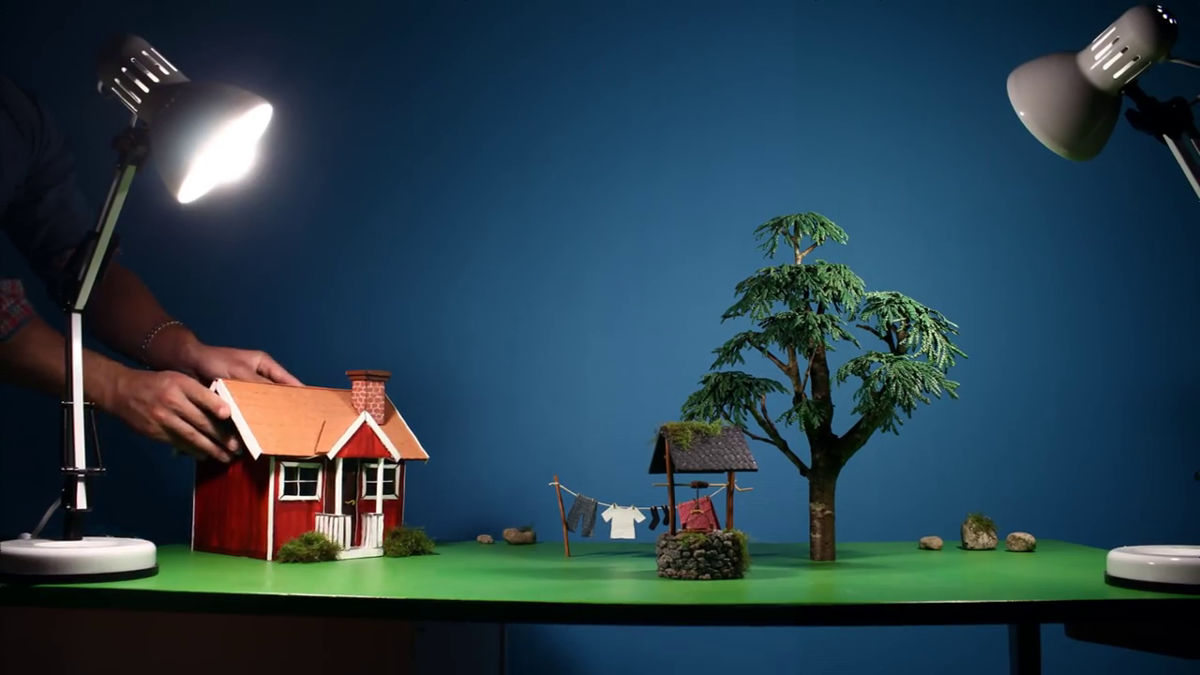
STOP MOTION WALKTHROUGH
Now let's see how to make your video frame by frame, what you need and how to get down to work.
NECESSARY MATERIALS
To make stop motion videos you need:
- Use a tripod to make sure it doesn't move or the jump will be noticeable in the video.
- Artificial lighting. Natural light is too changeable and can affect the final result.
- Remote Switch. On the one hand you avoid vibrations; on the other, you forget about getting closer to the camera and concentrate on moving objects and pressing the shutter from wherever you are. Also, it can help you avoid unwanted shadows. Below I leave you a trick in case you do not have a remote shutter release.
- Objects. The objects or motifs that you have chosen as the protagonists of your video.
- Application to make stop motion. It is not essential but it does help, especially when you do it from your mobile. In addition, some like Stop Motion Studio allow you to see the previous capture, which helps you reposition an object that has accidentally moved. Then I leave you with a list of applications that you can use.
- Application to control the camera remotely if you use the camera instead of a mobile. It is also optional, but it is very practical and serves as a remote shutter release.
TIPS
These are my recommendations or tips for making a stop motion:
- Patience. I start with patience because to create this type of video you are going to need a lot. If you are one to do things in a hurry, maybe this is not for you.
- Short videos. When you make your first videos, start by making them short, so if you make a mistake the frustration will be less. Go little by little, learning, and when you control the technique and all the details you can be encouraged to try longer videos.
- Be careful with the details. For the result to be perfect, or the best possible, you have to take good care of the details, a movement of the tripod, inconsistent or uneven movements, for example, can affect the final result.
- Reflexes. If there are reflective objects, beware of unwanted reflections. Wearing dark or white clothing can also help prevent certain colors of clothing from being reflected in the scene.
- The format. What format do you need? Are you going to shoot a square video for the Instagram feed? Or for stories? Being clear about the format beforehand is important when establishing the frame.
- Watch the shadows. That the objects cast their shadow can be an excellent option depending on what you want to transmit, what can completely ruin the whole video is that the shadow of your camera, tripod, yours, etc. appears.
- If you don't have a remote shutter release, use a timer or the delay shutter release.
- Sometimes it is easier to make the video in reverse, imagine that what you have clear is the position of the final shot. In that case, start there and once the video is exported you can reverse it.
- Make sure you have enough battery and space on the card , if you have to change it halfway, the least that can happen is that the equipment ends up moving.
- Edition. Edit all the photos with the same settings as the first frame of the video, you can sync in Lightroom or copy and paste the settings to the rest. Except in specific cases, you will not need to make large adjustments if you have prepared the scene well, a bit of brightness, contrast or saturation, so photographing in JPG format is more than enough and more comfortable when handling so many images that the RAW format that we usually recommend on most occasions.
- Video. You can use any video program, there are more professional ones, such as Adobe Premier, but the simplest and free ones like iMovie will work for you.or Shotcut. #BBD0E0 »
