
That nature is extraordinary and fascinating and offers wonderful gifts, is something we know well. Now, if there is a magical and admirable event related to it, they are the Northern Lights. A dance of lights in the sky that has no comparison. Her beauty is absolutely indescribable and everyone who sees her is trapped by her magic. And of course, such an event is so attractive to photograph that you have probably considered escaping to capture them with your camera. Well, if it has crossed your mind, you are in the right place. The time begins when they can be seen and we will tell you, where, when and how to photograph them. You can not lose this!
WHAT IS THE NORTHERN LIGHTS?
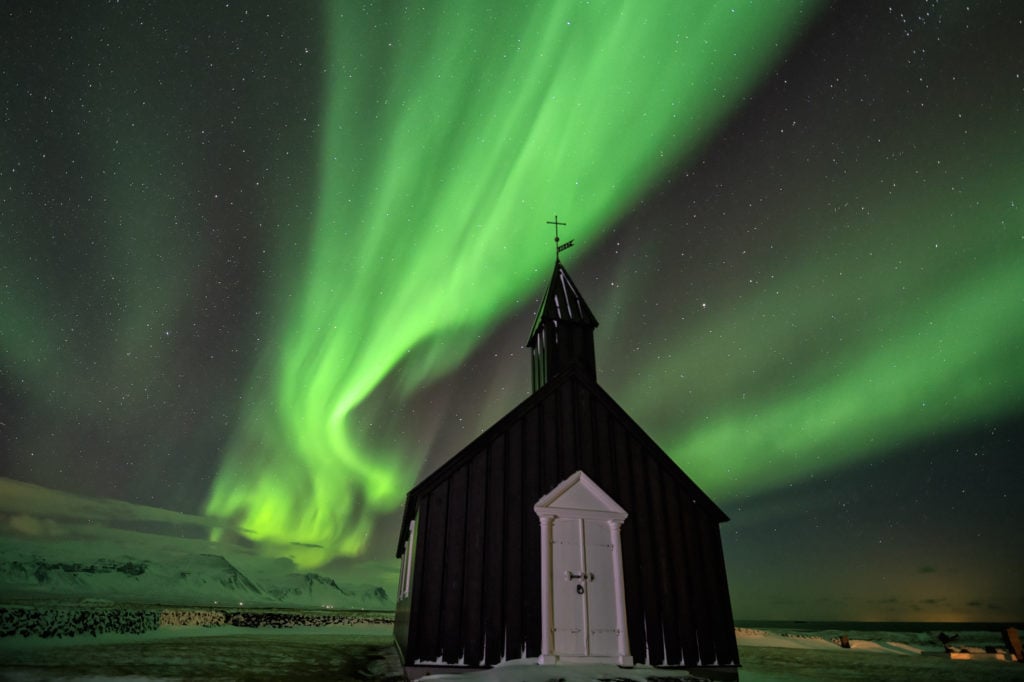
I could talk to you about how or why it is produced, but in reality this is a photography blog and the truth is that explaining the physical part of the matter subtracts magic. I prefer to leave you a photograph so you know what we are talking about. I will only tell you that they have to do with the activity of the sun, words like particles and latitudes are too short and ugly when it comes to presenting something as magical as this:WHERE
Of course, of course, to photograph them you will have to move (probably) very far, unless you live close to the places from where they can be observed. And also take a risk, it is a phenomenon that can be predicted more or less but like the rain, the predictions are not accurate and as much as the experts approach reality, nature in the end is capricious and unpredictable. So you can travel and come back without seeing them, that's why I'm going to tell you the sites from the best they look and most likely. But I insist, don't base your trip only on this purpose because you run the risk of "go-pa-na" and neither We want that, right? The places where this phenomenon occurs have enough appeal in themselves to visit them and enjoy them on a personal and photographic level. Now you choose the one that interests you, attracts you or you can In finland:- Utsjoki, which is the northernmost Finnish town. It is where more Northern Lights are seen throughout Finland.
- National Observatory of Northern Lights of Finland in Sodankylä.
- Inari Lake
- Although they can be seen from anywhere in the country, where you can best appreciate them is above the Arctic Circle, to the north. There is the so-called "Northern Lights Belt" across Northern Norway through the Lofoten Islands , a highly recommended place just like Tromsø .
- Reykjavik.
- Landmannalaugar geothermal area : a very interesting place from which to see them but you have to plan ahead because they do not open all year and you need an SUV to get there.
- The Jökulsárlón Glacier Lagoon .
- Northern and central Alaska.
- Saskatchewan
WHEN
As a general rule you can see them between the end of September and the beginning of March and the ideal time is one or two hours before and after midnight. Two days after solar storms are usually much more abundant and spectacular. In Alaska you can see them with more security between November and January. In Iceland from the end of August they start to appear and they do until mid-April. I leave you where you can look at the prediction in:- Iceland
- Alaska
- Norway: Download Norway Lights, an APP to know where and when to spot them in Norway, available for iPhone , Android , Windows .
EQUIPMENT
This is what you are going to need and you will have to be prepared when the great expected one appears:- Tripod: oh, yes, you will not get rid of this time. It is not the lightest to do night hiking in the snow thousands of kilometers from your home, but yes, you will need to be able to make long exposure and capture the beauty of the aurora.
- Camera with manual adjustments and that allows long exposure type SLR or EVIL.
- Objective wide angle and large aperture: a wide angle will serve to capture more of the landscape and luminous aurora and if for the better;).
- It has a spare memory card : you are going to shoot in RAW, in addition to a lot of photos, better not to risk and take enough space to not regret it right there and end up pulling your hair or deleting photos in situ to continue shooting. It would be a real shame.
- Replacement battery : something even worse could be running out of battery. In case you do not know, the batteries are discharged before in the cold, and there will be enough. In addition, with long exposures they are also emptied before. Do not forget to bring spare
- Remote trigger: if possible with timer (be careful that some only reach 30 seconds), like this one for Canon or this one for Nikon . Make sure it is compatible with your camera.
- Warm hands : this is not a very photographic article but with so cold you will appreciate it. Here is an example , although the offer is wide.
- Head lamp : as for example this one . Yes, of course, this is also optional, as he warms hands, but it will allow you to have your hands free when handling the camera. Recommendations: try to turn it off when you are going to shoot, put it to a minimum (whenever you see, of course), and if you have a choice, use red light.
HOW
Now I will tell you, step by step (or almost), how to photograph this unique phenomenon:- Look north. The auroras are known as northern lights for a reason If you are going to see and photograph them, look for a place where it is clear and / or there is an interesting element to include in the frame.
- Get in the front row. Try not to raise anyone in front of you and spoil your photo. Get in the front row Yes, don't stand in front of others, better next to each other;).
Avoid getting in front of you - Plant the camera on the tripod and perform the following adjustments.
- Beware of ISO.Try to use a low value or the noise will be too obvious, even if you don't adjust it too low to get light. Start with 200 and go testing.
- Set the brightness of your LCD down.
- Shoot in RAW. Yes, pay attention to me, you are not going to hit a trip of so many kilometers, pass cold cloth and leave most of the information on the road. Bring it all home that you probably need when editing.
- Focus to infinity. At night the camera can go crazy trying to focus on automatic so you better put it in manual. Focus a point in the sky, like a planet and make sure you zoom through your Live View (if you have one) that appears sharp. ( Trick: if you stick a little insulating tape on the lens to fix it, you will avoid involuntary movements of the ring).
- Take care of the composition. As interesting as the dawn is, you can't shoot without more. Try to compose your photography so that it is attractive to the viewer, includes part of the landscape, eliminates distracting elements, ensure that no one slips into the frame, and so on. It may be a good time to review these articles about blog landscapes .
Take care of the composition - If you are going to expose below 30 seconds, set to opening priority mode , then switch to Bulb mode . In priority mode you can over expose one or two steps. Although the ideal is that you try and depending on the results you decide.
- Use a wide opening. Depending on what your goal allows, use as wide an opening as possible.
- Adjust the exposure time to your liking. Perform different tests between 8 and 60 seconds and decide on the result that convinces you. Yes, more tests, did you think this was coming and kissing the saint? Well, no, photography is like that, also capricious but that is nice, if it were too easy it would not have so much charm and end up getting bored.
- Check the histogram. The screen can fool you by looking like the brightest lights of what they are. Check the histogram that never lies.
EXTRA HELP
- Patience: this is, in my opinion, the most important. You will have to arm yourself with patience because I have already told you, the Northern Lights is capricious, it makes its appearance when it feels like it and it stands before your eyes for as long as it seems, it can be 5 minutes or two hours.
- If you have doubts, do not stop shooting : the phenomenon is not very intense, or it starts very weak and you look like clouds or you are not sure. As pressing the shutter of your camera does not cost money, do it. Your camera, with such long exposure times, will capture much more than your sight and what may appear to be a very weak dawn, in your image it will be appreciated with much more intensity. It will have been worth the risk, don't you think?
- Reflexes? If you can capture the reflection do not miss the opportunity! The result can be impressive.
The Aurora reflected in the water - Color: the color of the auroras depends on the molecules it contains, if it has more oxygen, nitrogen, and so on. I'm not going to expand on this but I do warn you so that you are clear that they will be the color they are, that you only see green or pink. Do not expect to find the purple Northern Lights, appear green and take a click Enjoy what nature offers you that green, orange or mauve is a wonderful spectacle.
- Remove if you have any filters on the lens.
- Guides: if you can afford it, maybe it would be nice to hire a guide for your adventure. They will accompany you to the indicated places and will take you back. At night, in unknown places, with snow, etc., all help is little. Here are some examples: in Finnish Lapland , in Tromsø (Norway) , or in Iceland .
- Be careful (with you): warm up (with appropriate clothing for the cold really) and do not leave part of your skin in the air, that is, among other things, that you wear gloves (however uncomfortable they are to photograph). One trick is to use very thin gloves underneath or wear ones like these . Do not venture without company, or at least warn where you are going to be, carry a phone, flashlight with spare batteries and something warm in a thermos, you will appreciate it
- Be careful (with the equipment): the temperature changes are not good for your camera, I told you how to protect your equipment in adverse conditions . Trick: during the wait you can store the card and batteries in some pocket of your coat, attached to the body so that the heat reaches them.
- Do not miss the magic: try not to obsess with the photos and relax to contemplate a show that you never see again in your life. Yes, photographing it is important, but it is not the only reason why you are there, if not only you will know how the lights dance in the sky through your viewfinder, for that, put on flickr and contemplate the auroras of others
- What about the moonlight ?: If you are wondering if you can photograph the aurora with full moonlight, I must say yes. You can capture it with any moon phase, the only difference is in the result. When the moonlight invades the landscape you will get photographs of a more illuminated landscape, almost as if it were day, however, without the moon, the mountains, trees and others will appear dark. It all depends on what you are looking for, but I think that both situations have their special charm and that you don't have to be overwhelmed by it.
- Check location during the day: if you have the possibility, visit the place during the day to plan ahead where to place the tripod, the framing, and so on.
