
A pinhole camera is the simplest camera that can be created, the first to be invented, and the easiest to recreate. Pinhole photography gives a lot of play, it requires patience, dedication and passion for photography.
Photographing with a pinhole camera is a great exercise if you are a creative lover, you like to try new things and, why not, swim against the current a bit, get away from fashion, selfies and Instagram filters. Pinhole photography is the very essence of photography. And the best thing is that all that magic fits inside a boring cardboard box .
WHAT IS A PINHOLE CAMERA?
A pinhole camera is a photographic camera that is characterized by not using an optic or lens but a hole (pinhole). This camera consists of a light-tight body, a small hole that allows light to pass through, and photosensitive material.
HOW DOES A PINHOLE CAMERA WORK?
A pinhole camera works very simply. Light rays enter the chamber (any light-tight container will work) through a small hole and are projected onto the wall opposite the hole.
Just like in a conventional camera or in the human eye itself, these rays project the image in reverse.
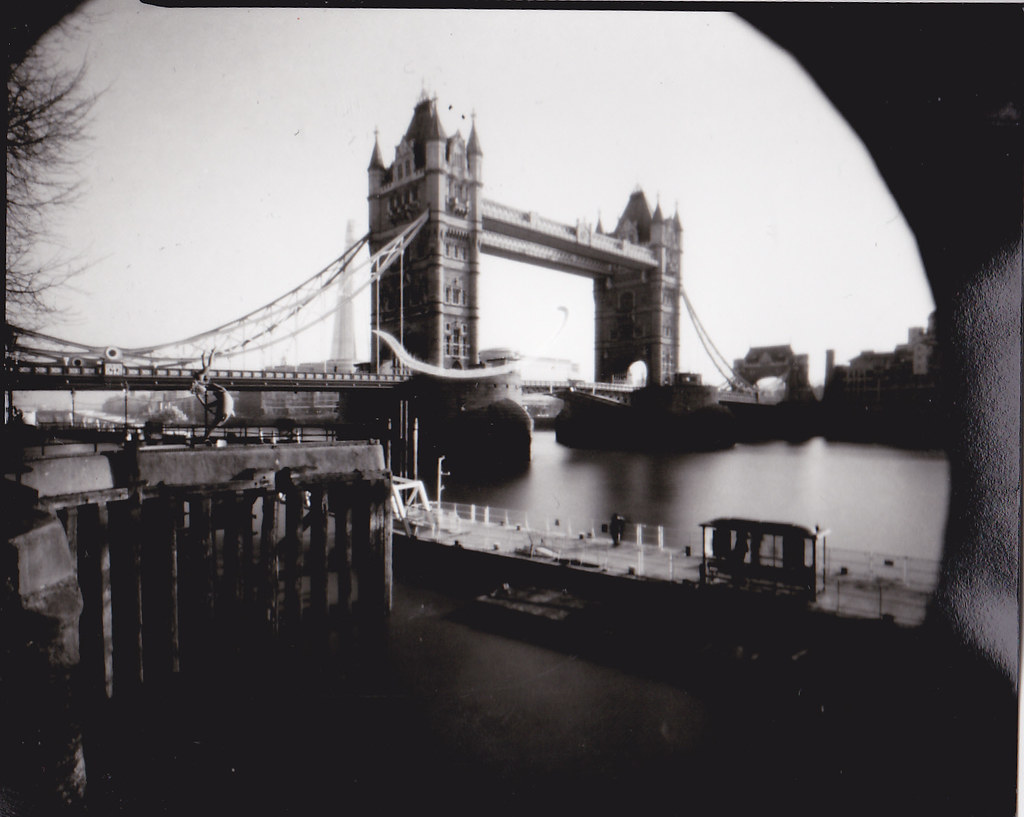
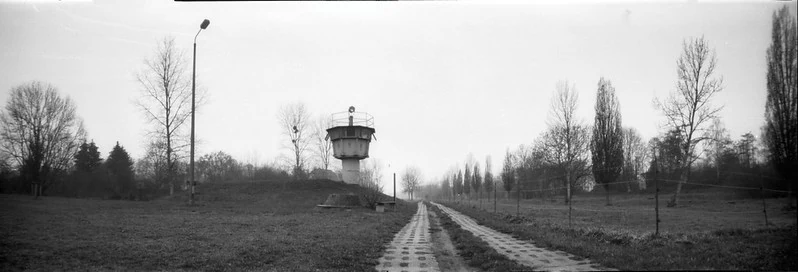
You can see it in the following example:

To take a photograph, in the place where the image is projected inside the camera, we must have photosensitive material. We can use photographic paperand even reels.
In pinhole photography, small pinholes (holes) are used (a diameter of around 0.4mm) so high exposure times are used to let light through.
To take a pinhole photo we must, therefore, have a light-tight box except for the small central hole, photosensitive material, and some system to cover the pinhole when we stop exposing.
As simple (?) as this ? . Would you like to know how to create your own homemade pinhole camera step by step? Let's go to the next point to see it in detail.
HOW TO BUILD A HOMEMADE PINHOLE CAMERA
If you've been bitten by the bug and want to build your own pinhole or pinhole camera , you couldn't get a better resolution, because it's an extremely creative and inexpensive way to play with photography in its purest essence.
MATERIAL NEEDED TO BUILD A HOMEMADE PINHOLE
If you want to build your own pinhole camera, have the following materials on hand:
- A light-tight box: it can be a cardboard shoe box, a biscuit or coffee tin, etc. The important thing is that it can be opened and closed but does not let light in.
- Some scissors, cutter or similar.
- Insulating tape of black color with which we will cover possible entrances of light.
- Photosensitive material: the easiest thing is to start with photographic paper, although it can be done with reels.
- Thumbtack, needle or similar: to create our hole or pinhole through which we will let light pass. It is recommended to use a maximum diameter of 0.4-0.5mm.
- A can, a plate or silver paper where we will make the hole.
- A red light if you work with photographic paper, since this is not sensitive to red light. It does not work for reels, since these are sensitive to red light.
- Opaque bag for photography: Although you can put and remove the photosensitive material in a dark room, the truth is that the easiest and most effective thing is to get an opaque bag.
- This type of bag allows you to put your hands in a sealed way and manipulate the camera inside without light entering. If you are going to become fond of pinhole photography, it is a photographic accessory to consider. Hereyou can see an example.
HOW TO MAKE A PINHOLE CAMERA STEP BY STEP
You already have all the material you need at hand, so now we are going to build a pinhole camera step by step:
- Step 1: Paint the box matte black (inside only), it will help to avoid unwanted reflections.
- Step 2: Let it dry.
- Step 3: Cut out a small square or circle on one of the faces, this is where we will later place our pinhole.
- Step 4: Cut out a piece of tin that we will hook inside the square hole that you have cut out in the box. Or use a piece of aluminum foil folded in half.
- Step 5: Smooth the aluminum well so that it is without imperfections.
- Step 6: Use a 0.4mm or 0.5mm thick needle or pin to poke a hole in the aluminum or piece of tin.
- Step 7: Add black electrical tape to all 4 sides of the aluminum square.
- Step 8 : Hook the piece of aluminum cut with the hole already made, in the square that you cut out in the box, on the inside.
- Step 9: Create a lid for your pinhole. You can use black tape like the one you just used, and in the place where it coincides with the hole, put a bit of aluminum so that the small hole does not get dirty with glue from the tape.
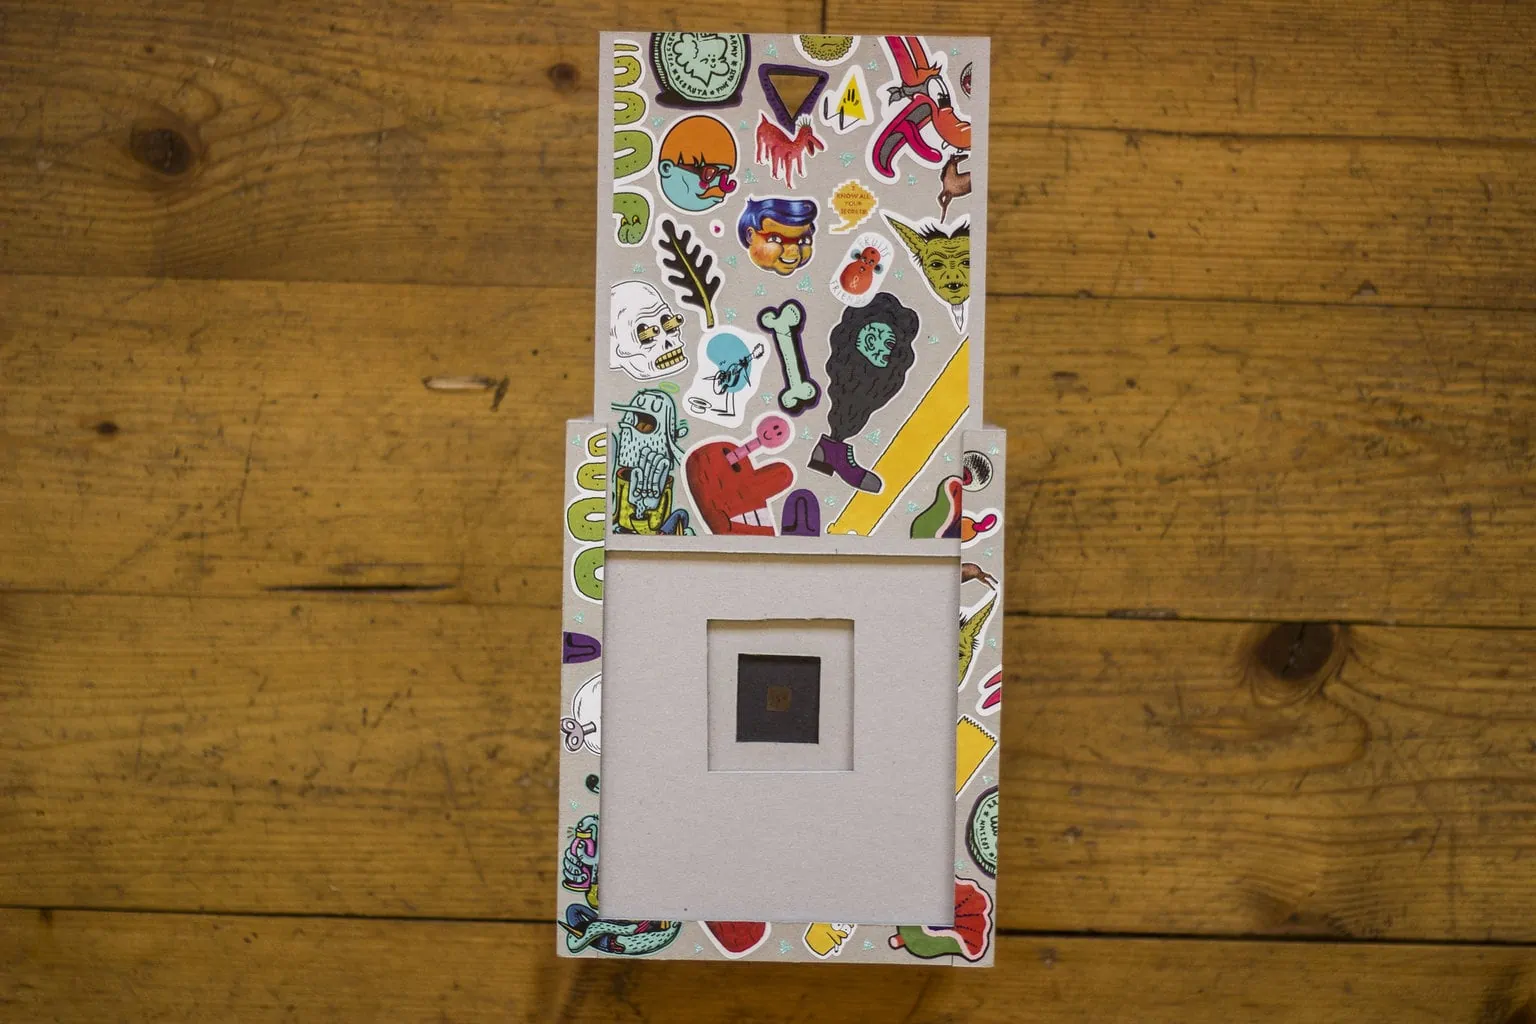
There is no single way to make a homemade pinhole camera, here you can see another way to build it:
You already have it done. Now all you have to do is add your photographic paper to the wall of the box where the image will be projected. Remember that you have to do this step in total darkness or the paper will be veiled. Consider getting a red light to perform this step.
To fix the paper to the wall of the box, the ideal is that you have cut it to the exact size of the box and it fits. If this has not been the case, you can use tape that sticks on both sides to prevent it from moving or falling while you take it to the place where you want to go to take the photos.
EYE: Don't make the wrong side of the paper, I'm telling you from my own experience, especially if you do it in the dark ? . For starters, it may be easier to start with a paper with a glossy finish, so it's easier to tell by touch if it's one side or the other.
Once you have the paper loaded, put the lid on the pinhole, and make sure to close the box well. Add black tape to the seams of the box to keep light out.
Now you can go out to capture the light in its purest essence ?
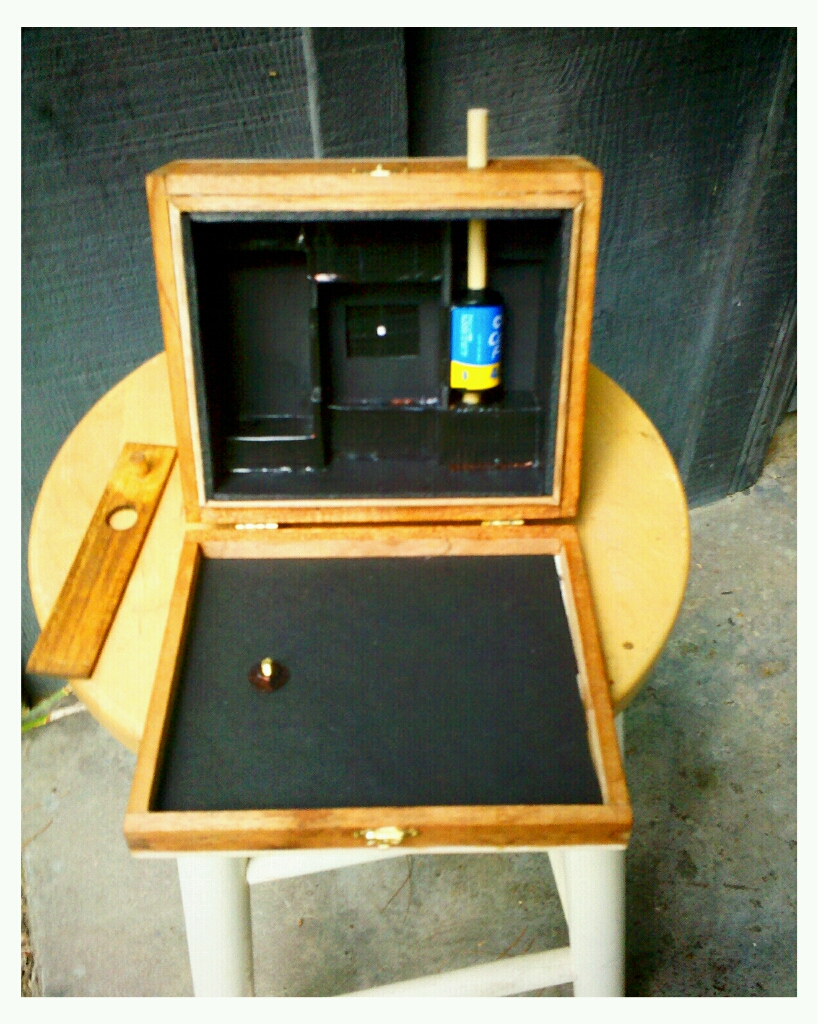
If you become fond of the subject, you can create increasingly elaborate pinholes: with wooden boxes, covers for the sliding pinhole, etc. Look at this couple of examples:
In short, any light-tight container can function as a pinhole camera.
PINHOLE PHOTOGRAPHY
You already have your home camera set up but the most important thing is missing, putting your pinhole camera into operation ?
LEARN TO USE YOUR PINHOLE CAMERA
A pinhole camera works essentially like any other camera. It is a dark box that includes photosensitive material on top of which the image is projected (in digital ones it would be the sensor, in analog ones , the reel).
As a lens or optics, it has a pinhole that will allow light to pass through the photosensitive material.
This hole or pinhole will mark the level of definition of the image. The smaller it is, the sharper the image will be, although at the same time it will require more exposure time.
If we press the shutter on a digital camera, here we uncover and cover the pinhole again. That intermediate time in which it is open is our exposure time.
HOW TO CALCULATE THE EXPOSURE TIME OF A PINHOLE CAMERA?
To calculate the exposure time of a pinhole camera, you must take into account several aspects:
The first thing you should know is that we are going to work with the same concepts as when we work in manual mode with an SLR camera or similar: ISO, aperture, and speed.
The ISO will be determined by the photographic paper that we are using, so it will be a fixed value. The speed will depend on the light that we find in the scene and the aperture of the diaphragm will have to be calculated and it will be, once we know it, a fixed variable.
In short, it will be like working with a semi- automatic mode where we must deduce an approximate speed for each scene.
To calculate the diaphragm opening (f/) of our camera, we must follow the following steps:
- Find out the focal length of the camera you have created, or what is the same, the distance between the lens and the sensor, in this case between the pinhole and the photographic paper. Measure the distance from one to the other and write it down.
- Next, write down the diameter of the pinhole you used.
- Both measurements have to be in the same unit of measurement (cm, mm, or inches, but in the same unit).
- Next, divide the focal length you have obtained by the diameter of the pinhole.
- The result will be the aperture of your pinhole camera.
of/stop aperture = focal length / pinhole diameter
For example, if my camera has a 90mm pinhole to the photo paper, and my hole is 0.4mm, this would be the calculation I would use to find my aperture:
–>90mm/0.40= 225. So the aperture of my camera will be f/225.
Next, we would only have to find out the shutter speed for each situation.
TRICK: You can always use the light meter of your digital camera to calculate a fairly accurate speed. To do this, you will start from f/16 or f/22, the maximum that your camera allows. Write down the speed that it proposes for the scene and the ISO that you indicate (the same as your photographic paper).
From there you have to count speed steps as you increase the f/ value.
For example, let's say that a scene gives me these values on my digital camera or light meter:
f/16, 1/60s, ISO 400.
Since I've already figured out that my pinhole camera's aperture is f/225, what I need to do is increase the f/ value as I decrease the shutter speed to compensate for the light I'm taking from it by closing the diagram.
I would calculate from f/16 and I would close step by step -> f/22, f/32, f/44, f/64, f/88, f/128, f/176, f/256. I stop here because I have already calculated that the aperture of my camera is f/225.
I would do the same, lowering the speed starting from the 1/60 value that the light meter of the camera gives me.
To calculate it quickly, you can try this formula:
POt = ((fp)^2/(fd)^2)*DOt
POt = Opening time of the pinhole camera
fp = Number of f-stops of the pinhole camera
fd = Number of f-stops of the digital camera
DOt = Opening time of the digital camera
In our case the result of the formula is the following:
POt = ((225)^2/(16)^2)*(1/60) = 3.29 s
With those light conditions, my pinhole camera should be 3.29s of exposure.
I don't know if this template can help you simplify your exhibits, but it's worth a try:
Pinholes aren't an exact science, many photos you'll take a bit intuitively, and you'll probably miss more than a few times. But therein lies the fun. If we wanted perfect photos, with great definition or perfect exposure, this wouldn't be the way to go ? .
HOW TO DEVELOP A PINHOLE PHOTO
As you may have imagined, the thing does not end here, after making our camera, calculating the exposure time, removing and putting the pinhole cover at the start and end of the exposure, etc., now comes the step where the magic happens: revealing the Photo.
WHAT DOES IT TAKE TO DEVELOP A PHOTO?
- A dark room with a red light
- Four trays that fit the paper and that support liquid
- developer liquid
- stopping fluid
- fixative liquid
- Water
1. Prepare the four trays with the chemicals following the instructions on the bottle and place them in this order:
Developer-Stop-Fixer-Water
2. Turn off the light and turn on the red light.
3. Carefully remove the photo from the pinhole camera, trying not to touch the emulsion part. Insert the paper into the developer tray for approximately 90s or until you see that the image has already been developed and does not produce any change.
4. Then put the copy in the stop tray for about 30s.
5. After those seconds, put it in the tray of the fixer to avoid that it is veiled in the sunlight for 4 or 5 minutes.
6. Finally, wash it with water and let it dry. You will see that your photo is upside down and is negative (what is clear appears black and upside down).
7. To print it, you must scan it and invert the colors in a conventional photo editor.
Some cultural centers have laboratories that you can rent by the hour to reveal your photos, it's a matter of doing some research to see if you have one nearby and you prefer to do it that way.
INSPIRATION ABOUT PINHOLE PHOTOGRAPHY
There are some pinhole photography groups that you can join on platforms like Flickr to share your photos or just to get inspired.
Here are a few that you can take a look at:
- Pinhole Photography
- Pinhole Photography Medium Format
- Pinhole Photos
- Pinhole Perspective
Would you dare to build your own pinhole camera? I encourage you to do it at least once in your life. To enjoy the magic of photography in its purest essence, to experience the frustration of failures and the immense joy of successes.
