Surely more than once you have read something about the dynamic range. It usually appears here and there in any article about exposure , histogram , light meters or light in general. But do you really know what it is? Do you know how to get the most out of it? Well, I hope I know how to explain myself well and, by the end of the article, you will be a master of dynamic range, or at least that you have understood and internalized the concept ? And if you want to delve into lighting in photography, this is the article you were looking for.
WHAT IS DYNAMIC RANGE?
As always we are surrounded by photographic buzzwords that get tangled up in our fingers, cloud our minds and confuse us. This time, we will leave the definition for later.
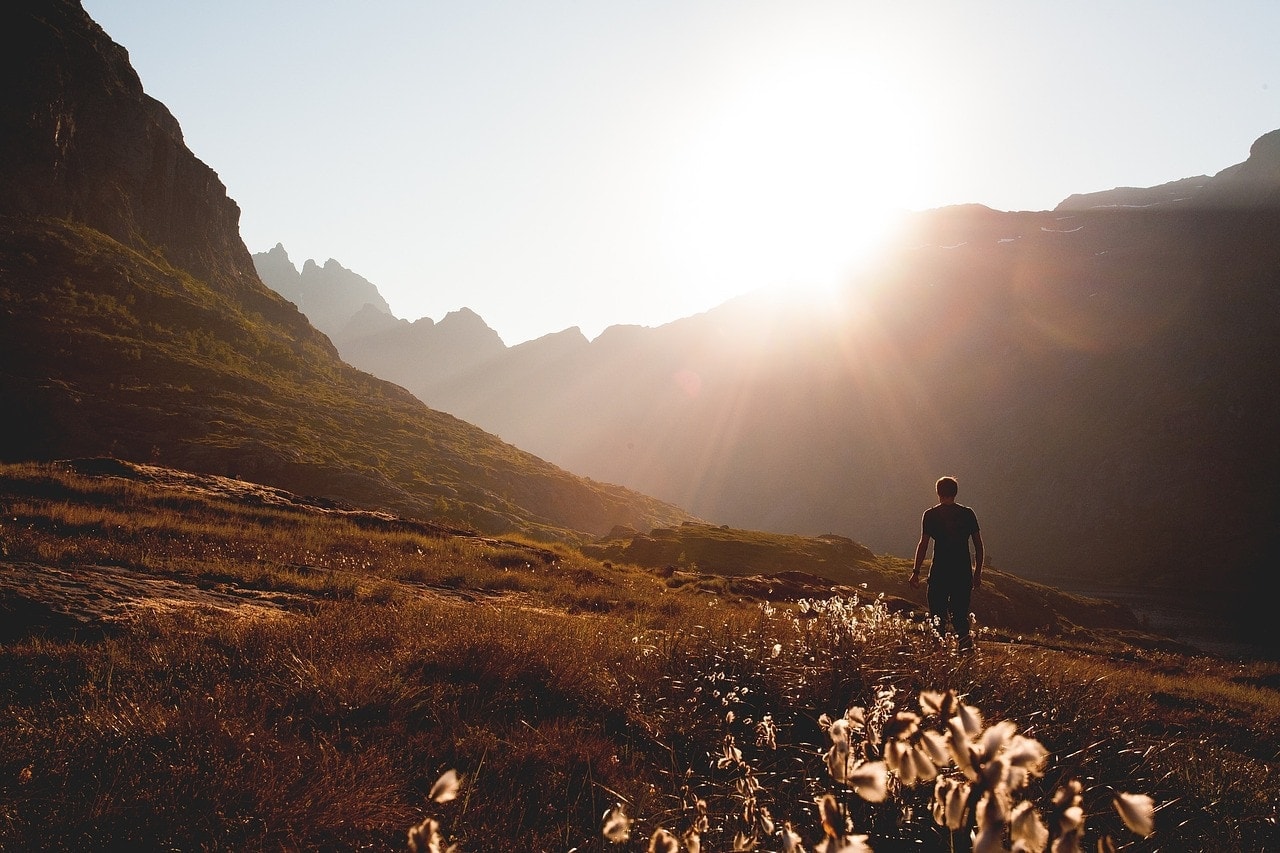
Now just think: how many times are you looking at a beautiful scene, of which you like everything, with a magical light, some precious colors, and you decide to take out your camera to immortalize that essence, that wonderful light, that sky full of infinite shades, you frame , expose, shoot and surprise! The photography and the scene have nothing to do with it. You get the burned sky, without tones, or the dark earth, without textures. Nothing to do with the wonderful scene before you. Hasn't it happened to you millions of times?
Well, that's mainly due to two factors:
- This happens in the first place, because our eye is infinitely better than a camera (however professional it may be) in capturing the simultaneous detail in light and shadow, since it has the ability to continuously adapt the pupil to the different levels of brightness of the scene.
- Secondly, because the scene (although since we are capable of processing it correctly with the naked eye, it may not have seemed so to us) has too much difference between the lights and the shadows for the camera to be able to process both correctly, that is, it has more dynamic range than our camera can capture.
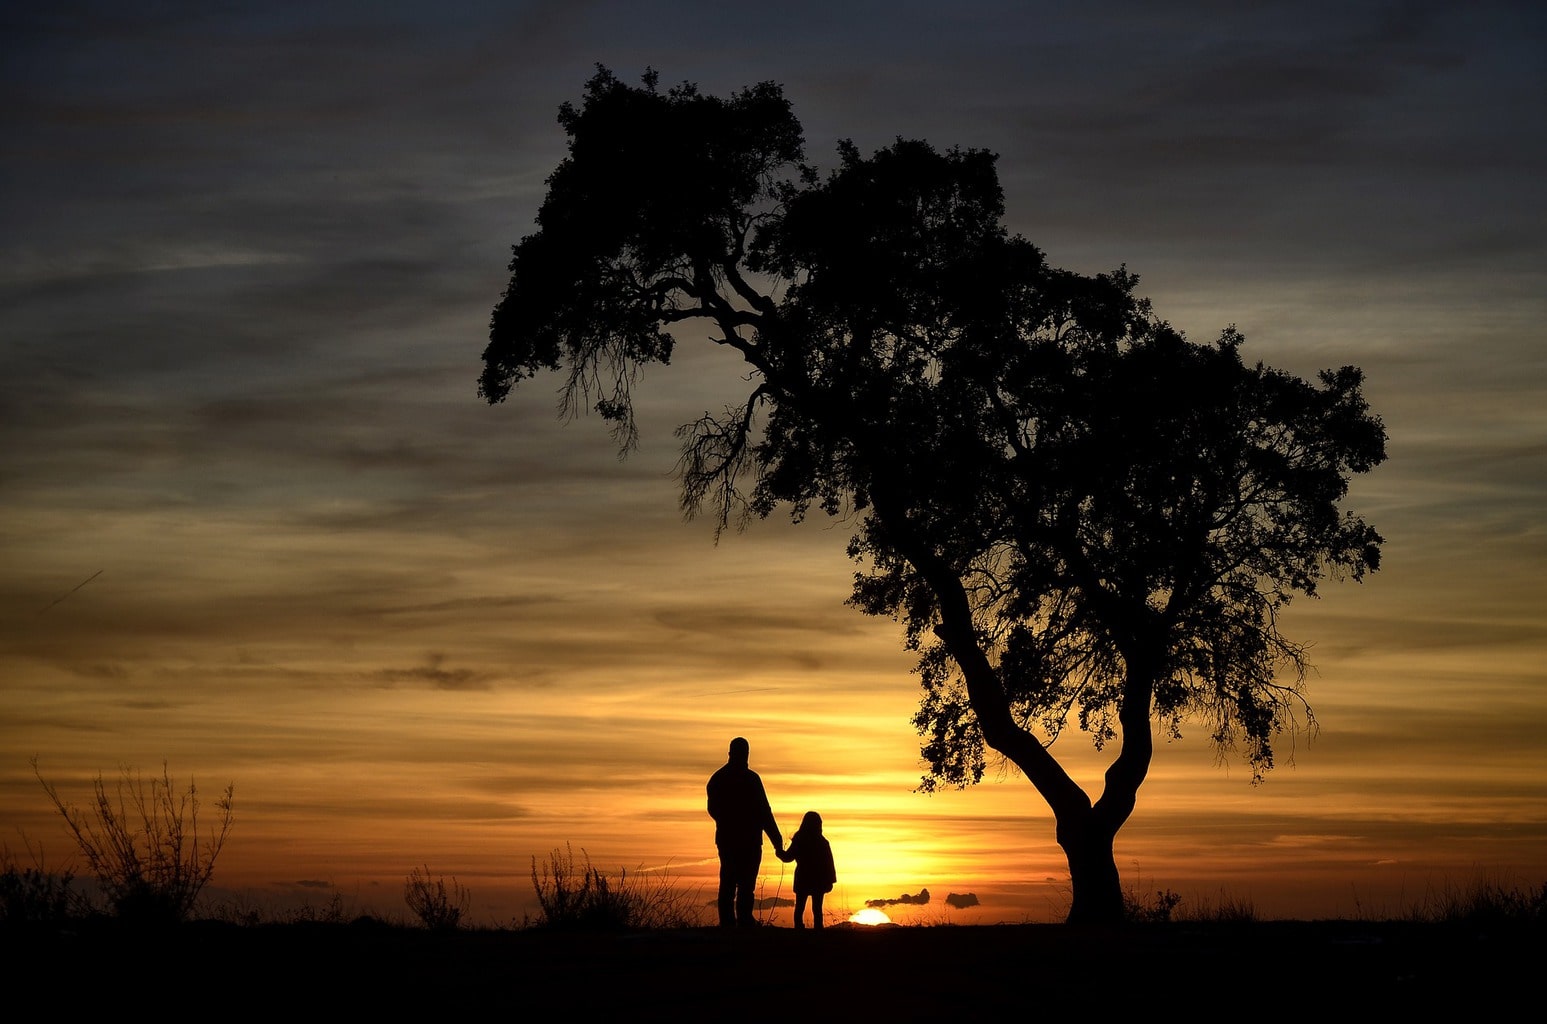
DYNAMIC RANGE (or Dynamic Range): is the ability to capture detail in lights and shadows within the same image . In other words, our ideal goal is to achieve almost pure blacks and whites with a large number of intermediate values .
THE HUMAN VERSUS THE MACHINE
When we talk about dynamic range, we're talking about the ability to capture the different lights and shadows in detail in a scene, right? We usually express this difference in diaphragm steps . The more difference diaphragm stops our camera is capable of correctly expressing, the better dynamic range it will have. In other words, a camera that has a dynamic range of 8 f-stops will be more capable of capturing the light reality of the scene than one that only has 5 f-stops.
And while our cameras are working, for example, with 5-8 f-stops, our eye is capable of processing scenes with more than 15 f-stops apart. Almost nothing, right? That's why we always, always have to assume that in scenes with a great difference between light and shadow (highly contrasted) our camera will be incapable of portraying what our eyes see.
THE HISTOGRAM, YOUR GREAT ALLY
We already talked about the benefits of the histogram , how it can help you see if your image is well exposed or not, but not only that, it can also help you see if your image has a rich or poor dynamic range, and therefore Therefore, it can help you work on site to improve it. Let's see how the different types of dynamic range are translated depending on the scene and the histogram in various images:
IMAGE 1:
What can we deduce from the following image by observing the histogram with respect to its dynamic range? If you look closely at the histogram, you will see that it contains information throughout the length of the histogram; in the central zone as well as in the extremes (left shadows, right highlights). This means that from this scene, we have managed to obtain a good dynamic range, since we have information about midtones, highlights and shadows.
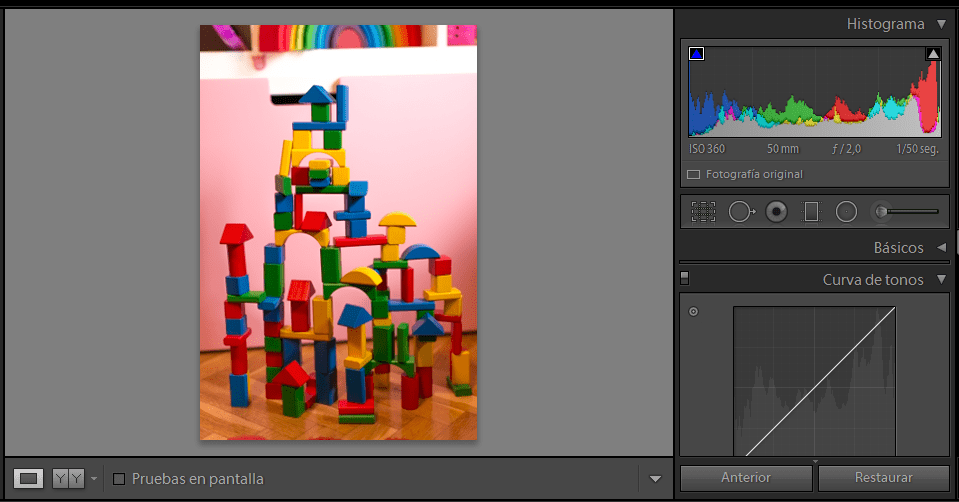
IMAGE 2:
What do you think of the next scene? Would you say it has a good dynamic range? If you look at how the information is distributed along the histogram, you will see that it contains, like the previous image, information in all light zones, so we would also say that it has a good dynamic range.
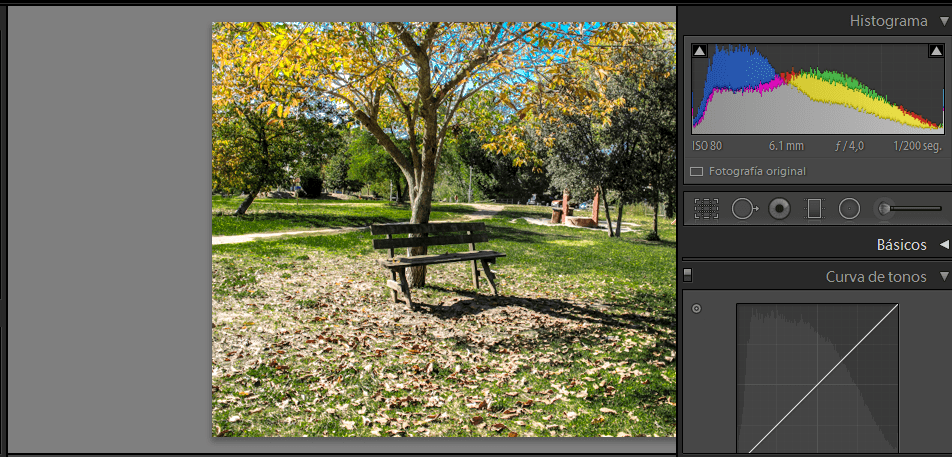
IMAGE 3:
Now take a look at the following image, would you say it has a good dynamic range? Most of the information is concentrated in the right part of the scene, corresponding to the whites and highlights, but the left area has hardly any information, there are hardly any shadows or blacks, you see?
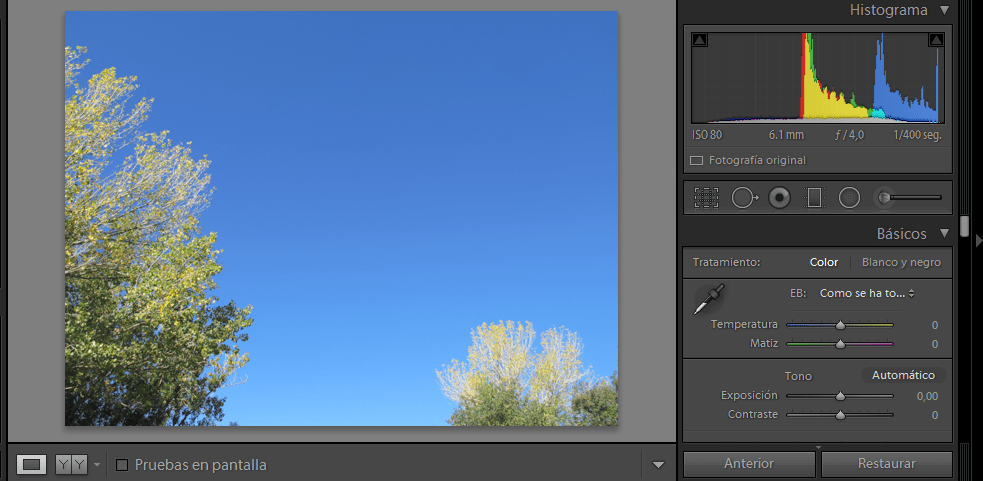
IMAGE 4:
Finally look at the following image. What do you think of the dynamic range of the image? Have you noticed how the information from the lights is concentrated in the left area of the histogram? In this case, there is hardly any information about highlights or whites.
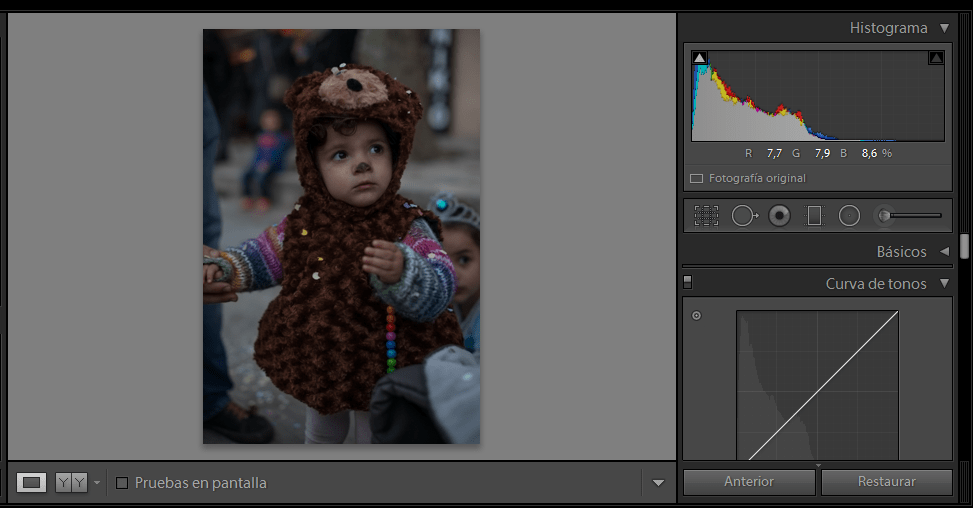
HOW TO GET THE MOST OUT OF THE DYNAMIC RANGE
Keep in mind, however, that if the scene in front of you does not have a very pronounced difference between light and shadow , that is to say, if, for example, your camera supports up to 7 stops of light difference, and the scene only has 5, your camera will be perfectly capable of portraying what is in front of it . You can do the test by measuring the darkest areas of the scene and then the lightest ones and see how many f-stops are different between them to find out if your camera will really be able to portray the scene faithfully.
But the essential thing when it comes to getting the maximum dynamic range that it offers you is to take advantage of it, and that is done simply by correctly measuring and exposing your photographs. That is to say, there will be scenes that are, naturally, somewhat blended, or with very high contrasts, which will leave a good part of the scene without light information. Not to worry, there are images that are just like that. Now, for any scene that we want to represent, the important thing is not to fail in the measurement and exposure of the image because if it is well exposed, it will mean that we have achieved the greatest possible dynamic range in situ and that we can then work on it in the processing to enlarge something else the dynamic range of the scene.
Of course, do not forget to shoot in RAW whenever you anticipate that you are going to retouch your images.
TECHNIQUES TO INCREASE DYNAMIC RANGE
FILTERS
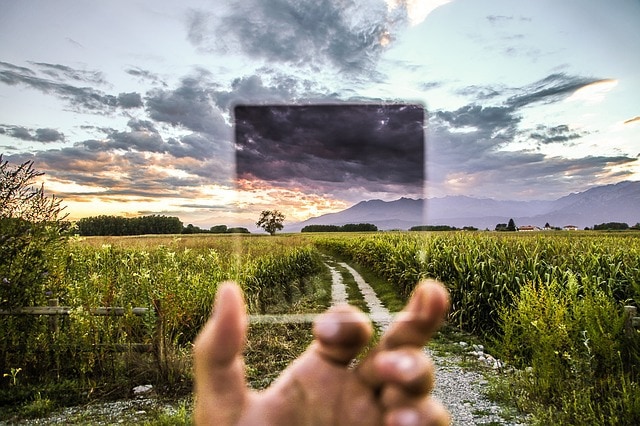
There are landscapes so beautiful that it seems that they are going to have to photograph themselves, right? Too bad that the usual thing happens to us when taking the photo, that the sky has too much light compared to the ground and it turns out that we are burned, or the earth is too dark. Now we know that this is the fault of the limited dynamic range of our cameras ;-). Luckily we are not alone in the face of danger. With the help of a neutral density gradient filter , we can help to compensate the two exposures thus reducing the difference between highlights and shadows, and helping to extend the dynamic range of the scene by not having to choose between highlights and shadows.
BRACKETING
There are different types of Bracketing (or bracketing), although in this case we will focus on exposure. Exposure Bracketing consists of taking several identical images in a frame, varying only the exposure in each one of them. Normally three images are taken, one exposed for the highlights, one for the shadows, and one with the "correct" values provided by the camera. Once we have the images with the different exposure values, we can join them using Photoshop or some other editing program so that all the information overlaps one on top of the other, giving us detail in all areas of the image. For a better explanation click here ?
WORK THE RAW FILE
With our "raw" file and the amount of light and shadow information it contains, retrieving highlights is easy and usually gives good results as long as we start with a good image. Working on basic settings such as shadows, highlights, blacks, whites, and even contrast, will allow you to expand the dynamic range of your image satisfactorily.
If you hesitate between exposing for the shadows or the highlights, do it for the shadows, these are more difficult to recover than the highlights, because doing so generates a lot of noise. It is what we call righting the histogram , or what is the same, that the image tends more towards the highlights than towards the shadows, so that we can finally recover the image with less loss of quality than in the opposite case.
DEFINITELY
In order to faithfully represent what surrounds us, for an image to be able to transport us to the scene that existed at the time the shot was taken, the closer we get to the original model, the more the viewer of our images will be able to delve into that moment. That is why we never recommend abusing retouching or HDR, too many retouching gives a feeling of unreality and distances us from the moment we wanted to represent through our image.
I hope this article has been useful to you, that it has given you something and, above all, that it has made you go look for your camera, or open your computer to touch and analyze images, histograms, lights and shadows. You only learn by fiddling around and practicing ? Oh, and don't forget to share if you think it might be useful for someone else. Thank you and see you soon.

