
In this article you will find EVERYTHING you are looking for on a white background for photography.
Do you need to put a white background on a photo? Or do you prefer to remove the existing white background and change it to something more interesting? Or just remove the background from an image online?
Are you looking for a plain white background to download? Maybe what you hope to find is a white background for your photo shoots?
Well, all this, and more, you have it available in today's article.
- White backgrounds to download
- How to buy a white background for photos
- How to make the background of your photos really white
- How to remove the background from an image online (free, and without a watermark)
- How to remove the background from an image with Photoshop
- How to put a white background on a photo
- When to use a white background in your photographs?
WHITE BACKGROUNDS TO DOWNLOAD
To download these free white backgrounds you just have to click on the image you want, right click and Save Image . Ready!


HOW TO BUY A WHITE BACKGROUND FOR PHOTOS
When buying a white background for photos it is important to know what to look for:
- Price: You will find a price range from 15 euros to more than 100 depending on the material or whether or not it goes with support. The important thing is to find a balance between your needs and what you can or want to spend.
- Size: A white background is not the same for a fashion portrait as it is for a small product or a flower. Determine what size you need and look carefully at the measurements before purchasing it.
- Material: There are backgrounds of cotton, polyester, vinyl, etc. There is no one better than another, but they respond to different needs or budgets. Look at what kind of cleaning it has; his resistance; if it is more or less easy to transport and if it makes more or less wrinkles.
- Support: There is the option of a smooth white background to hold with tweezers or on a bar, such as this one made of muslin, or this other vinyl; or purchase the kit that includes the support with several funds(white, black and green, as a general rule).
I have left you some recommendations, if you want to see more types and sizes of white backgrounds you can find a wide variety here.
To achieve a smooth white background in product photography or other small objects, there are also light boxes., that you can find them in different sizes.
And if you want to build your own light box, follow this tutorial.
HOW TO MAKE THE BACKGROUND OF YOUR PHOTOS REALLY WHITE
Let's see what you need to get a background that is really white and only white ? :
1. GET A WHITE BACKGROUND
As weird as it sounds, you may have already tried to achieve a white background by using a white background, but strangely enough, you couldn't.
That's because the background being white does not ensure that the result reaches pure white.
Other factors influence the process, and if they are not taken into account, it is possible that the result, rather than white, is gray, greyish or off-white.
We are not able to distinguish hundreds of whites like the Eskimos, but we do know how to appreciate pure white ? .

Despite what has been said, a white background helps. So get one, or at least as clear as possible and, above all, that contrasts with the protagonist of your image, whatever it is.
In the previous section I have left you ideas and recommendations to buy a white background.
In addition, for small motifs you can use objects that you have at home, a light table, an infinite background that you can create by following these steps , etc.
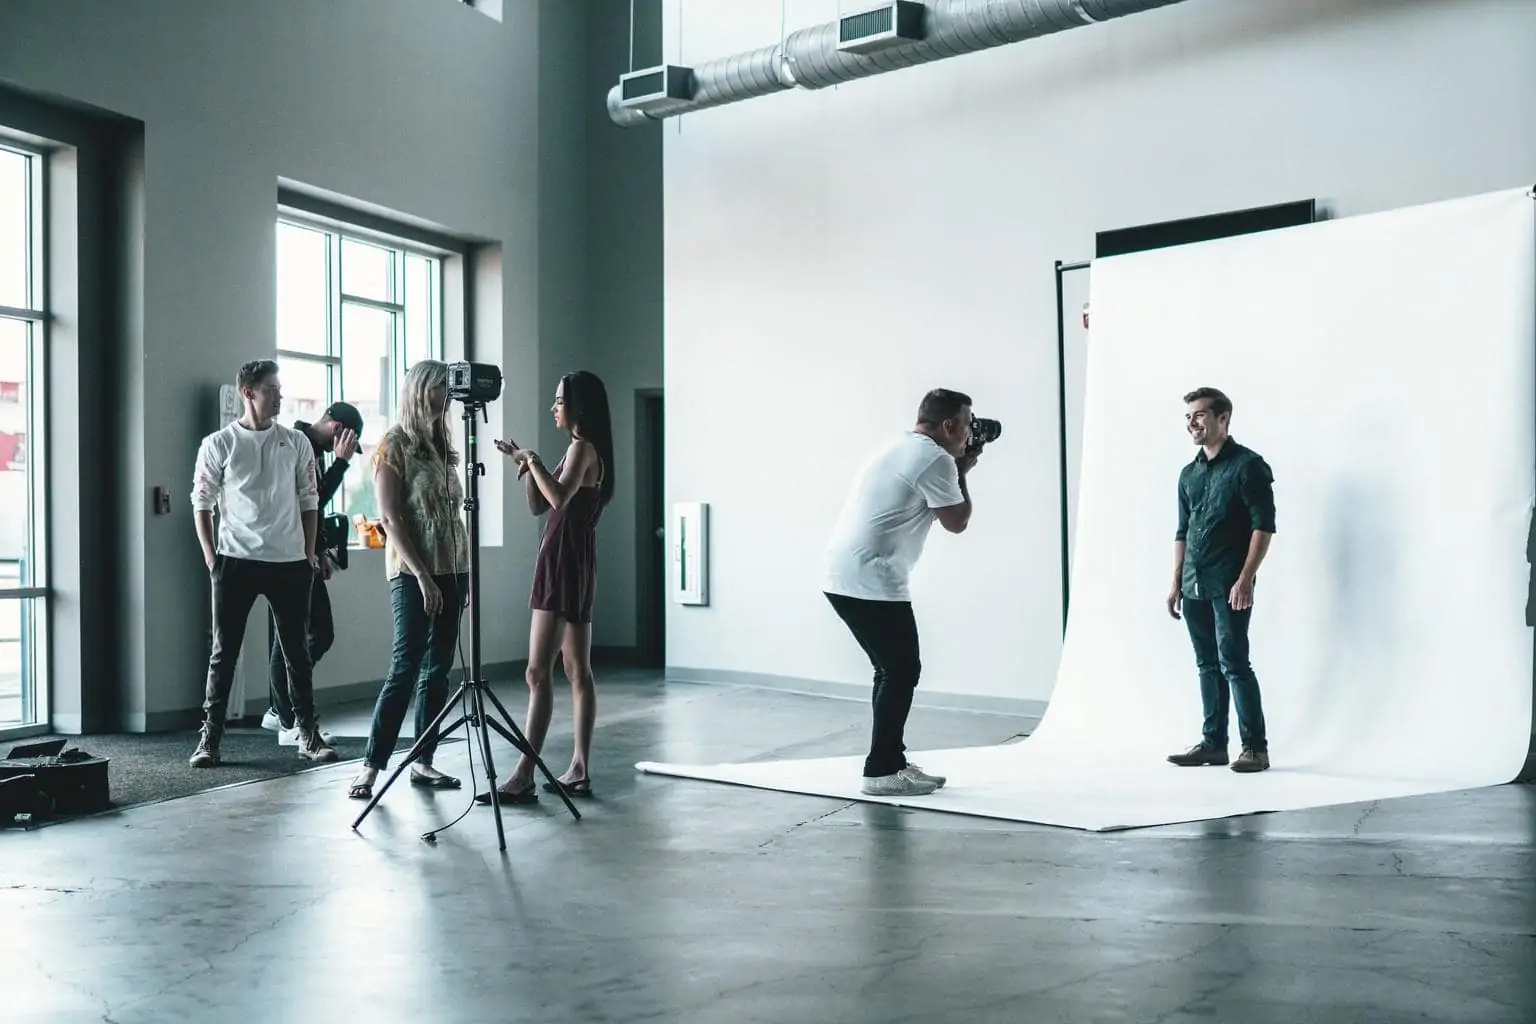
2. SEPARATE THE SUBJECT FROM THE BACKGROUND
Your first impulse may be to place your protagonist directly on the whitest wall in your house, or the curtain, poster board or whatever you are going to use as a background.
But if you place your protagonist too close to the background, several things will happen:
- The subject itself will cast shadows on the wall, graying your image.
- You will see the detail of the background and with it all its imperfections (gotelé, wrinkles, spots, etc.).
- The background lighting will be the same as the subject's lighting, so you won't be able to work with increasing the exposure on the background (we'll see why this is important in a moment).

So, after locating a good background, your second mission is to make sure that your subject does not create shadows against it and that you can apply a sufficient aperture so that what you want to portray comes out perfectly focused but not the background (it will help you to conceal imperfections and achieve a more natural result).
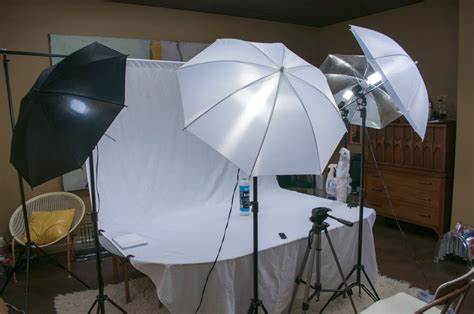
3. LIGHT UP THE BACKGROUND
Another essential trick so that your background is whiter is that it is well lit , in a homogeneous way , preventing shadow areas from being created.
The lighting should be enough to make it look like pure white .
For this, it must be higher in the background than in the main subject, and well differentiated in both planes.
In this way you will prevent the protagonist from appearing overexposed or burned.
4. USE A NEUTRAL GRAY CARD
Assuming that you use your camera's light meter to measure light, like most mortals, you will have the problem of measuring reflected light.

Reflected light photometers give you the exposure values based on the light reflected by the objects or people on which it falls.
It is not the real light that reaches them (which is what external photometers can measure) but rather the light that they give off .
Additionally, they are configured to measure based on a neutral gray. It is with this value that they give a correct exposure. For this reason, on white backgrounds (as with snow images) or, vice versa, in scenes with a lot of blacks, the light meter is easily confused and provides wrong values.
- The easiest and most correct solution is to get a neutral gray card. They are small and very cheap. You must place it next to your subject in a place that receives exactly the same light as what you are going to photograph and measure the values of the card.
- If you don't have any, look for something that looks like it, in a similar shade and that reflects the same light.
- If you are not clear, measure your subject in a timely manner , so that the rest of the scene does not influence the measurement.

5. ACTIVATE THE HISTOGRAM
This will depend on each image. The histogram , in case you don't know, is like a fingerprint of our photographs and each one is different depending on the image.
But what you should have is a clear tilt to the right of the histogram (highlights) which is where the information on the white of your background should be reflected.
6. ACTIVATE THE HIGH BEAM INDICATOR
It is used to mark the areas where information is lost due to excessive light.
In this case, you want the background to be one of those areas, but not your main subject.
Activating the highlight indicator will be very useful to know which areas you have in pure white and if you should increase or reduce the light from the background and/or from your protagonist.
7. CONTROL THE WHITE BALANCE
It's crucial that you control the white balance (or color temperature) of your available lights to prevent them from casting the image in unwanted tones, especially if you don't have professional stage lighting equipment.

8. ALWAYS PHOTOGRAPH IN RAW TO ACHIEVE A WHITER BACKGROUND
In addition to achieving a correct image from the camera, the best way to ensure a good final result is by photographing in RAW format.
The RAW (raw) is a format without processing by the camera that preserves more information about the scene allowing more margin when editing (which brings us to the next point).
9. EDIT TO GET A WHITER BACKGROUND
To get the purest white in the background you will most likely need to go through editing.
Most editing programs allow you to increase whites, exposure or highlights, as well as improve blacks or shadows.
The edition will give you that touch that you lack, if you lack it. But the ideal, as I told you before, is that you try to get the most perfect image possible in the camera ? .

HOW TO REMOVE THE BACKGROUND FROM AN IMAGE ONLINE (FREE, AND WITHOUT A WATERMARK)
Now let's see how to remove the background from an image online. Yes, yes, I bring you two options for free and without a watermark .
REMOVE BACKGROUND FROM AN IMAGE WITH REMOVE BG
The easiest and most effective way I have found is from Remove bg.
It is a free and very simple online program.
The drawback is that the resolution is very low. If you want high-resolution images, you have to go through the box, of course.
Let's use this image of Mario as an example.

The steps to remove the background in Remove bg are:
- You open the page and upload the photo on the right side (Upload Image), you can drag it.
- Automatically, the photo without background appears and you download it by clicking the Download button.
- You already have it! Easy, right?

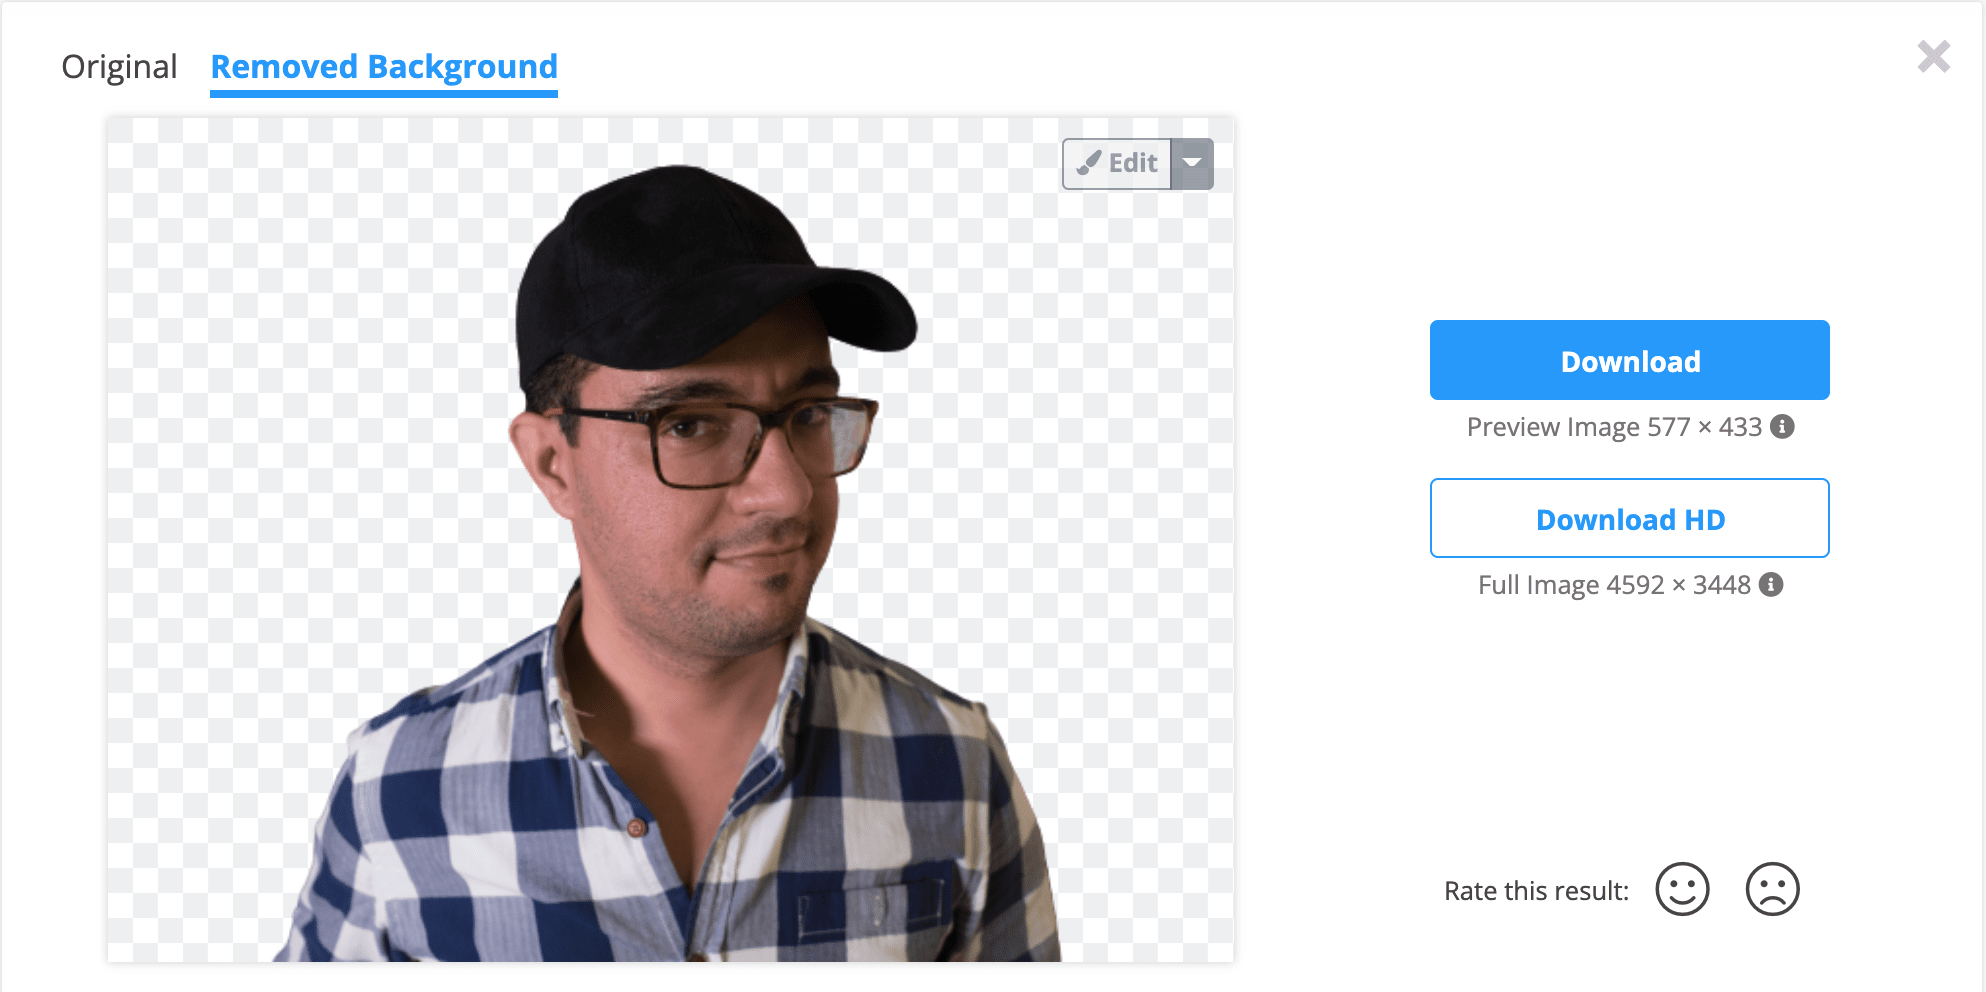

If you enlarge the image you will see that you get a .png file. It has no background, although you see it white above, you can put whatever you want on it.
REMOVE BACKGROUND FROM AN IMAGE WITH PICWISH
Another free online tool without a watermark is PicWish. The advantage is that the resolution of the downloaded images is higher.
The drawback is that if the background is not very smooth, it works a little worse than the previous one.
Of course, with smooth backgrounds it works very well.
I give you two examples of results, the same image as before and another with a plain background, click on them to see them better.


HOW TO REMOVE BACKGROUND FROM AN IMAGE WITH PHOTOSHOP
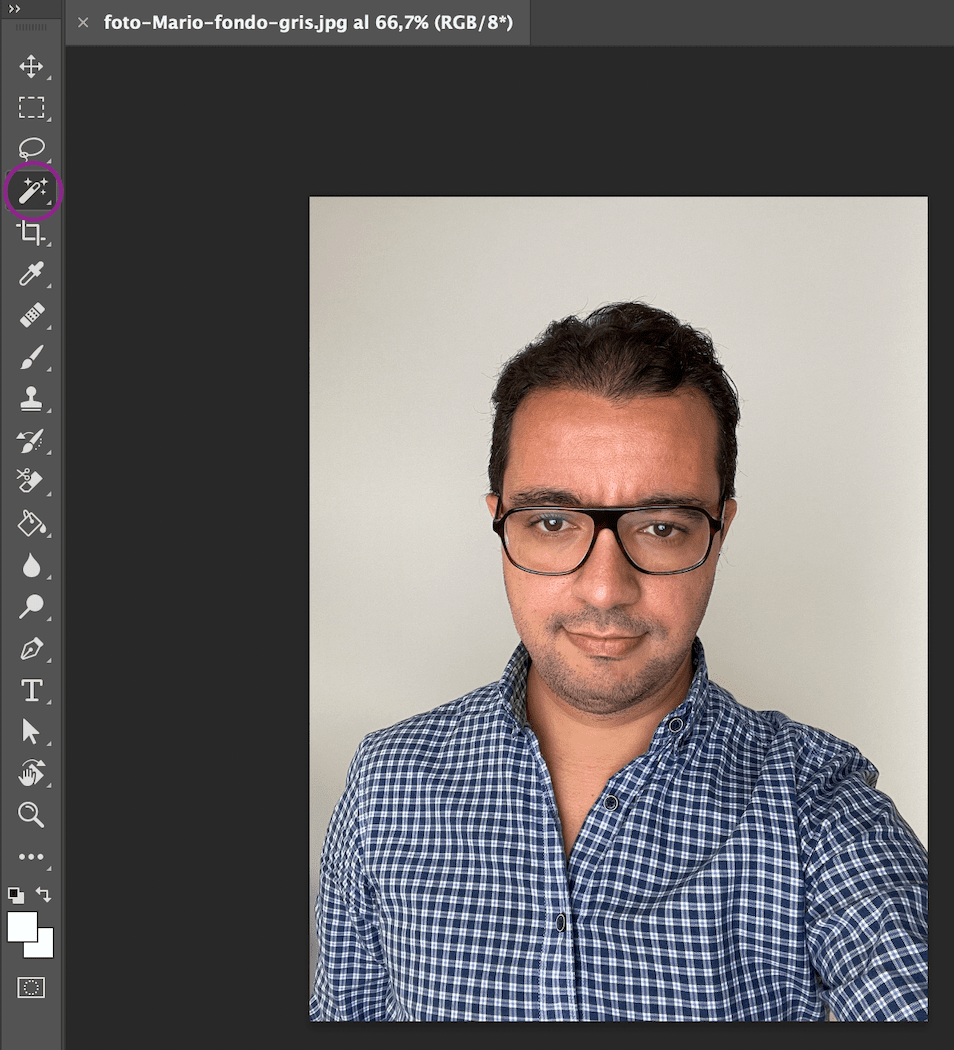
If you have the program and want a higher resolution result, these are the steps to remove the background from an image with Photoshop , below are the screenshots:
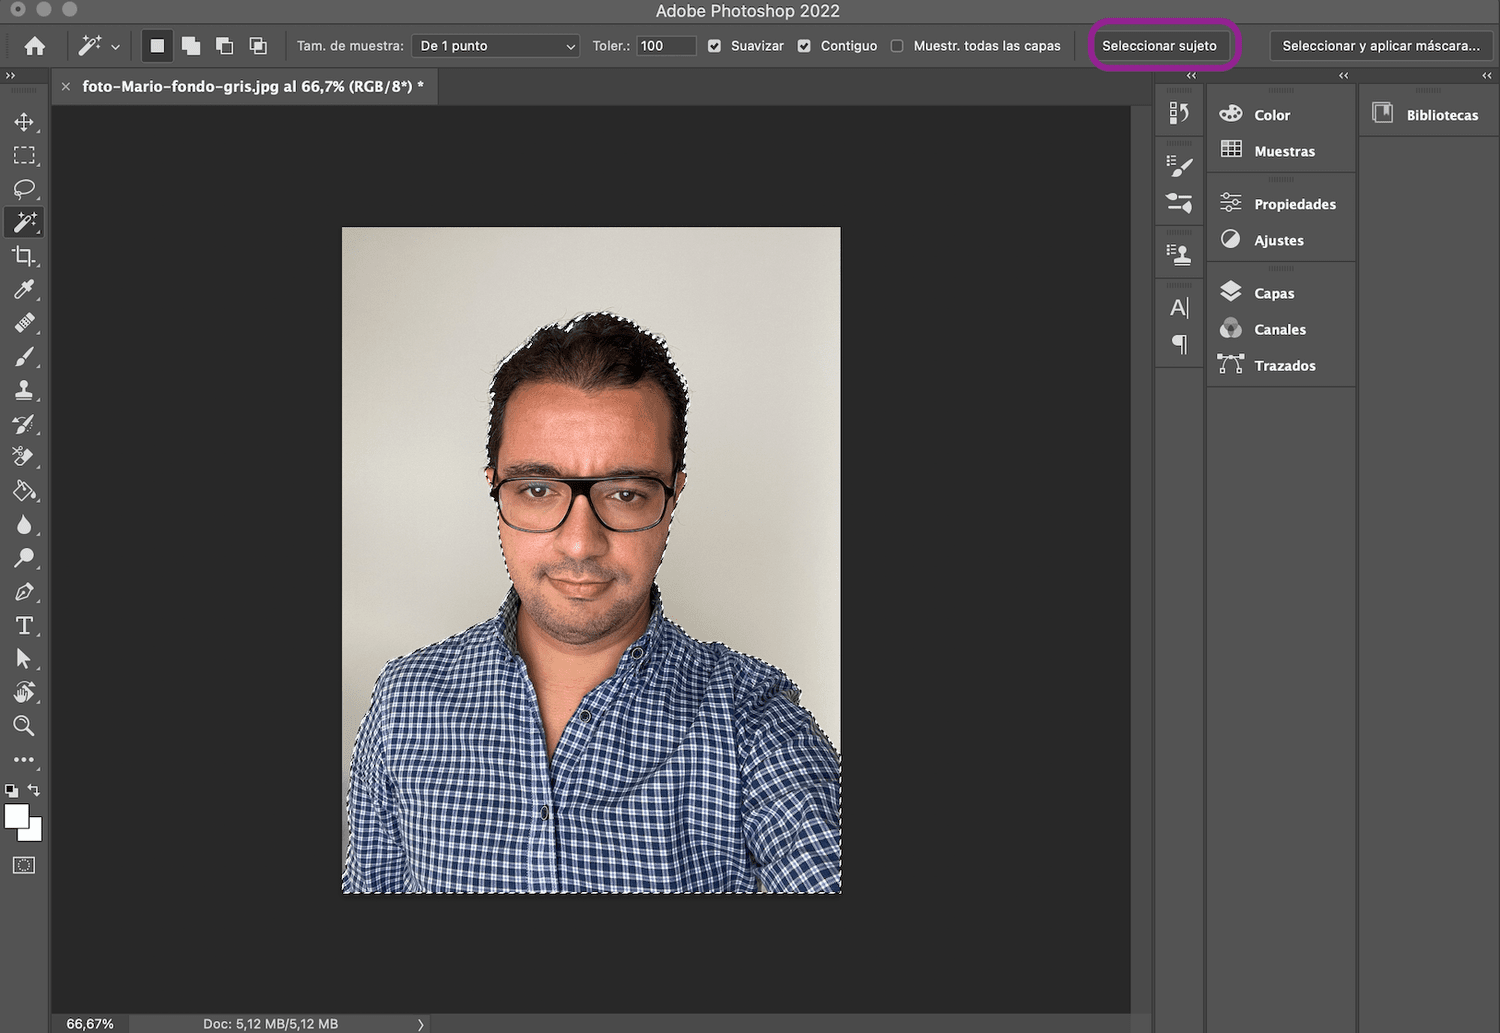
- Open image and select “Magic Wand” tool.
- For a more precise selection I recommend you use the "Select subject" option (top right).
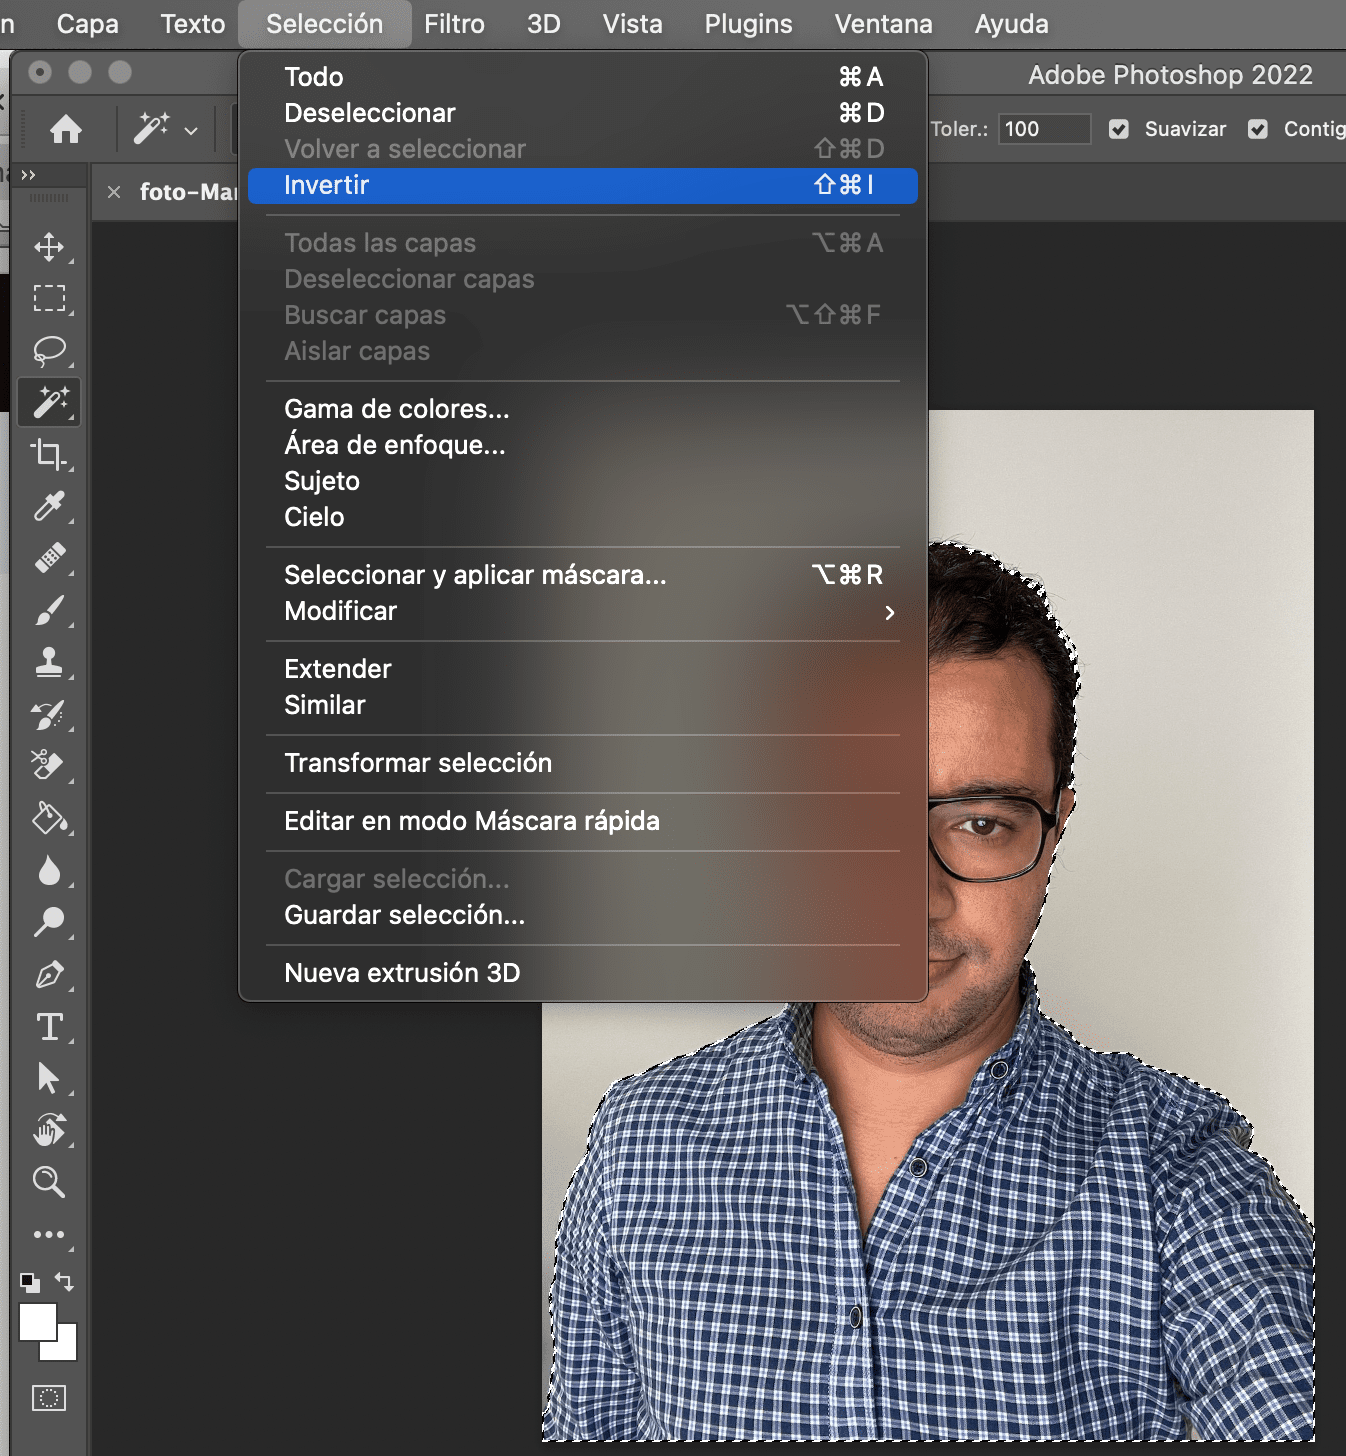
- Follow the Photoshop menu path: Select > Invert to select the background.
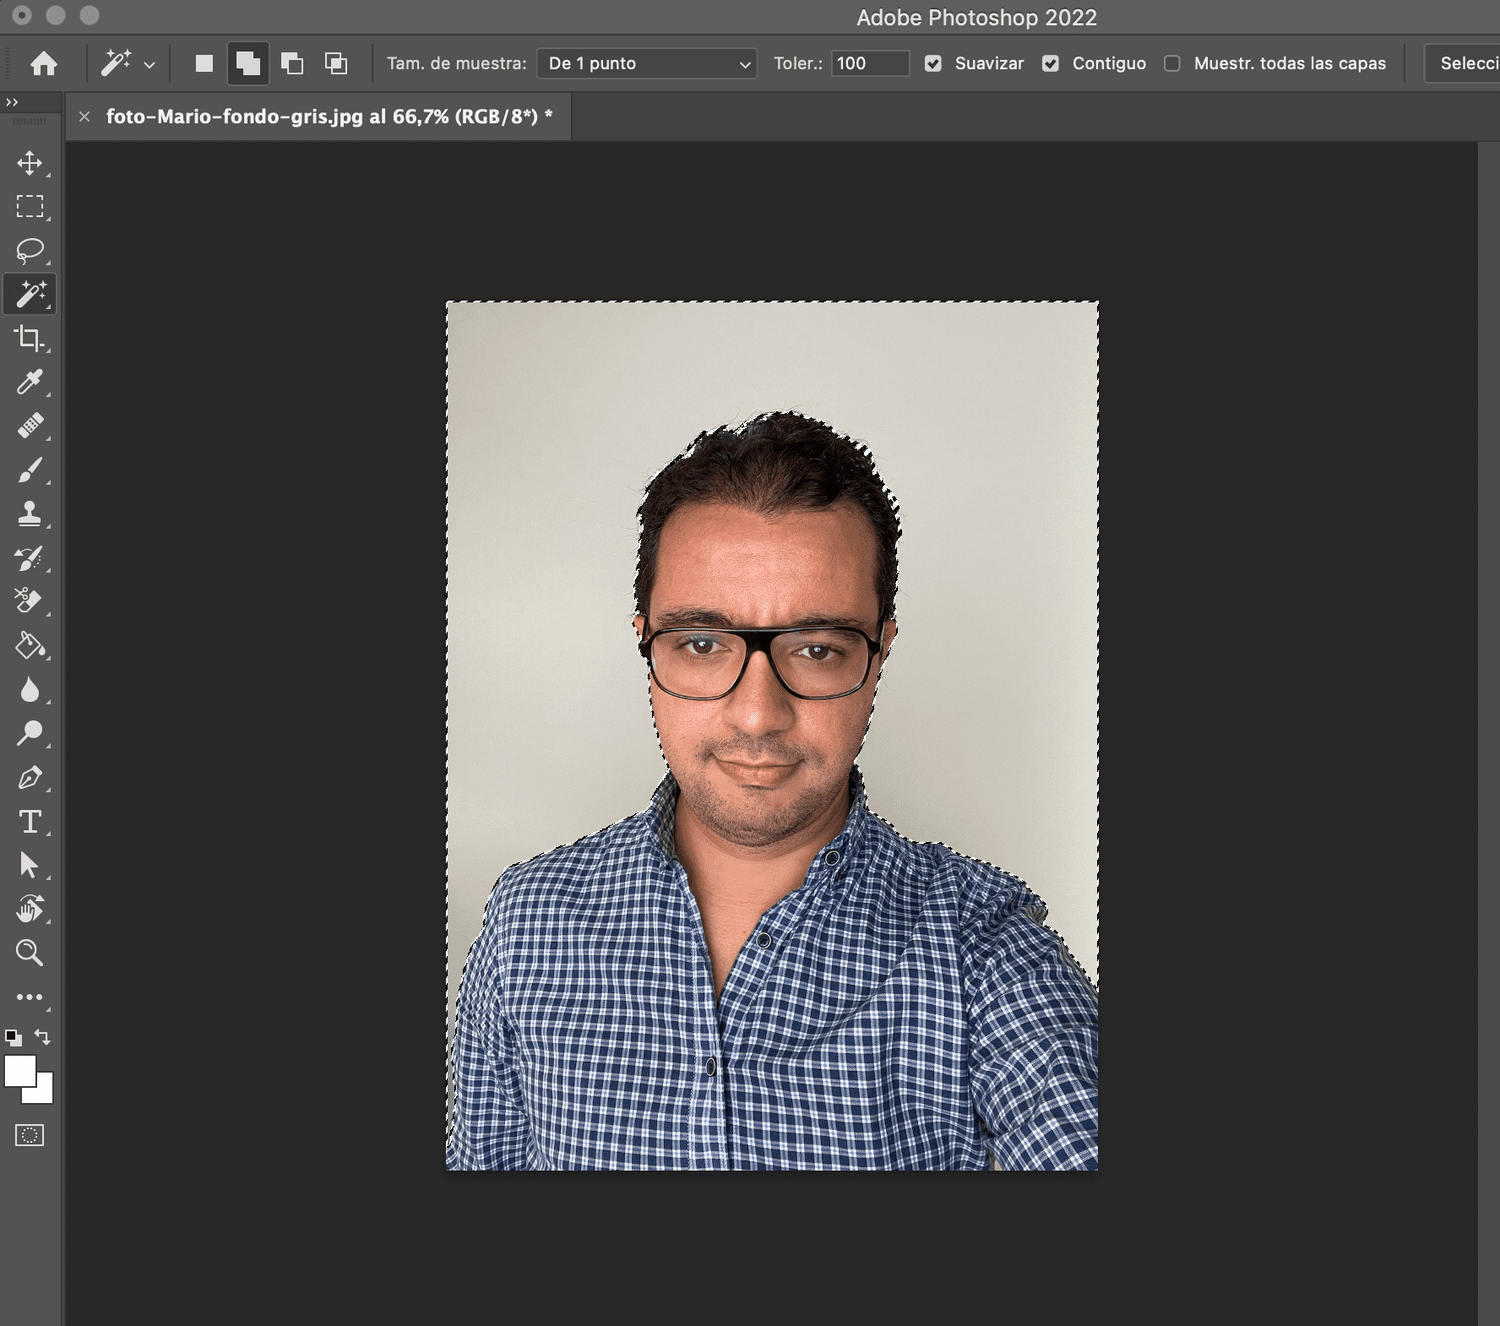
- Once the background is selected press Ctrl+Delete (Windows) or Command+Delete (Mac)
- You already have it, you only have to Export your photo.

HOW TO PUT A WHITE BACKGROUND ON A PHOTO
In the following video Mario explains step by step how to put a white background on a photo. I will summarize it below.
If you found it useful, I remind you that we have a Photoshop Masterclass divided into two sessions (Beginner and Advanced) with many more tips and tricks.
This is the summary of the steps to put a white background on a photo that you can see in the larger video:
- Upload photo and background (or backgrounds you want to try)
- From the Magic Wand tool select the Select subject option
- From the Edit > Copy menu or with the Command+C (Mac) / Control+C (Windows) keys
- Go to the file where the background is
- From the Edit > Paste menu (Command+V /Control+V)
- Transform (Command+T /Control+T) to modify the size to your liking and place it in the part of the background that we want.
APPLICATIONS TO PUT THE WHITE BACKGROUND FROM THE MOBILE
In case you didn't know, there are also these applications to put the white background from the mobile :
- Photo Background Eraser ( iOS)
- Simple background changer ( Android)
- Auto Background Changer ( Android)
- Change Photo Background ( Android)
- Adobe Photoshop ( iOS )/ Android)
- Superimpose ( iOS )/ Android)
They have some free options, or trial days, but in order to use them well and get good results you have to access the Pro or paid option in most of them.
The good thing is that some allow you to do great things for very little money, like Superimpose, which only costs about 2 euros approx. and allows you to put a white or black background, change it to a different one, make a double exposure, etc.

Anyway, I recommend you try them all and decide which one you like best.
WHEN TO USE A WHITE BACKGROUND IN YOUR PHOTOGRAPHS?
To finish, I am going to share some of the most common uses of the white background in photography:
- fashion portraits
- Corporate images of the employees of a company
- Product photography (don't miss our mega guide with tips and tricks in the link)
- Websites
- Journals
- High key photos
Mastering different photographic techniques and resources will provide you with tools for all kinds of situations and will undoubtedly make you a better photographer.
That is why I recommend you make an effort and practice what you have learned to the maximum, since it is the only way to internalize the concepts.
