It may be that every time you have seen the concept “white balance” you have jumped with a scared face directly to the next setting, to the next article, to the next chapter of the book. I understand you perfectly . It is a concept that creates torpor even before having reached the " s " of whites. Allow me, before continuing and if you want to delve into the subject of lighting in photography, to recommend reading this mega guide that we have prepared for you, so that you do not miss any important concept.
Returning to our topic, if you search Google for the definition of White Balance you can find terms such as:
- Spectral distribution of energy
- Light energy
- RGB level scaling
- gamma compensated
Mario would say "Is it me or do I get the feeling that you have to study Semantic-Photonic-Graphic Engineering to understand these concepts?" The worst thing is that explaining things in such a complex and hermetic way, all it does is scare away the amateur photographer, giving them the false impression that photography is something very complex. Nothing could be further from the truth, luckily .
The truth is that it is so easy to use, so easy to understand and use it to your advantage when taking pictures, that passing by is almost a sacrilege, because the white balance is nothing more than the color cast of an image. Surely you have ever looked with surprise at a photo that has turned blue or orange. How strange, right? if when you looked through the viewfinder you saw a perfectly white light (or normal, come on…).
This is because our eye is capable of perfectly processing different color (or dominant) temperatures without flinching, but the truth is that the sensors for the moment are not up to the task, let's go as usual, the human being, for now, beat the machine .
That being said, let's take a detailed and simple look at what white balance is, what it is used for and, above all, how it can help you improve your photos.
WHAT IS WHITE BALANCE?
The white balance (White balance or WB) is the way we have to balance an image in terms of color cast. Ideally, this dominant should be neutral, ie white, which in real life is roughly equivalent to midday light or flash light, which is also considered neutral.
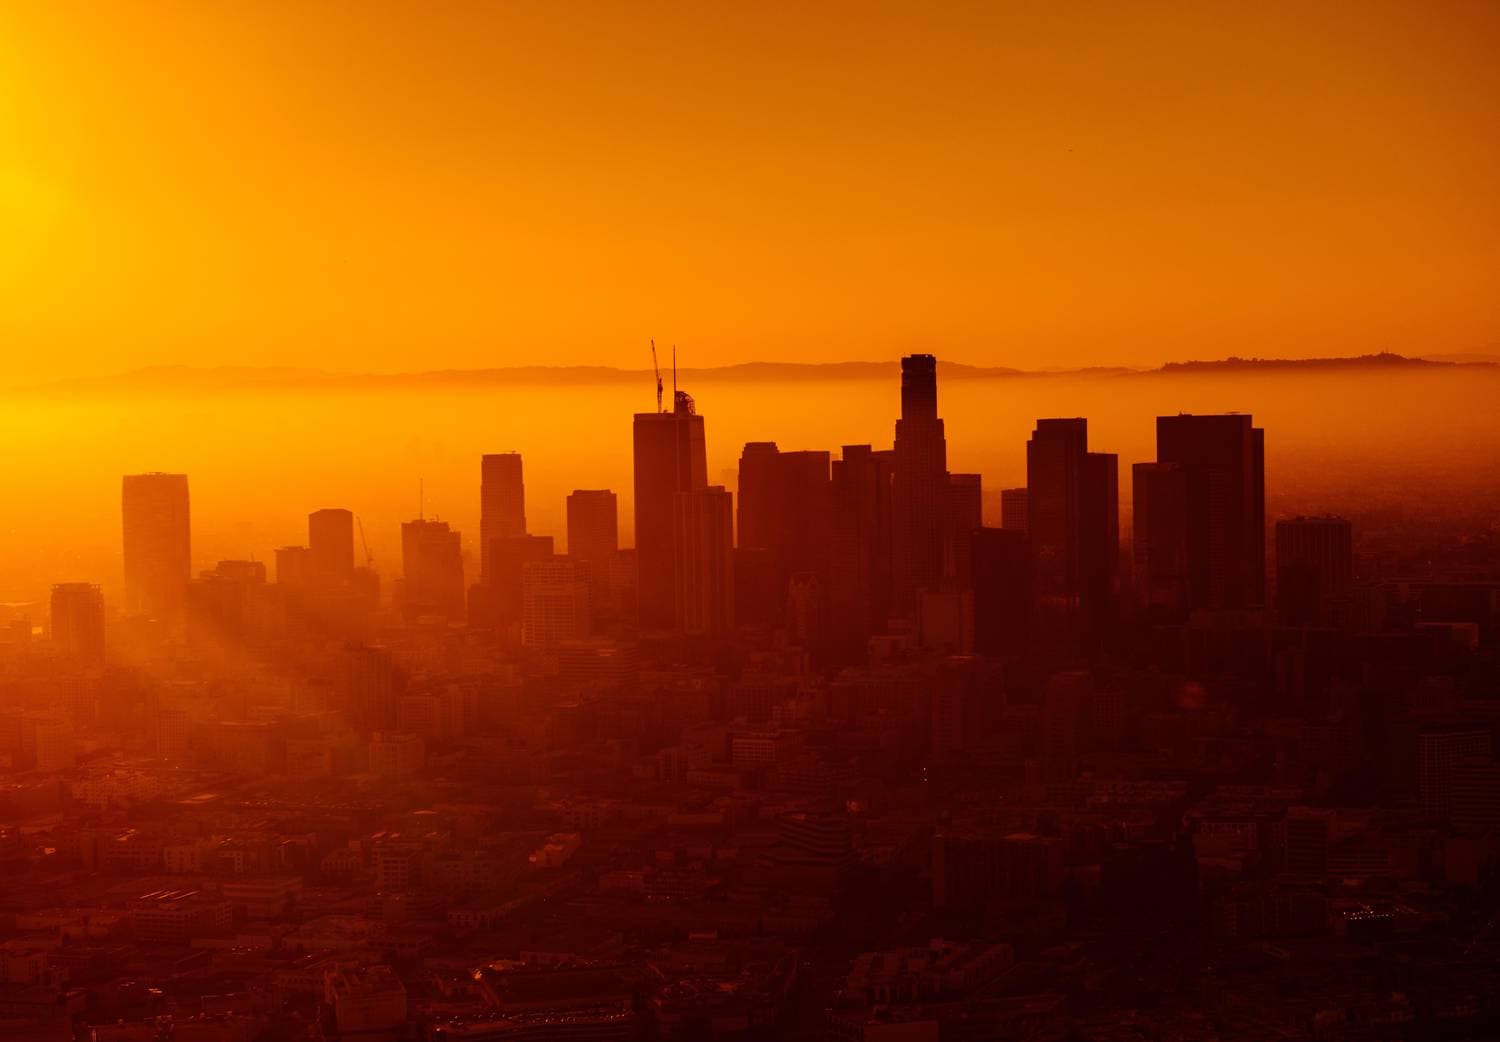
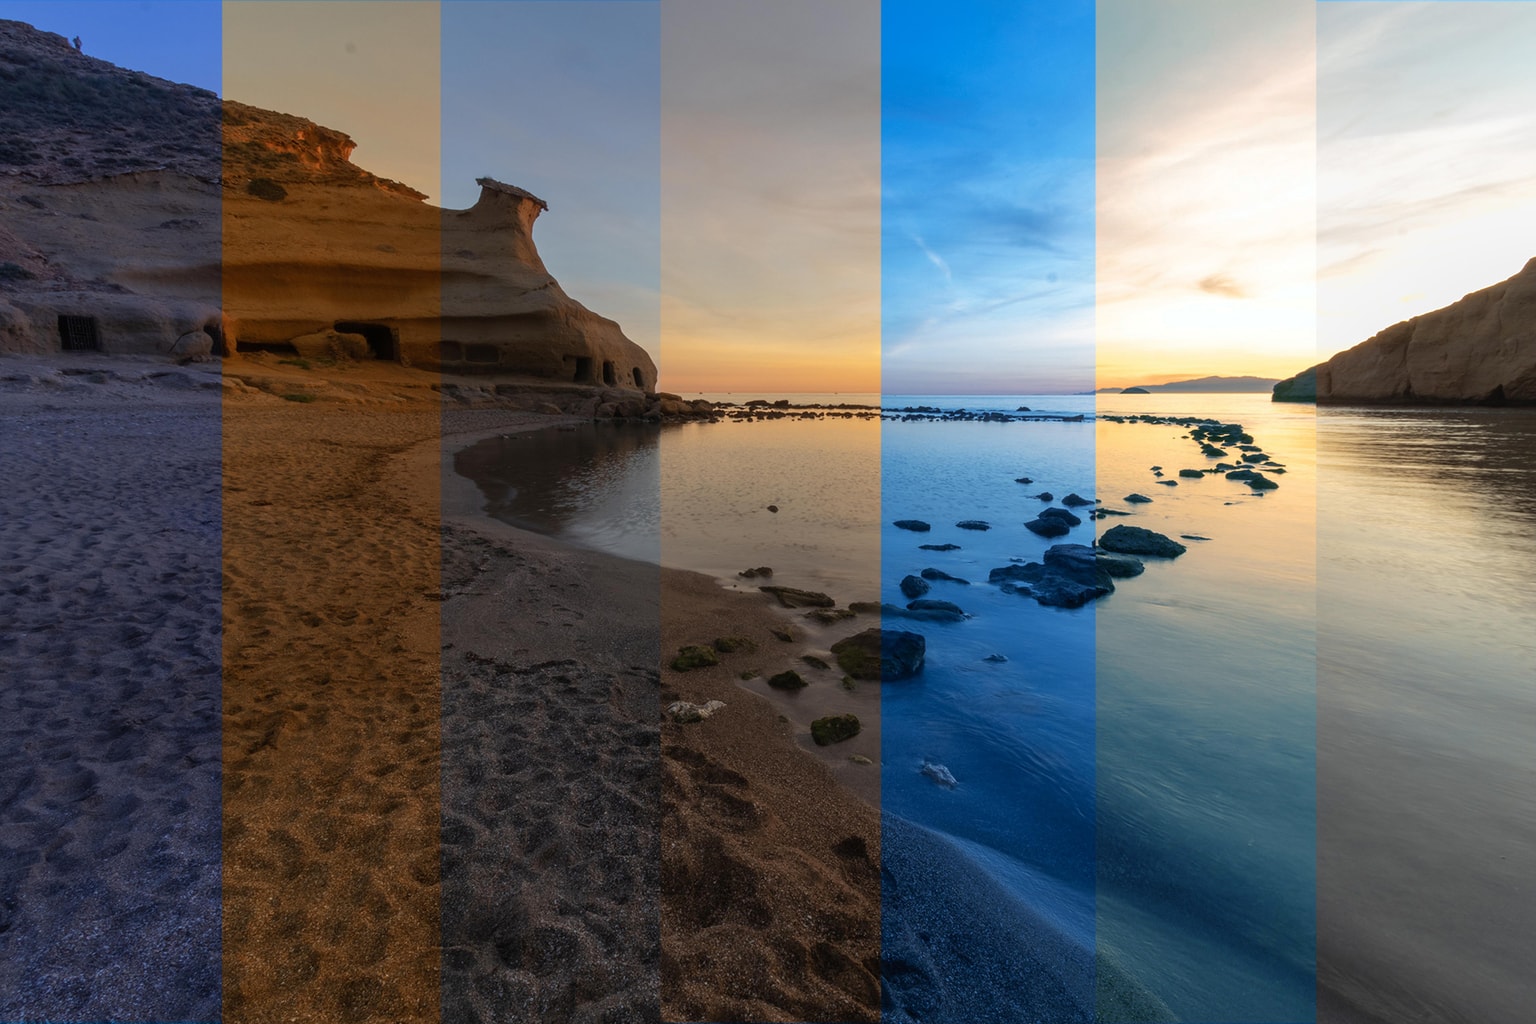
Each type of light and each moment of the day, although it is not always obvious at first glance, has a color cast, which is also known as color temperature . Color temperature is measured in kelvin degrees, and they are classified as warmer temperatures ( sunsets, for example), cooler temperatures ( cloudy days) or neutral (we have already mentioned that they are the intermediate hours of the day).
For practical purposes, what it is about is that all those tones that are not neutral end up being neutral .
HOW IS THE WHITE BALANCE ADJUSTED?
And you'll say, "Okay. Very good, but how is it done? Well, it's very simple, compensating for each other. In other words, if you have a scene that is too warm, you will have to add a bit of cold to it, and if, on the other hand, you have an image that is too cold, you should add some heat to it. As simple as that. And this is what your camera's automatic white balance does.
Now you will ask me "And how do I know which tone is going to be predominant so that I can correct it?" The answer is easy: you can let the camera itself take care of detecting that a certain color is excessively dominating the photo and let it take care of counterattacking it. If you want the camera to handle this task for you, go into the White Balance setting and choose the “Automatic White Balance” (also known as “AWB”) option.
Since the machines are not perfect, sometimes the camera is not able to detect a certain excess of tones and, therefore, cannot correct it. That's where you come in (you're the photographer, did you forget?) ? Basically you are going to do the following: you are going to shoot a test photo and you are going to look at it carefully, if you find it correct and neutral, great, but if you see a certain excess towards a side in blue tones or to the other in red tones, you will have to manually select one of the different semi-automatic White Balance modes that your camera makes available to you. Next, I attach a small graph in which I explain what White Balance to choose depending on the excessive tone that you want to remedy:
The graph above shows more or less all the options that cameras offer us to adjust the white balance semi-automatically (also called presets ). From left to right we would have tungsten lights (indoor ones), the next symbol corresponds to fluorescent light, the next to flash, the sun to midday light, the cloud to a cloudy day and, finally, the emoticon of Shadows. These are ideal for scenes where one type of light clearly dominates.
As you can see, it is not very complex. If you perceive that the photo comes out too "cold" use a white adjustment of the ones you see on the right of the graph, if instead the photo comes out more "warm" and orange, use a White adjustment of those that appear on the left of the graph.
Let's go with an example, which always looks better. In the following photos, the flowers are illuminated with a lamp with the typical bulb that offers a warm light. The result, obviously, is an image with a clear orange cast (left image). In the photo on the right, the white balance has been adjusted with the Tungsten mode, which has managed to neutralize the tone.
-
Automatic mode in scene with very warm light -
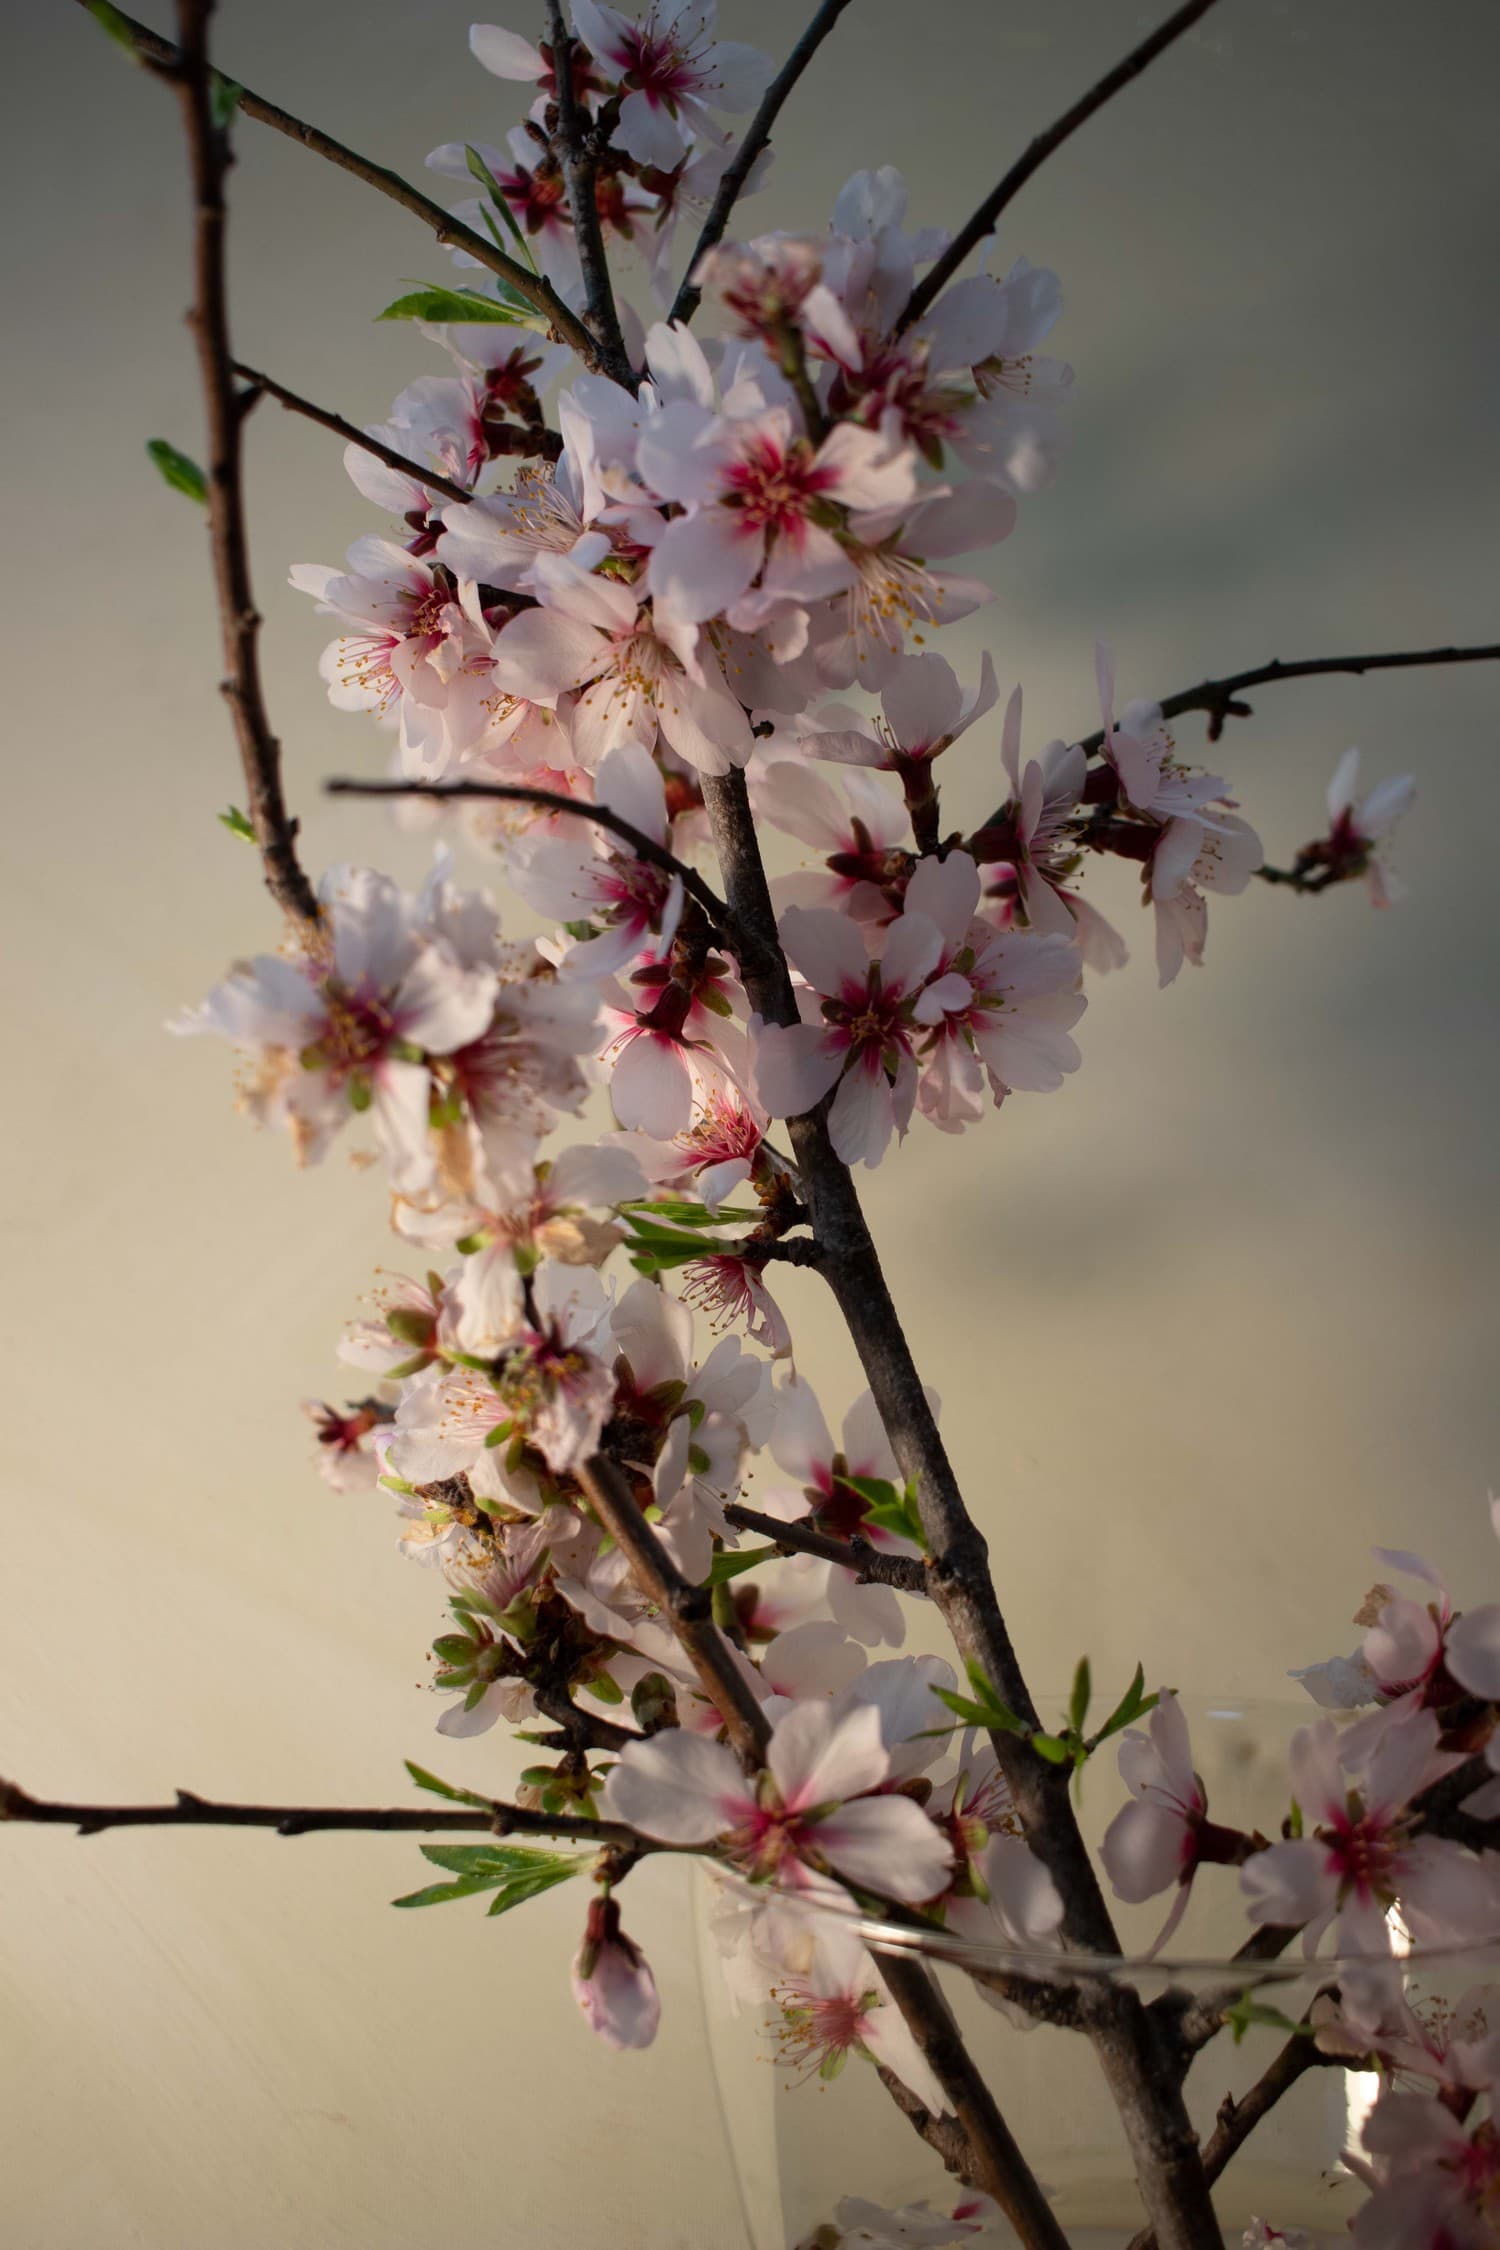
Tungsten mode that corrects color cast
WHAT SEMI-AUTOMATIC WHITE BALANCE MODE TO USE AT ALL TIMES?
Let's get a little more specific. These are the semi-automatic modes that usually appear on cameras, they may not all appear on yours, don't worry, the main ones are even on your smartphone ?

- Auto (A) : The camera automatically adjusts the white balance according to the ambient light and the use of the flash (if present). Below I will tell you when to use the automatic mode but whenever you photograph in RAW format, use it without fear. In this case we have AWB which is automatic with priority to ambient light, and AWBW which is white priority and reduces the warm cast of ambient light). But on most cameras it will be AWB only.
- Daylight (sun): Useful when shooting outdoors with the sun shining.
- Shade (shady house): It is somewhat warmer than cloudy, adding orange colors to the photograph. Suitable for sunsets and sunrises and shady areas.
- Cloudy (cloud): Advisable on cloudy days or in shadows. Produces images somewhat warmer than sunlight.
- Incandescent or tungsten (bulb): Use only with light from tungsten bulbs or the image will appear very blue.
- Fluorescent (incandescent tube): Activate this if the photos look too green or when you are under fluorescent lights (the typical ones in offices).
- Flash (beam): Used when using the camera's flash.
- Preset or custom (PRE) or the last icon in the image above: It is adjusted for a specific lighting, a card or gray card is usually used. But you can also use a white sheet.
Some cameras have a Choose Color Temperature (K) option, which allows you to manually change the Kelvin value (typically 2500 to 10000).
AND HOW DO I KNOW WHICH LIGHT IS COLD OR WARM IF I SEE THEM ALL THE SAME?
As long as you learn that indoor lights are warm (in general), that flash and midday lights are neutral, and that shadows or cloudy days are cold, you have more than enough. But you will see that, knowing all this, you will pay more attention and you will end up training your eye. Knowledge is power ?
Although if you want to go a little deeper and introduce you to the friend Kelvin who appears in the table above, here is the list of the most common lights with their respective color temperatures. Lower values (for example, 1700) correspond to the warmest lights, and higher values to the coldest. The K is for Kelvin, yes
- 1700 K: Light of a match
- 1850K: candle light
- 2700–3300 K: Incandescent or tungsten light (conventional household lighting)
- 3000 K: tungsten (with halogen lamp)
- 4000–4500 K: Mercury vapor lamp
- 5000K: Fluorescent light (approximate)
- 5500–6000 K: Daylight, electronic flash (approximate)
- 5780 K: Color temperature of pure sunlight
- 6200K: Xenon lamp
- 6500 K: Daylight, cloudy
- 6500–10500 K: Television screen (LCD or CRT)*
*Source: Wikipedia.
Another way to look at it is based on the time of day. At sunrise and sunset, the color temperature is warmer (2000K), at noon it is more neutral (5500K), at mid-morning or mid-afternoon about 3500K, cloudy or shady skies are cooler (6000-7500K).
MANUAL OR AUTOMATIC MODE?
The automatic mode usually works quite well in most situations, for example with neutral and homogeneous lighting. However, when mixing different lights with different color temperatures, or the color temperature is at the lower or higher extremes, it is often not the best fit.
You can also use auto mode when shooting in RAW mode, we'll see why later. Now, if you are going to photograph in JPG format, I strongly recommend that you watch the white balance. In this case, it will be very difficult for you to correct it.
Keep in mind that cameras process white balance differently. Some models of newer or more advanced cameras tune more than other older or more basic models. It is important to know how your camera works. That does not mean that yours, if it is an amateur, will not do well, the difference is probably not evident unless it is a highly trained or professional eye. Just keep this in mind if you change cameras often, so you don't scratch yourself if you notice differences.
When there are varied lights or you see that the automatic does not work as it should, you can use the semi-automatic or preset modes that I told you about before.
You also have the option that I have told you about using the custom mode of some cameras. It's a way of telling the camera what is white under a certain light.
THE MAGIC OF RAW
If you are a lover of the RAW format, you will be delighted to know that it is not only the format in which you get more information for processing (and, therefore, higher quality), but it is also the format that allows you to correct the white balance. of the image in processing without loss of quality with a single click.
That is, if you're working in RAW, don't worry about white balance until you get to processing. There you can adjust it in a simple way as you consider and with just one click or move a cursor. Next, we are going to see how to do it in Lightroom, although in other editors it is very similar.
HOW TO FIX WHITE BALANCE IN LIGHTROOM
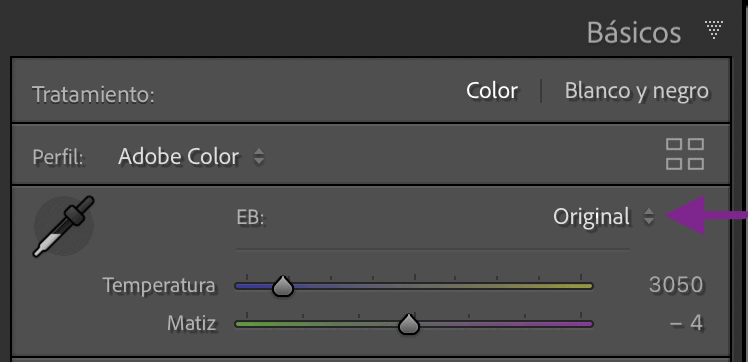
In this example we have an orange cast for the warm lights. Let's look at three (very easy) ways, having shot in RAW, to correct the white balance from the Lightroom Basics panel.

One way is by selecting the white balance from the drop-down (see right image) that is activated by clicking where the purple arrow indicates (left image).
-
Click where the purple arrow indicates -
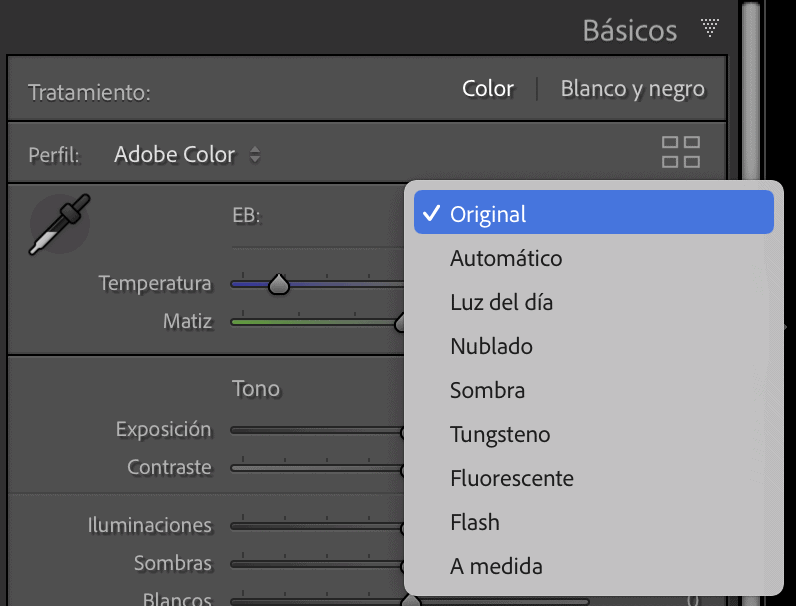
The dropdown opens and you choose
In this case, the best option to cool the warm lights is Tungsten, you can see the before and after below . Seems clear, right?
Another more personalized option is with the Temperature cursor (see right image). To the left you cool the image, if you move to the right, you warm it up. You can also click on the number on the right and enter the figure that you consider, that is, the exact temperature that you want it to have.
As a curious fact, you can see how the cursor moves when you modify the white balance with the first option in the dropdown.
Lastly, we have the White Balance Selector. If you select the dropper that surrounds you in the right image and move it with the mouse to an area of the image that is (or should be) white, when you click it adjusts automatically. If you don't like the result, you can always specify more with the Temperature cursor until you find the result that most convinces you because...
SHOULD AN IMAGE ALWAYS BE NEUTRAL?
No, the truth is that no ? . In most images, the grace is that the colors are as faithful as possible to the reality that you intend to capture. For example, does it make sense to remove the warmth of a sunset? If precisely the attraction is in the warmth of its light, right?
But white balance is also a personal testing ground that can help you craft your own expressive and creative path with the image. Adding warmth or coldness to your images is a way like any other to unleash your creativity, to enhance your message, in short, to find your photographic discourse.