
How frustrating it is to find ourselves before a wonderful landscape , with an incredible sky, some suggestive rocks, or a meadow of a dreamlike green and see that we are unable to portray it as we would like, right? You have visualized it, you have stopped everyone who has wanted to accompany you on an excursion, you have planted your tripod , you have framed, you have made sure to place the horizon well straight, you have measured the light like this, without thinking much (or even thinking about it a lot), and you find yourself before an image that not even the best of the editors seems to be able to save. That is because, although you are able to perfectly process both lights of the scene, the truth is that our camera cannot even get close to what our eyes are capable of doing. They are images with too much difference between lights and shadows so that our sensor is able to process them correctly. Now, do not despair, that for almost everything there is a solution. The solution to this problem is called Neutral Gradient Filter , the one that gives title to this article , and when you know it you will think about how something so small can become your best ally in landscape photography . We see it?
WHAT IS A NEUTRAL GRADIENT FILTER?
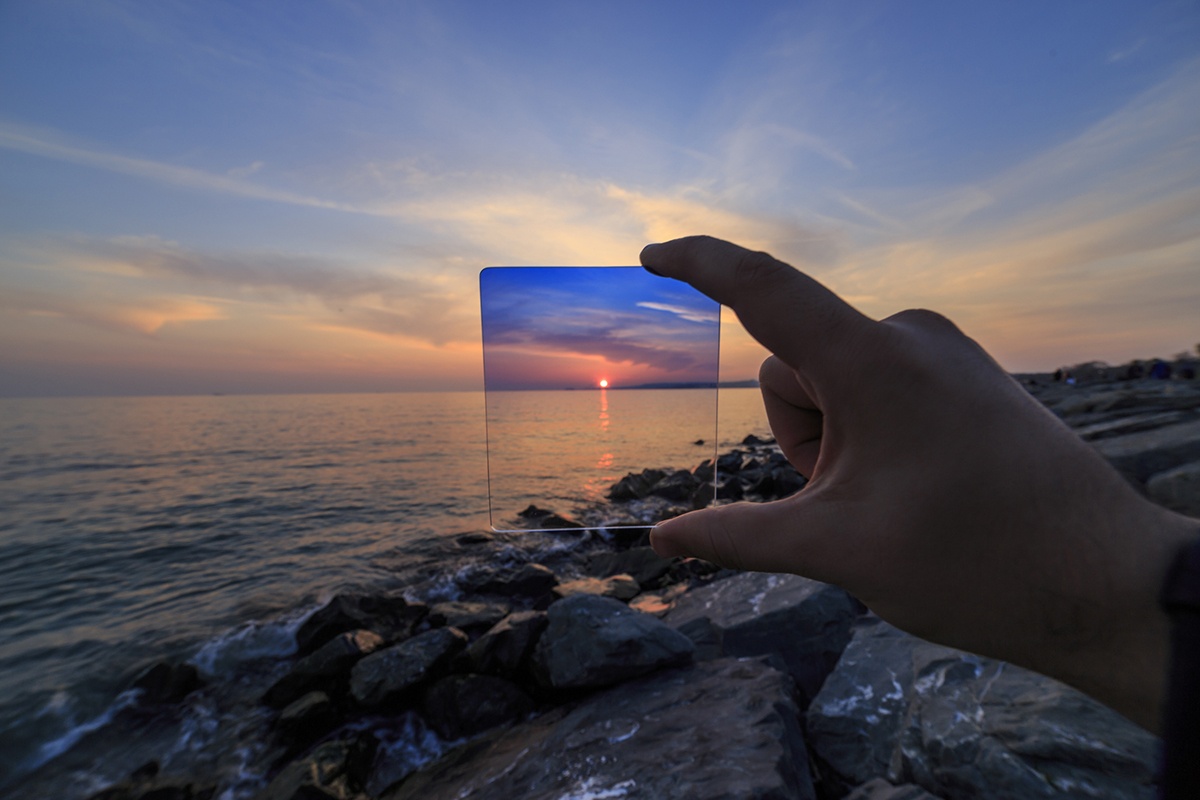
A neutral gradient filter is tinted in one of its parts in order to reduce the light input to the sensor in one half of the image, while the other is transparent so as not to modify it. The neutral term indicates that, apart from subtracting light, it does not affect the shades of the image. Imagine the typical scene, for example, of a meadow, with a sun above, a sky of a brand new blue in the upper area and a meadow of a dark green in the lower area. Although you are perfectly capable of processing both lights, the truth is that your sensor, as you well know, cannot. By placing the dark zone of this filter in the sky zone and the transparent zone in the darkest zone, you can compensate for the exposure of the scene, in order to obtain a well-exposed image in both areas of the photograph.WHAT TYPES ARE THERE?
ACCORDING TO THE FORM
To start, you must decide if you prefer thread (round) or square , for which you will need a filter holder. The former are more comfortable to use as long as you only plan to use one. Instead, the seconds have the advantage that you can superimpose several filters at once. In case you plan to use more than one, it is best to opt for the squares. That is, if you already see that you are going to be a madman of the landscape, it is best to choose the rectangular ones, which will not only serve you for this type of filters, but for all types ;-). Otherwise, with a circular one you save buying the adapter and having to carry it on.ACCORDING TO THE STEPS IT COMPENSATES
Or what is the same, depending on the amount of ambient light that remains in the tinted half. Filters begin by compensating 1 step (0.3ND) up to 3 steps (0.9 ND). The most common are 0.3 ND (1 step), 0.6 ND (2 steps) and 0.9 ND (3 steps), although for perfectionists, they have to compensate for half a step: 0.45 ND (1 , 5 steps) or 0.75ND (2.5 steps). The most used of them all is the 0.9ND that compensates for 3 steps, so if you can only get one, you can start with thisDEPENDING ON THE TYPE OF GRADIENT
Basically we can transition the tinted area in a sharper or softer way. If the horizon is clear, that is, if there are no elements in the middle of the horizon that can show the use of the filter, we can use a hard transition gradient . On the other hand, if there are elements on the horizon (trees, houses, etc.), it is best to use a filter with a smoother transition to hide the use of the filter.- TIP: If you have opted for the use of the filter holder and you have a neutral gradient hard transition filter, you can soften it by moving the filter up and down slightly during exposure. This way you will be able to smooth the transition between the tinted and the transparent part. Of course, very careful to move the camera while the shutter is open
HOW IS IT USED?
Once you have chosen the framing and composition of your photograph, what you should do is calculate the difference in light between both parts of the image. This is calculated by measuring in a timely manner the light zone and then the dark zone. The difference between one and the other will give you the number of steps necessary to compensate with the filter. To work with filters and do these types of calculations it is best that you always work in manual mode , otherwise the camera will compensate the exposure by varying other variables and it will be impossible to calculate the difference. For example: Imagine that you measure the sky promptly and it gives you a correct exposure of 1 / 1000s and f / 11 to ISO 125. Then you measure the ground promptly and it gives you a value of 1 / 250s maintaining the ISO and diaphragm values ??(which are what In this case you are interested in maintaining a good depth of field (closed diaphragms) and sharpness (low ISO). The difference between lights and shadows in your image is, in this case, 2 points, so for this scenario you would need a gradient filter that compensates for this difference in light. In this case we would use a 0.6ND. (Steps in shutter speed: 1 / 1000s, 1 / 500s, 1 / 250s, 1 / 125s, 1 / 60s, etc.)CAN'T I DO IT WITH AN EDITOR?
Yes and no. Power, you can. Now, the better the image you get directly from your camera , the better the quality of it, trying to recover lights and shadows is never "free", sometimes you lose a lot of quality in the attempt . And do not forget, in addition, that in the majority of competitions a minimum or null edition of the images is valued, so if you plan to introduce yourself to some, then that, less is more.BRANDS AND PRICE
In this case, more expensive means almost always better, that easy. However, sometimes the improvements are invisible in the eyes of ordinary mortals, so it is not necessary, unless we seek professional use of images, buy the most expensive. Cokin is a brand that combines quality and price more than acceptable, so it is not a bad way to start. There are several starter kits that come out quite well in price and already offer the filter holder with various adapters for different optical diameters and the three classic filters (1,2,3 steps). Here is an example on Amazon for 61 Euros. Formatt-Hitech and Lee are reference marks in filters, but the price skyrockets quite a bit. A Formatt-Hitech of 0.9ND of smooth transition can be found for about 78 Euros on Amazon and a Lee for about 94 Euros , also on Amazon. As you can see, the difference is a lot, although if your source of resources is unlimited, in this case it is worth spending. If not, with a Cokin kit you can do wonders to start. Sometimes it surprises what something as simple as a filter can do to improve your images, right? Do you dare with the neutral gradient? Do you think anyone else would be interested in knowing what it is about? Then, share it with him or her . Thank you and see you next time.