
Simple tips that will allow you to buy a working machine and save your nerves
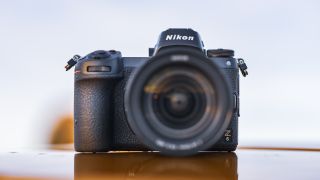
So, you are going to buy a new camera. How to correctly check the camera before buying, so as not to get a defective copy, and how not to become a victim of fraud? In this article, we will cover the basic rules for checking cameras. It will be mainly about models with interchangeable optics. However, most of the tips will be true for checking compacts.Getting ready to buy
To make a successful purchase, it is better to prepare at home for a trip to the store for the camera .- Clearly decide on the model. Make sure that it is not outdated, still relevant. Look at the information on it on the manufacturer’s website: haven’t newer models of the same class with better characteristics come out? Look at customer reviews of the selected camera on the Internet. Finding reviews is very easy. It is enough to open any search engine and type in the search bar “Camera such and such reviews”.
- Where to buy a camera? To minimize the risk of fraud during the purchase, it is best to buy the camera in stores whose reputation does not raise your doubts. Do not buy where suspiciously cheap. Most likely, there they sell goods from “gray” parties that do not have an official guarantee, or even used things under the guise of new ones.
- Do not expect sales consultants to really help you choose something in a regular store. It is important to understand that their task is not to choose the best camera for you, but to make the best deal.
- The best option for the store is the manufacturer’s company store . Here you absolutely will not have problems with the guarantee. Sellers are professional and always ready to help.
- If you are new to photography and are not very good at photography, you should not buy used cameras. Checking them is quite difficult, they can have many hidden defects. If you still decide to buy a used camera, you need to check its “mileage”: how many frames have already been made on it. We will talk about this below.
- When checking the camera, it is better to have an idea of ??its controls. Download the instructions from the manufacturer’s website and study it. See how shooting modes are selected, how shutter speed, aperture and light sensitivity are adjusted, how to enable burst shooting, how autofocus is turned on and off, how picture quality is adjusted, and how focus points are selected. If you are a beginner and do not yet know anything about the shooting options, it is better to bring someone to the store with you who can help you set up the camera for a complete check.
- Keep in mind that cameras are almost always sold without a memory card in the kit. Make sure you have a memory card with you.
- It is more convenient to check the quality of test images on a large screen. If possible, bring a laptop with you to view images on it.
Checking the camera
So, we are in the store. Before us is a box with a welcome camera. How to check the camera on your own? Let's get it right.Visual inspection
Inspect the box: it should not be mechanically damaged. Find the warranty card in the box. Check that this is the manufacturer’s official warranty card, and not a third-party service center warranty, as is often the case with unofficial “gray” supplies of photographic equipment. Verify the serial numbers on the packaging, camera, and warranty card. Check package contents. There should be no signs of use on the equipment. Everything should be wrapped in bags. There should be no fingerprints or scratches on anything. If signs of use are found, do not listen to the seller’s comments, but simply request another instance without signs of use. If you buy a camera complete with a lens, check the lenses of the lens: for scratches or dust inside. Mount the lens on the camera. There should not be any backlash: the lens should be fixed tightly.Testing camera mechanics
After a visual inspection, we move on to testing the camera. Insert the battery and memory card , turn on the camera. If the battery is discharged to zero, you should charge it at least a little. Take a few test frames in automatic mode. Check if the built-in flash works. Check burst shooting. Turn on burst shooting, hold down the shutter button: the camera will continuously capture frames while the button is held by the photographer. Take a small series of shots - five to six. In this way, we check the shutter performance of the camera.
A menu with a choice of burst settings that appears after clicking the button on the left. Select the item “continuous fast”.
Checking the camera for defective pixels
It is important to check the camera's matrix for broken and hot pixels. What are broken and hot pixels? You may have already met them on computer monitors. Dead pixel - this is not a working element of the matrix of the camera. In photographs, it will look like a bright dot in all pictures. A hot pixel will not be noticeable under standard shooting conditions, but when shooting at a slow shutter speed or at high ISO, it will turn into a colored dot in the picture. The appearance of a number of hot pixels is allowed when shooting at high ISO values ??and when using multi-second shutter speeds, however, it serves as an alarming sign if they appear already at sufficiently low ISOs and when using shutter speeds around 1/60 s.
Defective pixel example. They are especially noticeable on a black background.
- Close the camera lens cap. Shooting must be done with the lid closed to get a black frame. On a black background, all defective pixels will be perfectly visible.
- Turn on shutter-priority priority (S) on the camera.
- Set image quality to JPEG at maximum quality.
The menu for choosing the quality of pictures in the camera Nikon D5300
- Turn off autofocus: it will not let you take a shot when the lens cover is closed.
To disable autofocus, slide the switch on the lens to “M” - “Manual Focus”
- Set shutter speed to 1/25 s and minimum ISO. This is usually ISO 100.
Shooting options displayed on the screen of the Nikon D5300
- Take a frame. Examine it at 100% scale (this is important: otherwise defects will not be visible). If extra dots appear on the black field of the image, you should refuse to buy this copy of the camera.
- Now we’ll complicate the task for the camera: extend the shutter speed to three seconds (it can be indicated as 3 ”on the camera screen) and raise the ISO to 800 units.
Shooting options displayed on the screen of the Nikon D5300
- We study the resulting frame. Perhaps hot pixels will appear on it: multi-colored dots. If there are one or two of them - it's okay. If the account went to tens, you should refuse to buy this instance of the camera.
Defective pixel image
Image without defective pixels
Back focus and front focus. What it is?
This is an autofocus error when the lens is systematically focused not at the specified point, but behind it (back focus) or in front of it (front focus). As a result of incorrect focusing at the point you were focusing on, sharpness may not be available. Back and front focus are only for SLR cameras. Compact and mirrorless cameras do not suffer from this defect, because their focusing system is arranged differently. Back and front focus are not so scary for owners of top models of DSLRs: Nikon D7000 level or higher. In these cameras, you can fine-tune autofocus through the menu.
Fine-tune autofocus in the Nikon D810
- Only the specialized service center will be able to accurately diagnose the presence or absence of front and back focus. By the way, manufacturers do not consider it a marriage. In a service center, autofocus can be easily adjusted.
- It is important to understand that in practice the photographer “misses” almost always with focus (you need to be able to focus correctly too) while the camera fulfills everything correctly. Therefore, if you systematically get blurry shots, think about whether you are using the device correctly.
- If you buy a camera complete with a lens with a low aperture (for example, “whale” lenses 18-55 mm with aperture F / 3,5-F5,6), then the presence or absence of front or back focus is unlikely to work notice both in the store and during further shooting. Due to the large depth of field, possible focusing flaws are leveled. So the owners of devices with “whale” lenses (with which the devices are sold in the kit) should not worry about back- and front-focus problems.
- Set up the camera: set the mode to “A”, set the most open aperture. ISO can be set to “auto”.
- Autofocus must be on.
- Choose the center focus point.
- We’ll select an object for shooting: it can be a piece of paper or a box with any letters, a newspaper, a ruler, or a special test target.
- We focus on the center point at a predefined location. It’s important to remember exactly where you focused. In the case of a test target, it is necessary to focus strictly on the place intended for this. Usually, “Focus here” is written here. We will use a sheet of paper in a cage , drawing an even line in the center of it. We will focus on it.
- Let's make a few frames, about a dozen. We strictly monitor that the focus point is exactly where we need to focus. Please note: after the camera is focused, it cannot be moved forward or backward. After all, if the distance between the subject and the apparatus changes even by a millimeter, the focus will be lost and the test will not be accurate. If you suspect that the camera is still wrong with focusing, take a few more test shots to make sure that the miss appears systematically.
Correct operation of the autofocus system. It can be seen that the focus is exactly where we aimed: on the black line.
Front focus: Focus “ran” forward.
Back focus: the focus was behind the line, not on it.
Mileage of my camera.
Nikon D810 Camera Shutter Module.
