

To cut or not to cut? That is the question? Rather no, it's about knowing how to crop a photo or where to cut. Many times in the blog we have recommended you fill the frame, cut heads or whatever is necessary for your photography to gain impact. Cutting is fine, but cutting well. That's what today's article is about. I am going to give you the keys so that you know where it is or is not advisable to make the cut when framing your photograph. Because no, it is not the same to cut at the ankles than at the middle of the thigh.
There are certain basic rules of how to crop a photo, which is not that someone came one day and said: "this way yes and this way no". Rather, they are rules derived from what has been proven to work and what has not. It is also true that, sometimes, one's own creativity is above any rule. Of course, for this there must be a clear intention, a reason to break the rule. If it is due to ignorance of the norm, be sure that it will be too obvious and it will not work.
HOW TO CROP A PORTRAIT PHOTO
Let's first see how to crop a portrait photo and where we run the serious risk of spoiling the image. You will know that there are different types of photographic plans ; If you don't know, now is the time for you to find out ;). I say this because it is likely that when you say portrait you only think of a face, however, a portrait can also be a full-length or half-length photo, etc. This is important right now because I'm not only going to talk about clipping an ear or not, but we're also going to talk about tips.
The basic rule of thumb in portraits is never to crop at the joints. It does not fit. It's as if we somehow amputated a limb from the subject. That is the unconscious impression that it causes us and that is why it does not usually work.
As a guide, I'll give you a diagram of where it looks good to cut (purple) and where it doesn't look so good (yellow caution ? ). I add the blue for two areas that I want to tint below.
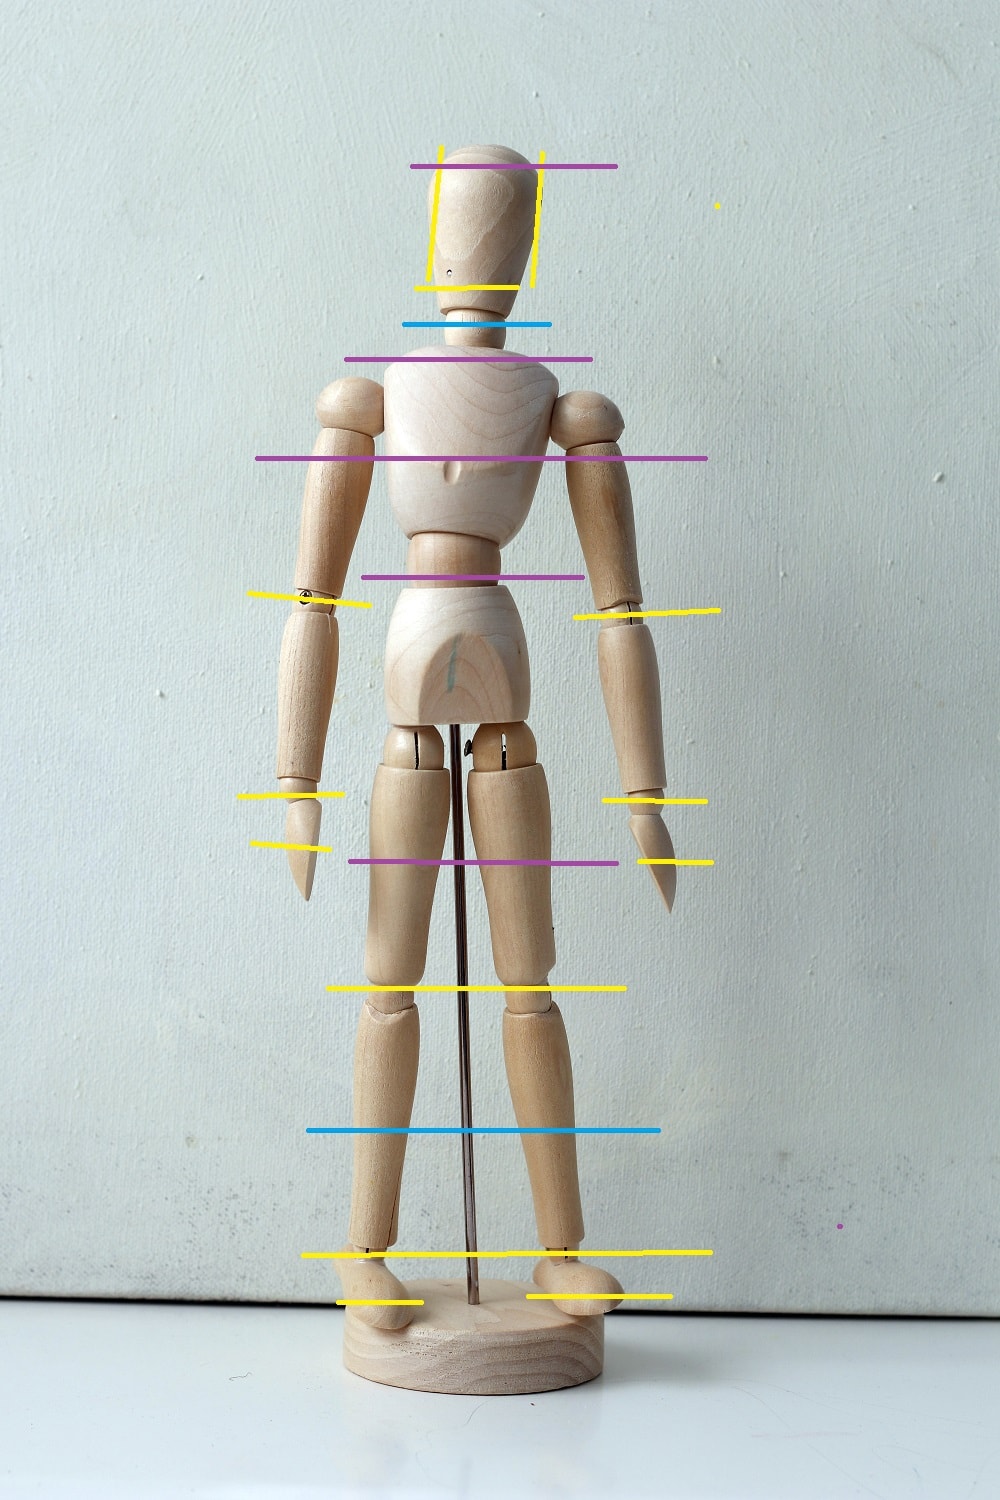
As you will see, the yellow lines are those that coincide with fingers or joints , also with ears (if you are going to do without one ear, or both, it better be completely, not a piece). I have also marked the chin in yellow. Sorry, cropping a photo to the middle of the chin looks weird, however, you can crop the forehead with no problem, normally. Here's an example, which image do you find "most pleasant" to look at?

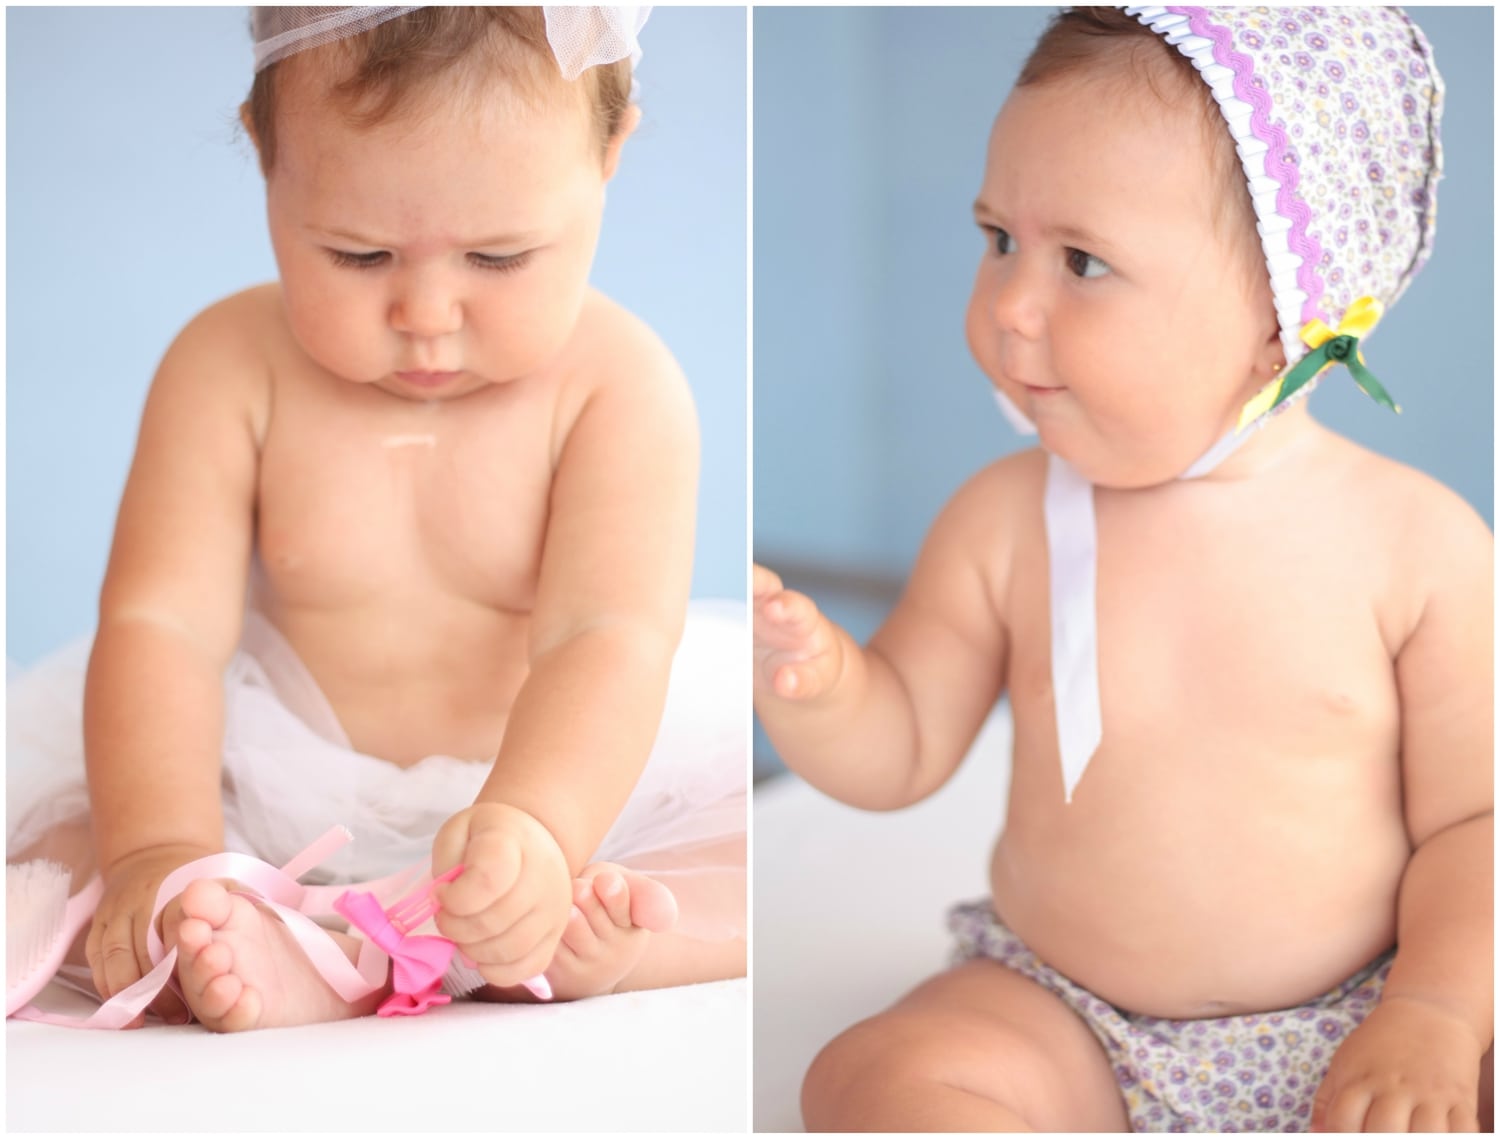
Here's another comparison, if you notice the image on the left has areas that are cut off, there's no space around the entire baby, however it works. Unlike the one on the right, the cuts are too aggressive (hands and knee).
Speaking of knees, in this example you will see it more clearly... Now that you see both, where would you cut?


Now we are going to see those parts with nuances, the neck and the shins as we call them from my land. They are the parts that I have marked in blue. Many photographers point them out as good or acceptable areas for cutting, however, they don't quite fit me, or at least not always.
We see it better with examples, but you decide. First, the "pimples", mid-thigh seems to me to look good in all photos, but cutting halfway through the knee and ankle doesn't usually work, it seems to me that something is missing in the image, something creaks me , and look that I have made this mistake many times, and I could not finish seeing what was happening. Another comparison, which frame do you like best?

In this case, I find the framing on the left more pleasing, I think it works better. Do you agree with me?
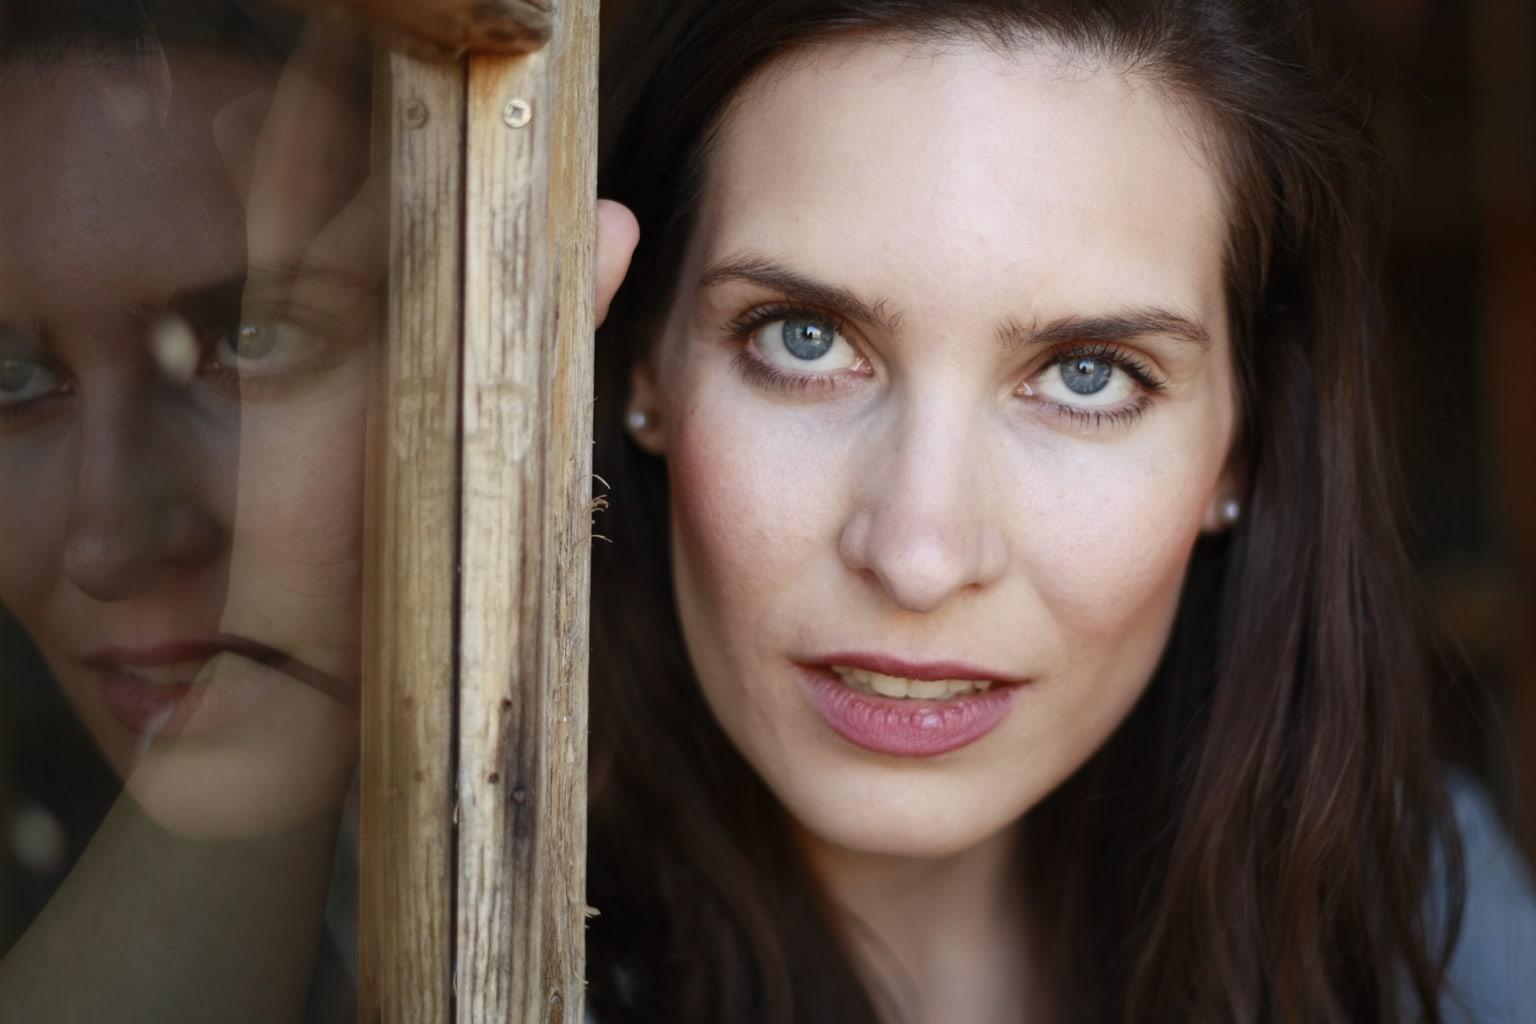
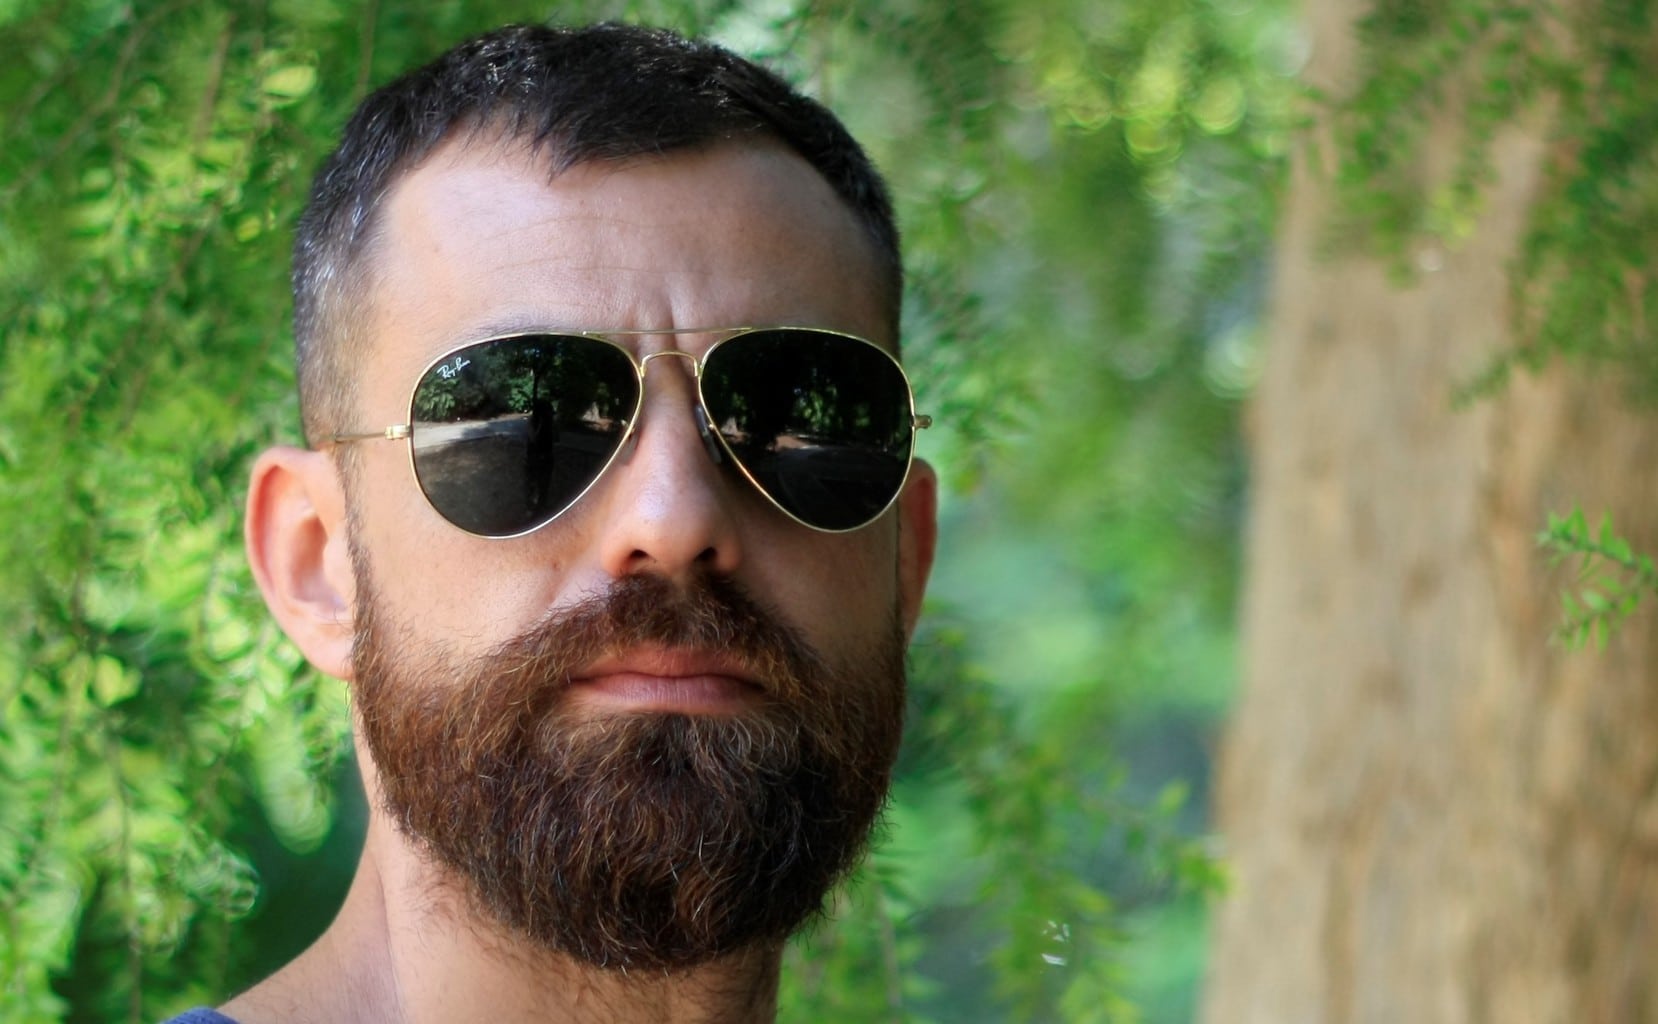
The other part of the body that I would add nuances to is the neck. Ok, many say that it can be cut at the neck without problems. Sure? If you pay a little attention you will see that not in any part of the neck. Some photos look more like beheadings to me (sorry for the exaggeration) than portraits. Leaving some air and cutting closer to the collarbones I think is much better than cutting right at the beginning or middle of the neck. Beauties aside, look at these two pictures, they are both cut off at the neck, but I think the feeling is very different. The girl's photo has been cropped a bit below and doesn't feel as cramped as the boy's, do you think?
HOW TO CROP OTHER PHOTOS
Not only in portraits we have to look at the place of cut. In any other photograph we take into account the composition, the way in which we place the elements within the frame, that is, where and how to crop the photo. Sometimes we opt for negative space :

Others, however, we prefer to fill the frame :
These are two very valuable resources that you should keep in mind when cropping your photo. Now, what happens when we stop halfway? How do we do it if we don't want to fill or leave negative space?
Many times, an object does not have to appear whole to be able to admire its beauty, our brain is capable of completing the image, especially when it comes to geometric figures or recognizable shapes.
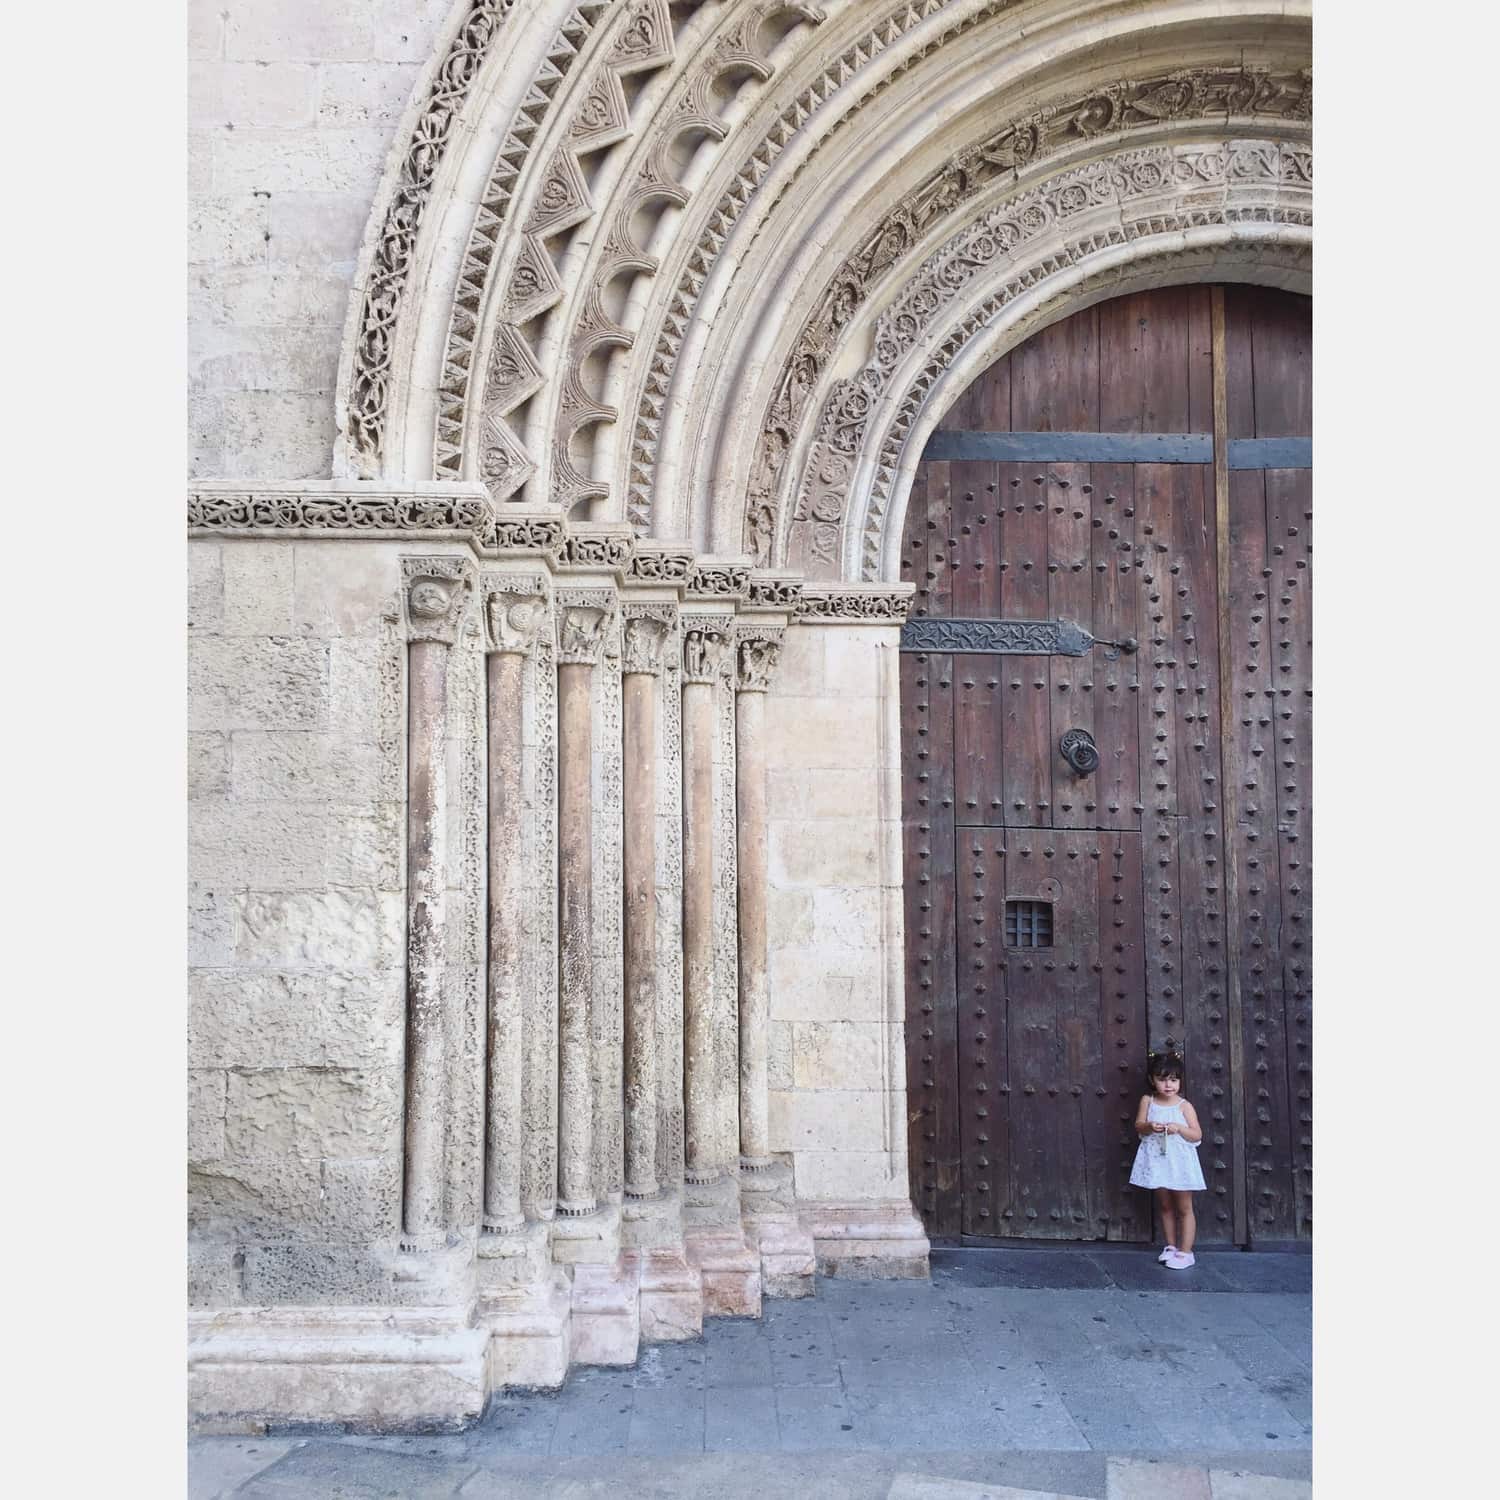
Could the entire door have been framed? Of course, a photograph could have been taken, even better, with the entire door. But do you think that's how it works? If you think so, you can take it as a trick if on the other side there is a group of immovable people who have insisted on spoiling your photo;).
Imagine a plate of food that is worth spoiling placed on a carefully laid table, with great detail. How about you cut it in half and reveal part of the table decoration? How about just showing a couple's feet to hint at a story without showing anything?
The key is often to find the visual balance . Just as there are some "rules" to know where to cut in a portrait, in the rest of the photographs it is more of an eye training in terms of balance. Do not worry, you will discover it little by little, with practice. You can also rely on other "laws" such as the three thirds or the gaze. They can be a good guide when in doubt ;).
SMALL EXERCISE OF CUTS IN PHOTOS
Now I am going to put a gallery with two types of photos, some in which I think the framing is nice and others in which, in my humble opinion, something does not quite work. The idea is that you observe them, you pay attention to where the frame cuts, that you try to find out if it works or not. In case something squeaks at you, try to figure out what it is. From here you can apply it to your photos.


