
![HOW TO PHOTOGRAPH A LUNAR ECLIPSE? [WITH IMAGES TO INSPIRE YOU]](https://photographychef.com/wp-content/uploads/2023/02/HOW-TO-PHOTOGRAPH-A-LUNAR-ECLIPSE-WITH-IMAGES-TO-INSPIRE-YOU.jpg)
Unlike the solar eclipse, to photograph a lunar eclipse it is not necessary to protect your camera or your eyes, which makes everything much easier, both in terms of equipment and security. If you want to photograph the next lunar eclipse, I warn you that it is not complicated if you follow the tips and tricks in this article.
Soon there is a total one, do you dare?
WHAT IS A LUNAR ECLIPSE?
A lunar eclipse is an astronomical event that occurs when the Earth stands between the moon and the sun, blocking the sun's rays from reaching our satellite. In this way a shadow cone is generated, umbra, which darkens the moon.
For it to take place, these celestial bodies must be perfectly aligned.
In the following diagram you can see it more graphically.
TYPES OF ECLIPSE
There are three types of lunar eclipse, only the first two are of photographic interest.
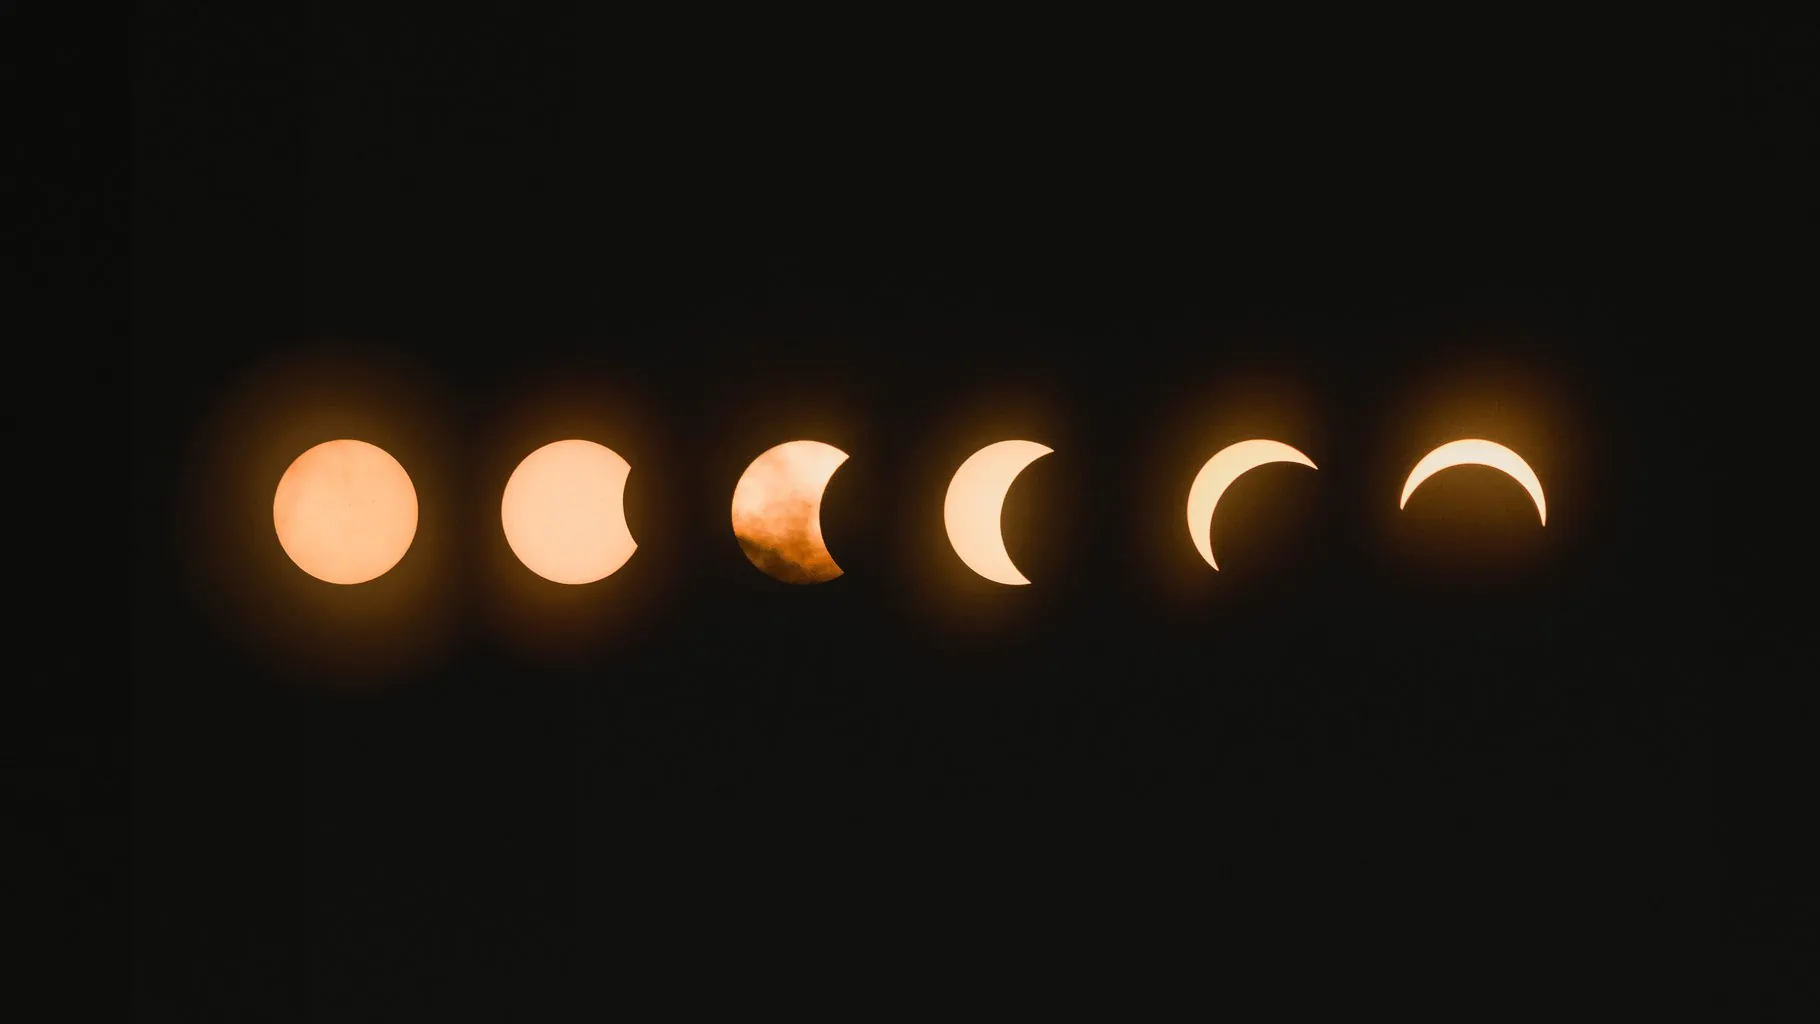
- Partial: only a part of the moon is hidden.
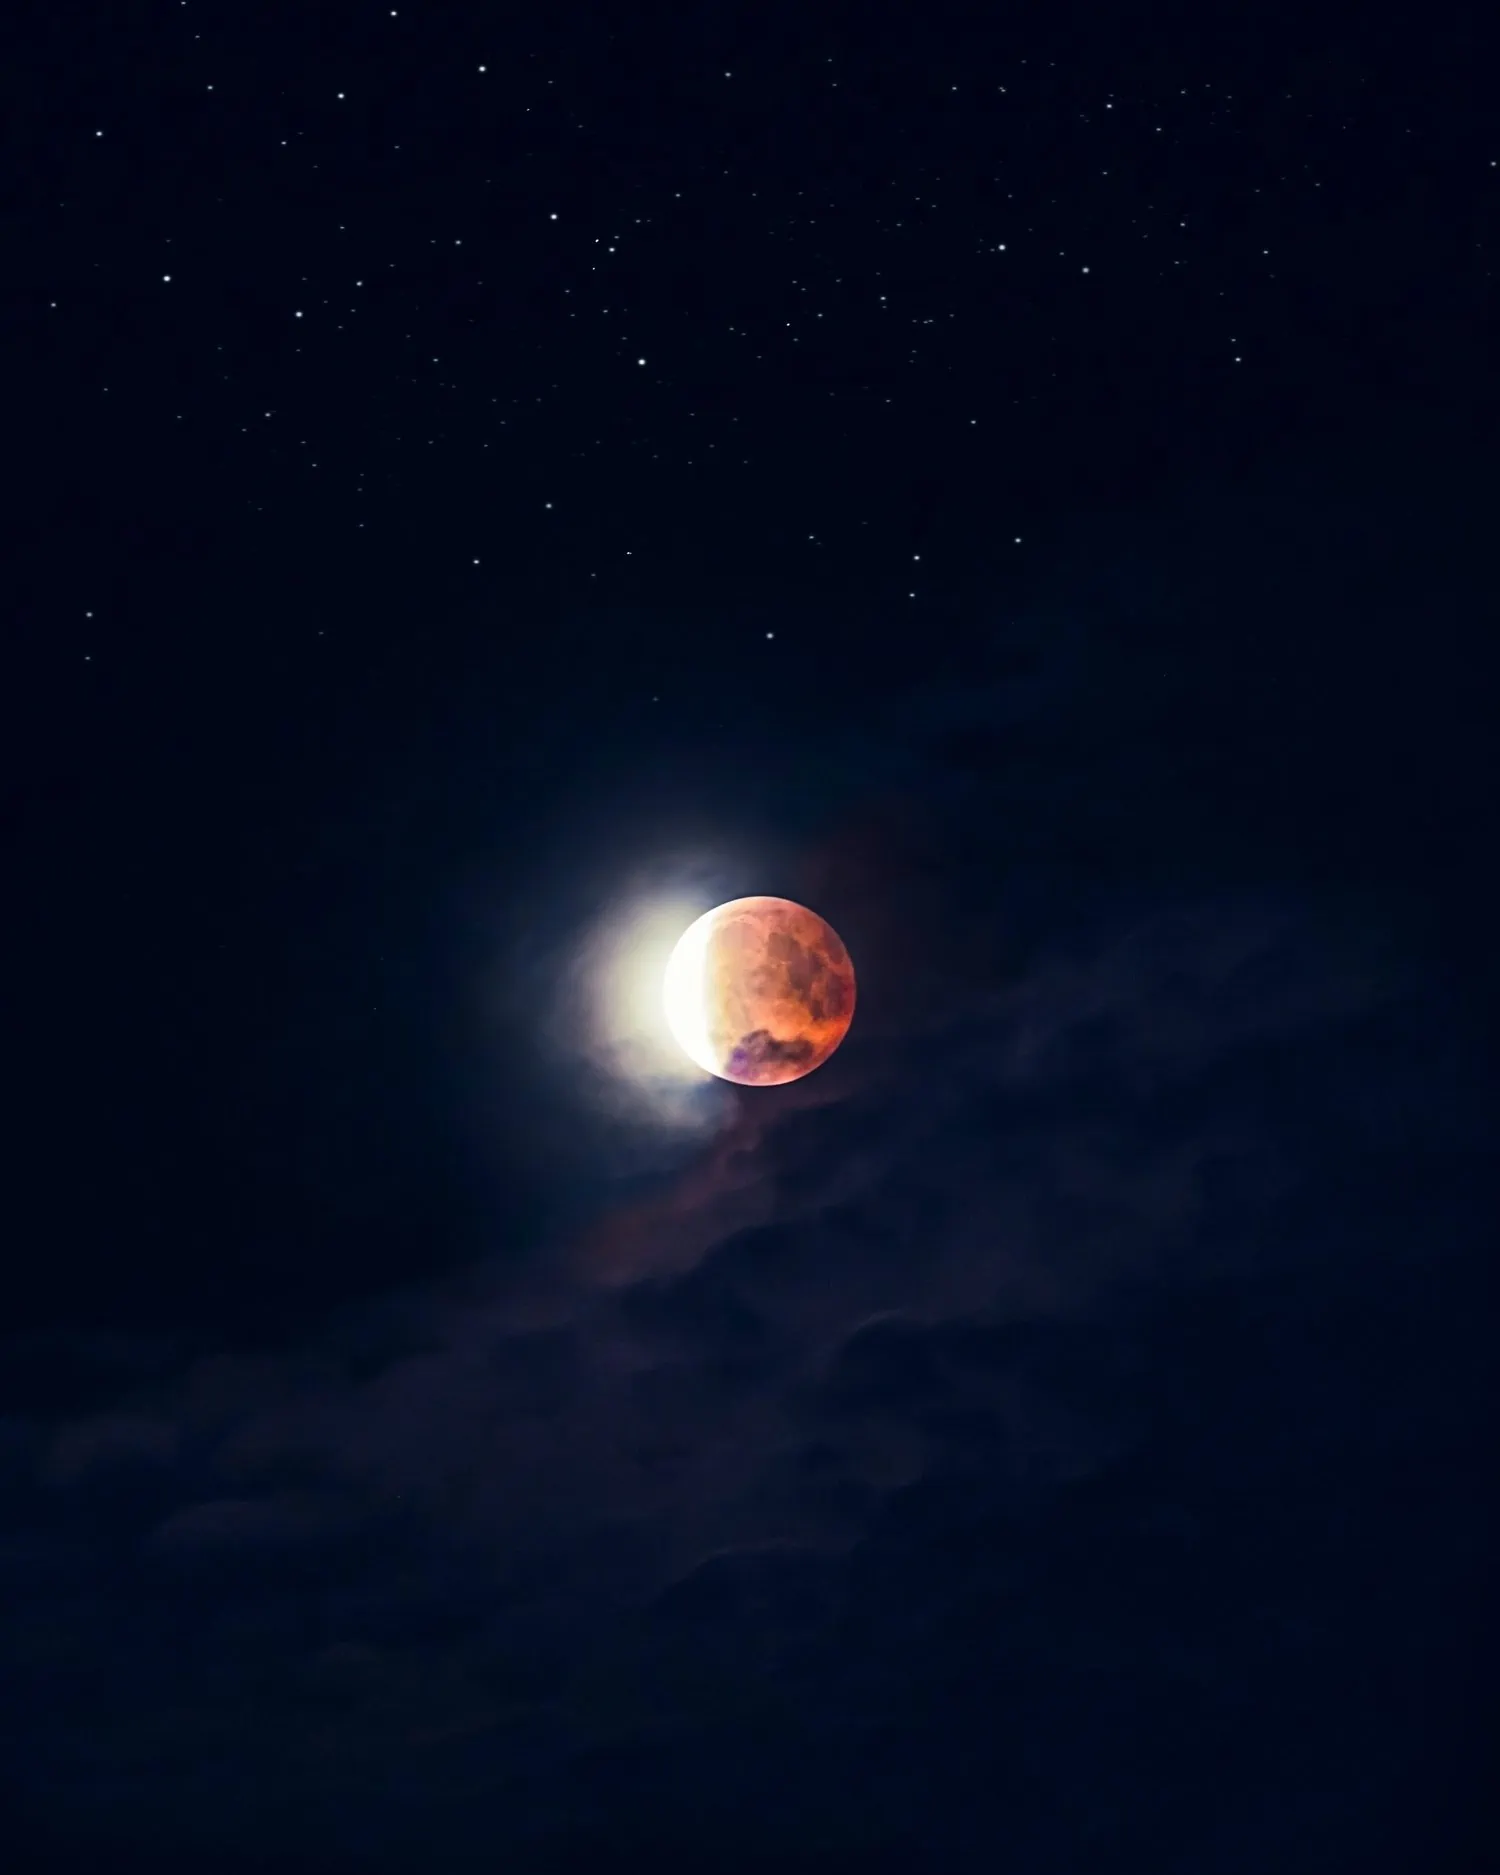
- Totals: the entire moon enters the umbra and in this phase, the moon appears red.
- Penumbral: the moon passes through the penumbra. They are more subtle eclipses and difficult to see.
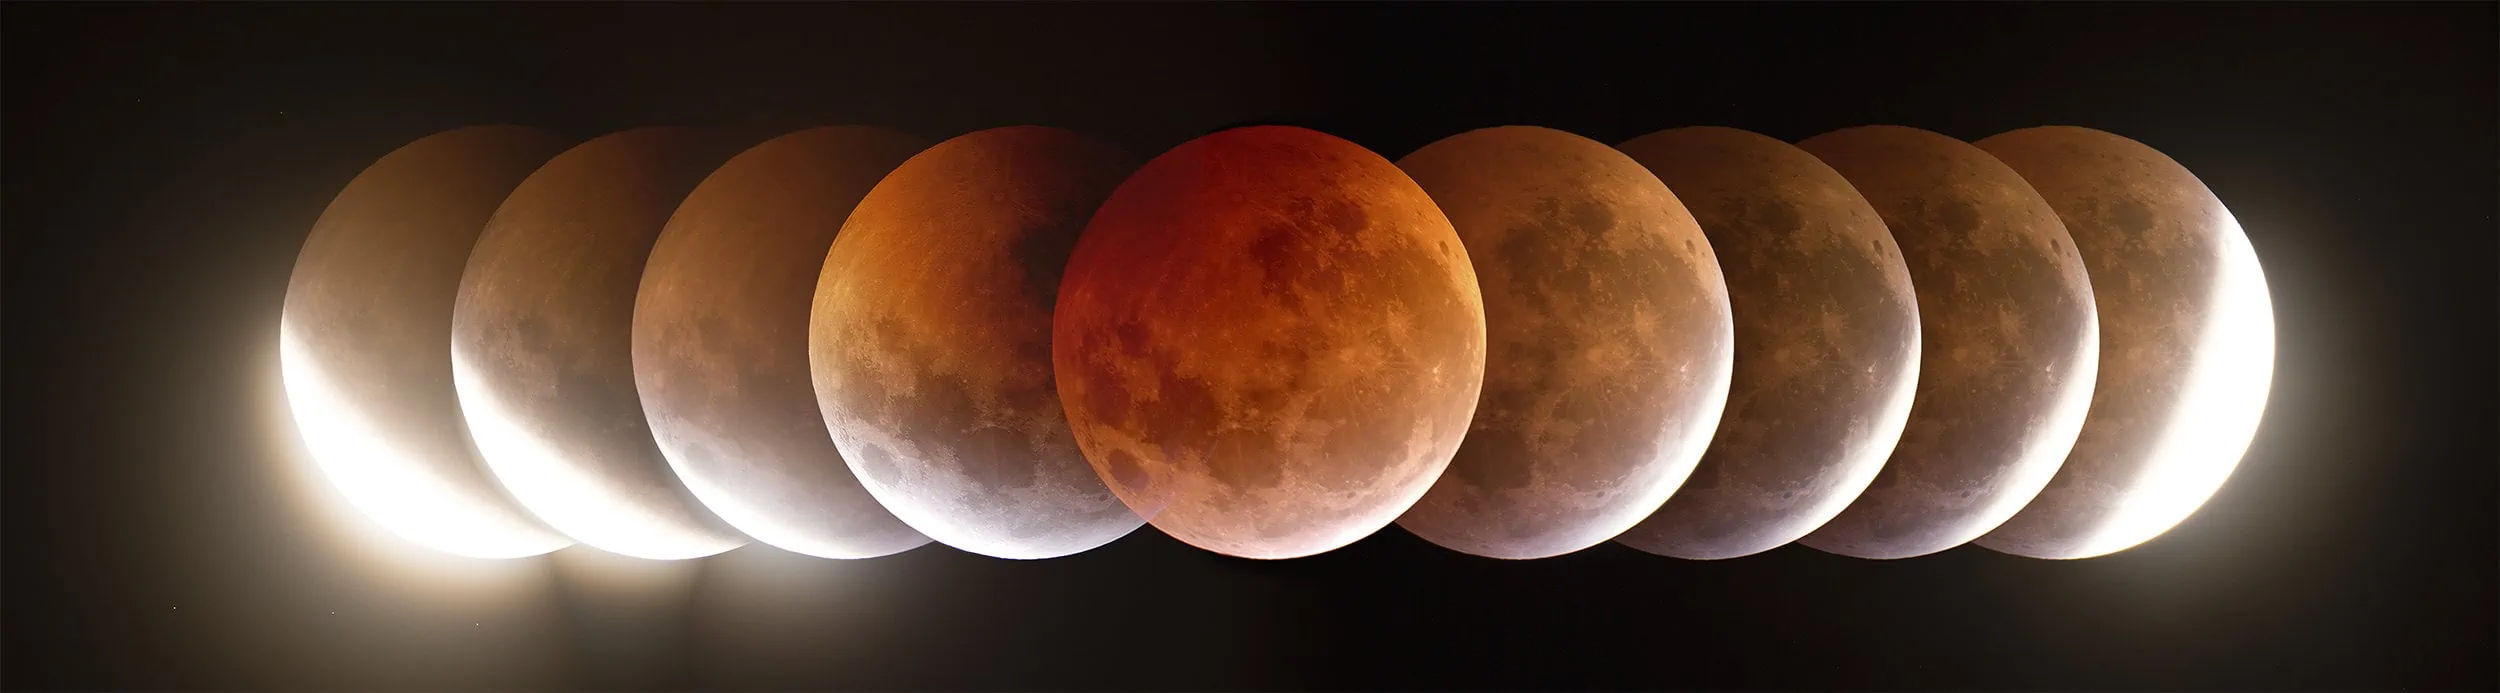
Total eclipses begin with a penumbral eclipse, are followed by a partial eclipse, and end with a partial eclipse followed by a penumbral eclipse (the total eclipse is in between).
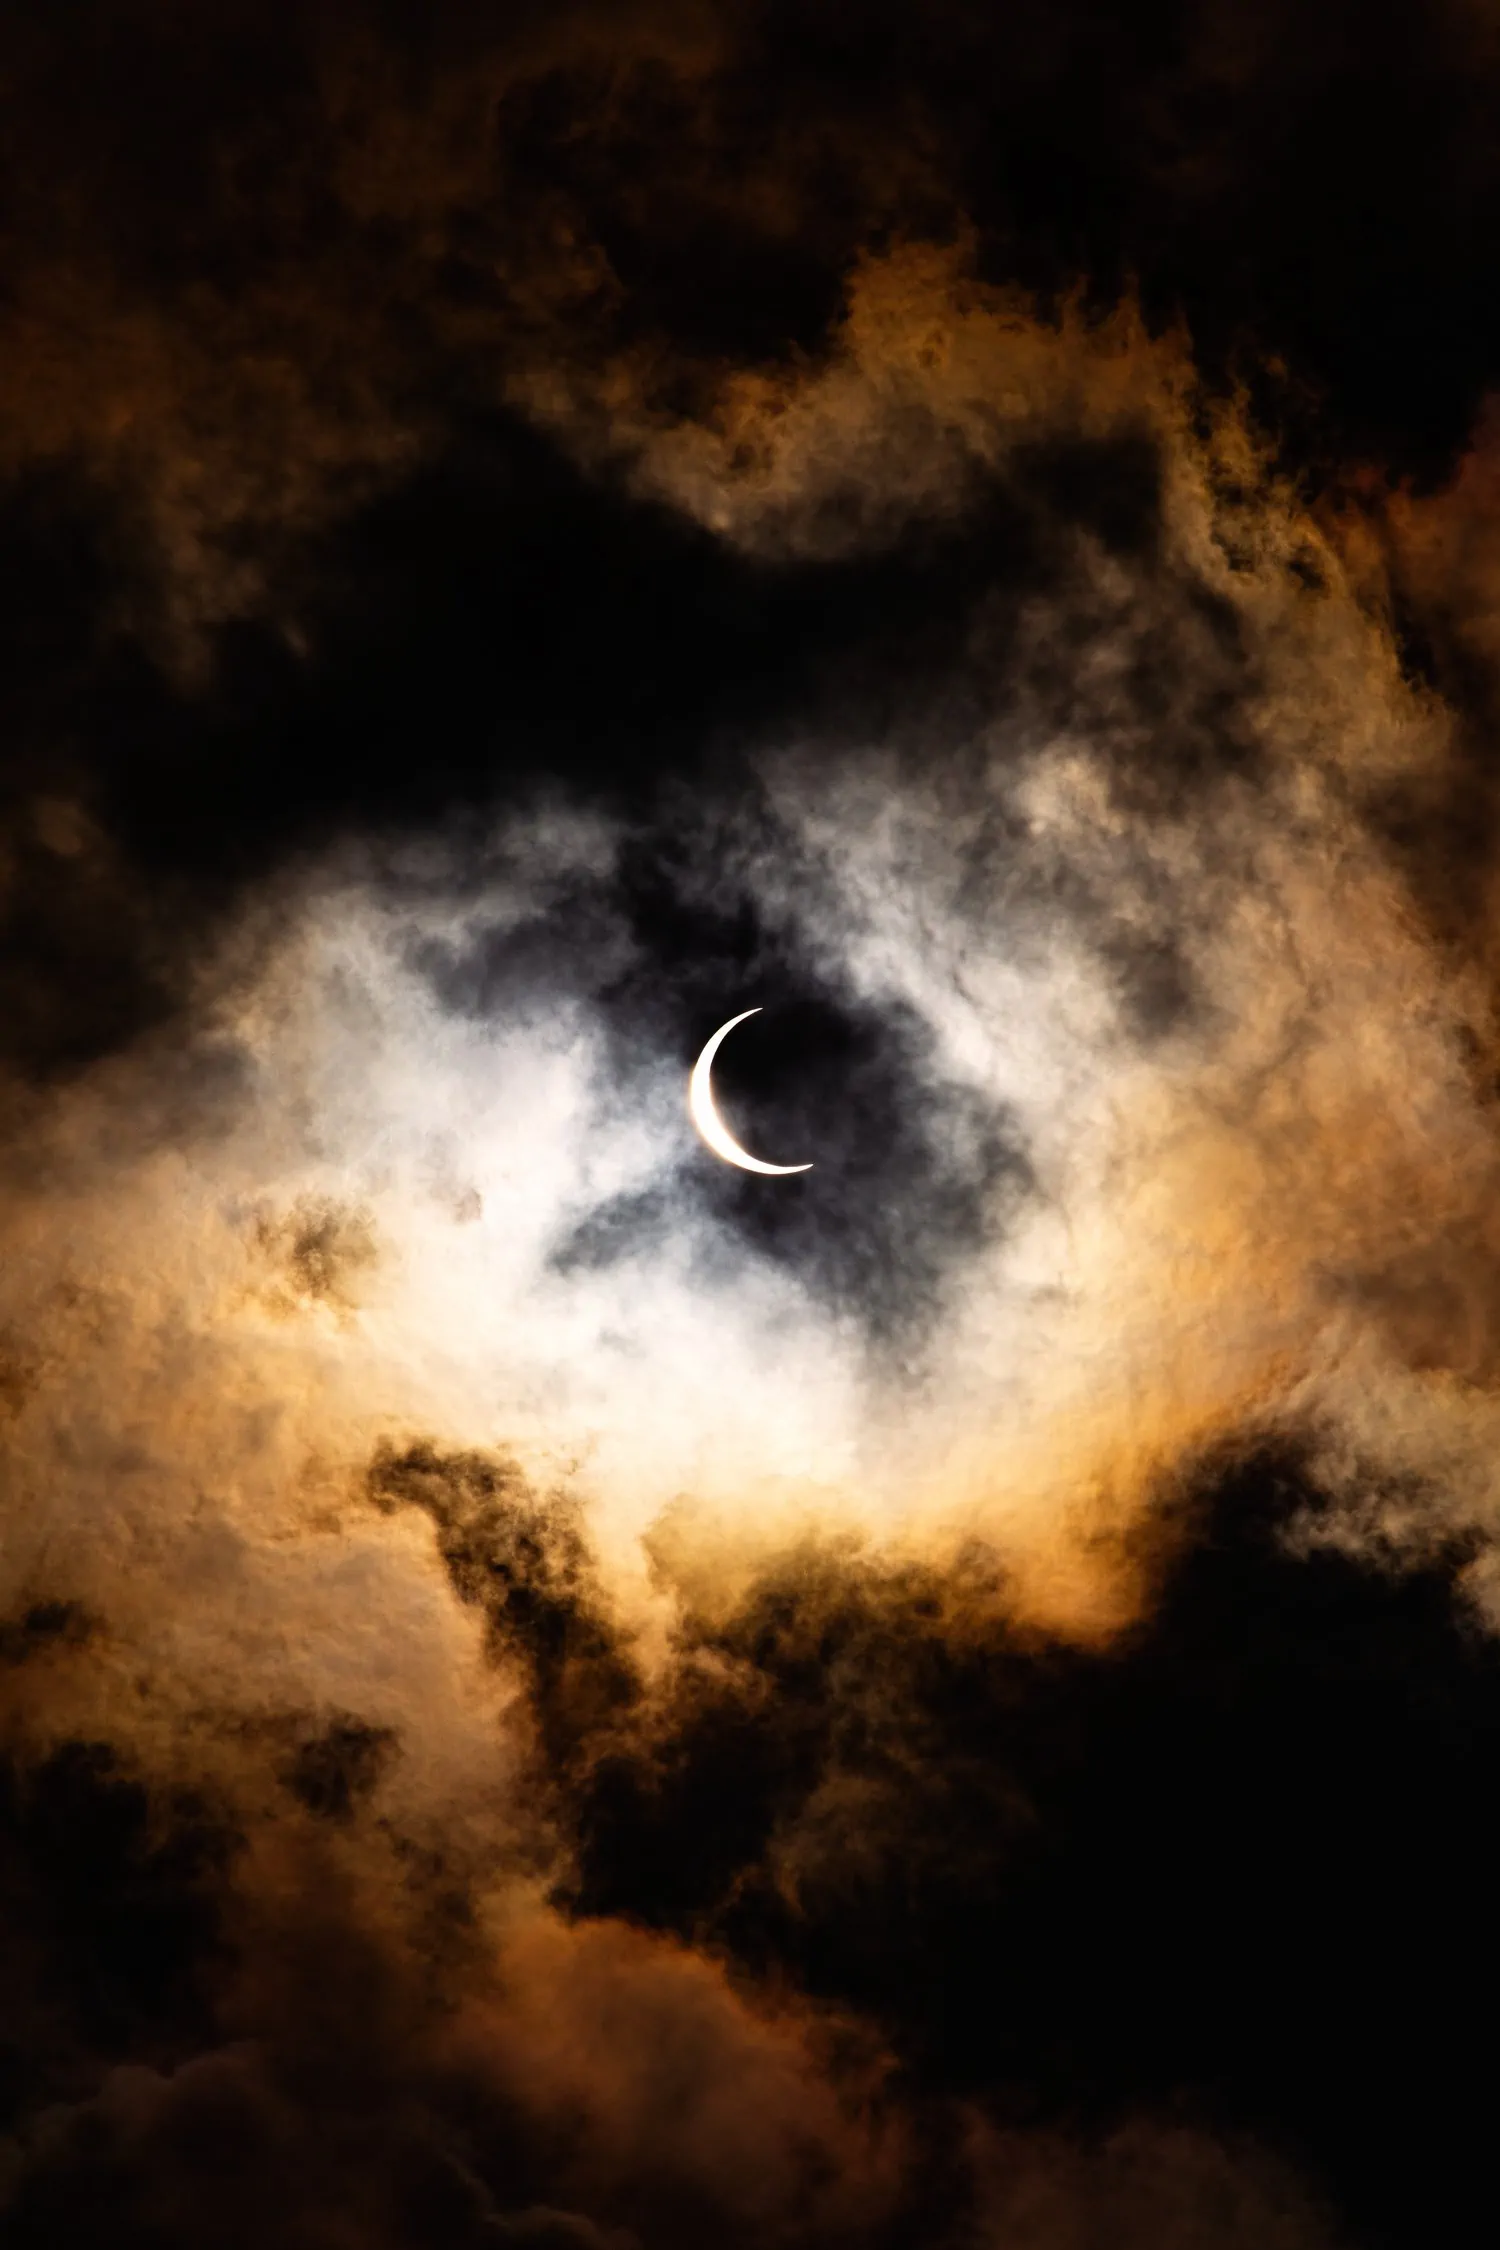
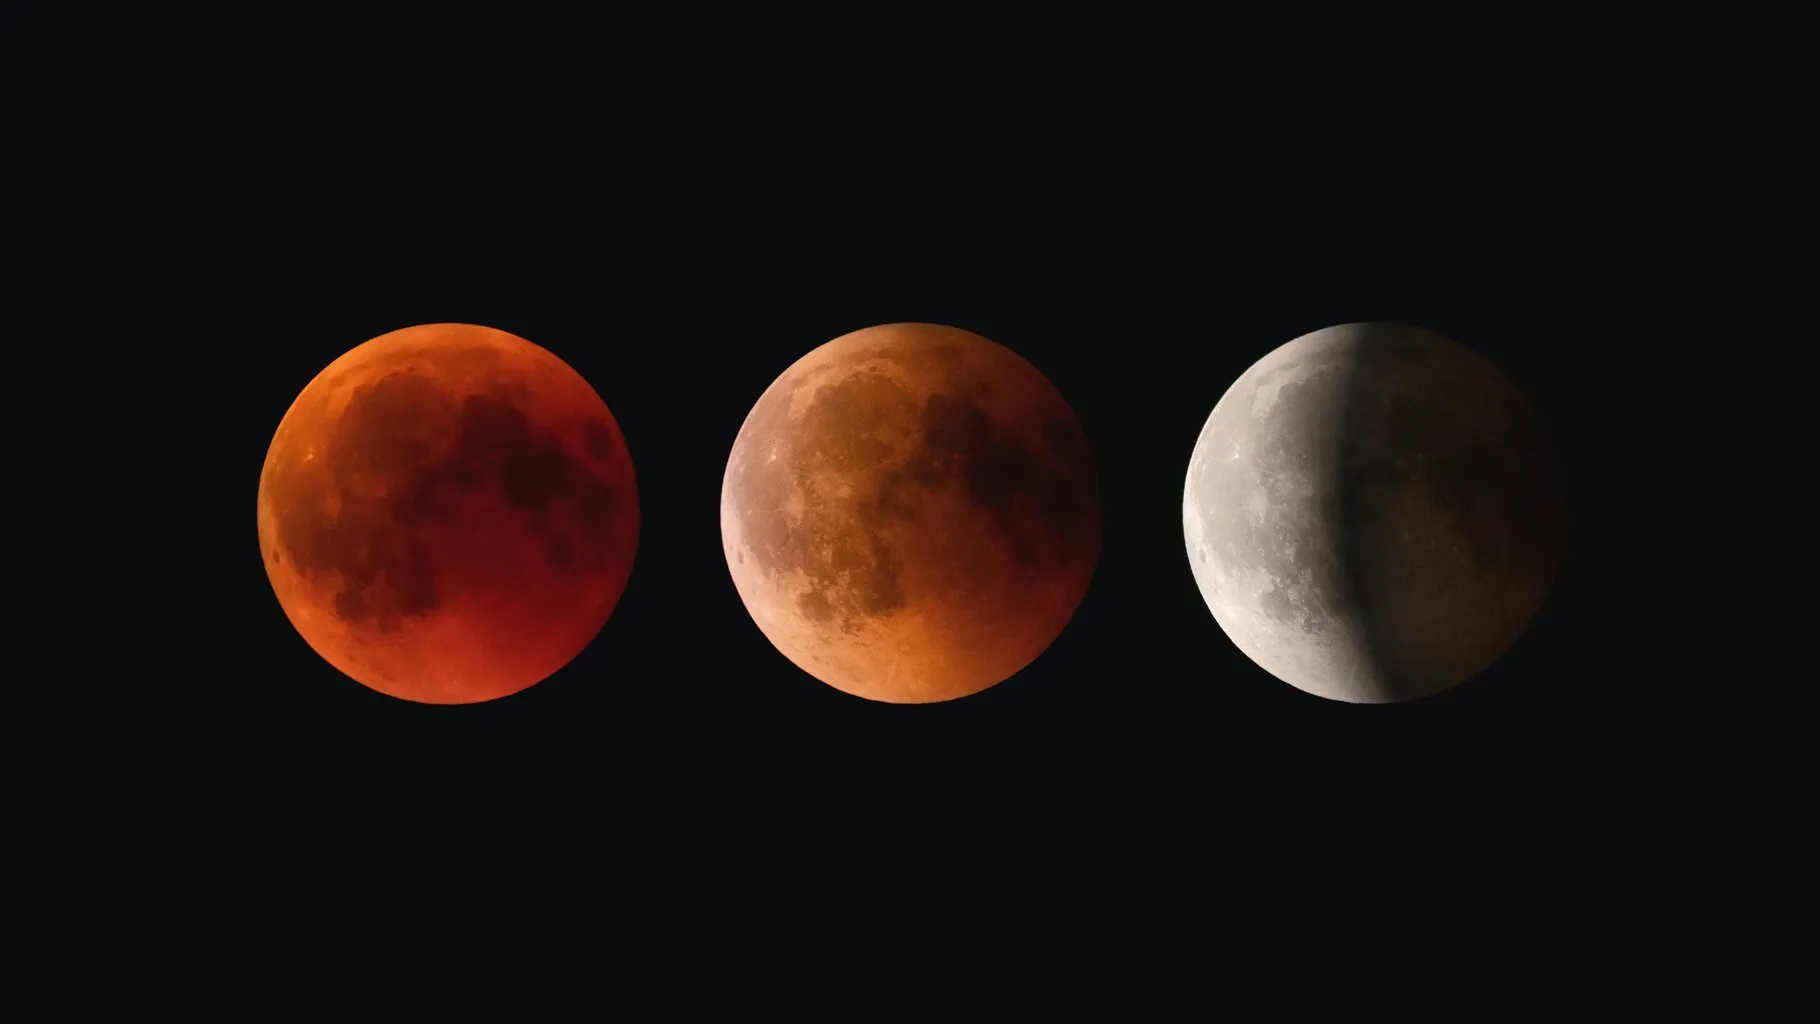
WHY IS THE MOON RED DURING A LUNAR ECLIPSE?
When the moon is in the umbra, indirect sunlight still reaches it and partially illuminates it. But this light must pass through Earth's atmosphere, which filters out most of the blue light.
The remaining light is red or orange in color and much dimmer than pure white sunlight. This reddish color can vary from dark brown to bright yellow through orange or deep red. This depends on the amount of dust and clouds present in the atmosphere.
For this reason, eclipses that occur after large volcanic eruptions are often very dark, as volcanoes spew enormous amounts of volcanic ash into the atmosphere.
If it weren't for Earth's atmosphere, the moon would be totally black during the eclipse and you wouldn't be able to photograph a pretty red moon.
HOW TO PHOTOGRAPH A LUNAR ECLIPSE
To photograph a lunar eclipse, we recommend you follow the following steps and tips.
1. PLAN YOUR NEXT LUNAR ECLIPSE
The first thing is to plan. The date is immovable, of course, you don't choose when it happens, but you can mark the date on the calendar and prepare everything you need in advance.
To find out when the next lunar eclipse is, you can visit the NASA page. Although I anticipate that just around the corner we have a total lunar eclipse that can be seen from Asia, America, Australia and the Pacific. It will be on November 8.
With apps like The Photographer's Ephemerisor other similar ones you will be able to see the trajectory of the moon, the exact time, or even plan a photo of the eclipse aligned with a monument, motif or emblematic place with which you want to combine it. Creativity has no limits.
2. FIND THE BEST PLACE TO PHOTOGRAPH THE MOON
Get away from the light, find a place without light pollution and if possible it is high up so that your views are much better.
Make sure that nothing gets in your way and that the elements you have in the scene contribute to the composition.

3. CHOOSE THE TECHNIQUE
Before taking the following steps, it is convenient that you choose how you want to photograph the lunar eclipse or what technique to use because both the equipment and the settings will be different:
WIDE ANGLE
Let's start with the easiest way to photograph a lunar eclipse.
For this, it is worth using any camera that allows you to deactivate the flash, expose for a long time and shoot remotely, even if it is with the 2s delay shooting mode. You also need a tripod if you're going to take a long exposure.
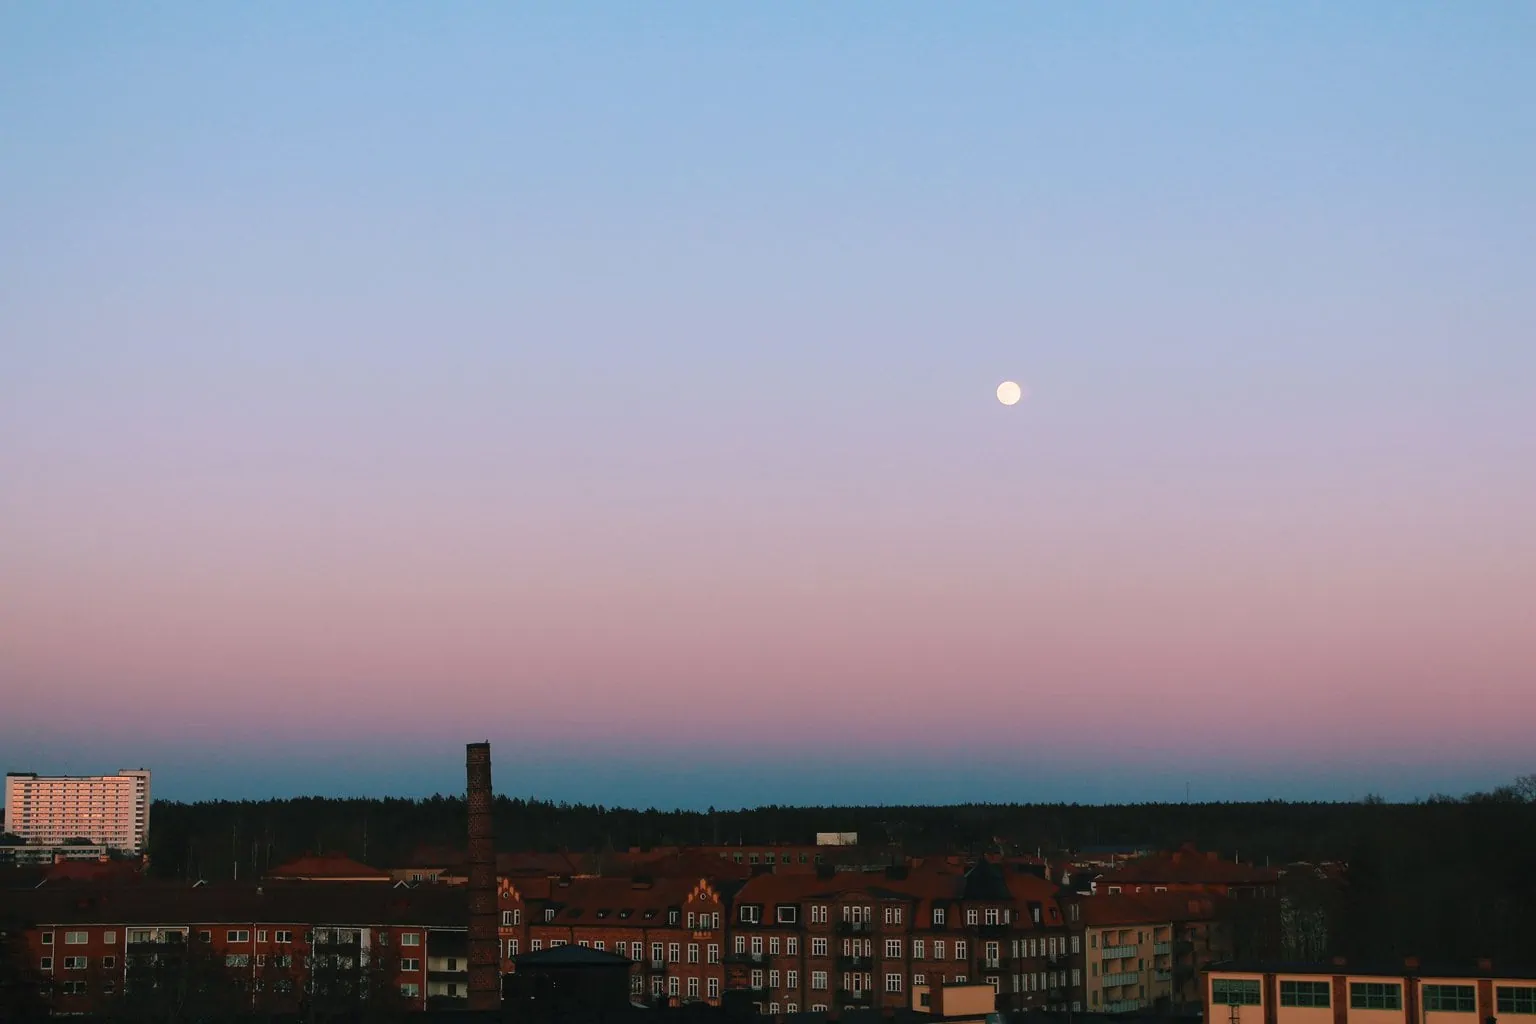
The most suitable objective is between 28-50mm if it is full frame and, if it is APS-C, between 18-35mm. For settings, ISO 400, the widest aperture the lens will allow, and the shutter speed that allows you to get a well-exposed photo. Between 5-30s can be a good starting point. After 20-30s you can start to see trails in the stars, keep this in mind in case you want to avoid the trails. In that case, apply the rule that we tell you in this article to photograph the stars as points.
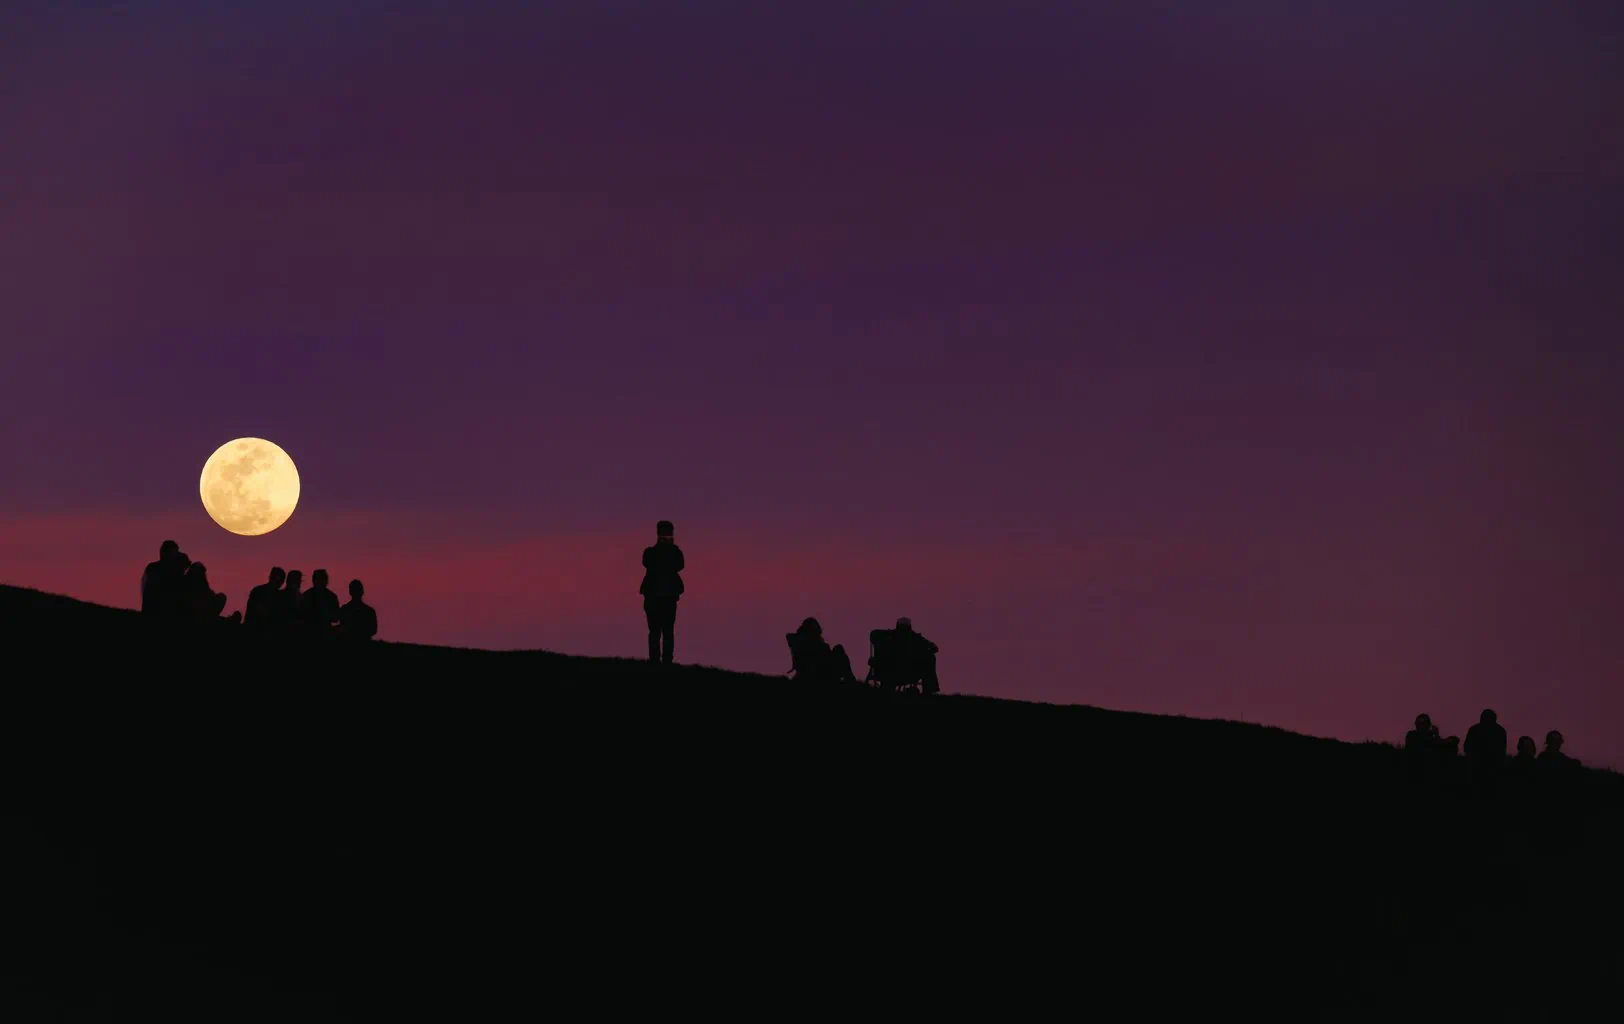
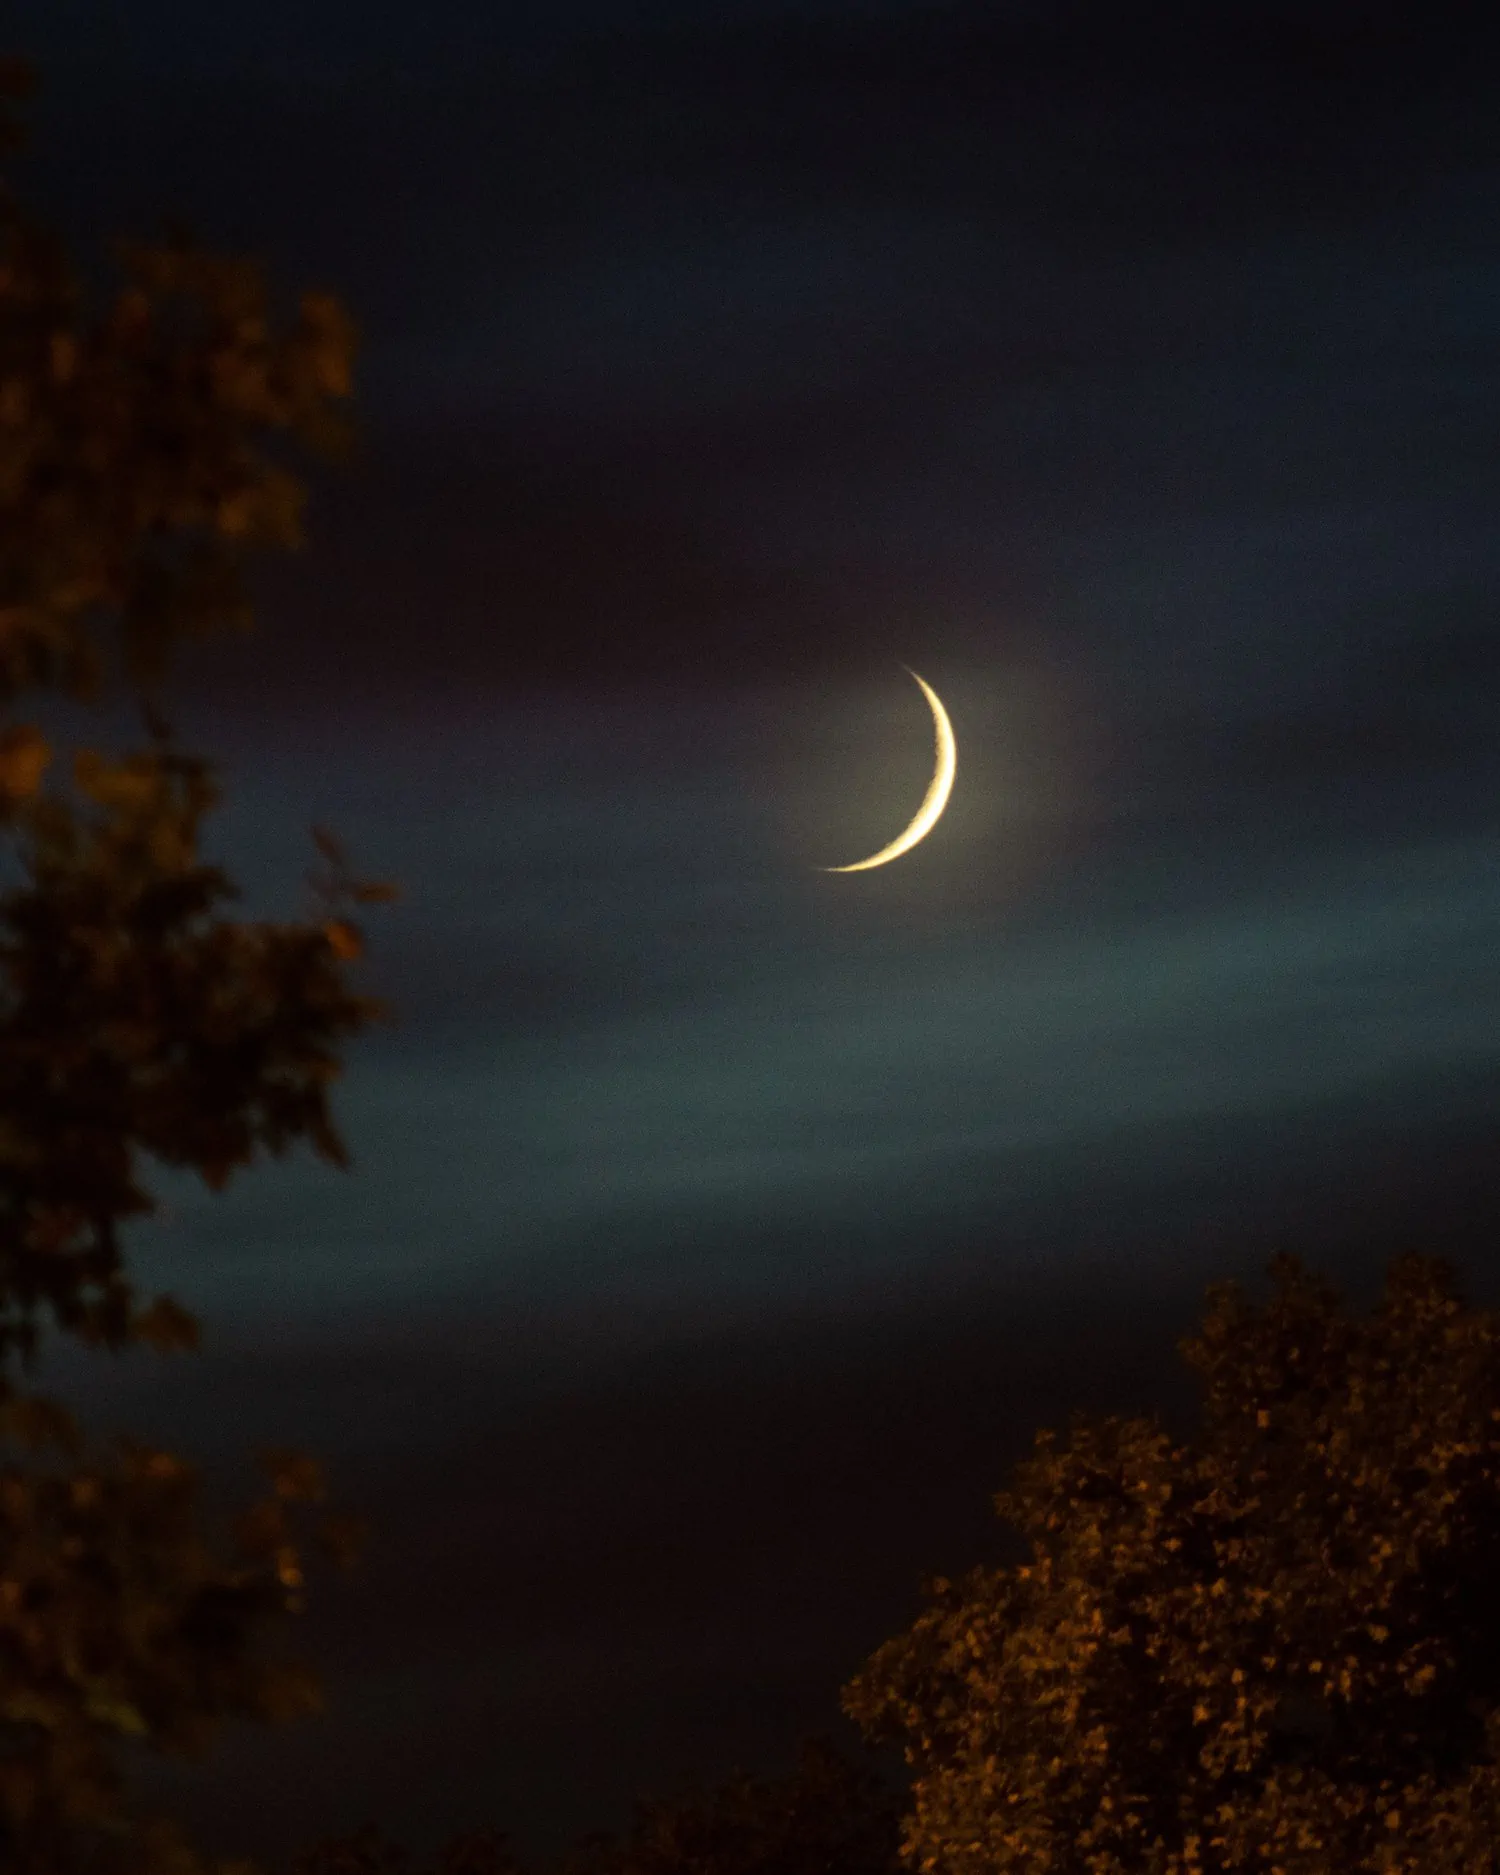
With this way of photographing the eclipse, you have to take great care of the composition because the moon will look tiny and it has to be part of an interesting setting. Look for a beautiful tree, a building or tower, even if it is abandoned, etc. Remember to light this foreground if you don't want just a silhouette. A flashlight or external flash can help.
If you have the option of going to the place beforehand to study the composition, it is an excellent option. Keep in mind that the time you are in that same position will not be the same. Use an app to plan your shot.
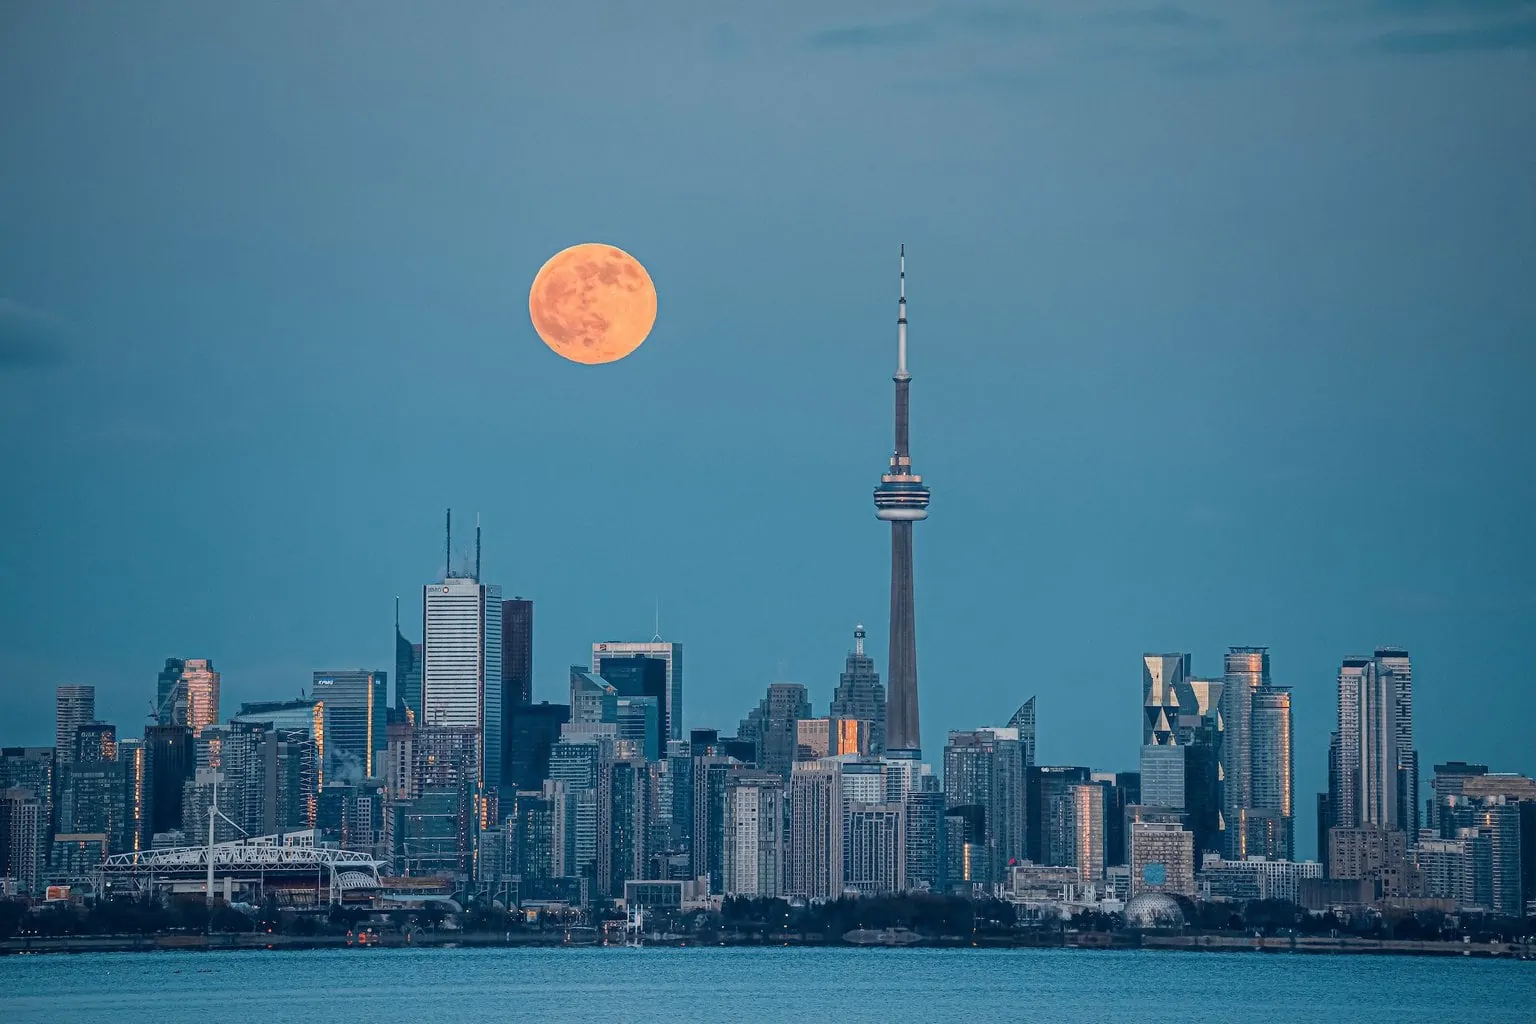
TELEPHOTO
Let's say this is the opposite technique to the previous one. Have you ever wondered how to get the big moon out? Very big?
If you have a telephoto lens and/or multiplier, or a telescope, you can either photograph the moon in close-up and make a montage or collage with the different phases, for example, or photograph the moon in interaction with a motif or subject. Like those photos in which you see a giant moon and in one part the silhouette of one or more people; or the moon behind a tower, etc.
The longer the focal length, the larger the moon will appear in the photograph. In this case, cameras with a cropped sensor have an advantage over full frame ones, since a 500mm, on a cropped sensor, is more or less equivalent to how the moon would look with a 750mm on a full frame camera.
If you have a compact camera, it will help you if it has a very powerful zoom from 60x, as some of these bridges do .
For this type of photography, it is important to calculate how far away and at what point you should position yourself so that the moon is in the place you want with respect to your subject. Or where the subject should be placed so that its silhouette falls within the outline of the moon. Nothing better than helping you with a suitable application for it.
STARTRAILS
If you like star trails and want to experience how the moon would look photographed with this somewhat more abstract technique, hereyou have an example
To achieve this you need the same equipment as for the wide-angle technique, although in this case the shot is somewhat more complex, it is necessary for the camera to have Bulb Mode and you cannot do without a stable tripod or remote shooting.
The settings in this case would be: an ISO value between 200-400, an aperture of approximately f/8 and focus at infinity. Remember well charged battery and memory card with enough space.
The moon at the start of the eclipse should be framed in a corner and allow room for the moon to move throughout the image during the exposure. The direction of the moon will depend on both the hemisphere you are in and the time the eclipse occurs.
It is highly recommended to perform this exercise before the day of the eclipse, one night before. Keep in mind that the moon rises approximately 50 minutes later each night when making the composition and going to the place.
You already know that there are applications that also help you with the position of the moon at all times.
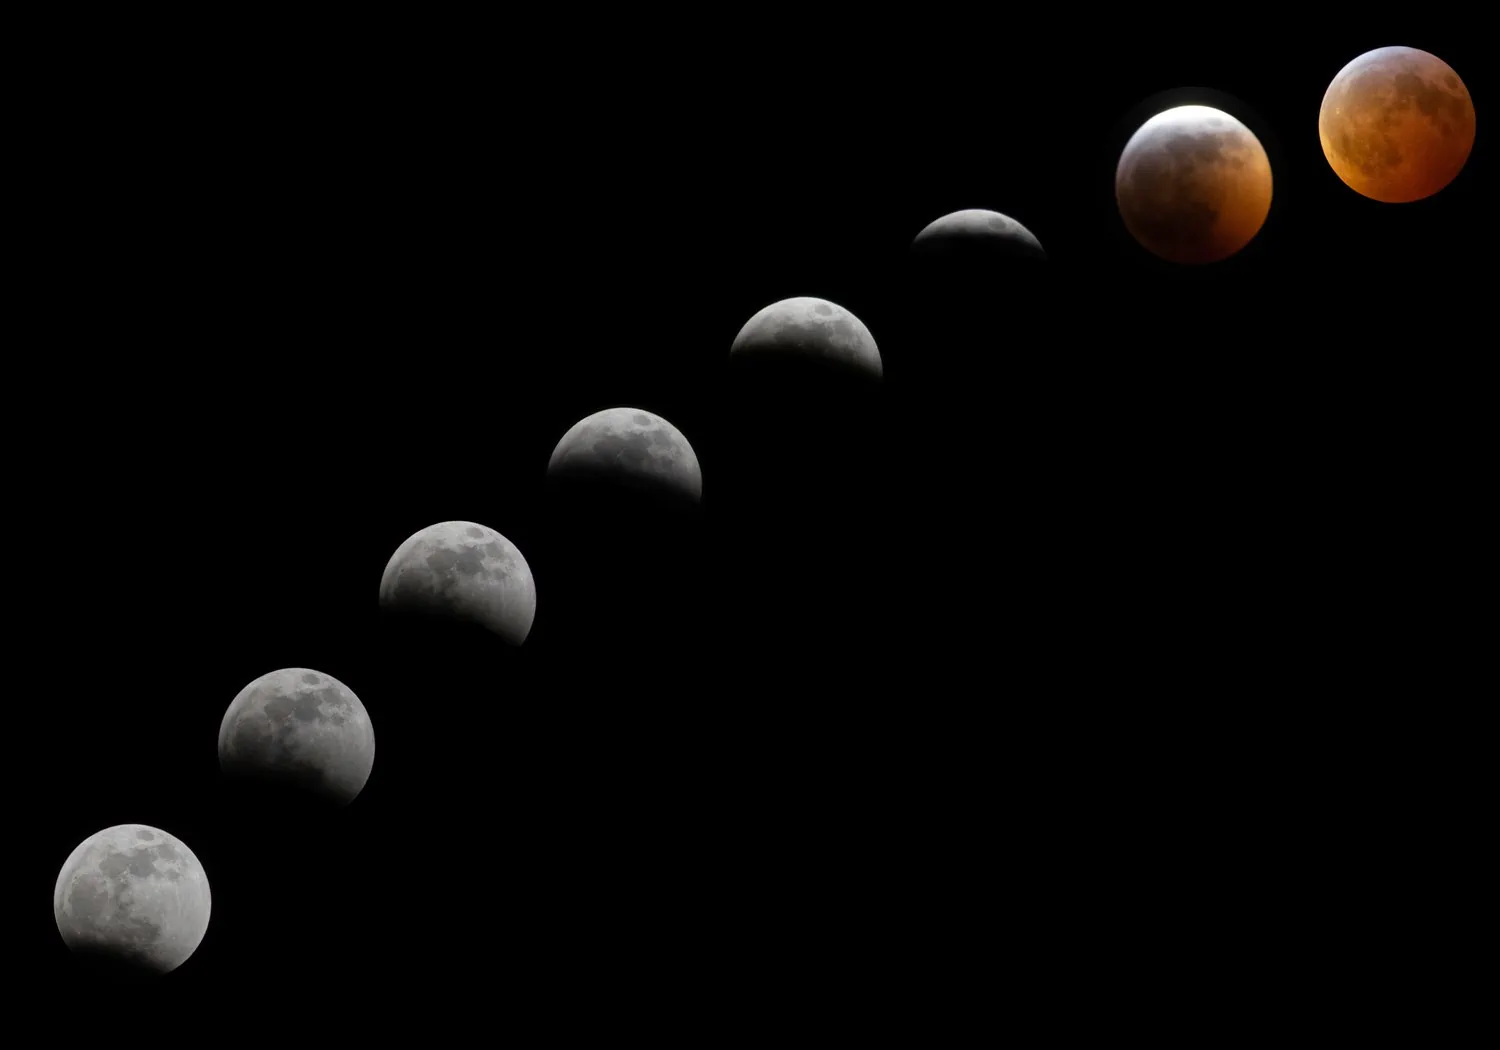
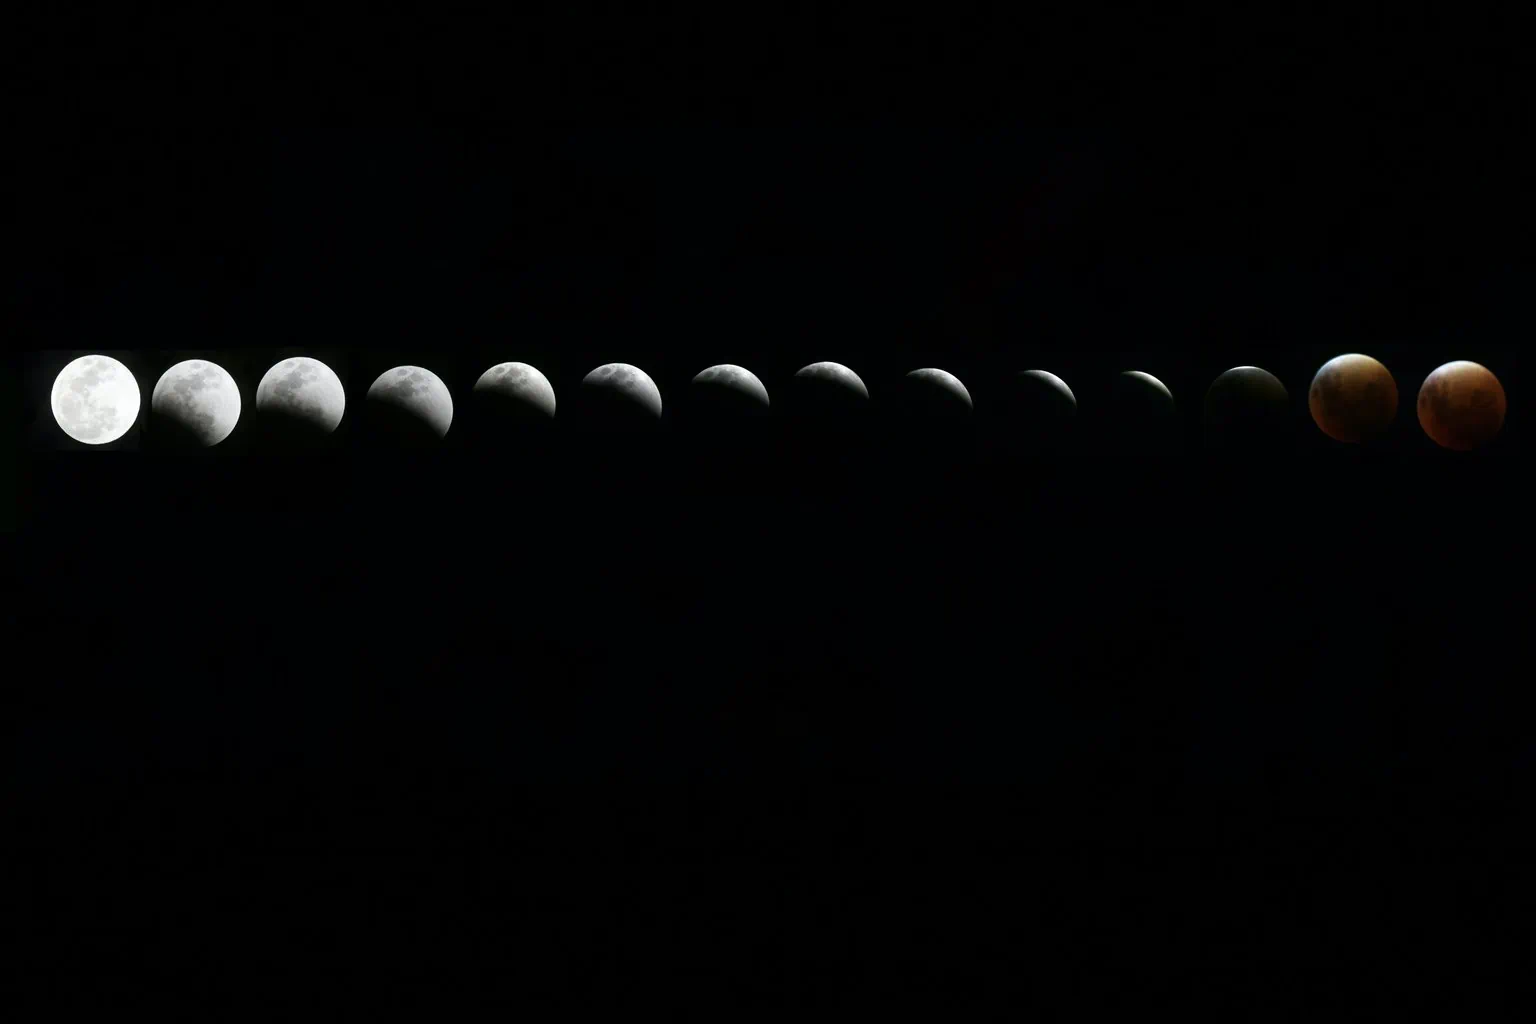
MULTIPLE EXPOSURE
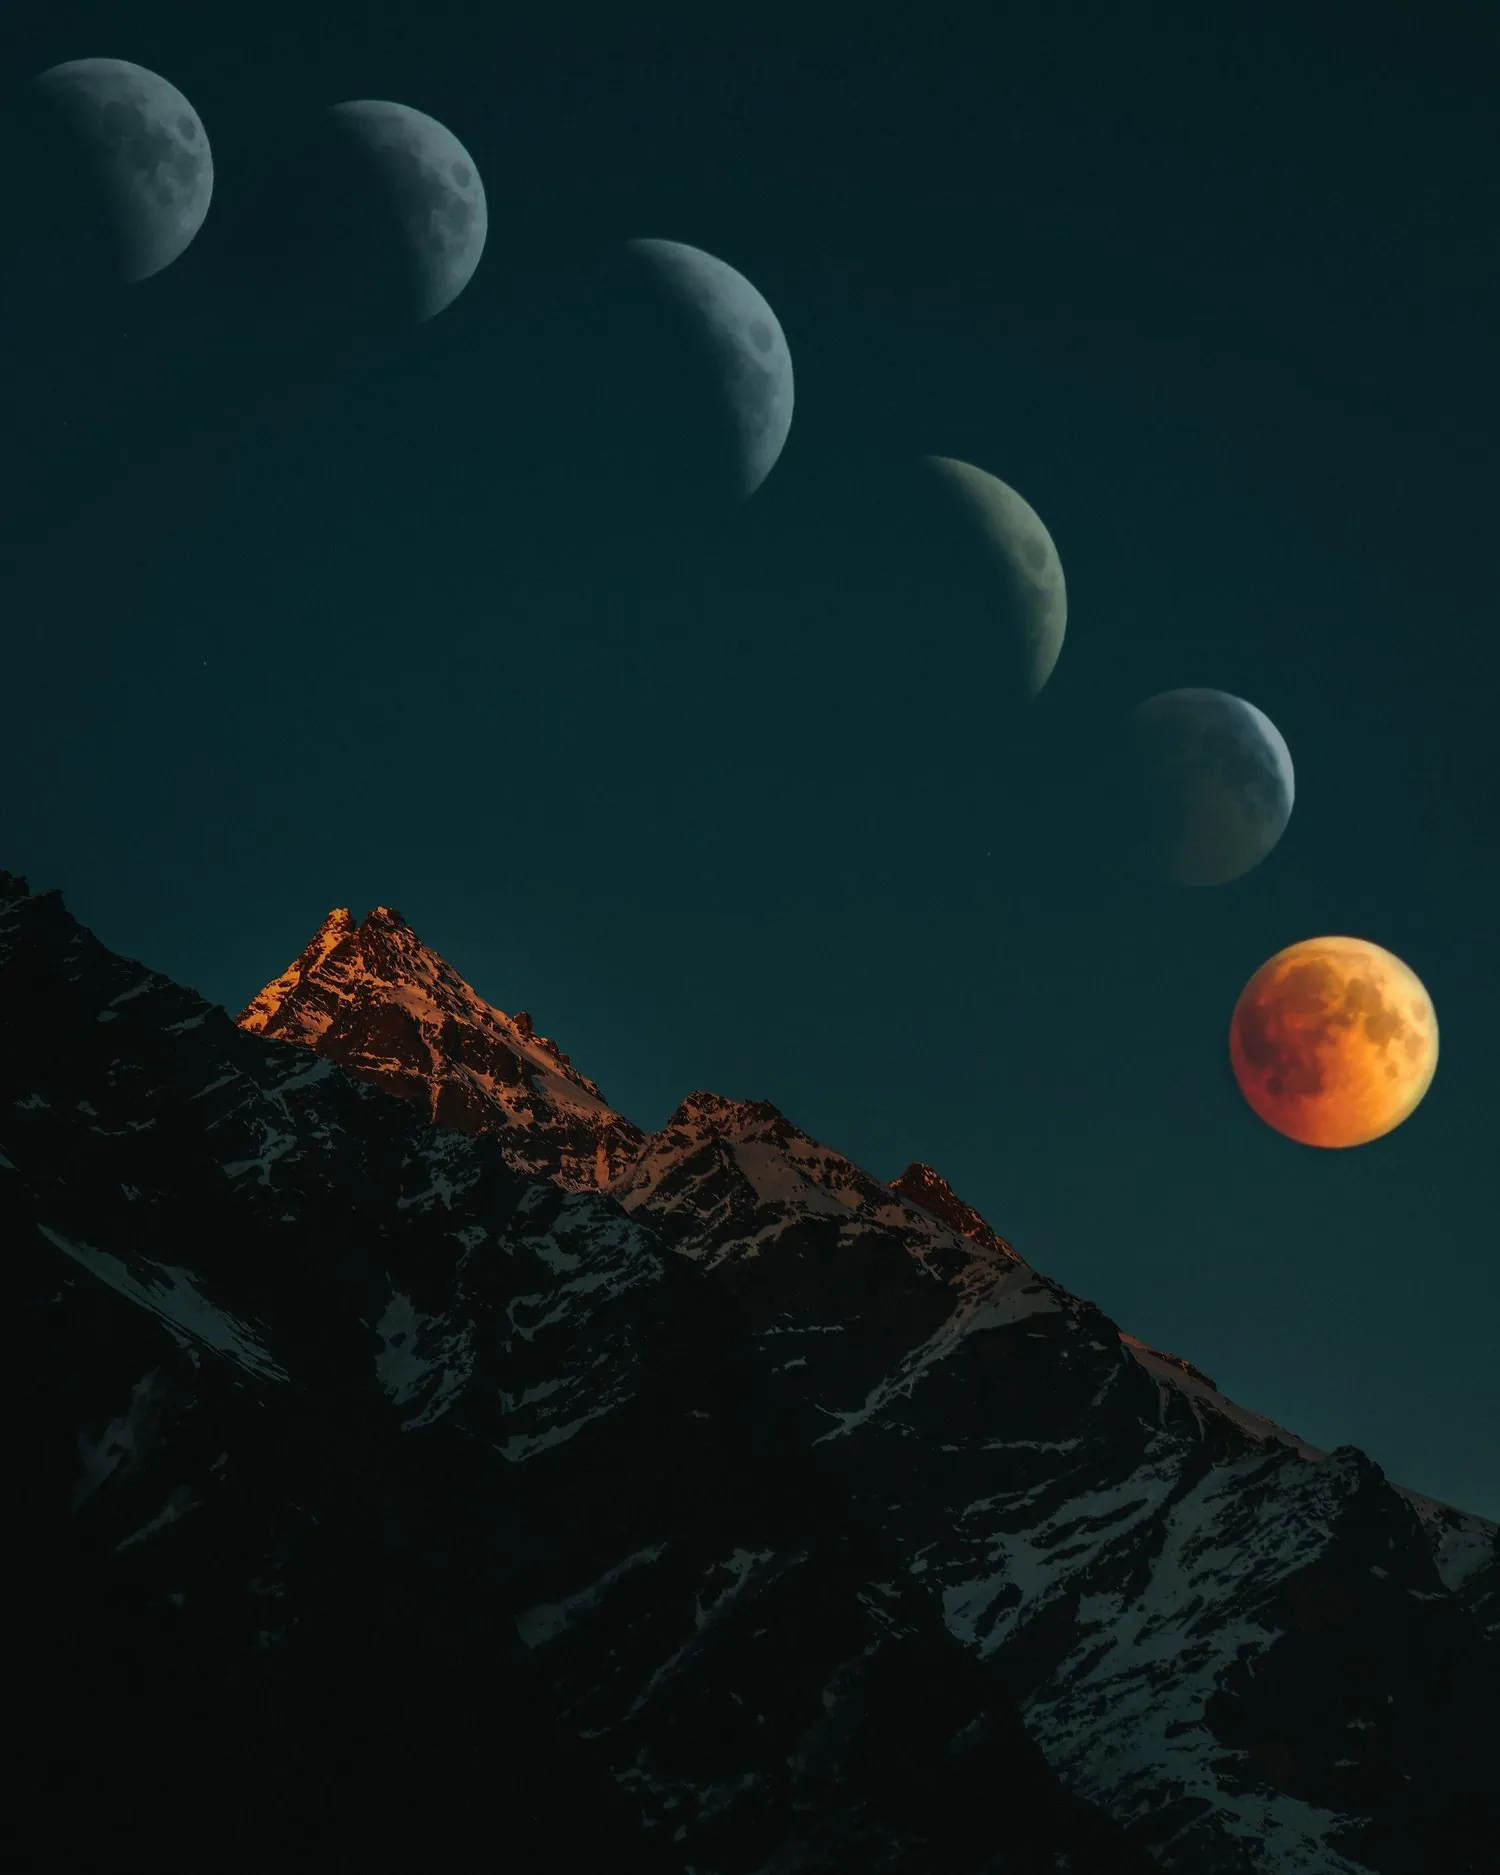
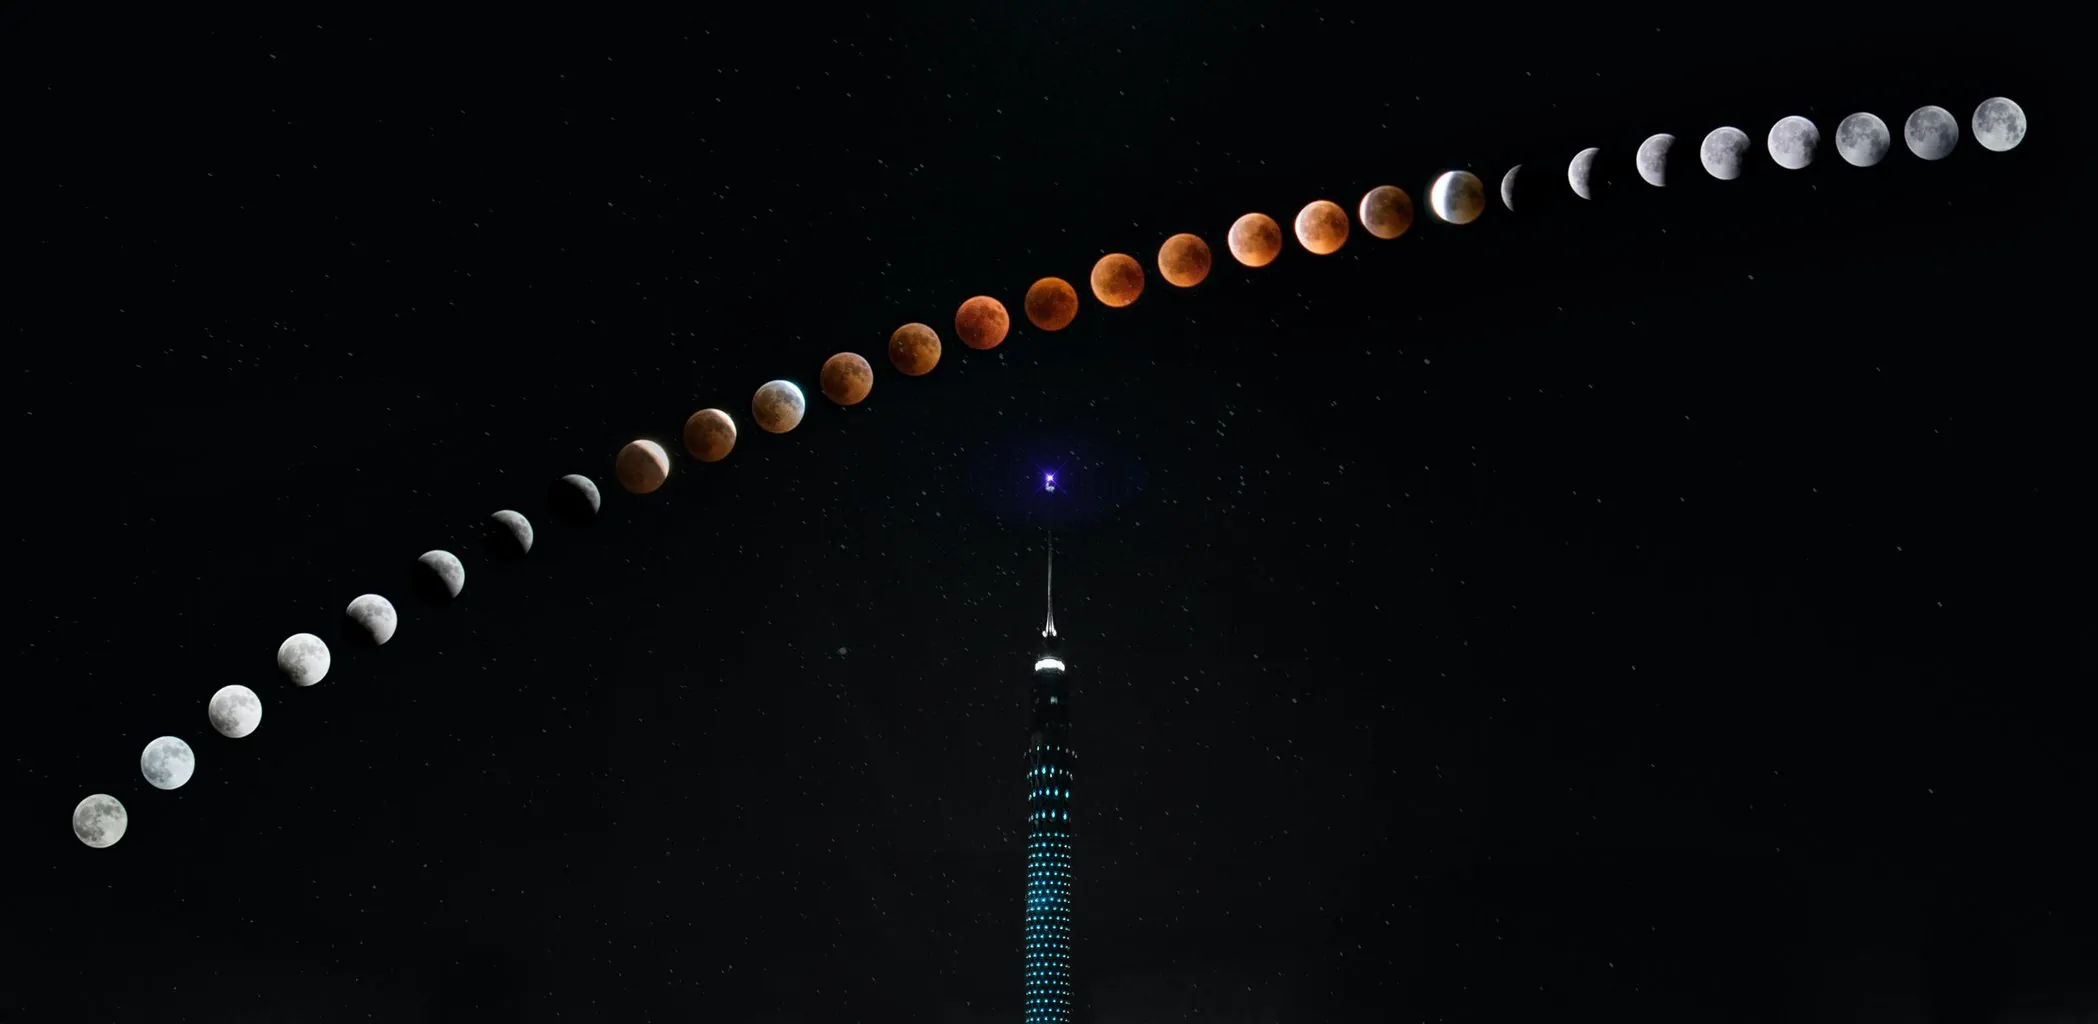
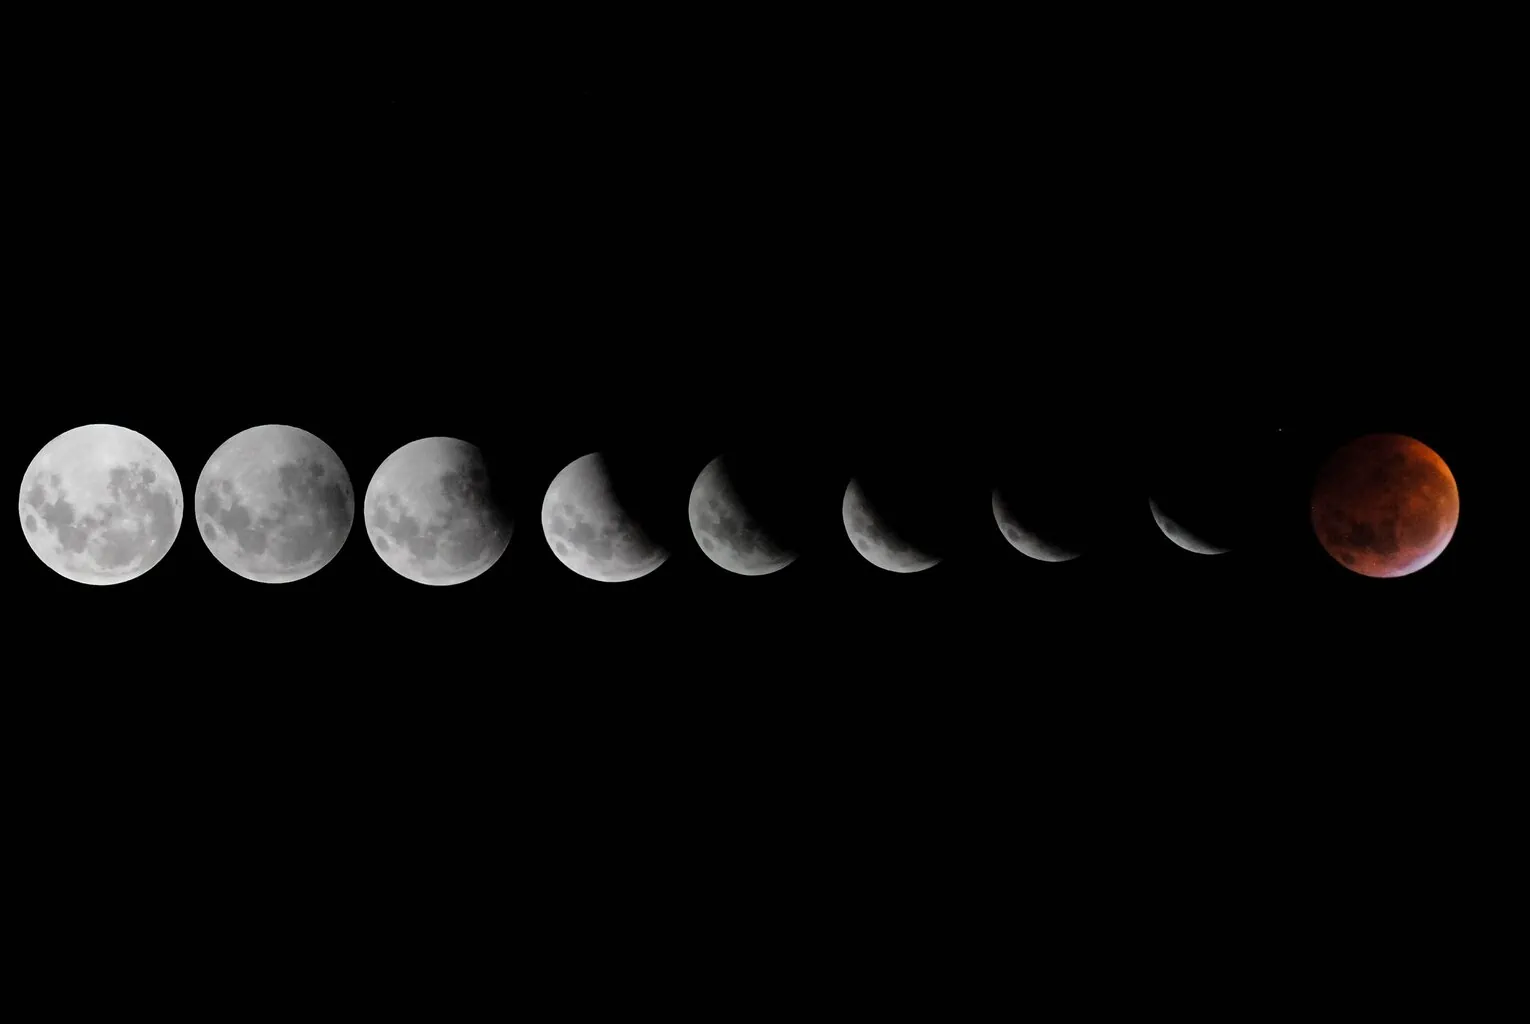
Halfway between the wide-angle technique and the star trail is the multiple exposure that captures a sequence of the eclipse with individual images of each phase, as in this example.
To achieve this technique you also need an angle lens, tripod and remote shutter release or intervalometer, then the images are joined in a program like Photoshop or any other stacking program; unless the camera has the multiple exposure option. In any case, it is very important that the tripod does not move under any circumstances.
Exposures are to be taken every 5-10 minutes, the frequency determining how many moons will appear in the frame and at what distance. The important thing is that it is always the same interval between photo and photo. If you don't have an intervalometer, you can use a countdown timer that alerts you every time you have to shoot.
With this technique you have to take into account that the exposure times will vary throughout the different phases, since the brightness of the moon will be different at each stage. Also this brightness can vary from one eclipse to another, however, hereyou will find a table with reference values.
4. PREPARE THE EQUIPMENT
What do you need to photograph a lunar eclipse?
- Camera with manual settings. Ideally, a camera that allows you to select the appropriate parameters: SLR, EVIL, Bridge, or advanced compact if it has a good zoom, for example, would be the most appropriate. If you thought you needed a Full Frame camera, I have already told you that APS-C cameras with a crop factor are in luck because they multiply the focal length, so your 300mm lens, for example, with a crop factor of 1, 5x would become a 450mm.
- Tripod. It is important to stabilize your equipment, especially if you use a telephoto lens or perform the startrails or multiple exposure techniques. It is also essential if you want to do a time lapse or any composition that requires several shots.
- Remote shutter release or intervalometer. The slightest movement can spoil the result and throw away your illusions of photographing an eclipse on the ground, something you don't want, right? In the event that you do not have or cannot get one, use the delay shooting mode or the mobile application to shoot remotely if your camera allows it. But never take the photo by pressing the shutter button.
- Aim. The longer the focal length, the larger the moon will appear. If you want it to look very large, the ideal is from 400mm. If what you want is to capture the eclipse sequence in a beautiful landscape, use a wide or a short focal length.
- Teleconverter. With a teleconverter you can multiply the focal length of your telephoto lens.
- Cards and battery. Carrying cards with enough memory is obvious, but don't forget the battery either. Take it well loaded and with some spare.
5. SELECT THE BEST SETTINGS FOR THE LUNAR ECLIPSE
Although I have indicated the appropriate settings for each technique, these are the general settings recommended for a lunar eclipse:
- Manual focus. In this case, run away from automatic mode and focus on the edge of the moon. Then, magnifying the screen, make sure it's in focus. If you are going to photograph a subject in the frame and you have to choose between the moon and the subject in focus, it better be this one that comes out sharp.
- opening . Try f/8, and from here, depending on the phase of the eclipse, you'll have to go up or down to adjust the exposure to stay within the shutter speed limit.
- Shutter speed. The rule is to try not to exceed 1s (2s at most) so that your photo is not shaken by the movement of the moon. But it will go from 1/125s in the partial phase until you have to touch the limit during the total eclipse phase.
- Set an ISO as low as possible, try not to go over 100-200 unless you can't keep your shutter time below 1-2 seconds.
- To make sure you get at least some correct photos, you can resort to bracketing or bracketing.
- Block the mirror. If your camera allows mirror lockup, do so to prevent camera shake. This with mirrorless cameras is obviously not necessary.
- spot measurement. Use spot light metering mode and make sure the moon is not overexposed.
- Not afraid to shoot. It takes advantage of digital advantages and every ten minutes it takes a series of shots with different parameters. Then you can eliminate the ones that are left over and keep the ones that have been the best.
- RAW format, so that later you can balance the white balance or edit your photo with all the information.
6. TAKE CARE OF THE COMPOSITION
Unless you want to capture the moon's landforms, practice, fill the frame with a glowing ball, or composite the different phases of the eclipse, the moon alone isn't usually of interest.
A photo of the moon alone is like a photo of a grass garden, with no flowers or other plants to give it life. Try to include other elements in the scene, branches, clouds, mountains, silhouettes of people or birds, buildings, etc. Whatever adds interest to the image.
OTHER TIPS FOR PHOTOGRAPHING A LUNAR ECLIPSE
These are not all photography tips, but I am sure you will find them very useful.
- Practice. Before the eclipse practice how to take pictures of the moon , as much as you can, in the link we tell you how.
- Seek inspiration. Search the net or at the end of this article for photos that inspire you and give you ideas for your next photo.
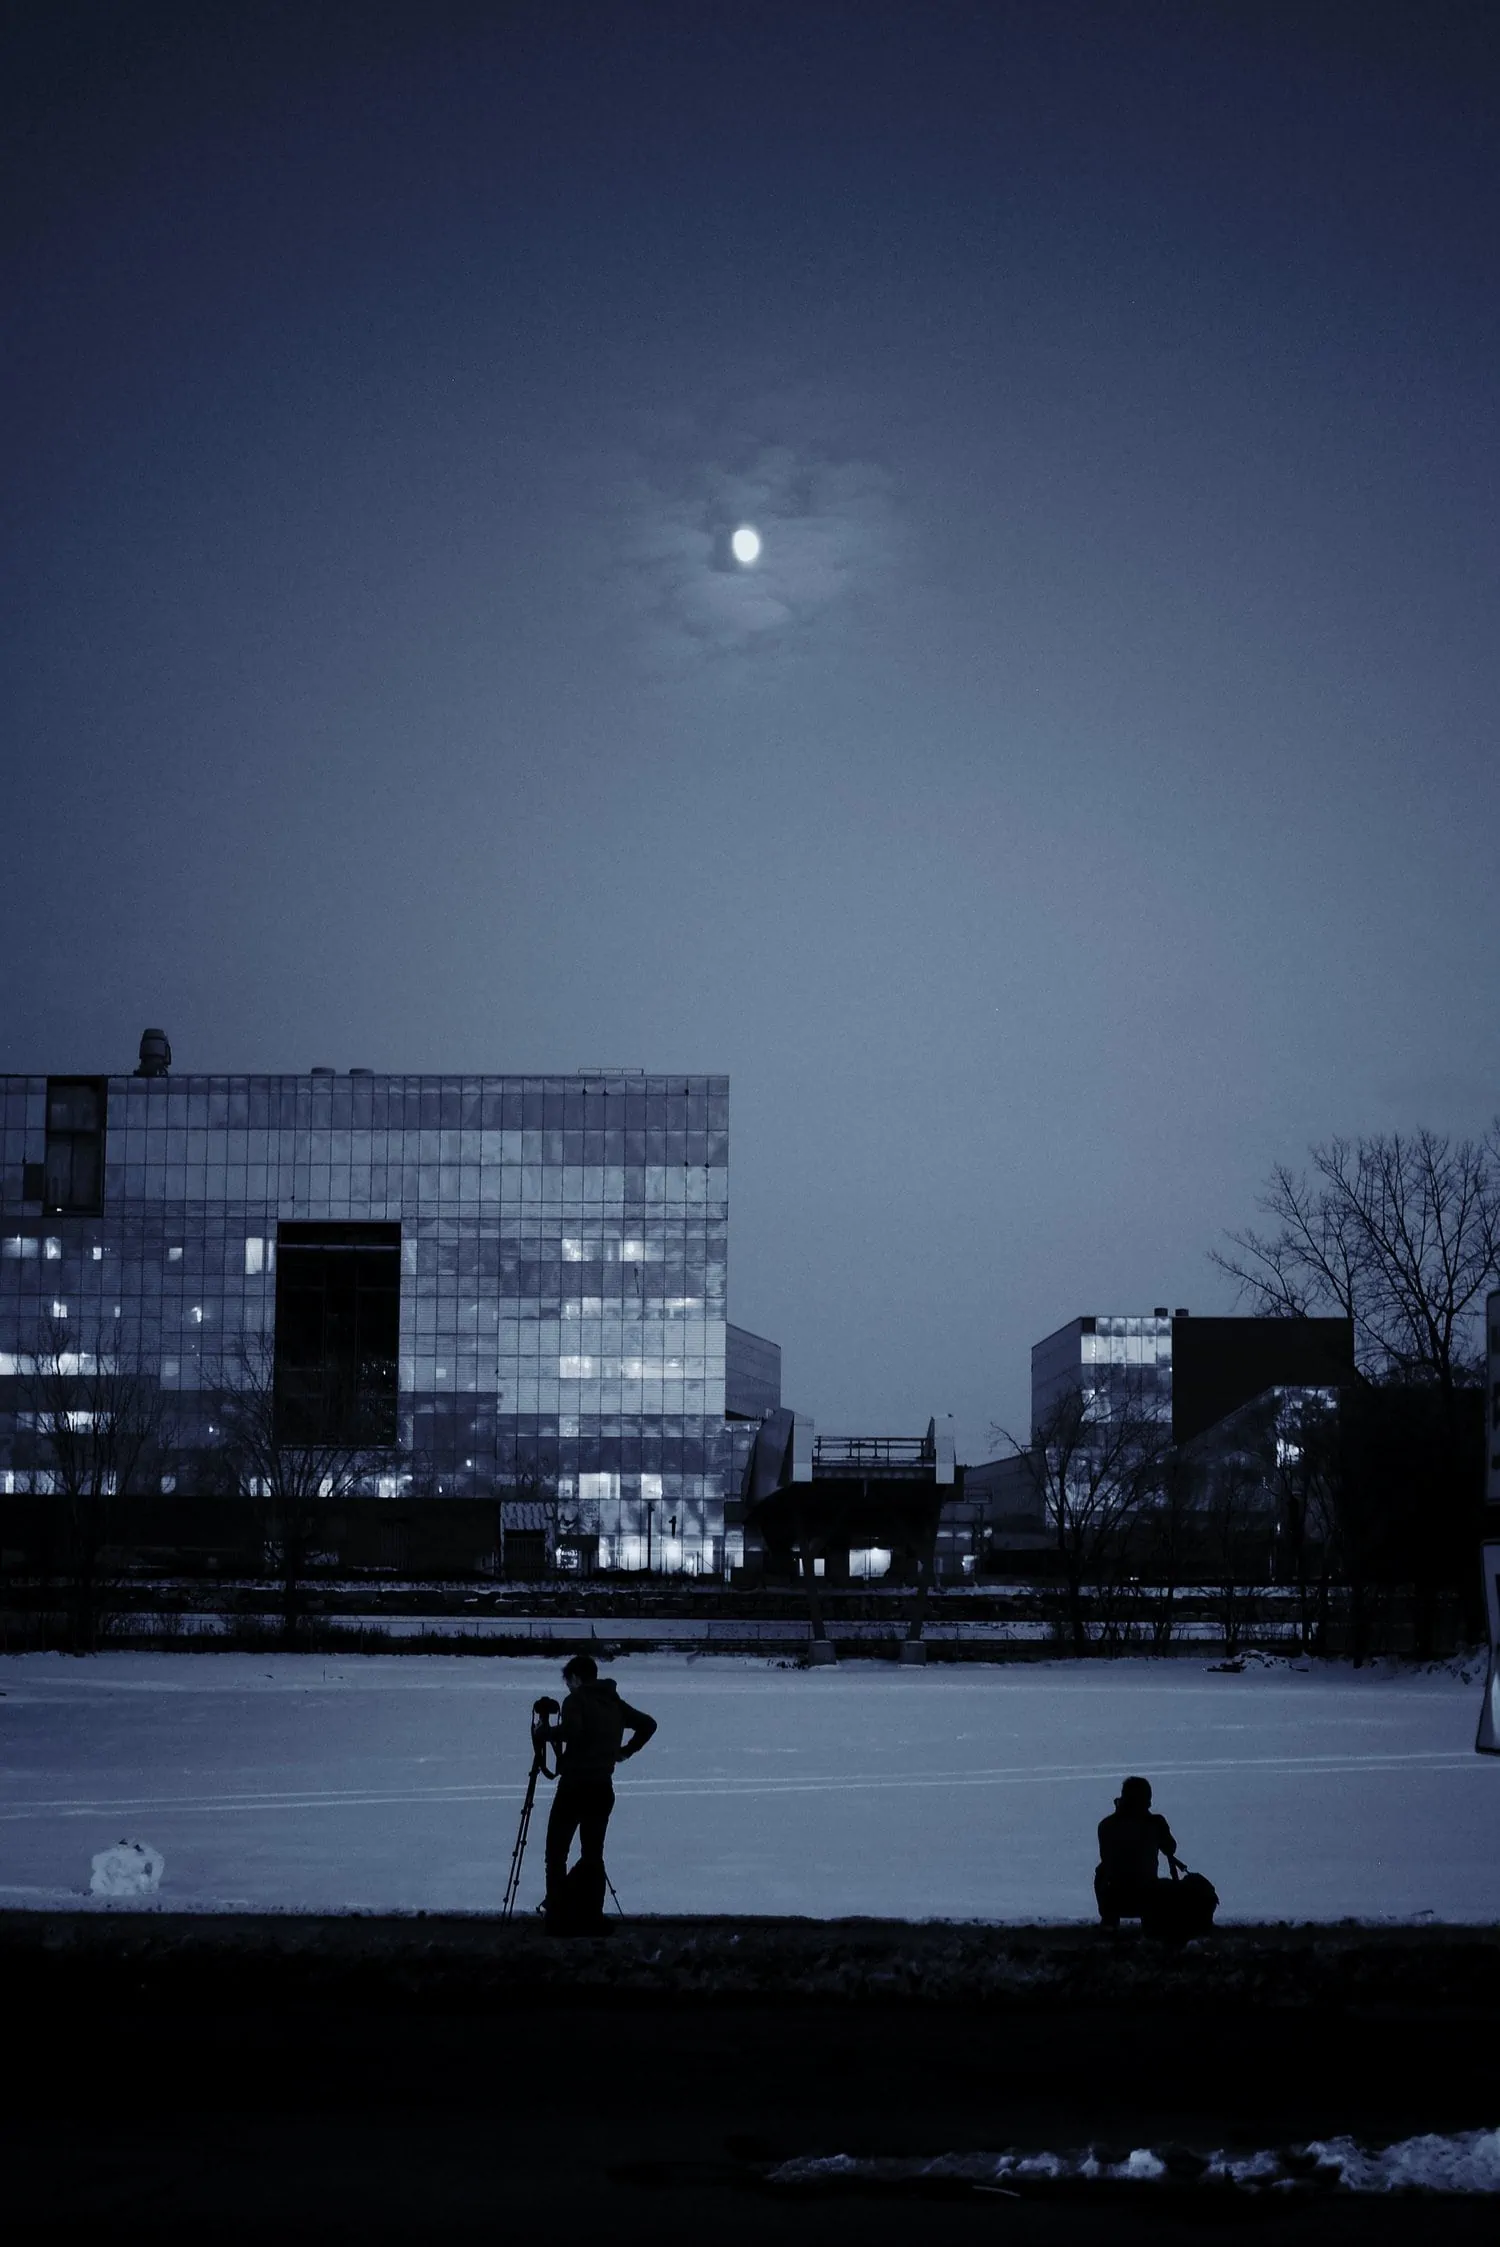
- Take a companion. You don't need someone to hold your external flash or reflector like in a portrait shoot, but you'll be glad to have someone next to you who dreams of the same pictures as you or loves astronomical phenomena to accompany you during the shooting. wait. The night can be very long.
- bundle up. The night can also be very cold and the eclipse very long, keep this in mind when dressing or taking provisions (a hot drink will not hurt).
- Do not put limits on creativity. If you are not an astronomy professional, but someone who loves photography, remember to have fun and unleash your creativity, tell a story, print your image of emotion, do not just capture an image of the moon as there are already a million . This only serves as practice or learning, once you get over the technical part, don't forget the artistic part.
HOW TO PHOTOGRAPH THE SUPERMOON
If all this about the eclipse and the moon has aroused your interest and you are thinking of photographing the next supermoon, here we will tell you how.
LUNAR ECLIPSE PHOTOS
In this linkyou have a series of photos of a total lunar eclipse and in this otherseveral examples of what you can do, but I also leave you with the following gallery of very inspirational lunar eclipses photos.

Today we have talked about how to photograph a lunar eclipse, but if you want to photograph a solar eclipse in this article we will tell you how.
