
Focusing is one of the most difficult and frustrating challenges for a photographer. In this article we will see how to improve focus and sharpness in editing with Photoshop and Lightroom in a simple way .
In fact, when we ask you about your most common photographic problems to try to improve and adapt our content to your needs, it is usually in the top 5 ? .
And it is not for less, because a great image can be totally useless if it does not have a good focus or if it does not have it in the place where we wanted to place it.
Luckily, every time we have better quality tools with which to make these types of adjustments, but do not forget that the image must come out as perfect as possible from the camera.
If so, the editors are capable of giving it that final touch that can elevate your photography.
First let's look at what influences sharpness to try and get that near perfect image from the camera. But I would like you to save our mega guide on focus before continuing , I think it will be super useful to have it on hand to refer to it whenever you need it and thus achieve that practically perfect image from the camera.
HOW TO IMPROVE THE SHARPNESS OF AN IMAGE?
Sharpness is the sum of factors and decisions that we make when we take a photograph. Starting with the choice of the objective, whether or not we use a filter, if we have it in good condition, what aperture to use, etc.
Here is a summary of some of the points that influence the loss of sharpness in a photograph:
- Extreme apertures (poorer image quality at the extremes of the aperture)
- High ISO (produces noise in the image)
- Darkness (hard to focus, blurred images and noise)
- Low contrast (hard to focus)
- Motion (shaky or blurry images)
- Objective quality (fixed lenses have fewer construction elements and therefore higher image quality (in general))
- dirty glasses
- Focus and reframe (produces parallax error or lack of focus)
- Filters (affect the final sharpness of the image)
- Minimum focus distance (find out what your lens is and don't get any closer than the recommended minimum or you'll have a blurry image)
IMPROVE FOCUS AND SHARPNESS IN EDITING WITH PHOTOSHOP
Improving the focus in Photoshop is very simple, we are going to see step by step how to give that extra touch of sharpness to your photo in Photoshop.
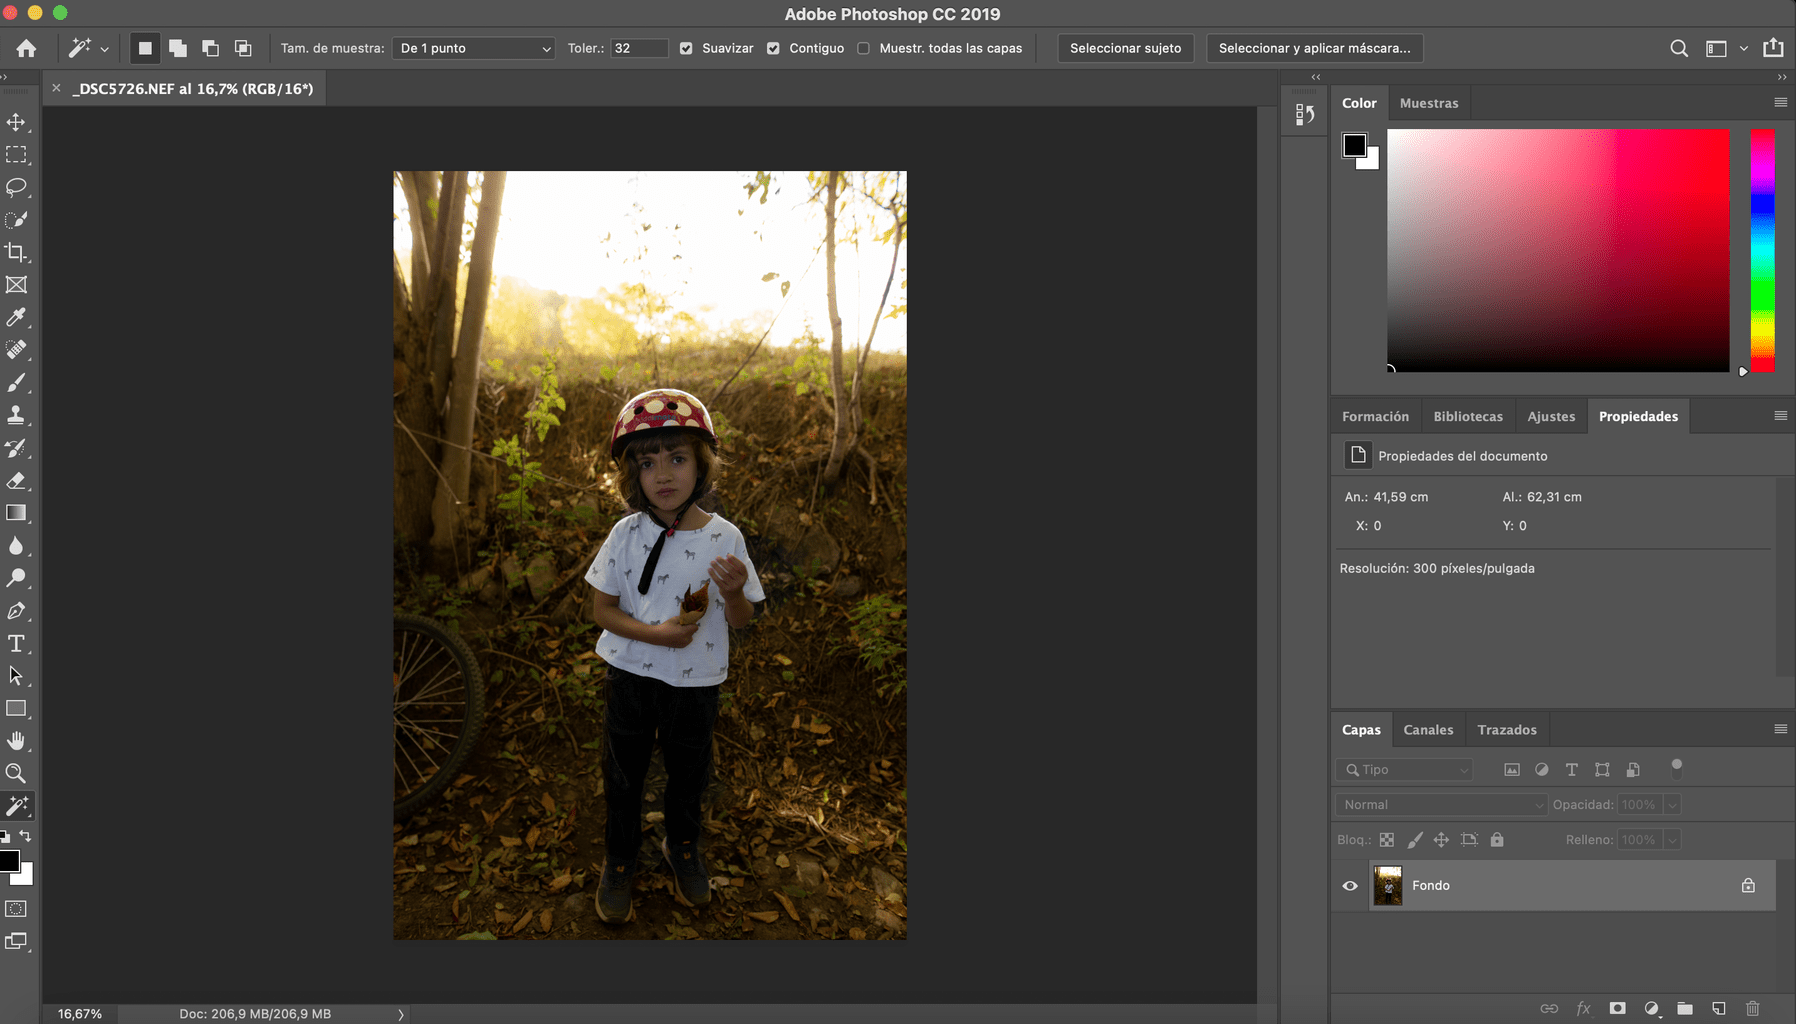
1. OPEN THE IMAGE IN PHOTOSHOP
Since editors do not work miracles, I want you to look for a photograph that is correct in camera but to which you want to give that extra touch of sharpness or focus, for example in the eyes of a portrait or similar.
2. CREATE A NEW LAYER
Once our photograph is chosen, duplicate the background layer and rename it to "sharpness", "focus" or similar.
To do it, simply hover over the background layer>right click>duplicate layer.
3. CONVERT IT TO A SMART OBJECT
Then convert it to a smart object.
Follow the path: Blend Options > Convert to Smart Object
In this way you can modify the settings later.
4. ENLARGE THE IMAGE TO 100%
Or at least give it a good magnification so that you can see in detail the sharpening adjustments that you will apply next.
5. APPLY AN UNSHARP MASK
To do this, go to the top panel Filter>Sharpen>Unsharp Mask .
6. CHOOSE YOUR UNSHARP MASK VALUES
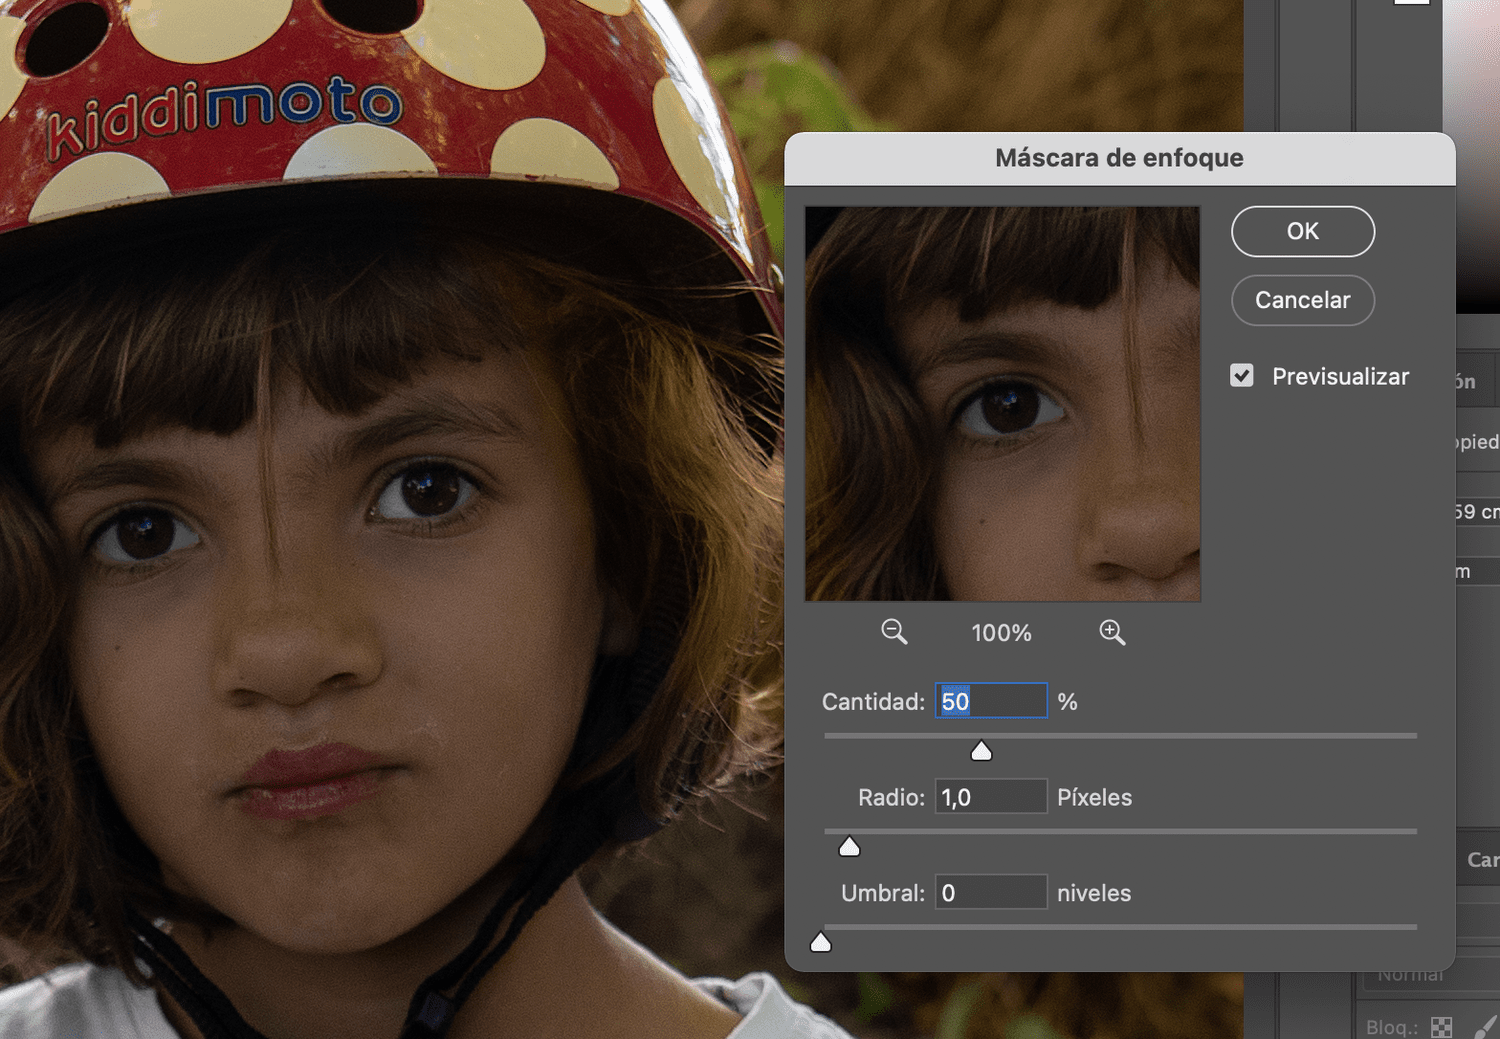
Remember that the ideal is to enlarge the image to see the detail of the adjustments that you are applying. In my case I have enlarged the image to 100%. If it is a portrait, always have the face in the box, which is the most important thing when it comes to achieving a correct result.
Inside the unsharp mask you have the Amount, Radius and Threshold sliders . To see the effect of each one, it helps to move the values to the maximum and reduce them until you get a realistic result that improves the initial image.
One way to do this is to increase the Amount to the maximum and, in turn, the radius to the minimum.
Now it is about gradually increasing the radius until aberrations in colors, halos, etc. begin to appear.
The “Threshold” slider reduces the sharpening, so in this case we are not interested in applying it.
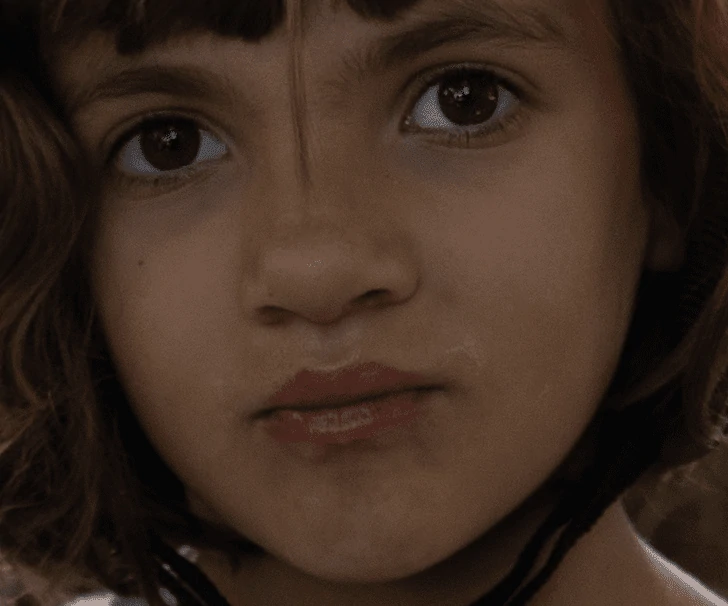
Here you can see the highly exaggerated effect:
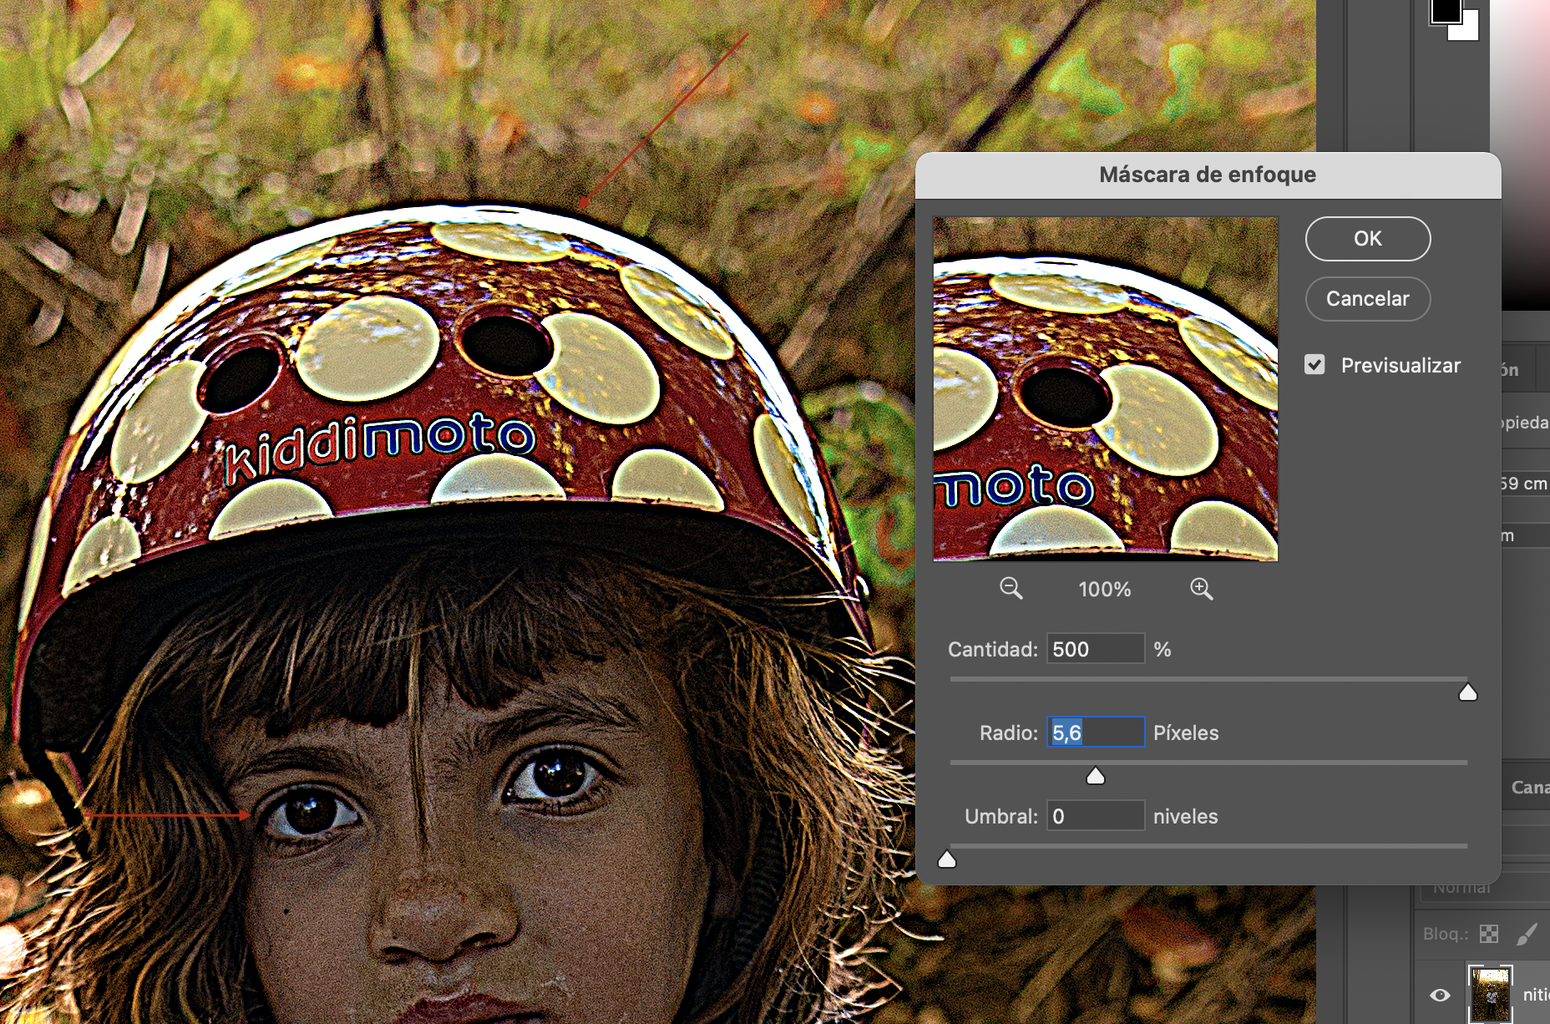
By clicking the preview button you can see the before/after effect application.
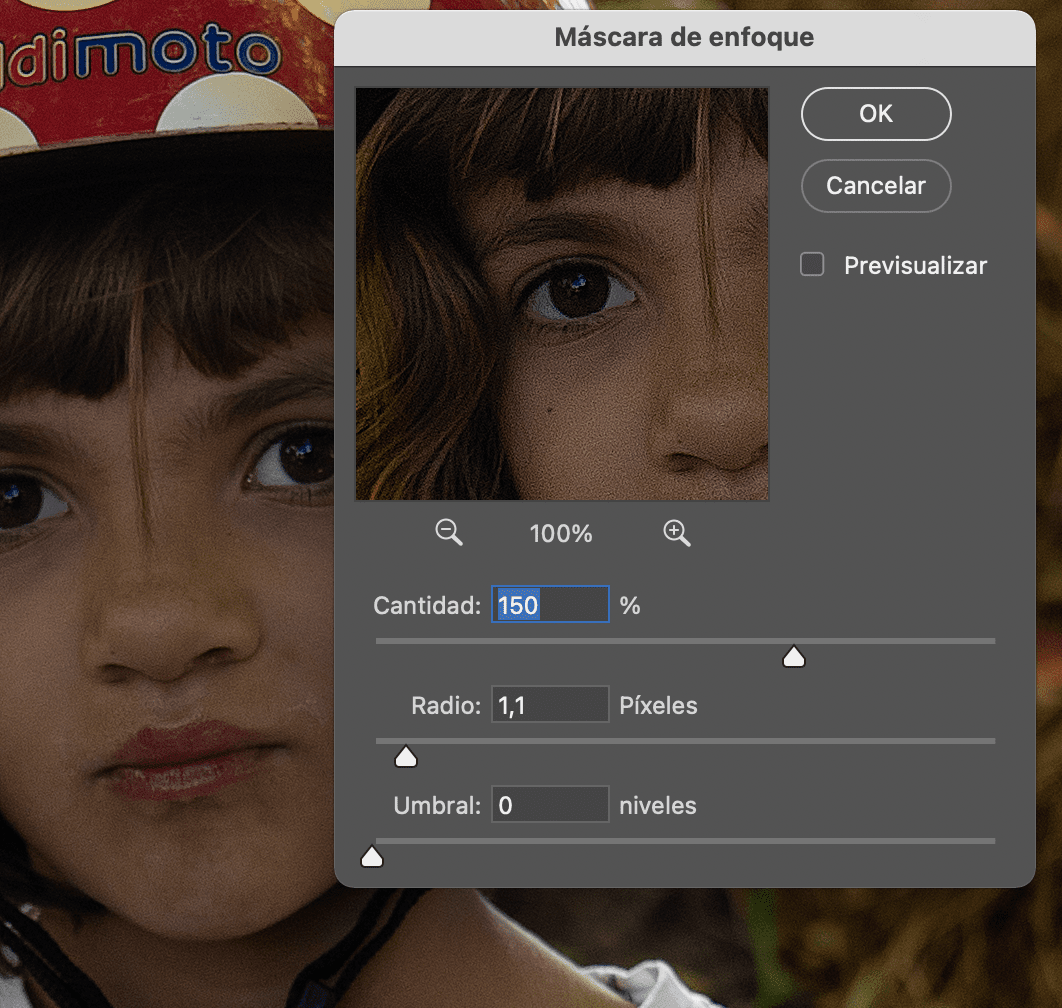
In my case, I find the right touch of sharpness that I want to add to these values of quantity and radius.
I have chosen a quantity of 150 and a radius of 1.1 but, depending on the size or type of image, these values can vary a lot.
A face is not the same as the texture of some petals or some rocks or what you can do with a 1MB image with one of 10MB.
I think the trick is trying to keep the image as natural as possible.
Here you can see before/after applying these sharpening values (image enlarged to 100%):

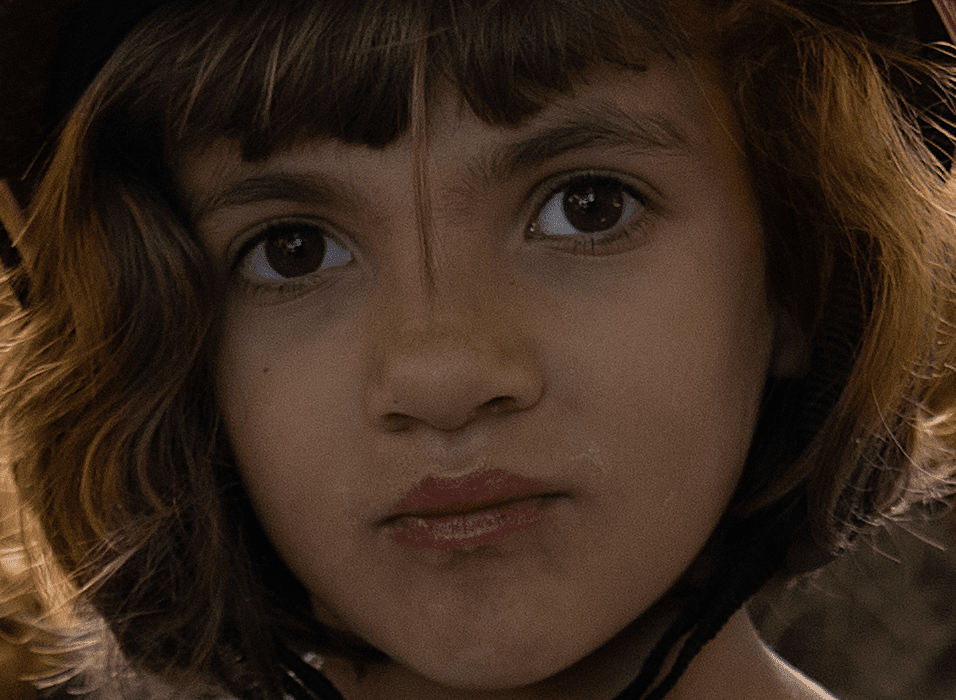
By applying the unsharp mask, we have the entire image sharpened. Now, I have used an open diaphragm aperture to blur the background, I really don't want to focus on the background but only the girl's face, especially her eyes.
To apply a selective approach, we go to the next section.
APPLY FOCUS SELECTIVELY IN PHOTOSHOP
1. CREATE A NEGATIVE LAYER MASK
To do this, make sure you have the "Sharpness" layer active and if it is not, click it.
Next, hold down the “Alt” (Windows) or “Option” (Mac) key while clicking the layer mask button located at the bottom right of Photoshop.
A black mask will appear, indicating that the mask is applied only to the area that we are going to select with the brush.
To select the brush, do it from the left panel. Next, make sure you have the color white selected. Once done, head over to the top panel and select the brush type.
For this “exercise” we will select within the “general brushes” the one that appears with the name “Diffuse circular”.
Select the size that best suits your image, we leave an opacity of 100% and a flow of around 2 to 4.
Once you have it selected, we just have to "paint" over the area in which we want to apply that extra sharpness that we have already defined previously.
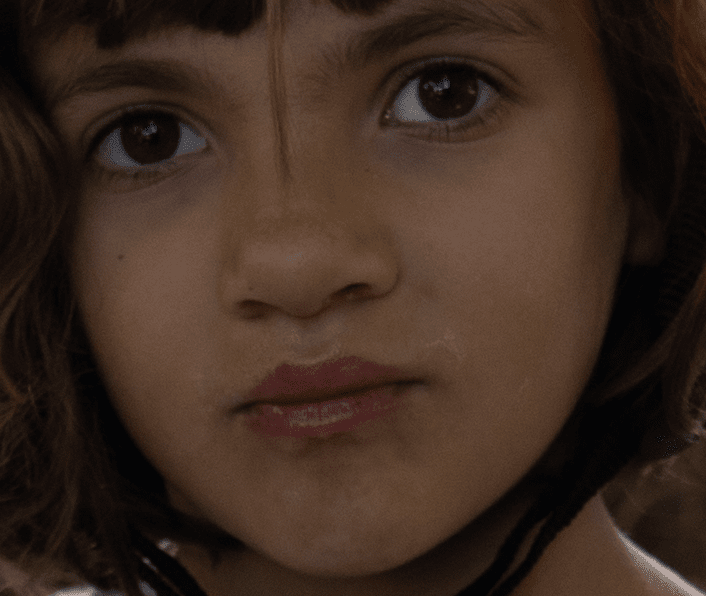
This type of adjustment that we have selected for the brush is applied smoothly, so you can go making multiple passes in the area that you want to highlight, the more you paint it with the brush, the more intensely the adjustments will be applied.
If you look closely at the two images I think you can see the subtle improvement in focus and sharpness in the eyes. Keep in mind that it is a 100% enlargement.

IMPROVE FOCUS AND SHARPNESS IN EDITING WITH LIGHTROOM
Now let's see how we can improve focus and sharpness in Lightroomwith the editing of our photographs.
I will exemplify it with the same image that I have used for editing in Photoshop.
1. GO TO THE REVEAL MODULE LOCATED ON THE TOP PANEL
Once inside the module, a series of editing settings will appear in the right panel.
2. LOOK FOR THE “DETAIL” SECTION
Scroll until you see the "Detail" tab.
Within detail you have, in turn, two sections, Focus and Noise Reduction .
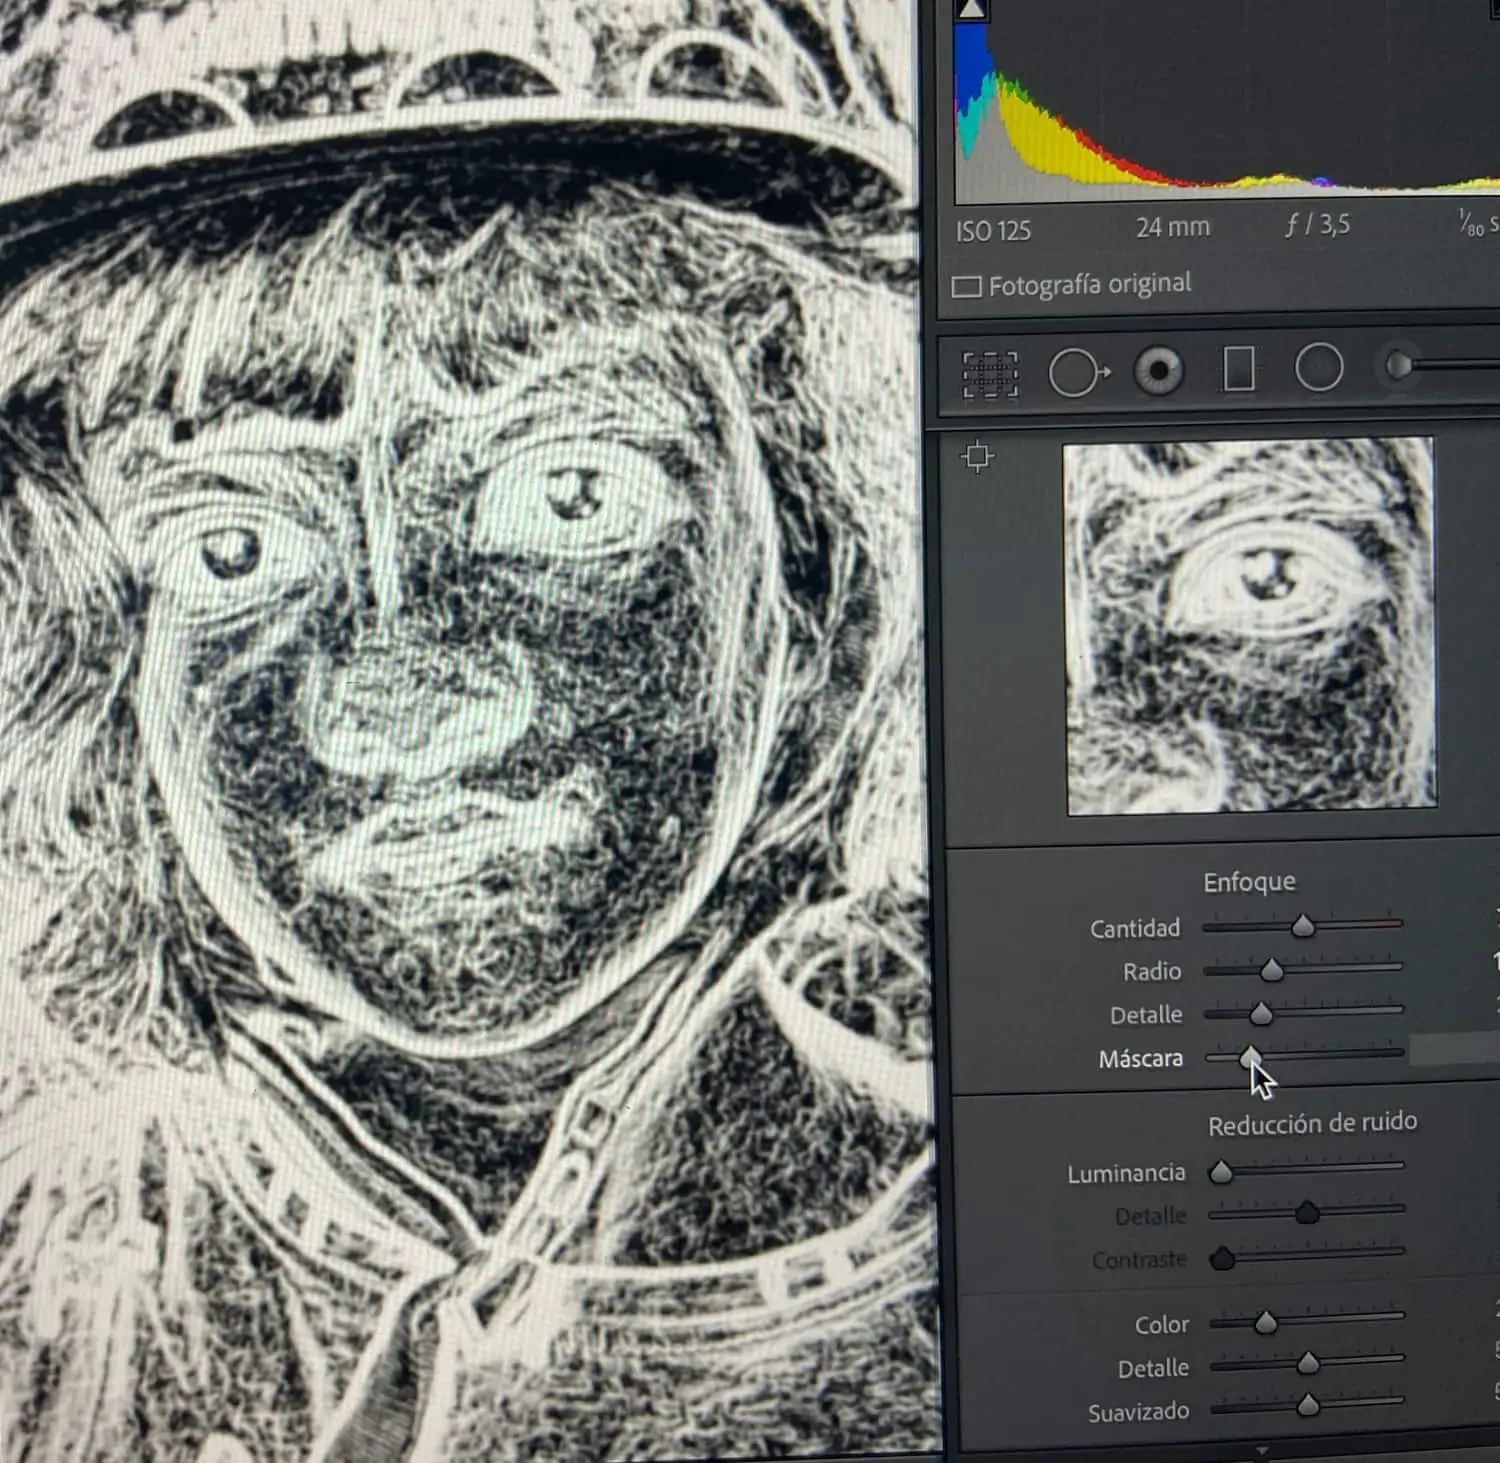
2.1. FOCUS ON LIGHTROOM
This tool is very similar to the unsharp mask we have used in Photoshop.
If you look closely at the cursors, you'll see that the program itself offers default values and an image magnification of around 100% so you can see how the changes are applied in detail.
You can move around the image via the magnification box to the point where you really want to see the effect in more detail. I have chosen the face, specifically the eye area.
- Amount: As its name indicates, it is the amount of focus that we are going to apply to our image. The higher the value, the more the focus increases.
- Radius: Indicates the size of the focus area around the edges of the image.
- Focus: With it we indicate to Lightroom what type of edges it should consider when focusing. At low values it will take into account the most obvious edges. On the other hand, at high values it will consider any edge.
- Mask: Here we decide which areas we want focused and which areas we want to protect from focus. It is surely the most important slider, the one that is equivalent to what we already know in Photoshop as the focus mask.
Let's see how to apply each of these adjustments as well as some tricks to hit the right point we need for our photography.
HINT: Use Alt+Mask (Windows) or Option+Mask to see where sharpening is applied on your image as you move the slider. So you can focus the focus on those edges you want to focus on.
You can also try this combination with the rest of the cursors, each one offers you the detail of the edges you are working on.
Focus Lightroom step by step
- Start with the Mask cursor using the trick I just told you about Alt/Option+Mask Cursor, to see the area where we want to apply the focus. Move it until the edges of the image you want in focus are in focus, no more.
- Next, move the Radius cursor slightly . The recommended values will depend on the MP of your camera but range between 0.5 and 1.5. Observe the effect with Alt/Option and Radio cursor a at the same time.
- Go to Detail and use a value between 25-45, depending on your camera resolution.
- Set an amount to about twice the resolution of your camera (for 24MP an approximate value would be 50).
Initial (very) indicative values:
- Quantity: Multiply the MP of your camera x2 or x3. For example, mine is 36 MP, so benchmarks for me are between 70 and 90-100.
- Radius: Between 0.5 and 1.5.
- Detail: Use a value close to or slightly above your camera's resolution.
- Mask: I recommend that you set the value using Alt/Option, since this value will depend entirely on the image we are editing.
Here you can see the before and after with an image magnification of 100%.
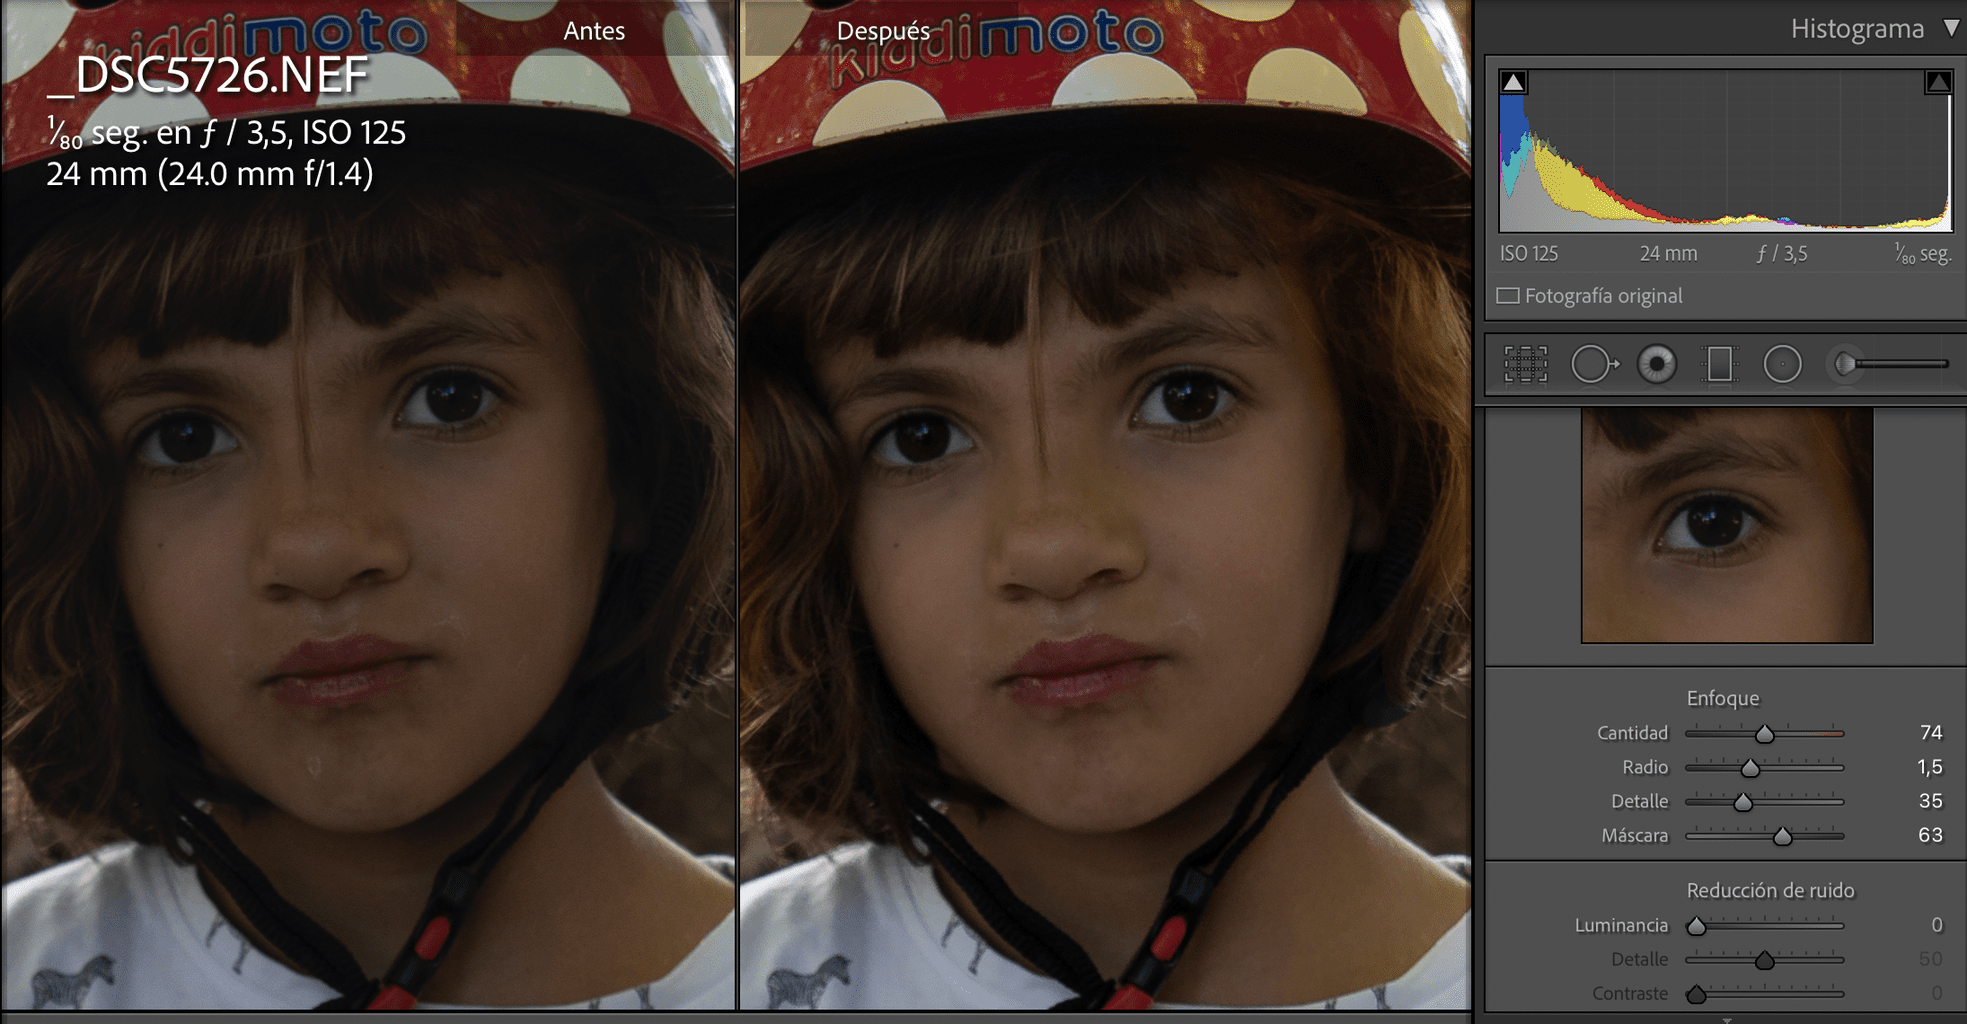
NOTE: Clicking twice on each cursor restores the initial values.
APPLY SHARPENING SELECTIVELY IN LIGHTROOM
We'll open our image in the editor and head over to the top right panel where we'll find the Adjustment Brush Tool .
With the adjustment brush activated, we can paint on our image those areas that we want to work on.
To see the area that you have marked, you must have the option “show selected mask overlay” activated, so those areas that you have marked will be marked in color.
By having the adjustment brush activated, you will see that a set of specific adjustments for the brush is displayed in the side panel.
Here you can change contrast, shadows, texture, etc., in the area that you have selected with the brush.
We are going to focus on focus.
Enlarging the image to 100% slowly moves the cursor to a value where you have gained sharpness and focus but without losing realism. It will depend on the image, but do not exaggerate the effect.
You can compensate with noise reduction to smooth out areas of excess noise, also trying to make slight adjustments to maintain realism and image quality.
The adjustment brush doesn't give you as many options as working on the whole image through the "Detail" so I recommend using it to make very fine adjustments.
In my case I have only used it to give a touch more focus to the look.
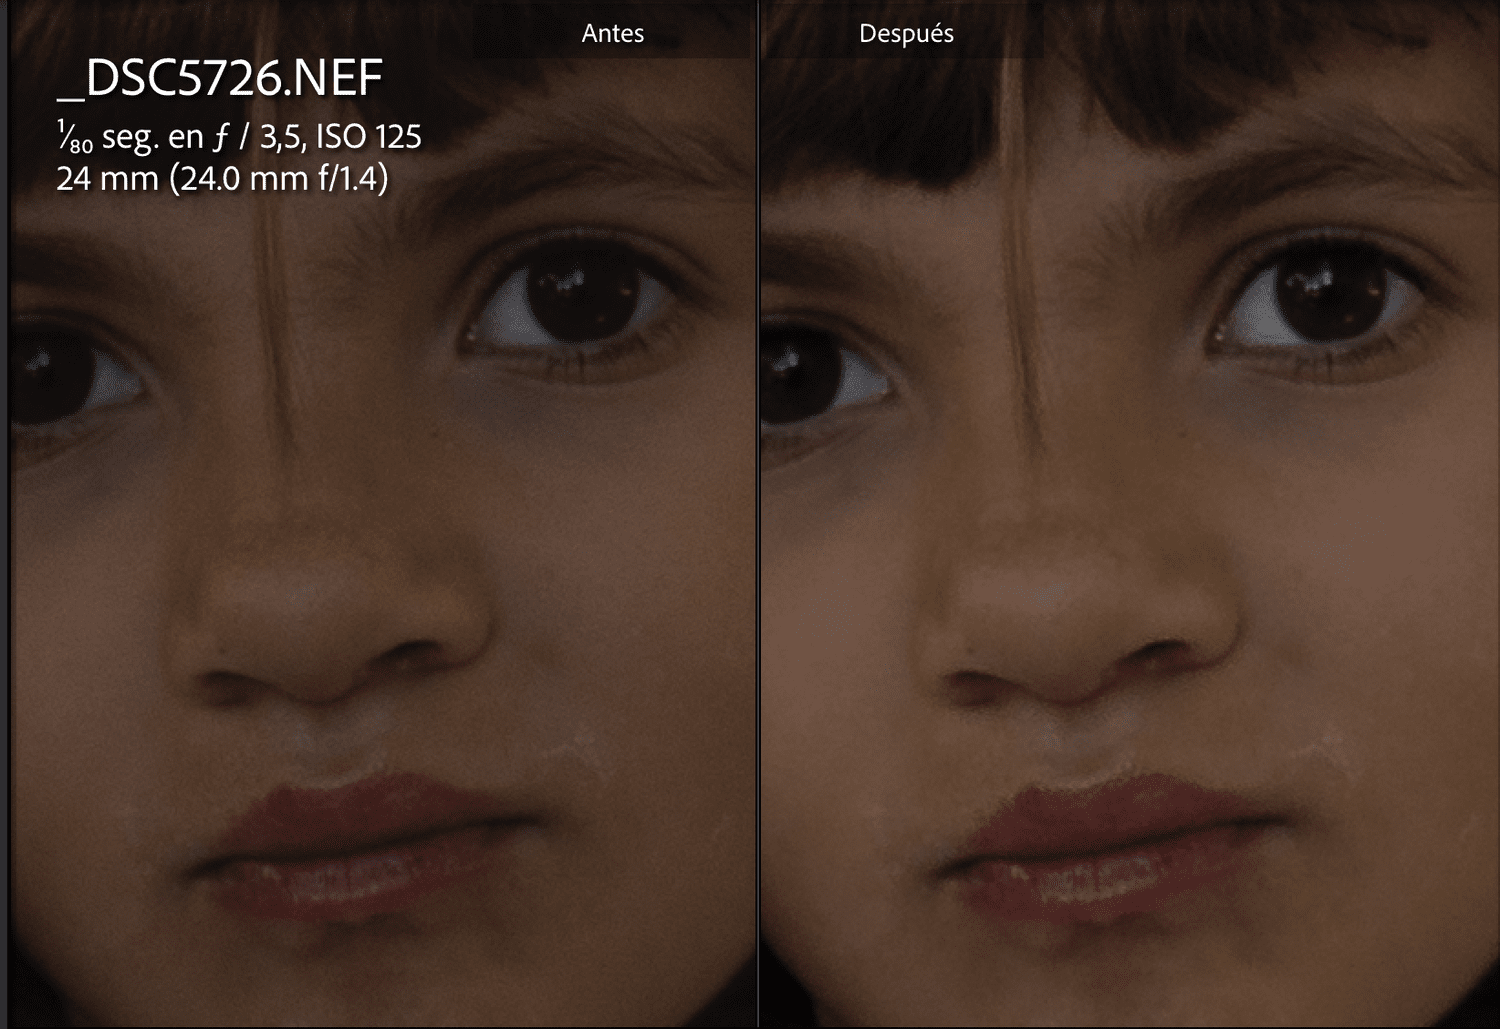
After these adjustments to improve the focus, I would have my image ready. Super easy, don't you think? and 5′ of work ? .
ONE LAST TIP TO IMPROVE FOCUS
For optimal results in any type of editing you consider, RAW is the format you need .
There is no color between trying to work with a JPEG image and a RAW one, so I recommend that you always consider using it.
