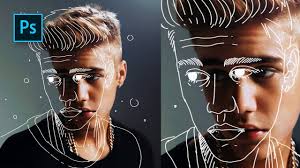
The style of processing pop art does not lose its popularity. It is used for advertising posters, in the design of magazines and just in social networks, as attractive avatars and campaign banners. In this article we will tell you how to make art in Photoshop. More precisely, we will make an art picture from a photo. And undoubtedly, the best program for creating art from photographs is Photoshop. There are several ways to create art. We will consider the least labor intensive and the fastest. For work we need a portrait. Open the image in Photoshop. Duplicate the image layer ( Ctrl + J ).
The background in the image needs to be removed. How to separate the object from the background, we wrote earlier in the article "How to process the background in Photoshop . " If you have a uniform background in the photo, use the Magic Wand Tool or the Quick selection tool . If the background is complex, then you need the Quick mask tool . In our case, you can separate the girl from the background using the Quick selection tool . We work with a duplicate image. Select the background without touching the model. After that, invert the selection ( Ctrl + I ). Now it’s not the background that is highlighted, but the object against the background, in our case, a girl. After that, just press the key combination Ctrl + C , Ctrl + V so that the girl’s image separated from the background is transferred to a transparent layer. Next, make our picture black and white by pressing the Shift + the Ctrl + the U . We turn off the visibility of the lower layers (click on the “Eye” icon ). Now we need to select in the “Filter Gallery” the one with which you can make the outline of the contours on our black and white photo and posterize the shadows and lights. Posterization will break the shades into levels, the transition between which will be very sharp. At this stage of creating art for each photo, you should choose your own filter or even two, if necessary. Most likely the following filters are suitable: “Strokes” / Brush Strokes / “Stroke” / Ink Outlines and “Focus on the edges” / Accented Edges ; “Sketch” / Sketch / “Photocopy” / Photocopy ; “Imitation” / Artistic / “Outlined Edges” / Poster Edges . The filter gallery is located in the “Filter” item.the main menu of the program. Important! When we select the filter, the main working colors should be black and white. In our case, the filter “Imitation” / Artistic / “Outlined Edges” / Poster Edges was ideally suited . The filter is customizable. To the left of the dialog box, you need to move the sliders until you achieve the desired result. "The thickness of the edges» / Edge thickness ask 1 , "The intensity» / Edge An the Intensity - 0 , "posterization» / Posterization - 1 . Notice how the lights and shadows broke into levels. After completing the selection of parameters, click Ok . It remains to colorize the image. The adjustment layer “Gradient Map” / Gradient Map will help us with this . You can call it in the list of adjustment layers, at the bottom of the layer palette. A dialog box will open. Double-click on the gradient to call up the settings. In them we have to set four color points for the gradient. We will move from left to right. More about Photoshop in Fotoshkola.net courses .How to make art from a photo: we make art of a photo in Photoshop (Photoshop)


