In recent times they have begun to appear on the Internet, more specifically on pages such as YouTube, Vimeo, etc., countless videos made with a very curious technique called Time Lapse.
These are videos of spectacular landscapes or situations in which everything happens very fast and in a few minutes you can appreciate, for example, the sunset, a sunrise or even until the course of a whole day.
Have you ever wondered how do they do it? Do not worry, in today's article I will explain step by step how to do and what you should keep in mind so you can make your first Time Lapse without dying in the attempt.
WHAT IS THE TIME LAPSE?
As its name in English indicates, Time Lapse, is a sequence of photographs taken with a certain time of separation between one and the other, which then through a computer, are joined to create a video that gives the feeling of being recorded in fast camera
Have you ever seen one? Check out the following and you will understand better what I am talking about:
Although it may seem like a really novel technique, it really isn't so much since there are short films from the beginning of the century made using this technique to show a slightly faster version of reality.
TIME LAPSE VS VIDEO
Surely you are wondering why take hundreds of photos to make a video if your camera films in Full HD? The answer is simple:
The video mode of your camera , despite using the same sensor and filming in Full HD, is much more limited in terms of setting the measurement and exposure parameters and the resulting quality than if you use your camera simply to take pictures. This means that, rather than filming your camera, video modes do not process noise, capture light, or work with the quality with which your camera is capable of taking a picture.
Think about it: a 16 megapixel camera will take photos in a size of 4928 x 3264 pixels while in video mode it is capable of capturing 1920 x 1080 pixels.
If you were thinking of making a video and then using a software on your computer, speeding it up to achieve the same effect, it is very likely that you will be disappointed when watching the resulting video.
TYPES AND USES OF THE TIME LAPSE TECHNIQUE
Types:
While you can make a Time Lapse video of anything that can happen to you, if you take a little time to investigate the different types of videos shared on the Internet, you will see that not all situations are ideal for a Time Lapse surprising.
In general, we can say that there are 3 great types of situations with which you can get some amazing videos:
Nature: this includes all kinds of flora and fauna that inhabit nature. From the flowering of a flower to the creation of an anthill.
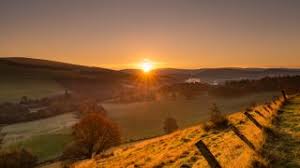
Landscapes: sunsets and sunrises, storms and lightning, winds, clouds, sun and stars, etc.
Others: everything that does not fall into the two previous classifications but which can be attractive to document: the traffic on a street, the construction of a building, and everything where over time something attractive is created or transformed.
While in the first two classifications (Nature and Landscapes) the fluidity and continuity of the video is key to its impact, in the third (others) it is not so important since it does not matter to lose some intermediate sequences because the important thing does not It is evolution but the transformation of the chosen elements.
USES AND APPLICATIONS
This technique, currently booming, is used by many media, agencies and photographers where power is sought:
Show long-term events, such as the path of the stars in the sky, in a short video.
Show in the same scene different subjects that move at different speeds.
Any other kind of artistic work.
THE NECESSARY EQUIPMENT
• The key to being able to take this type of photographs or videos is to have a camera, whether reflex or not, that allows you to take photographs every certain amount of programmable time. In any case, if your camera does not have the option incorporated at the factory, you can try to get an intervalometer or external remote trigger.
As you can imagine, the stability of the camera is an indispensable requirement when it comes to quality Time Lapse. To achieve this, the ideal is that you make a good and firm tripod. As you gain experience, you may also need a sliding base or rail so that you can move the camera to go through a scene, while still taking pictures stably. I recommend you read the following article: "How to Mount a Tripod Properly" if you don't want to waste hours of work and hundreds of photographs.
The objective you are going to use will depend on the scene you are going to photograph. If you want to photograph a landscape, it is recommended that you use a wide angle lens (8 to 25 mm), but for the flowering of a flower a macro lens would be ideal. Anyway, you can do it with the objective you have at hand, it does not have to be the most expensive, much less. While quality is important, it is not so much in Time Lapse.
100% charged battery and as much as possible, have more than one. If you have a grip that allows you to use more than one battery at the same time, excellent. Ideally, the photo session ends when you want, not when the batteries have it.
Memory cards of the maximum capacity and speed possible. If you run out of space in the middle of a session, you may miss crucial frames for the continuity and fluidity of your final video. It's better to prevent than to cure.
A good book: despite being a very exciting process, it is extremely boring. Imagine sitting for 4 hours with nothing else to do but listen to the camera's shutter take a picture every 30 seconds. You can go crazy! Carry something with you that you can entertain while the entire shooting process lasts.
LOCATION AND FRAMING
The location you choose to mount your camera on the tripod and the elements you choose to incorporate into the frame to dress the scene are essential for the resulting Time Lapse to achieve the impact you are looking for.
Choose your protagonists well and take your time to decide how you will have all the elements that you have available within the frame to achieve the desired impact. The less you improvise the better. Keep in mind that changing an element of place means redoing hundreds of photographs.
Take your time to study the location and framing well.
The location and framing are fundamental
EQUIPMENT CONFIGURATION
Once you have arrived at the place you chose to take the shots, you should not only place the tripod and the camera in its place but you must also adjust all the camera parameters to take each of your photographs. That is, make a good measurement and exposure of the scene to be photographed , and then configure the intervalometer to automatically take a photo every so often.
Depending on the scene you are going to photograph, the interval between each photograph will vary:
If you want to photograph a sunrise, for example, it is recommended that you use an interval of approximately 30 seconds since the sun will not vary much in position between one and the other.
On the other hand, if what you want to photograph is a highway full of cars, it would be advisable to use a much shorter time interval, if not the continuity jumps and the fluidity of the resulting video will be noticed too much. Try using intervals of 5 seconds or less.
To perform a Time Lapse of a landscape or a starry sky, as fluidity is essential, you must use a much shorter time interval between 1 and 5 seconds. However, these are general recommendations. Do all the necessary tests until you reach the result you are waiting for.
Shooting mode: although I always recommend using the manual mode to take each and every one of your photographs, in this particular case and depending on the duration of the video, it is recommended that you use the priority opening mode . Why? The “amount of light” available in a scene can vary from its beginning to its end, so if you use the manual mode, you should adjust the exposure according to each moment, instead, using the aperture priority mode, once established the required depth of field , the camera will adjust the exposure automatically.
Changes of light in the course of the dayRAW or JPG ?: The ideal format for working in photography is the digital negative or RAW because it saves in each file, all the information taken for later post production. Now, in a Time Lapse that lasts several hours, shooting in RAW can consume all the memory of your camera and not even talk about its battery. I recommend that you shoot in JPG mode, after all, after a session of more than 300 photos, the process of developing the digital negative could be eternal.
THE LIFE OF THE EQUIPMENT
If you have a SLR camera, I am sorry to inform you that they are not immortal. In fact, using the Time Lapse technique will cause your camera to wear more than normal. Unfortunately, photo by photo your camera will slowly approach its sad end: the funeral. According to the manufacturers, the life expectancy of most DSLRs is around 100,000 shots depending on the manufacturer and the camera model.
That is why you must carry out a serious planning process in order to waste as few photographs as possible when taking your shots, since after a long session of Time Lapse, you will have consumed a small but important portion of the Life of your camera.
Do not despair! 100,000 photographs may seem little to you, but it is not: take a look at the following article and you will understand better: "The Life expectancy of your Chamber [or The Funeral of your Chamber]". And if what you want is to prolong its useful life as much as possible, follow the following recommendations: "The Complete Guide: Cleaning Tips for SLR Cameras".
Be careful and make sure everything is perfectly adjusted
MAKE YOUR FIRST TIME LAPSE STEP BY STEP
Now that you have everything ready, it's time to take your stuff and start doing your first Time Lapse. Sure, after reading the following steps:
Get ready for the adventure: although it is possible that you make your first Time Lapse from the window of your home, if you plan to do it outdoors, I recommend that you not only pack your photographic equipment, but also carry a coat with you, an umbrella , a flashlight, sun protection and everything you consider necessary not to end up having a bad and long time. Make sure everything is in place, clean lenses and charged batteries so you don't have to interrupt the session for anything.
Do not improvise: as I told you before, the more time you spend planning the scenes and choosing the frame, the less time and wasted photographs. Imagine that after 4 hours of photos every 10 seconds, you realize that the sunset has been out of the frame!
Duration of the final video: to get a second of filming, approximately 25 photographs are required, so if you want to obtain a video of approximately 30 seconds, you must take around 750 photographs. Keep in mind that, to take 750 photographs with an interval between photo and photo of 10 seconds, the total time of the shot will be 2 hours (750 photos x 10 seconds / 60 minutes = 125 minutes). Review your action plan again after calculating the total session time.
Compose your photos: when placing the camera on the tripod is essential to make a correct Time Lapse. Make sure that the camera has been firmly mounted and that all the elements of the scene are well arranged in it . Keep in mind that any unwanted movement can ruin hours of work, so you should make sure that nothing and no one will move your camera. Also, make sure you are ordered when using your equipment. If you leave everything scattered, you will probably forget something when you re-edit the video.
Configure the parameters for the shot: depending on the characteristics of the scene to be photographed, you must adjust the different parameters for the shot such as: the shooting mode, the format of the photos (RAW or JPG) , the time interval between each photography, depth of field , etc. Read again how to configure the device if it has not been clear to you or have your query in the comments at the end of the article. Depending on the speed with which the elements in the scene move you must choose which time interval to use. The higher the speed, the lower interval, and the lower the speed, the greater the interval between photo and photo may be.
Focus manually: if you let the camera focus automatically, it may be that in some shooting, for example when passing a closer cloud, it decides to change the focus. To prevent the camera from getting confused and changing the focus, once your scene is focused, change the focus mode to manual . In this way, all the elements you have focused on will no longer be modified.
Get comfortable and start taking your photos!
Once the shots have been taken: to the computer
I ALREADY HAVE THE PHOTOS AND NOW WHAT?
Once you have finished taking each and every one of the photographs that will integrate the final video, collect all your things and make sure you do not leave anything lying around since the field of action will move to your computer. It is there where the magic happens and the photographs come alive!
To join all the images, an editing software is needed to export them to a video file once they have been joined and sorted. You can use any slide show program (Proshow, Powerpoint, Movie Maker, etc.) if you are not interested in the final video having the best quality, or you can use professional video editing software such as Adobe After Effects, the Sony Vegas, the Final Cut, etc. If you want your final video to be more professional and of higher quality.
Once you have sorted all the photographs in whatever software you are using, it will only remain that you choose the interval between photo and photo and adjust it if the fluidity of the resulting video does not convince you.
Here is an explanatory video of how to perform the union of the photographs using Adobe After Effects in a simple way:
WAIT, ONE DETAIL IS MISSING: MUSIC
Did you think the music magically appeared in your video? No way. It is essential that you take the job of selecting a song that reinforces the message of the video. Take your time, do the necessary tests and you will find the ideal music for the video you just created. There is nothing written about tastes, but instrumental music tends to give rise to more reflection and allows viewers to focus on photography rather than the lyrics of the song.
Once you have found the ideal music for your video, you can incorporate it into it using the editing software used to join all the photographs.
THE FINAL RESULT
I hope I have aroused your interest in venturing into this kind of animated photography! Do not hesitate and encourage yourself to make your first Time Lapse and share it with all of us! If you have enjoyed this reading of this article (as I write it) I would appreciate giving you a vote / recommendation on Facebook, Twitter or Google+.