
Mario's note : We continue with the series of Initiation Guides. On this occasion, Iaio Atamián brings 13 tips and tricks that will help you improve your photos of the moon or launch yourself into that type of photography if you have never tried it before. And if you want to delve deeper into night photography , do not miss this mega guide that I have prepared for you with tips, tricks and a lot of inspiration.
Since the beginning of humanity, the moon has been the object of the greatest fascinations for the human being. A source of light among so much darkness, the moon has become one of the most wonderful elements that decorate the celestial landscape that surrounds us, and one of the most coveted objects by photographers when thinking about and taking their photographs.
Have you ever tried to take photos of the full moon on a clear night in search of capturing its magnificence? You've made it?
Don't worry, in today's article I will teach you everything you need to know so that you can take not only incredible portraits of it, but also so that you can start using this star when composing your photographs.
- Find out what phase it is in
- find a good place
- the darker the better
- prepare your equipment
- Use a remote control or delay mode
- Use spot metering mode
- maximum focal length
- middle opening
- ISO to minimum
- Not too fast, not too slow
- Locks mirror for added stability
- Check the photos 100%
- Edition
HOW TO PHOTOGRAPH THE MOON: PREPARATIONS
Although it may seem like a relatively simple task, getting the best results when photographing the moon is not easy at all.
Before starting, I recommend that you take a look at the following articles that will be very useful for you to make the most of the advice that I am here to bring you today:
- As in most cases, the photos of the moon are taken at night, I recommend that you read: Introduction to night photography .
- Although it may not seem like it, the moon moves very fast, so you must perform a correct metering and exposure to find the ideal shutter speed. I recommend that you take a look at how to get long exposure photos and the following examples of light metering modes .
- Much more difficult than photographing the moon is photographing a starry sky, so if you follow Mario's advice in the article: how to photograph a sky full of stars , photographing the moon will be much easier for you.
- In low light conditions, it is very likely that your photos will come out blurred if you do not take the necessary precautions. Don't worry, if you read the following article you won't have any problem: how to avoid shaky photos in 6 easy steps .
WHAT EQUIPMENT DO I NEED TO TAKE PICTURES OF THE MOON?
This is the equipment you need to take pictures of the moon (successfully):
1. CAMERA
To achieve good photos of the moon, it is not necessary to enter into the dilemma of which camera you need: SLR or compact , since with either one you can obtain good results. What you cannot miss is a good zoom.
There are bridge and compact cameras with a lot of zoom , and if this is not your case and you do not have a telephoto lens, you can borrow one or even rent it.
2. TRIPOD
No matter how many stabilizers current cameras bring, if you want to get the best results, the ideal thing to do is to get a good tripod to gain stability. You can borrow one or run to a store to get yours, but first, be sure to read the following article where Mario explains how to choose a worthwhile tripod, the tripod that your camera would like to have .
3. REMOTE CONTROL
Ideally, since you are going to work with very long focal lengths , you should use a remote control when shooting your camera and thus avoid accidentally moving your camera when you press the shutter. In any case, you can use the "shot delay" mode that all cameras have in their menu, and thus avoid being in contact with it at the time of shooting.
Don't forget that the camera is just a medium, so if you don't have a telephoto reflex camera or a super zoom compact digital camera, you'll have to use your creativity and get around this problem with, for example, long views or a telescope.
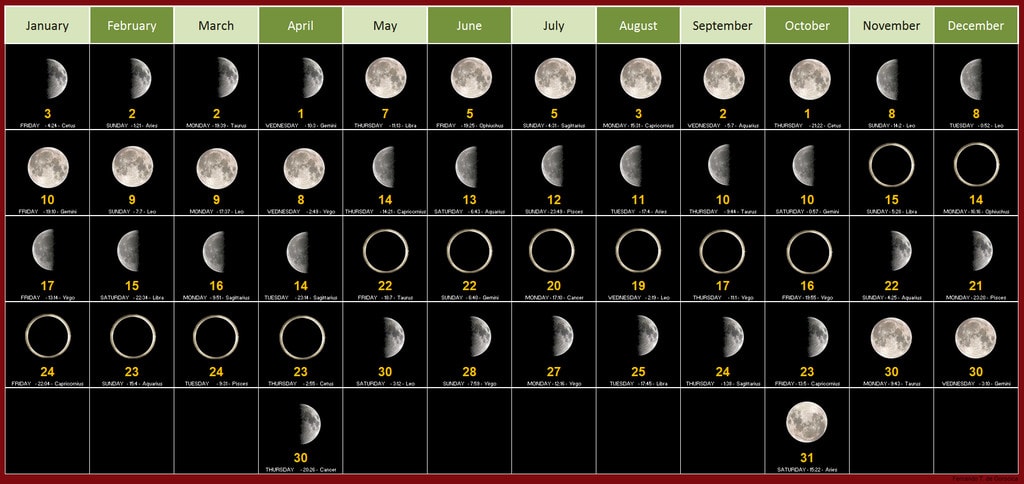
MOON PHASES
Before going out to make the best portraits that someone has ever taken of the moon, you must first know what phase it is in. Why? Imagine crossing a field to reach a lake, planting the tripod, setting up your camera and after a few hours of waiting, you realize that there is a new moon.
Almost any daily calendar marks the lunar phases, but if you don't have any on hand or don't feel like going to look for it, here's a page where you can check what phase the moon is in or will be in soon: Spanish lunar calendar.
Be careful to check the lunar calendar of your geographical area when planning your next photos of the moon.
HOW TO TAKE PICTURES OF THE MOON WITH SPECTACULAR RESULTS?
Next, I leave you the steps that I promised you at the beginning with their corresponding advice, so that you can obtain the best results when taking your photos of the moon:
1. FIND OUT WHAT PHASE IT IS IN
Since the protagonist of this article is the moon, the first thing you should make sure is that it is visible and in a phase that is interesting for you to portray it. You can do it on a full moon, or when it waxes or wanes. Seek to achieve the greatest visual impact.
2. FIND A GOOD PLACE
The moon will be there, always above your head, the problem is where you are going to stop to be able to portray it. Look for surfaces that allow you to work comfortably with your equipment and where you can firmly support your tripod.
3. THE DARKER THE BETTER
Although you can take some amazing photos of the moon during the day, first try it in the ideal conditions: in the dark of night. Likewise, it is not the same to do them in a city that reflects a lot of its light in the atmosphere, than in the middle of a field. You must configure your equipment according to the place where you are going to take the shots.
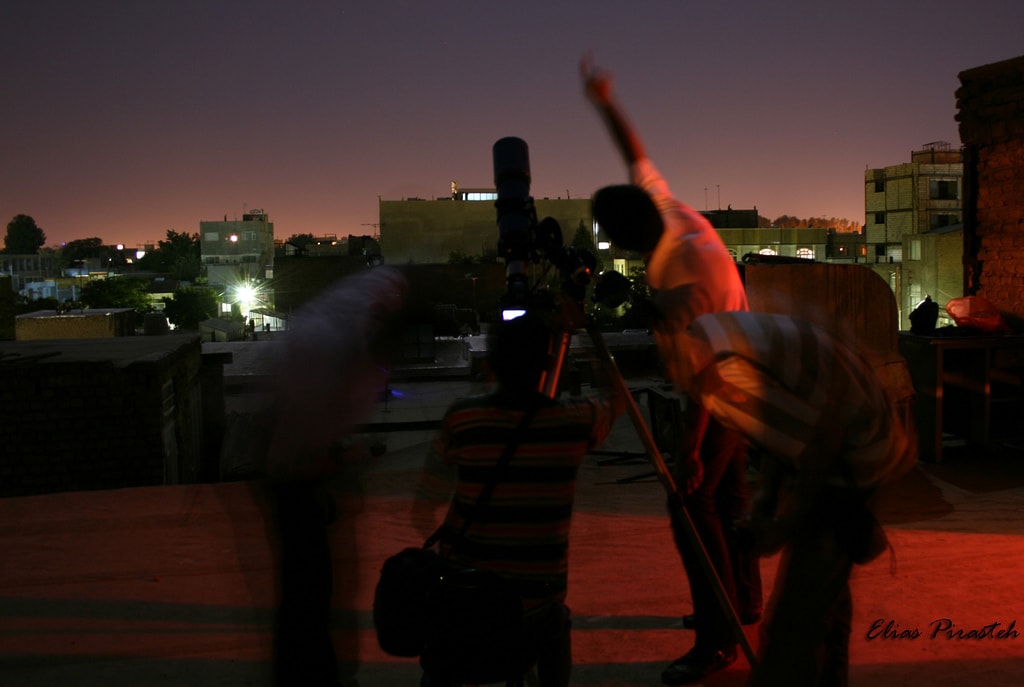
4. PREPARE YOUR TEAM
Once you have chosen the place, set up your tripod so that it is as stable as possible. If you don't know how to do it, here is a little help on how to correctly mount a tripod . Be careful to take some flashlights with you, as in the dead of night you may lose some of your equipment if you are not careful enough.
5. REMOTE CONTROL OR DELAY MODE
In order to prevent pressing the shutter from ending up moving the entire camera, use a remote shutter release or set the camera to “delay mode” for 5 or 10 seconds, so that you can walk away from it calmly enough without pulling nothing.
6. USE SPOT METERING MODE
Since the protagonist of the shot is the moon, configure your camera so that it measures the light in a specific way . In this way, you will be able to correctly measure the moonlight for the scene with your camera.
7. MAX FOCAL LENGTH
To achieve the closest zoom, use the maximum focal length that your zoom lens will allow. The focal length is measured in millimeters and this will depend on the objective that you are using or the one that your compact or bridge digital camera comes with. Whatever your camera, zoom in to the maximum and try to focus to infinity.
8. MEDIUM OPENING
In order to capture the greatest amount of detail on the lunar surface, it is recommended to use medium diaphragms. If the aperture of your lens goes from f/3.5 to f/22, using an aperture at f/8 uf/11 would be ideal. By closing the diaphragm, you will let “less light” into the sensor but will increase the depth of field.
9. SENSITIVITY TO A MINIMUM
When working in low light conditions, minimizing the ISO sensitivity as much as possible will help not only to reduce noise in the photo, but also to achieve a very black sky.
10. NOT TOO FAST, NOT TOO SLOW
The shutter speed should not be fast enough so that the photo comes out completely dark, nor so slow that, due to the movement of the moon, it ends up drawing a white trail on the sensor. You will have to find the balance between sensitivity, aperture and shutter speed to achieve a correct exposure. You can start shooting at 1/125s and increase or decrease the shutter speed as you see fit.
11. BLOCKS THE MIRROR FOR STABILITY
SLR cameras work with mirrors that allow the scene to be viewed through the viewfinder before they are raised and thus allow light to reach the sensor. When the mirror is raised, it can cause vibrations in the camera. Use Live View mode if you notice jitter in your lunar photos.
12. REVIEW YOUR MOON PHOTOS 100%
Once you have taken the shot, do not settle for seeing that the viewfinder shows it clearly. The small screens of the cameras can deceive our eyes, so I recommend that you view the photographs at 100% zoom in order to verify their sharpness.
13. FROM THE VIEWER TO THE COMPUTER. EDITION
Once you have downloaded your moon photos, you can retouch them, strengthen the lights and shadows, improve the contrast, crop them, etc. using the editing software that you handle best .
In any case, keep in mind that it is very difficult to achieve a good photograph in the edition, if it was not taken correctly, so repeat all the previous steps if you are not satisfied with the results.
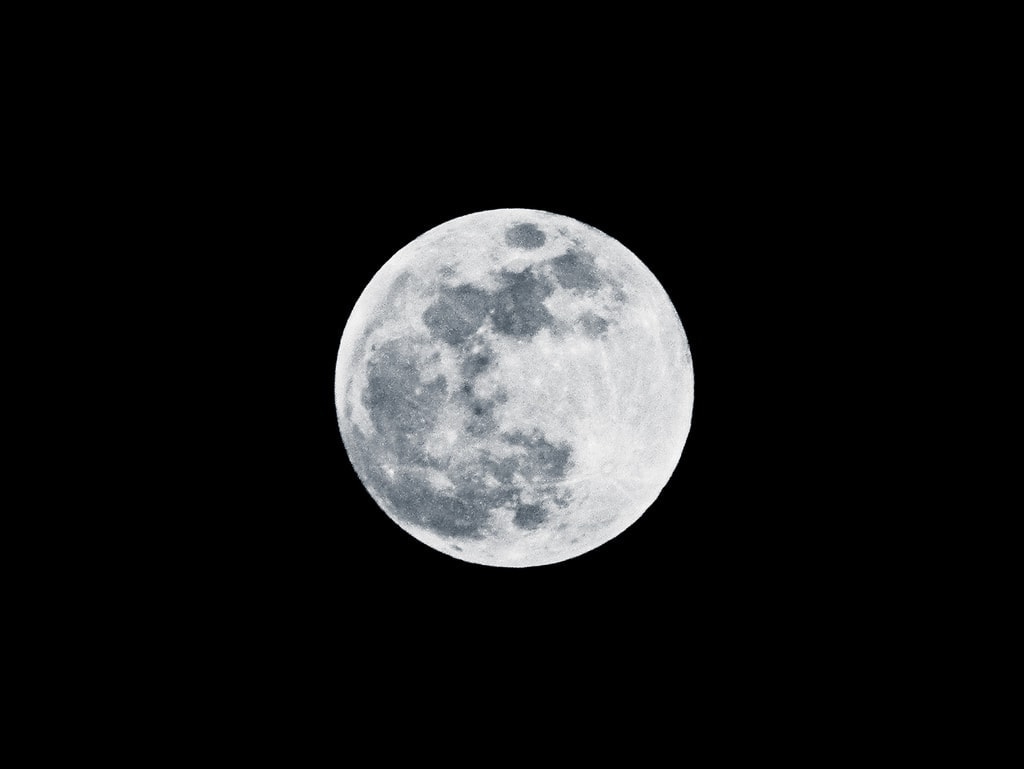
THE FINAL RESULT
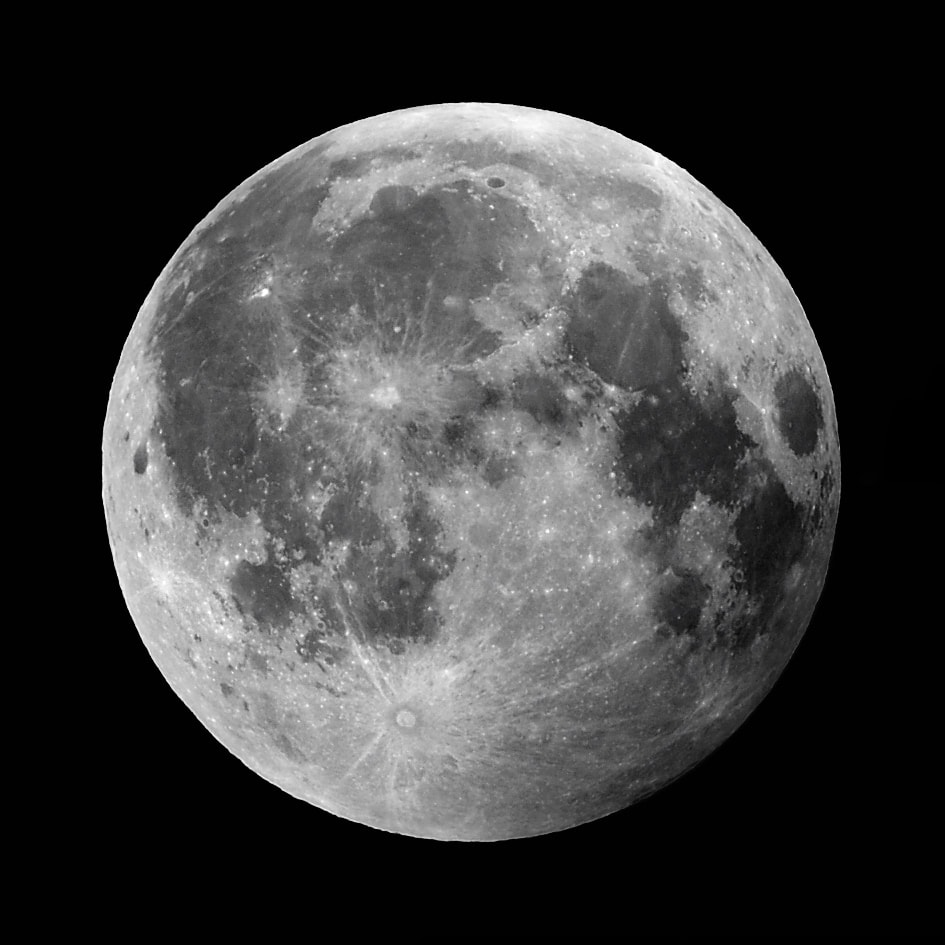
THE MOON AS A COMPOSITIONAL ELEMENT
Most likely, at first, you just want to take a good picture of the moon with your brand new camera to show off in front of your friends or to expand your archive, but after a while, and as you acquire more and more knowledge, you will begin to see the moon as a means to transmit or reinforce a message.
As I told you in the article on how to capture and transmit movement , "A photograph is really impressive not only when a good composition is achieved or if the subject or object is attractive enough, but also what differentiates a good photograph from an exceptional one , is the sensation that manages to transmit to the observer.”
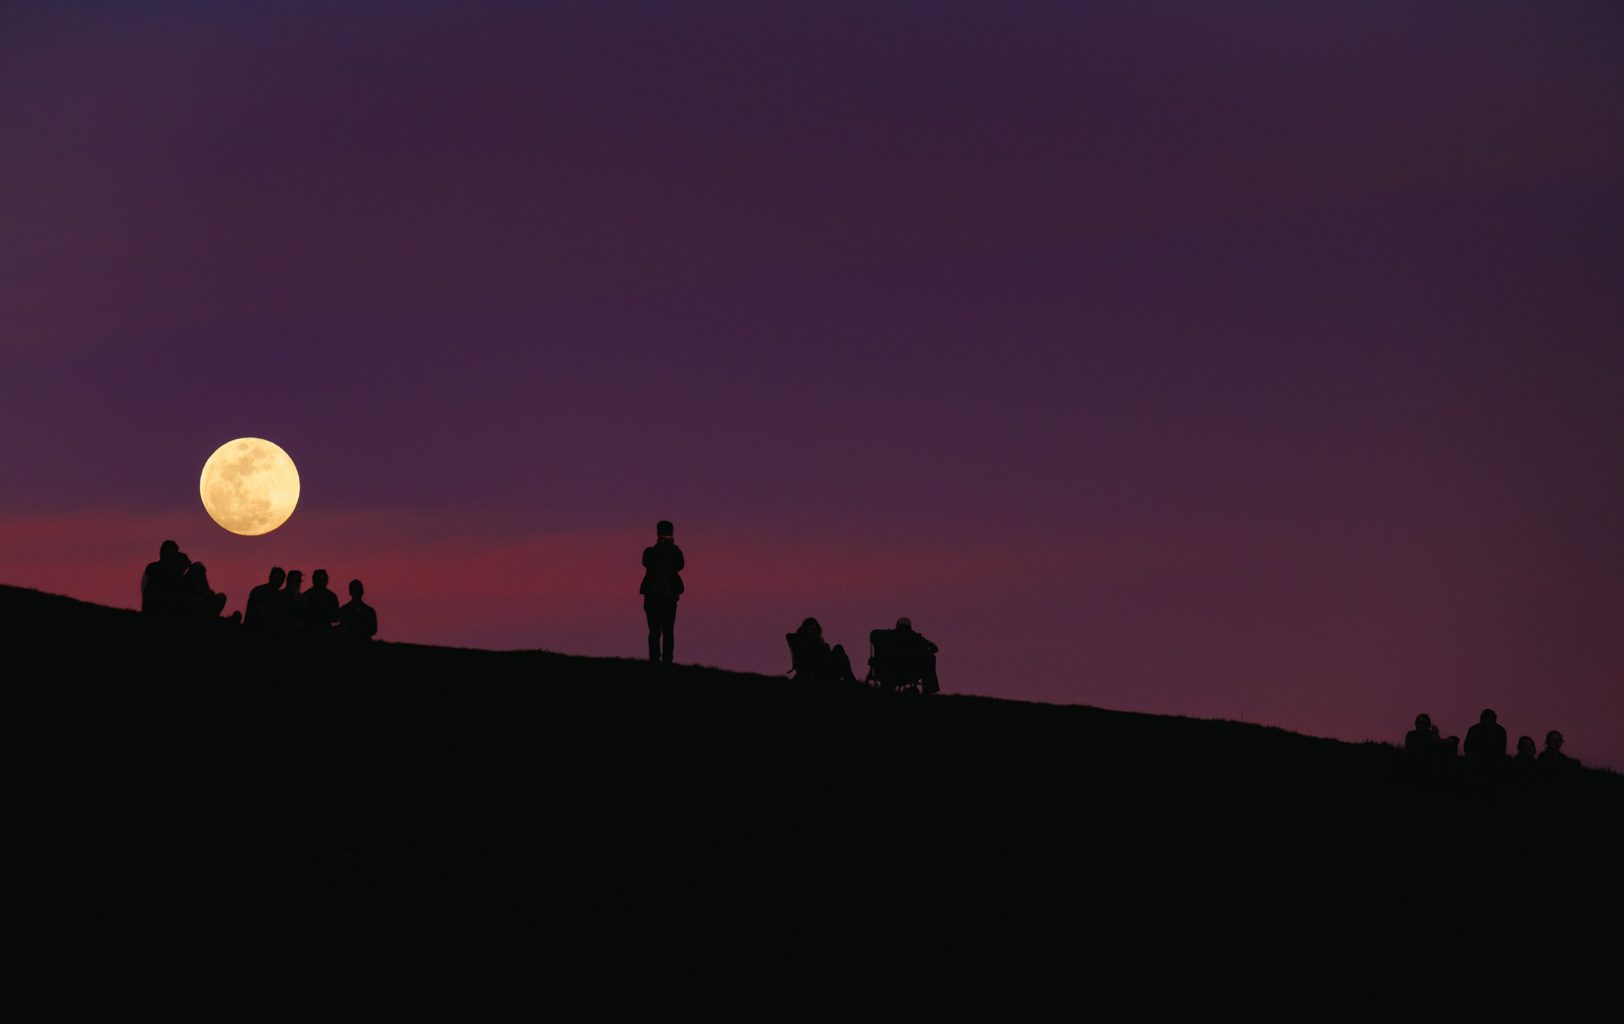
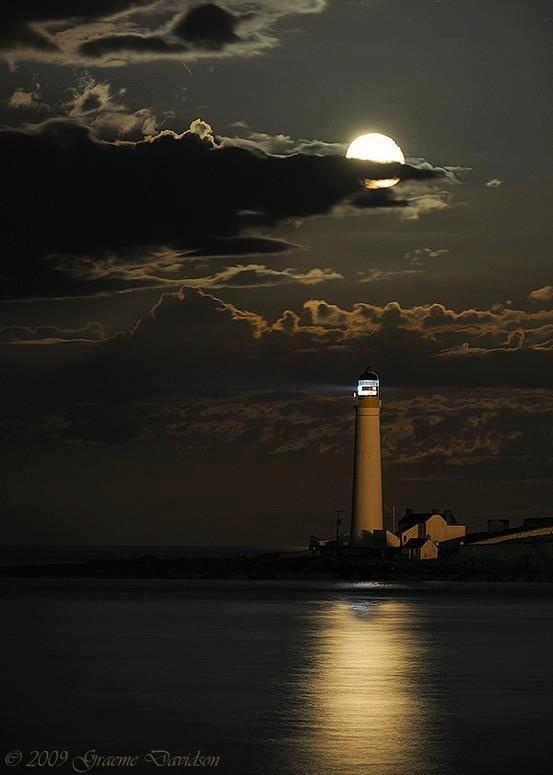
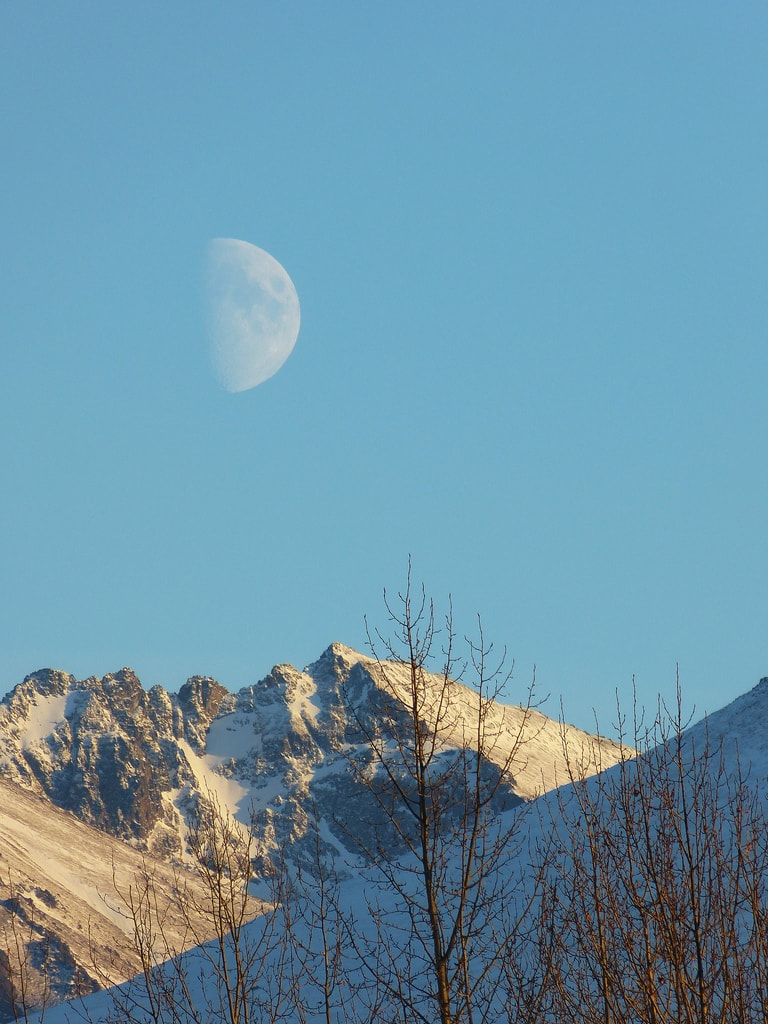
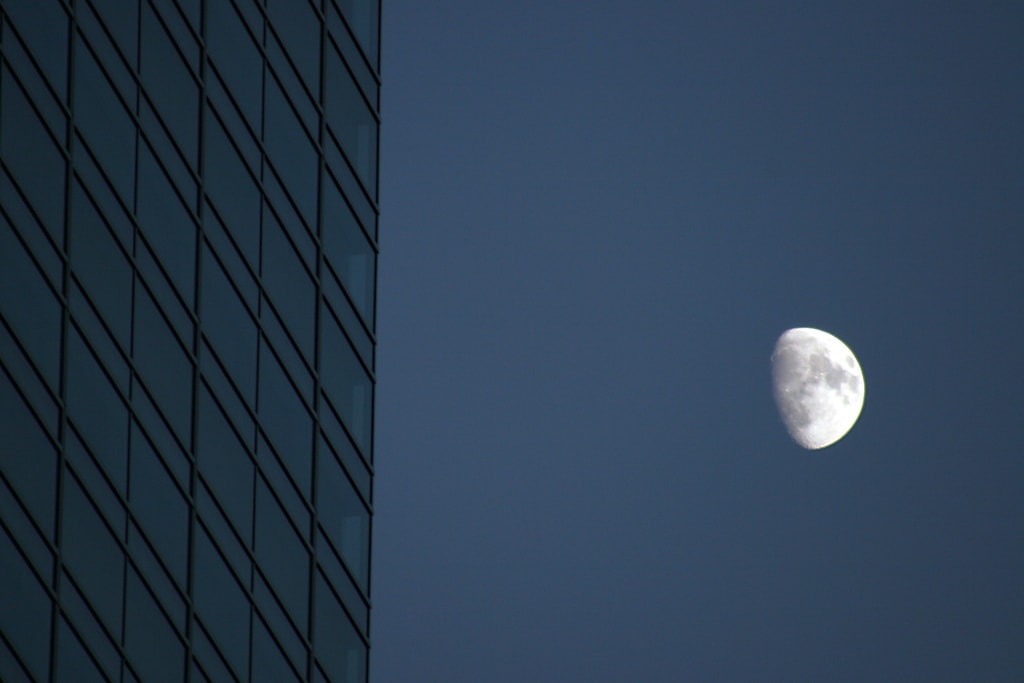
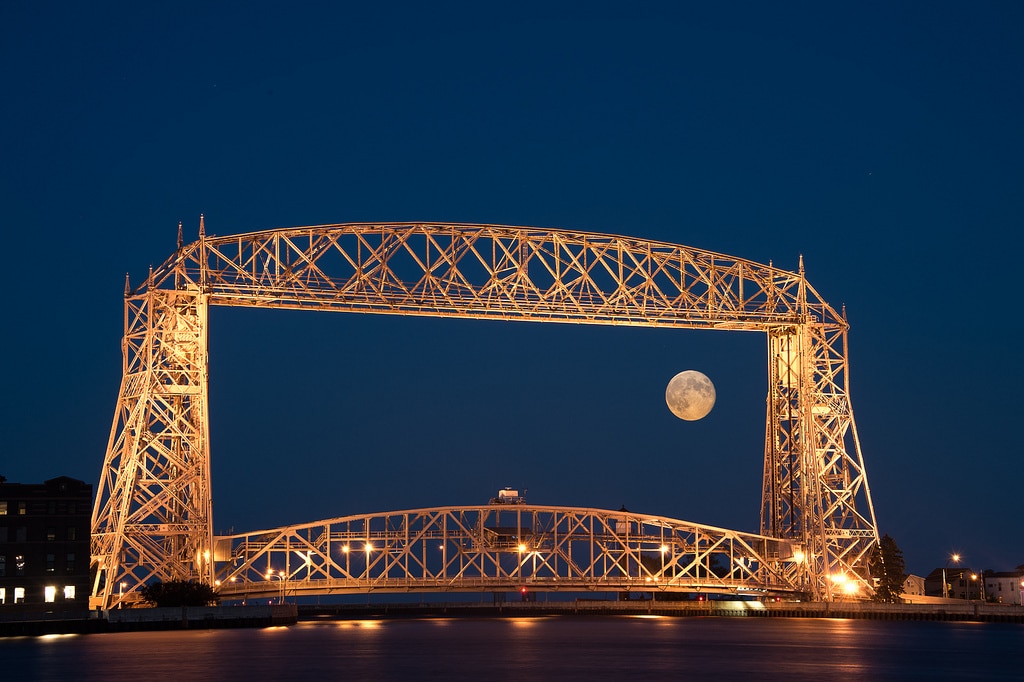
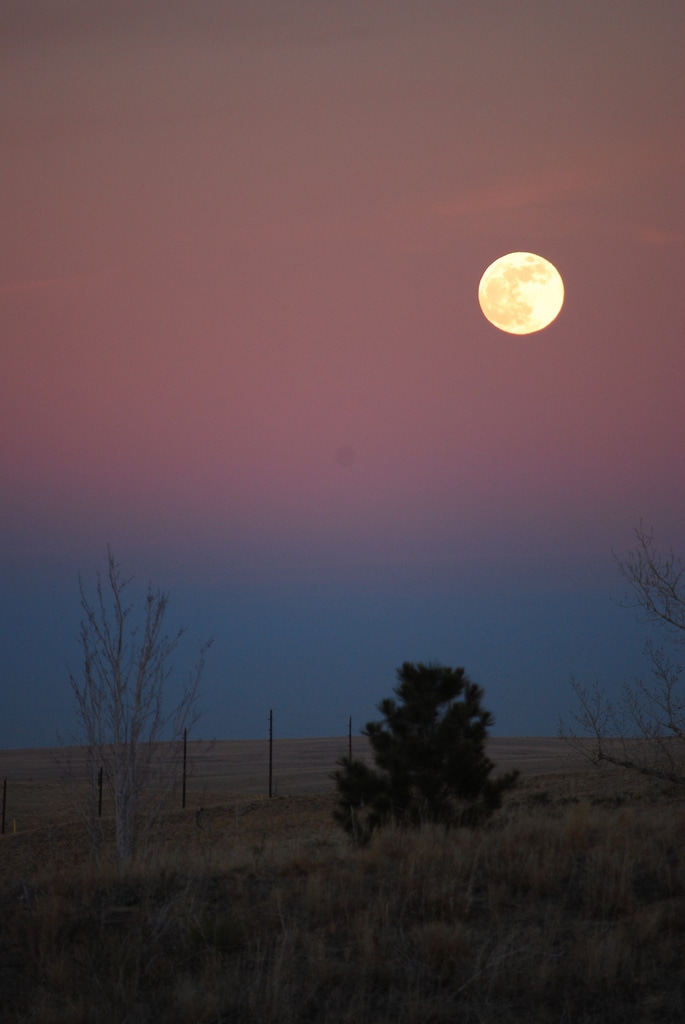
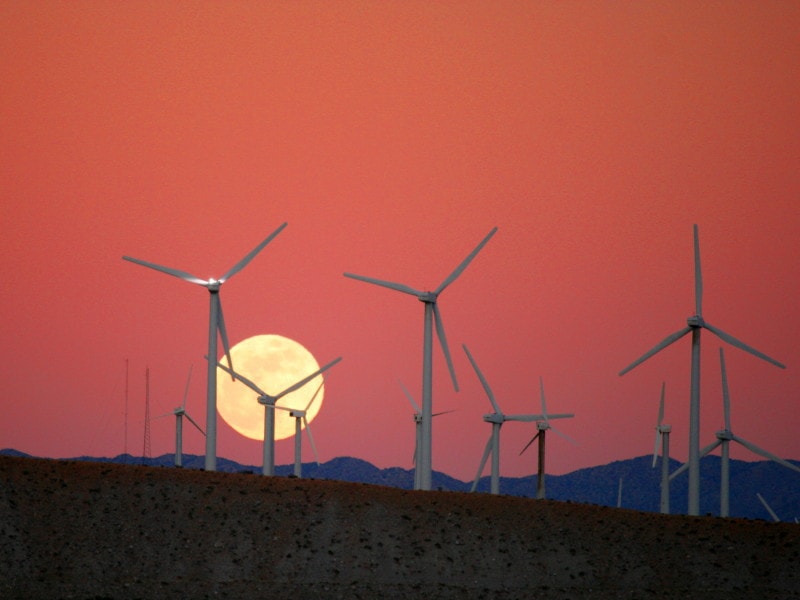
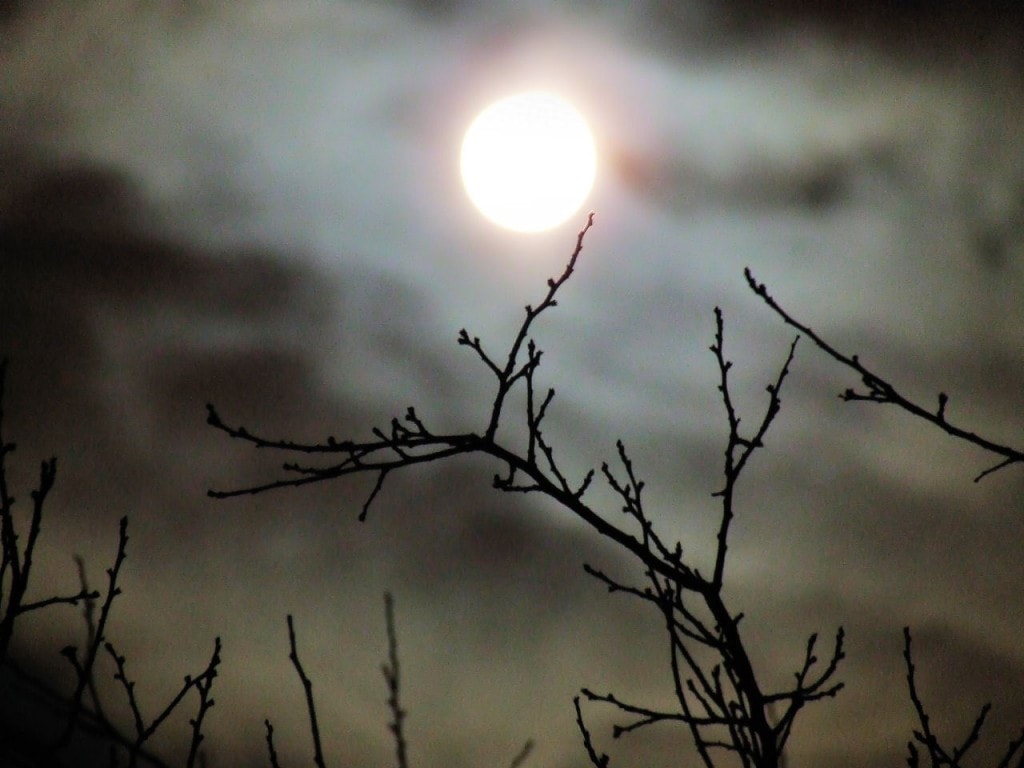
The moon helps to reinforce the message, to convey a sense of atmosphere and place in the photographs, its light dyes the dramatic scenes and its mere presence charges any photograph with emotion. The climate it generates, the light it reflects, the feelings it transmits have made it a means for your photographs to take a leap in quality.
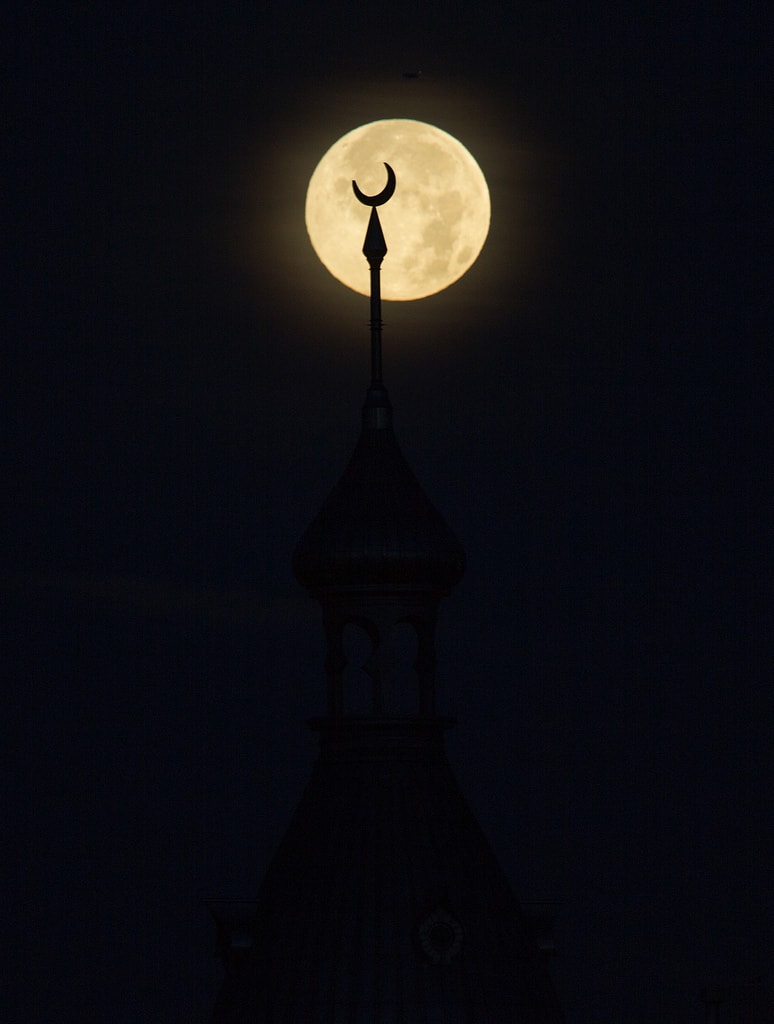
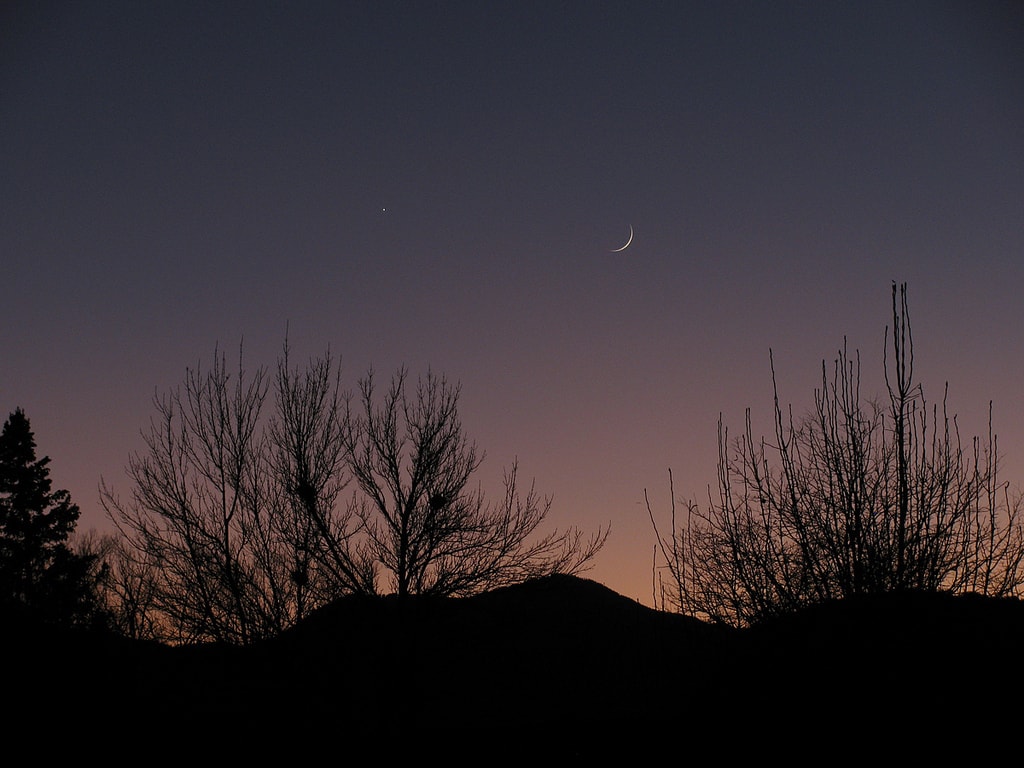
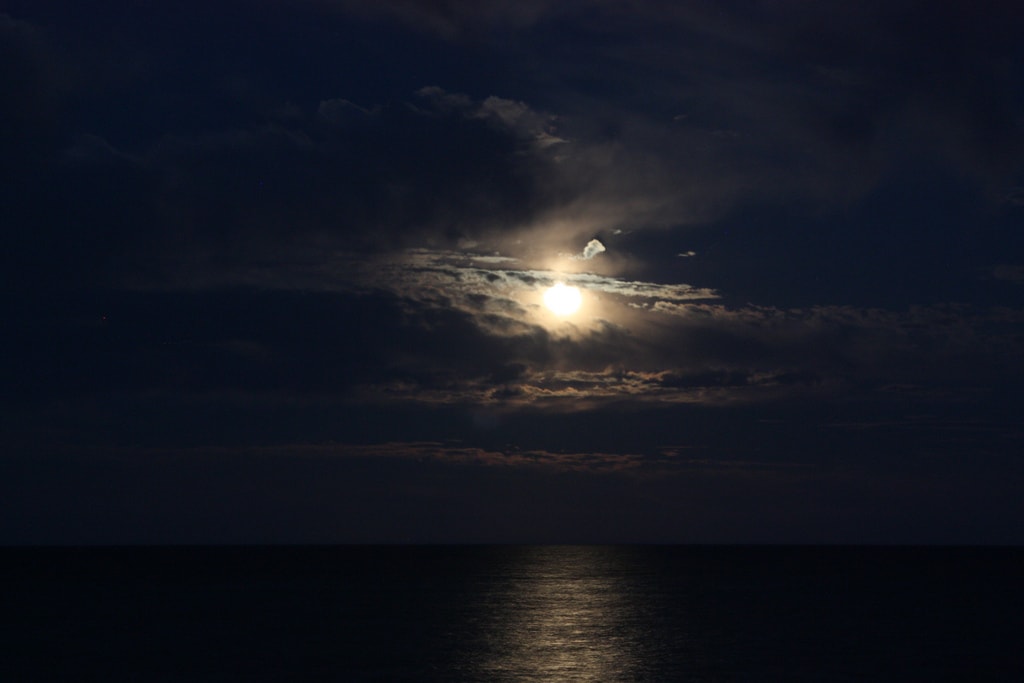
PHOTOS OF THE MOON TO INSPIRE YOU
To be honest, the photos of the moon alone in the sky, apart from impressing you with what you are capable of doing and practicing, have little interest. It seeks to include other elements that give the scene an aesthetic, visual or narrative sense.
Next, I leave you a gallery of photos of the moon that you can use as a source of inspiration:
You no longer have excuses for not going out tonight, camera in hand, to capture that beautiful star called the moon. I hope you liked the article. Do not hesitate to practice and spread it, please. Thanks
