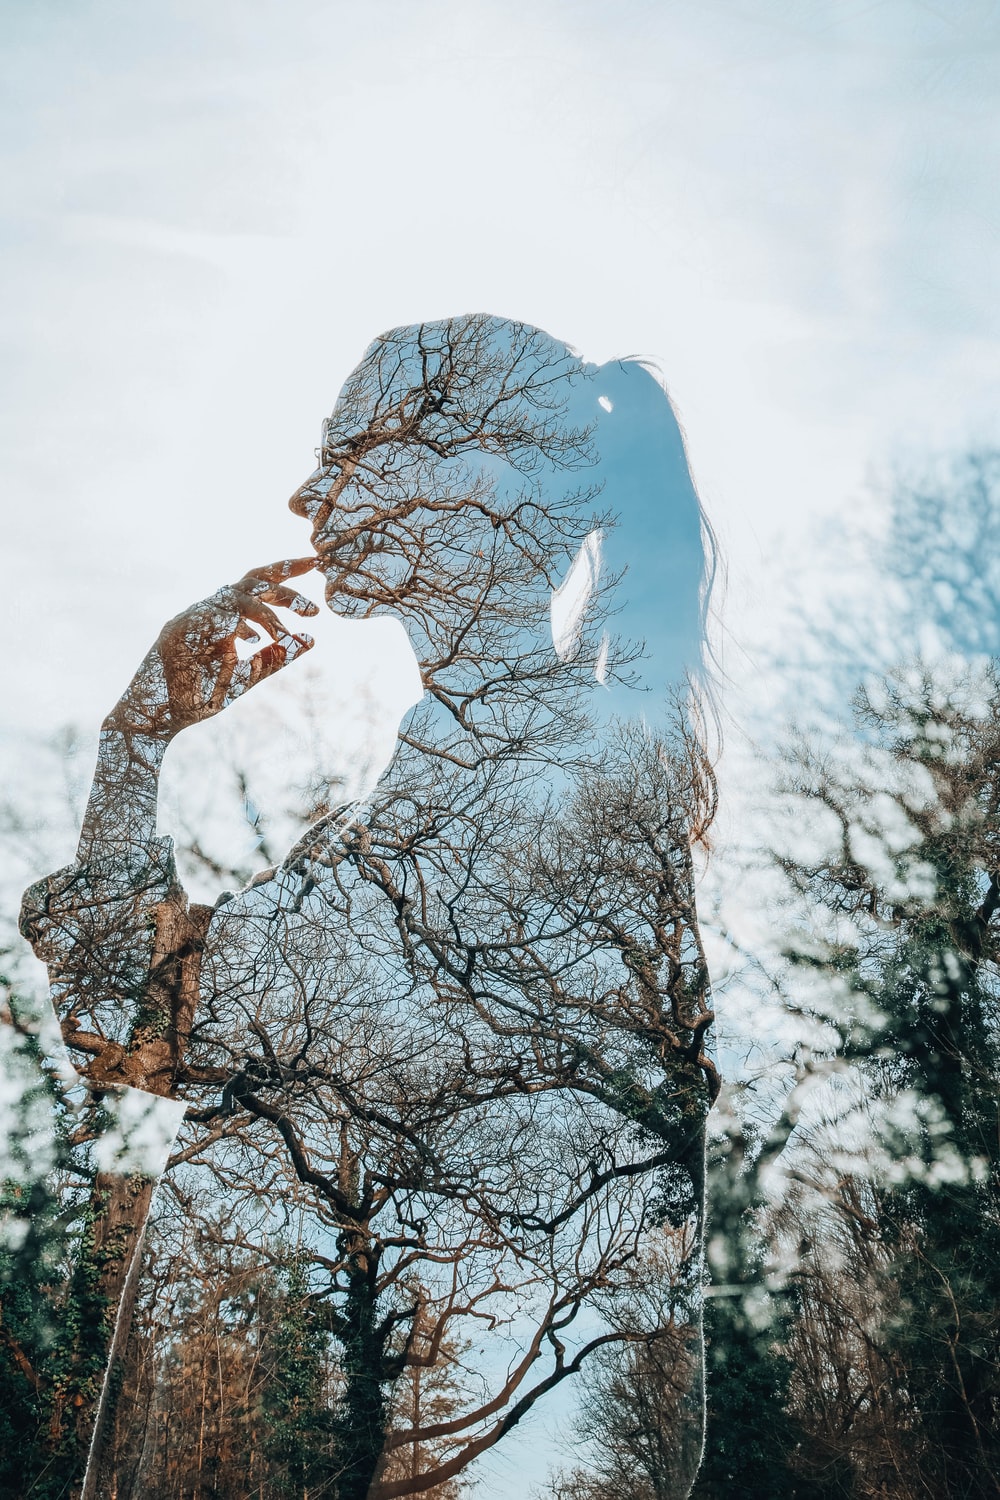
Multiple exposure is a treasured ticket to the country of artistic and mystical photography, which will delight you with new opportunities and more subtle transmission of our world. This genre will appeal to both beginners and professionals who have conceived global and meaningful projects. Someone will say that this is easily done in graphic editors. However, the simplicity of collage is exaggerated: it requires much more time and effort. In the camera, this process takes place instantly, you get a unique, unique and full of surprises result. The essence of multi-exposure photography is to superimpose two or more images on top of each other.
NIKON D300S Installations: ISO 200, F4.2, 1/125 s, 127.0 mm equiv.
A bit of history
Unfortunately, the pioneer of multiple exposure is unknown. But history brings us back to the times of film and cameras made of iron and glass. The first photo was a mistake: someone inattentively exposed the film twice on the same frame. The result was rather strange, but some photographers saw this as a huge potential for artistic development. The heyday of multi-exposure falls on the sixties of the XIX century. That's when photographers who want to draw more attention to their business got the old method off the shelf. In such photographs, people were captured in the frame twice, in different positions: for example, face and back to the viewer.How to shoot?
I will analyze the process of creating a frame with multiple exposure using the example of Nikon D600. Nikon SLR cameras from model to model have an almost identical menu. When switching to new cameras, you don’t have to study the settings again.Stage I: camera setup
Go to the settings - “Shooting menu”, item “Multiple exposure”. We activate this mode. Conveniently, you can do both single shots and series. We determine the number of shots to combine: from 2 to 3 (I usually shoot with double exposure, that is, 2 frames in one). There are some restrictions on this kind of shooting. First, you must be in one of the following modes: P, S, A. Best of all, M. Secondly, multiple exposure is not recorded when Live View is on. Thirdly, multiple exposure has a time limit of 30 seconds (default). That is, you can’t remove the model and go to the neighboring city in a day to photograph the mountains for the second shot, and for the third - Lake Baikal.Stage II: preparation for the shooting
NIKON D600 Installations: ISO 640, F2.2, 1/125 s, 50.0 mm equiv.
Before shooting, it is important to consider what you want to get in the end. You can be inspired by pictures on the Internet: see what objects and shapes are better to combine. In such a shooting, there is always an element of surprise; frames are not always obtained as we imagine them. But do not give up: try different aperture and shutter speeds for different frames.
Try not to overload pictures with details. For example, it makes no sense to remove a branch with many leaves and then photograph a branch of a neighboring bush. Take as a basis one object (person), and as a second frame something simple (landscape).
NIKON D600 Installations: ISO 125, F3.5, 1/200 s, 50.0 mm equiv.
This type of shooting opens up great opportunities for creativity and experimentation. With experience, you will develop intuition, and you will easily determine which frames to use for blending.
NIKON D600 Installations: ISO 640, F2.8, 1/80 s, 50.0 mm equiv.
Almost all the photos in this article were taken with a Nikon D600 camera and a Nikon AF-S 50mm f / 1.8G lens. For such frames I always use a portrait lens.
NIKON D600 Installations: ISO 250, F4.5, 1/200 s, 50.0 mm equiv.
If your camera does not have a multiple exposure mode, you can achieve the same effect in the graphics editor. With it, you can fully control the process. But this, as they say, is another story ...
The Word to HTML converter is the best free online tool to transform Word, Excel, Google docs, and any other document to web content.


