
Following the request of many VIP Readers, I update and republish this article about RAW format. If you have a camera that only shoots in JPG, this article won't do you much good, but if you have a DSLR, EVIL, or advanced compact camera and currently only shoot in JPG, I recommend sticking around. This article interests you.
I will try to explain in a very simplified way:
- What is the RAW format?
- The advantages of shooting photos in RAW mode
- The drawbacks of the RAW format
- For whom is RAW indicated?
- The different names of the RAW format
- Steps to process RAW format
WHAT IS THE RAW FORMAT?
RAW means "raw" in English. Therefore, it is a format in which we keep the raw, unprocessed photo, as if we had not taken it yet. When you take a photo in the usual JPG format, the camera permanently saves the image on the memory card (with the settings it considers) and does not admit changes later, or maybe yes, but very few. On the other hand, if you shoot the photo in RAW format, you are somehow "preserving" the scene within the memory card and thus maintain the possibility of finishing taking the photo later, on your computer.
When you photograph in JPG format, the camera permanently records the image on the memory card in a format (JPG) that can be interpreted by any photography software. In addition, at that moment the camera records the photo with certain data (white balance, saturation, exposure, contrast, etc.) and dispenses with other unnecessary data. Somehow the camera compresses the photo or packages it and leaves it ready to view at any time, send it to a friend, post it on social networks, and so on.
In contrast, when you shoot RAW , the camera records not only the image data but all possible values, leaving the photo somehow "open" to any changes later. Imagine, for example, that you shoot the photo with certain exposure and white balance values, but later you change your mind and want to change those values to others, but you can't shoot the photo again because you're already at home in front of your computer. . If you only had a JPG image you could hardly change the truth, but if you had one in RAW then you would open it, make the necessary modifications, and at that moment you would obtain your final JPG image, already on the computer.
RAW images are therefore a kind of "negative", a source file from which you can obtain the final image that will always be JPG.
Because let's not fool ourselves, no matter how many detractors there are of photo editing or retouching , it is the last step of a photograph, where we can contribute our vision as artists. Because when we take a photograph, we have imagined it in a way in our minds and the camera is not always capable of capturing exactly what we want. However, with the editor we can highlight some areas, highlight some colors, divert attention from less important parts, in short. Finish modeling the photo at will .
WHAT ARE THE ADVANTAGES OF SHOOTING RAW PHOTOS?
All photography professionals shoot in RAW mode. In all the forums and events where you can find professional photographers, journalists, model photographers, etc., ask them what format they use, they will tell you RAW.
WHY? WHAT ADVANTAGES DOES THE RAW FORMAT BRING ME?
- Image quality: The RAW format does not compress the photo like JPG does. With a RAW photo you can be sure to capture ALL the quality and information possible.
- Allows later changes, adjustments, improvements: With the RAW format you can change almost everything in the photo. Except for details such as the framing, the arrangement of the objects/subject, etc., you can change almost everything else later. You can give the photo more exposure (light), change the white balance, make it warmer or cooler, change the saturation, and so on. For example, we all know that to shoot a photo in low light conditions, high ISO values are often used, and that causes the photo to have noise in the darkest parts. Well, thanks to the RAW format we can calmly, from the comfort of our computer table, minimize that noise, thanks to the possibilities offered by the RAW mode.
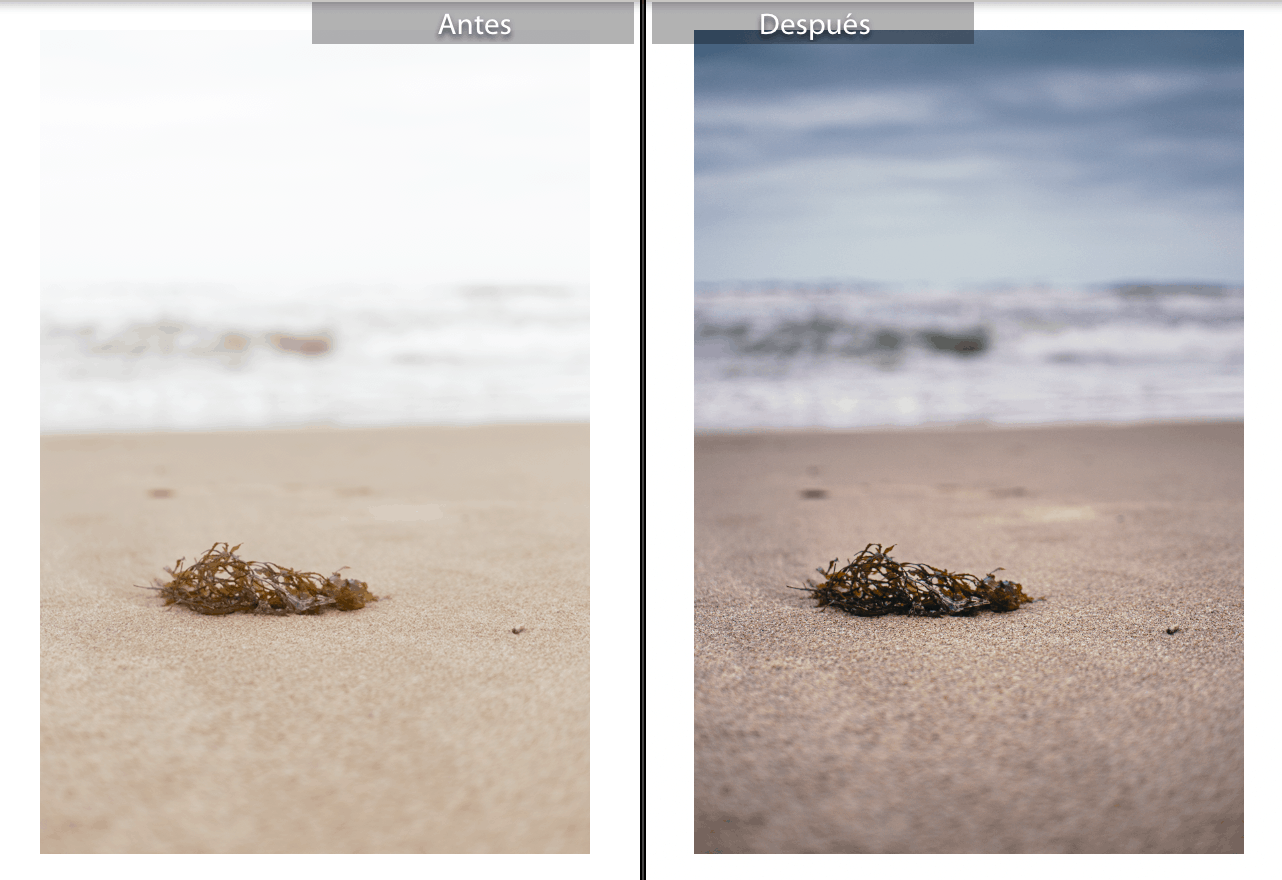
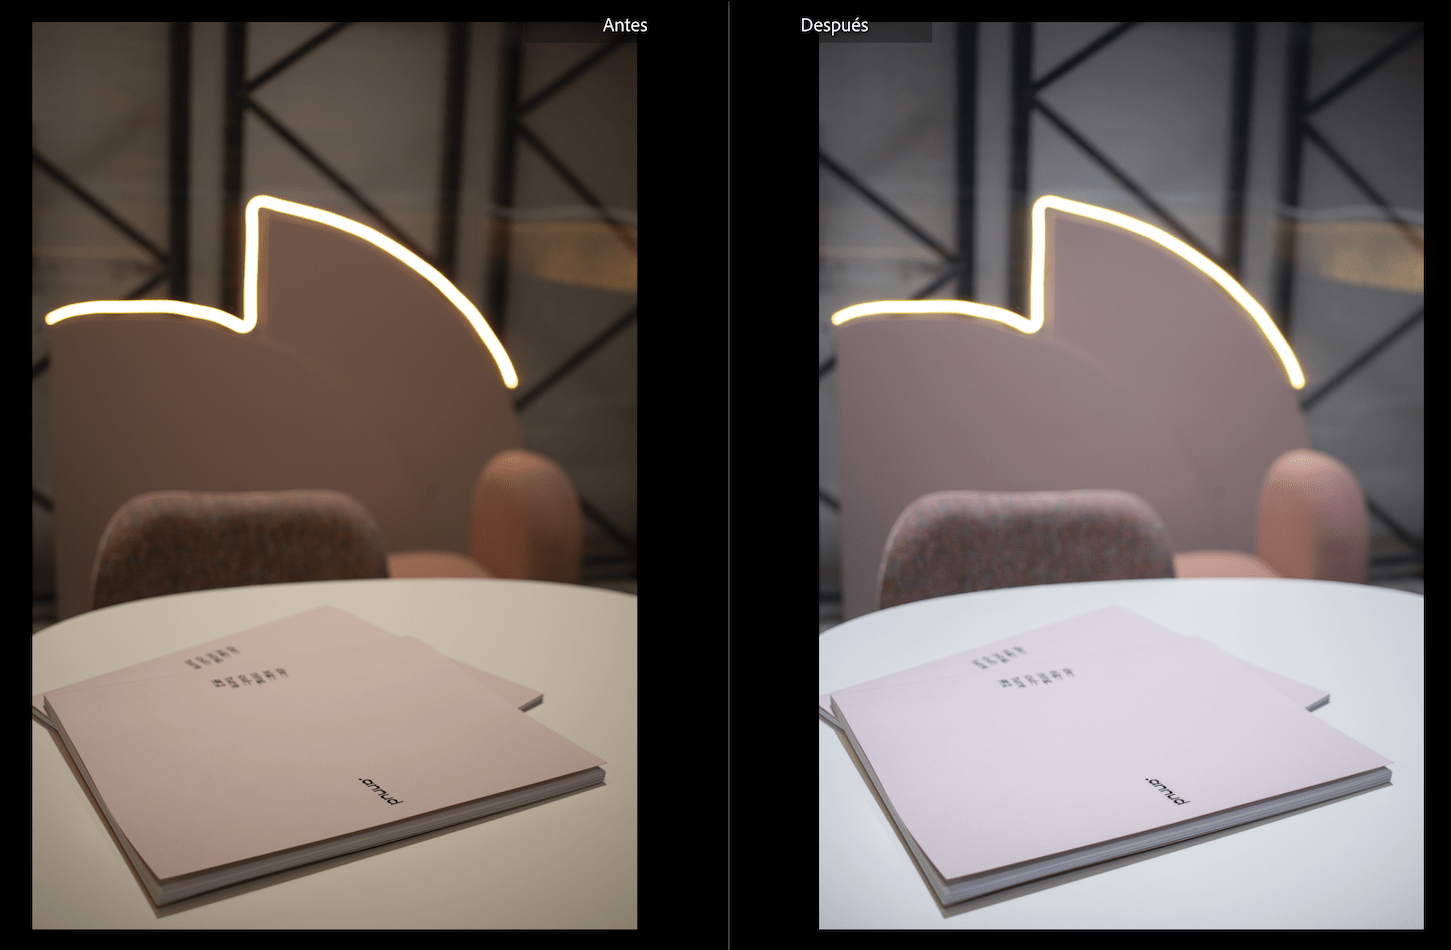
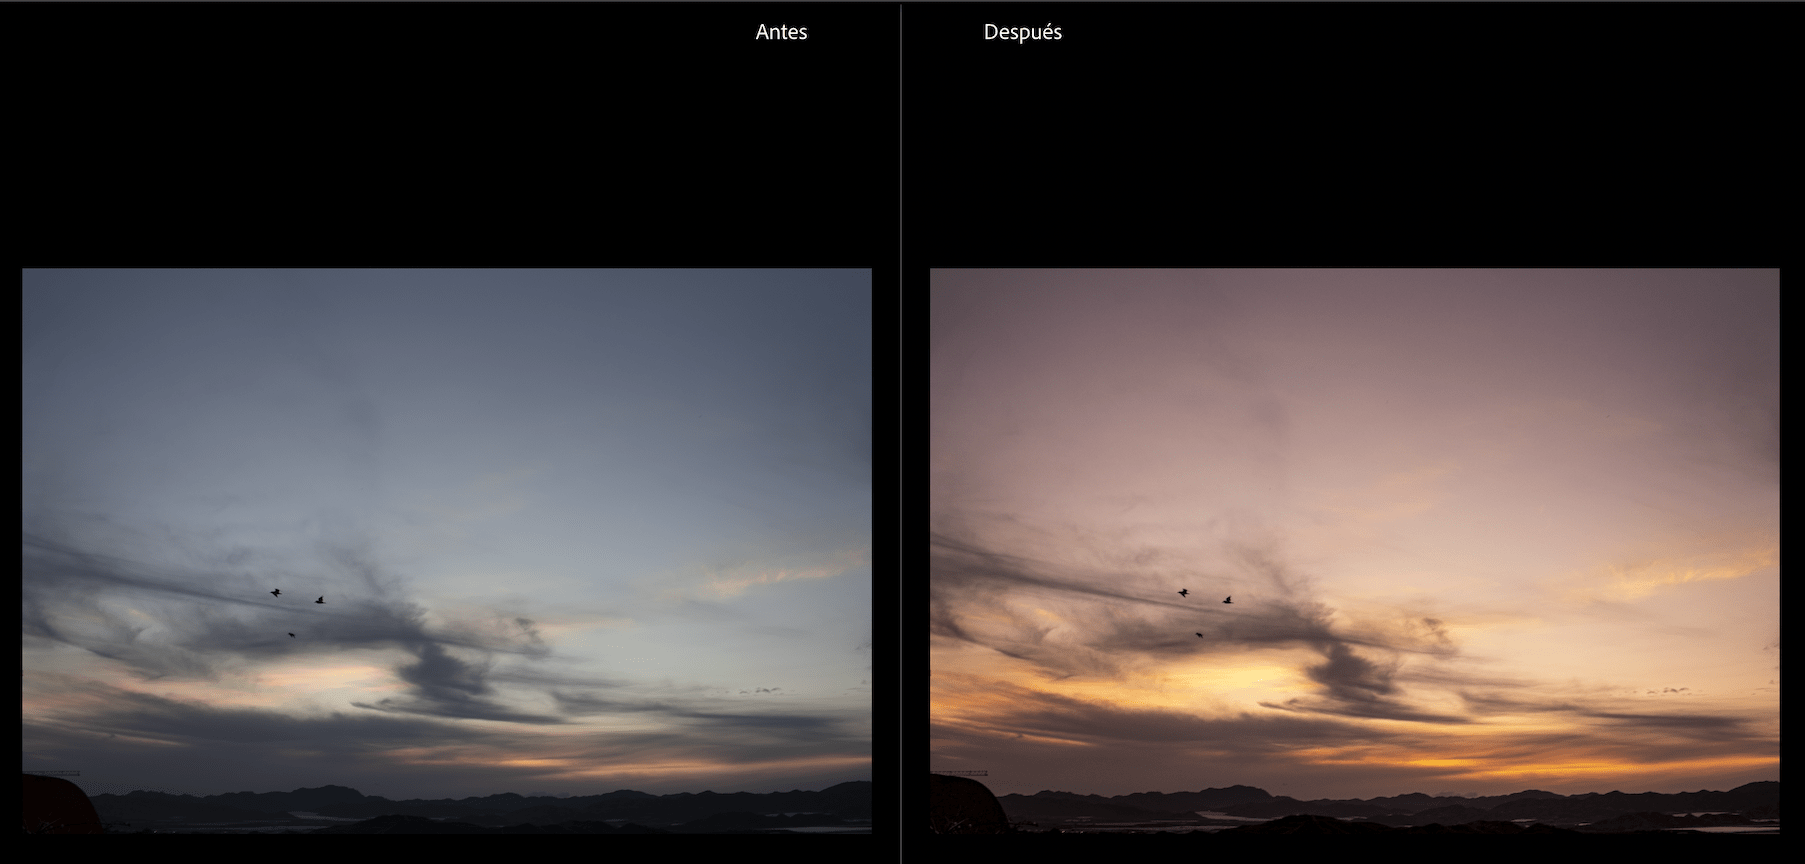
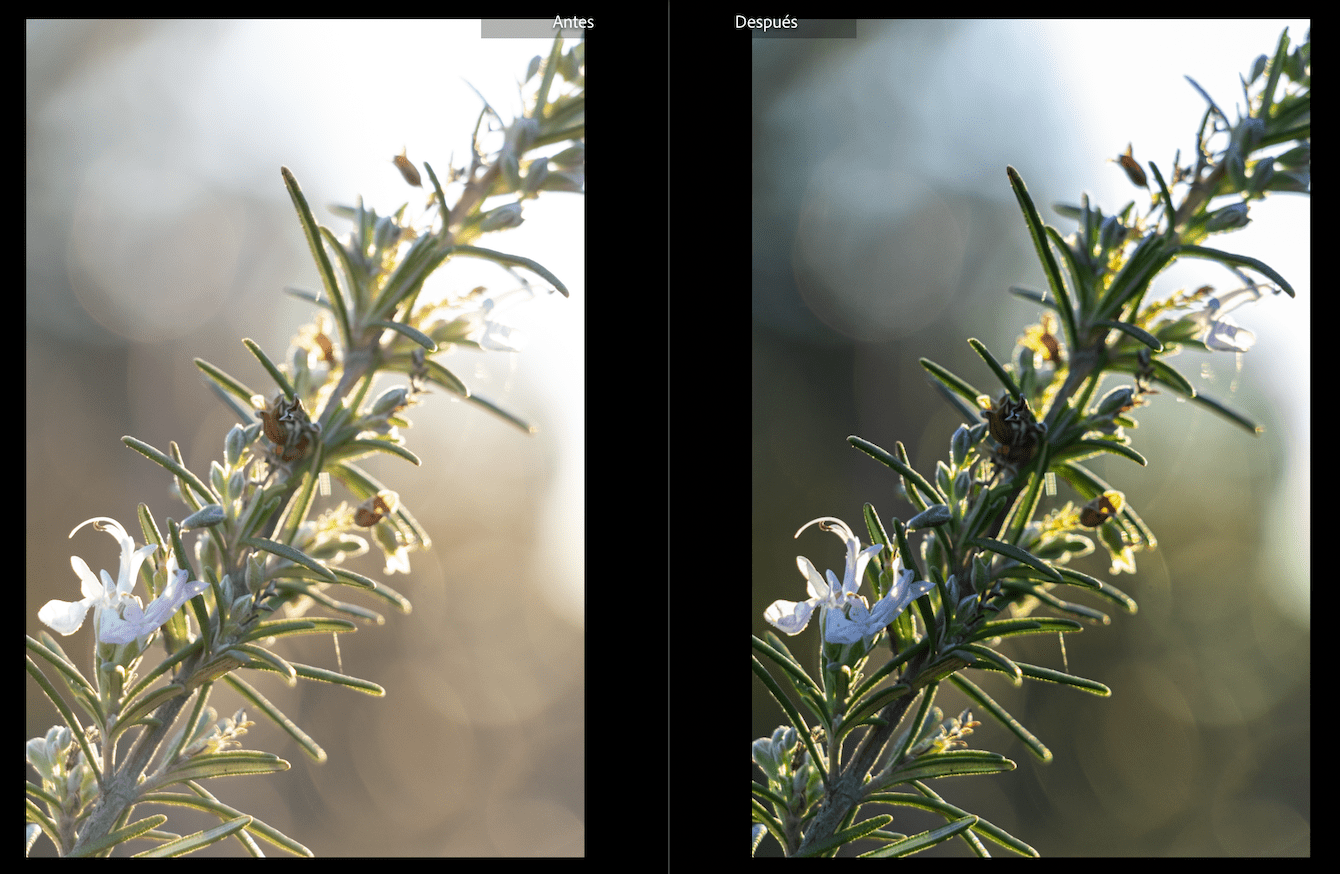
EXAMPLES OF PHOTOS IN RAW FORMAT BEFORE AND AFTER DEVELOPMENT
Here are some examples of photos taken in RAW format and how they looked BEFORE and AFTER processing. You will see how past everything that the RAW format allows.


DISADVANTAGES OF SHOOTING WITH RAW FILES
But if you decide to take RAW photos, not everything will be advantages. Let's see:
- Memory card space: The RAW format, being "raw" and uncompressed, takes up much more space on the memory card than the JPG format. Where 400 JPG photos fit, maybe only 110 RAW photos fit.
- Cumbersome post-production process: At first it's cool to take photos in RAW format and work on them later on the computer, but after a while it starts to seem like a fateful, long and boring task. And it is that if you take photos in RAW you can only use them, send them, publish them and share them once you have processed them on your computer.
- The RAW format is not unique and universal: The JPG format is unique and universal. All JPG's are the same, all programs open and read JPG photos in the same way. This is not the case with RAW images as each camera has its own way of rendering RAW. For example, Canon RAW is different from Nikon RAW. This raises a compatibility issue. Many warn that a RAW photo could be opened and used today but in 7 years it may not be possible, since manufacturers update their software and sometimes change RAW.
FOR WHOM IS RAW INDICATED?
If every time you do a session you come back with 200 or 300 photos, forget about RAW, since having to process so many images one at a time on the computer can be very time consuming. On the other hand, if you take about 100 photos or less in each photo session, you may be interested in shooting in RAW. If you like to view your photographic works on your computer and spend some time working on your photos one at a time, then RAW is definitely what you need.
If you have a very small memory card or you lack space then it will not be a good idea to shoot in RAW either, since it is a format that, as I said before, takes up a lot of memory, for those cases it is better to shoot in JPG. On the other hand, if you have plenty of space on the memory card, do not skimp on RAW.
Another good indication of whether or not RAW is right for you is to ask yourself the question "What do I want RAW for?" If you can find an answer to this question, well go ahead and shoot RAW. But if, on the contrary, you don't know what you want it for, if you shoot in RAW but in the end you don't get any benefit from it, then maybe it's better for you to stick with JPG and that's it.
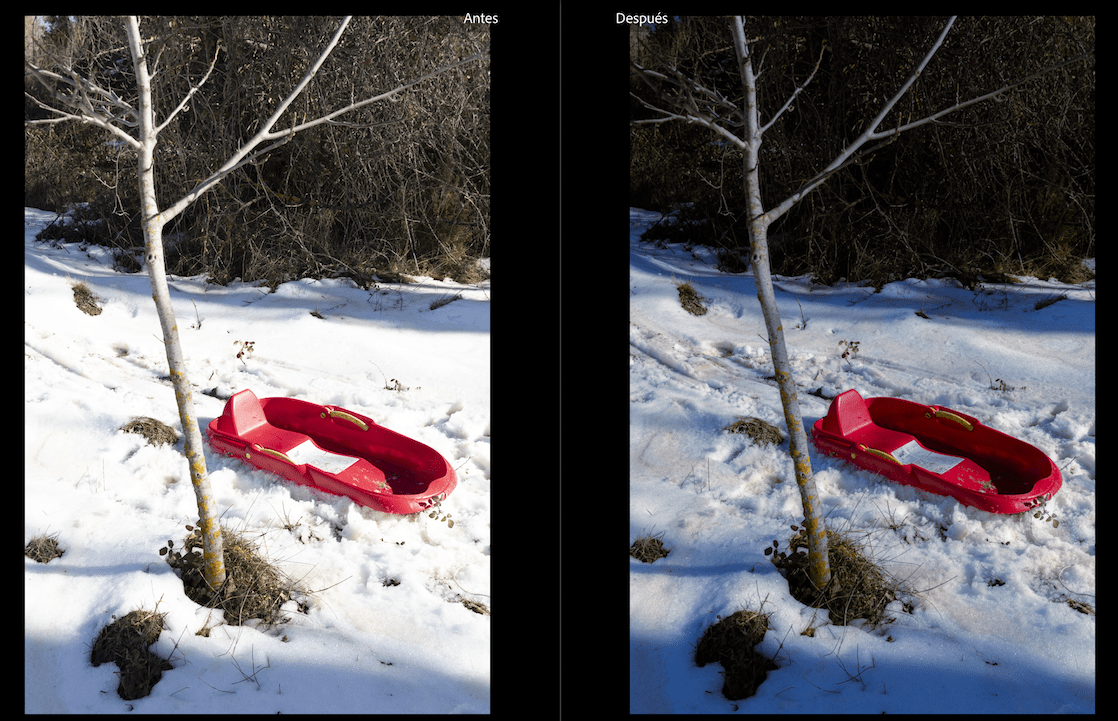
Now let's see the same photograph taken in JPG, in RAW and with a basic RAW development:
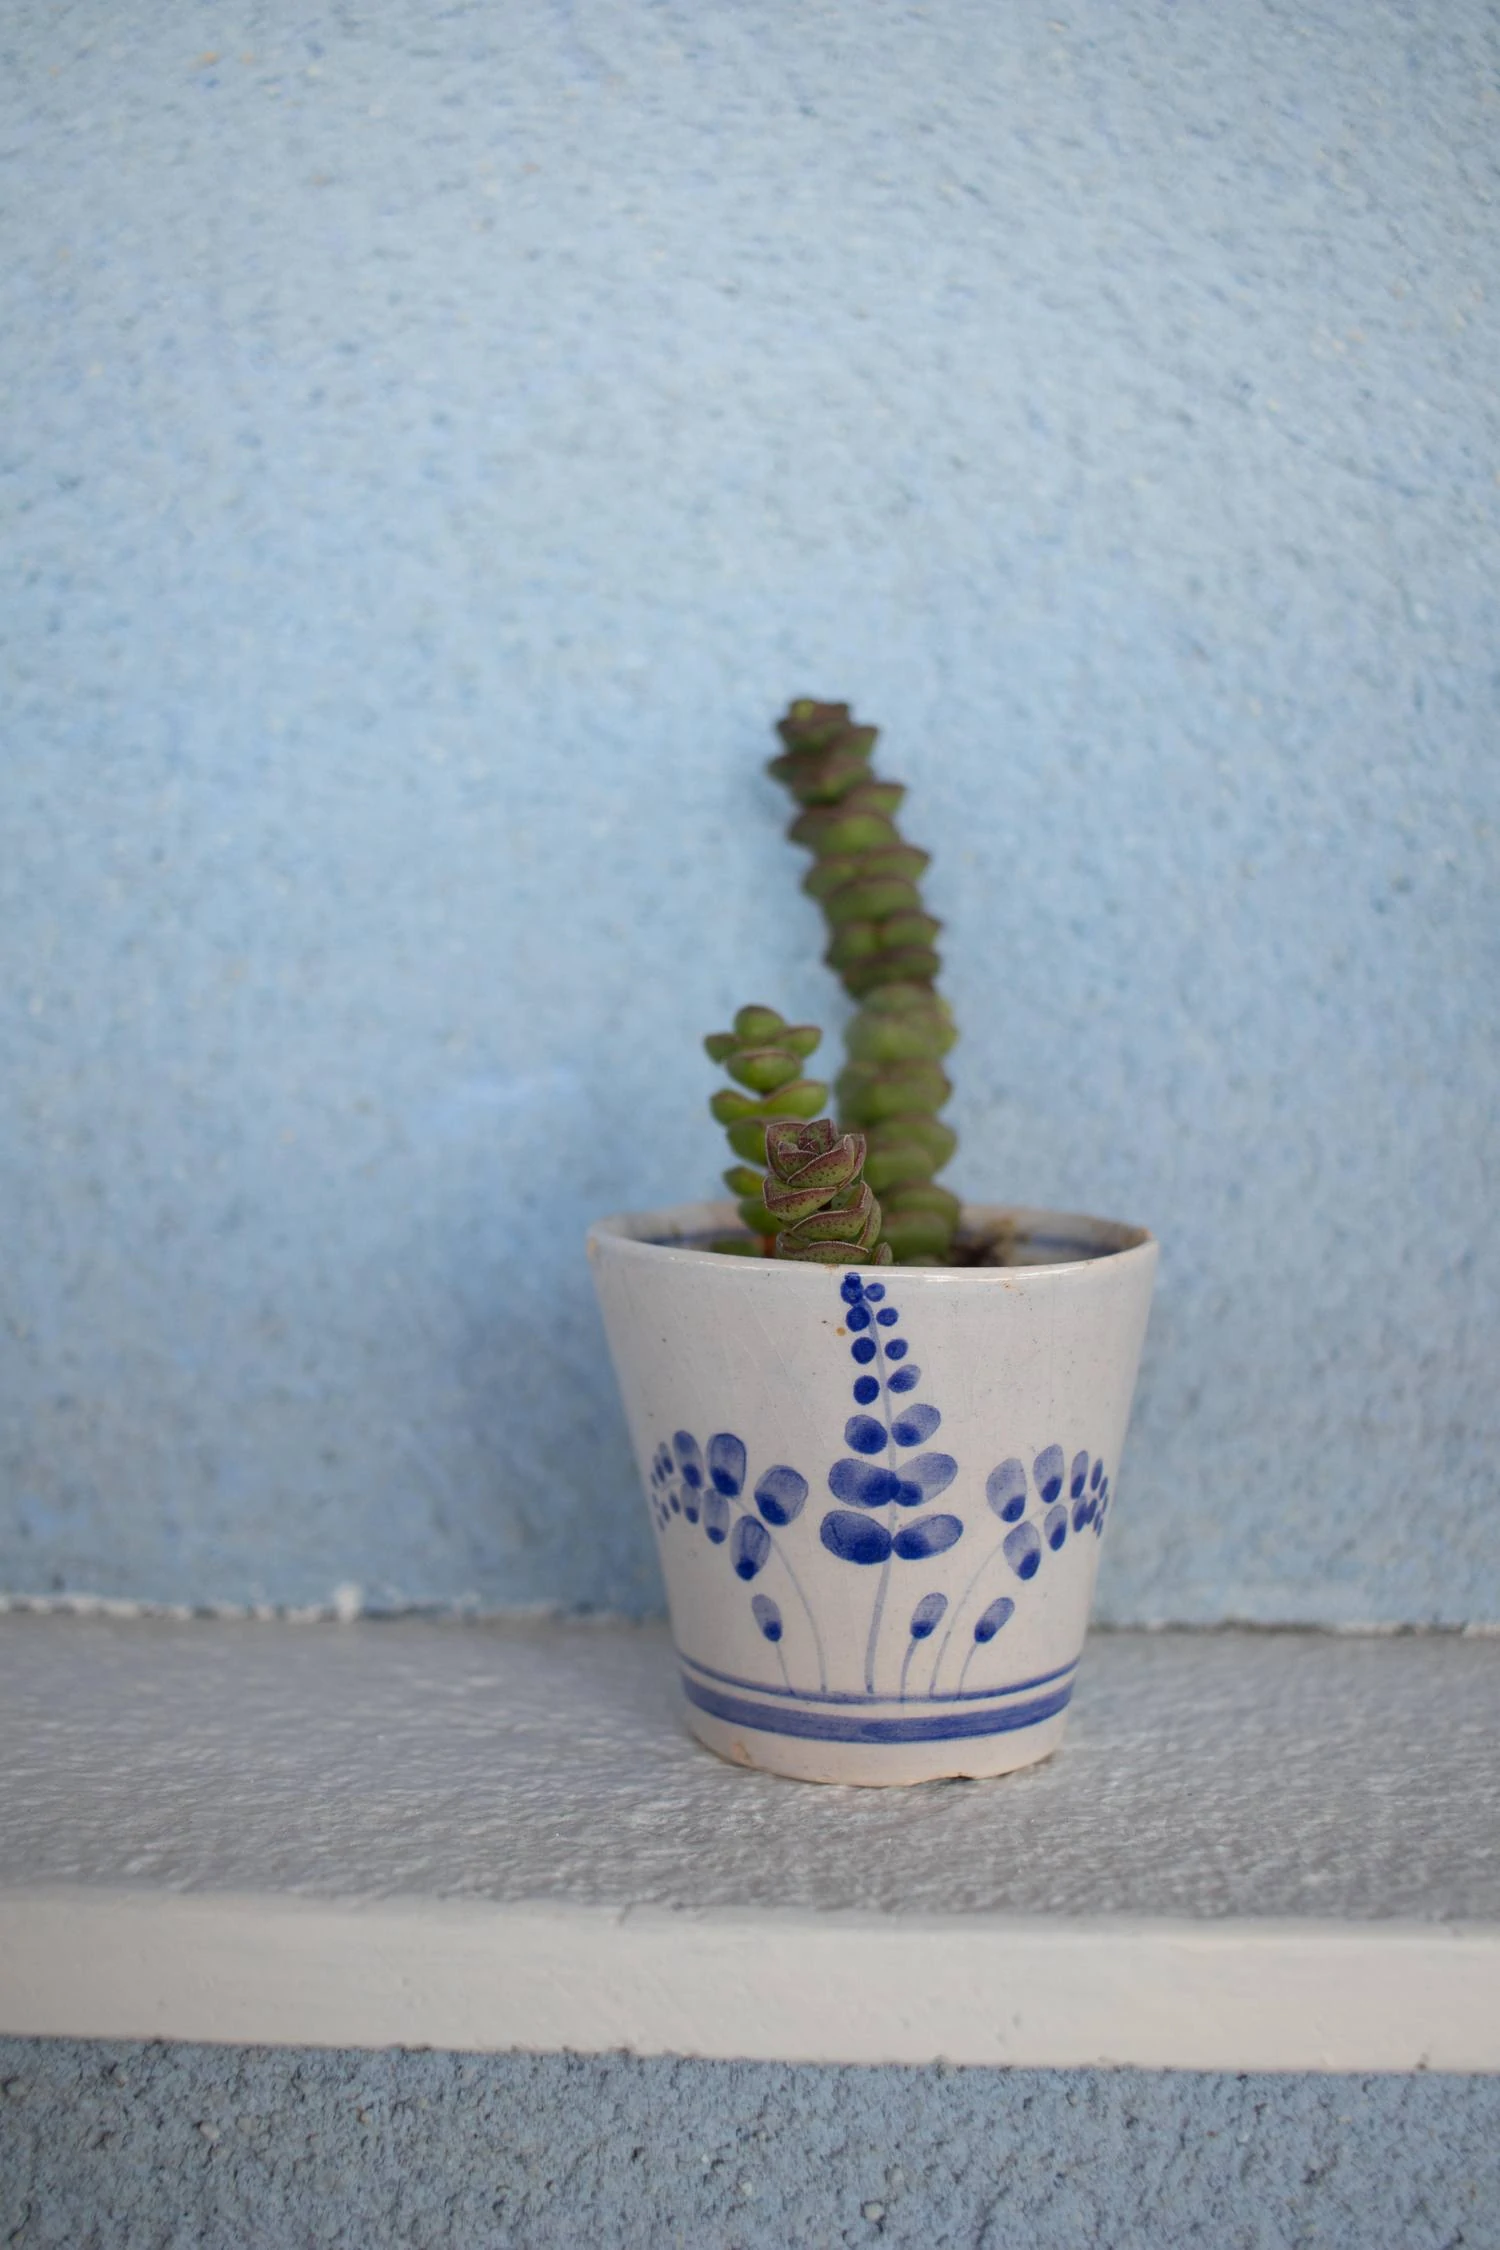

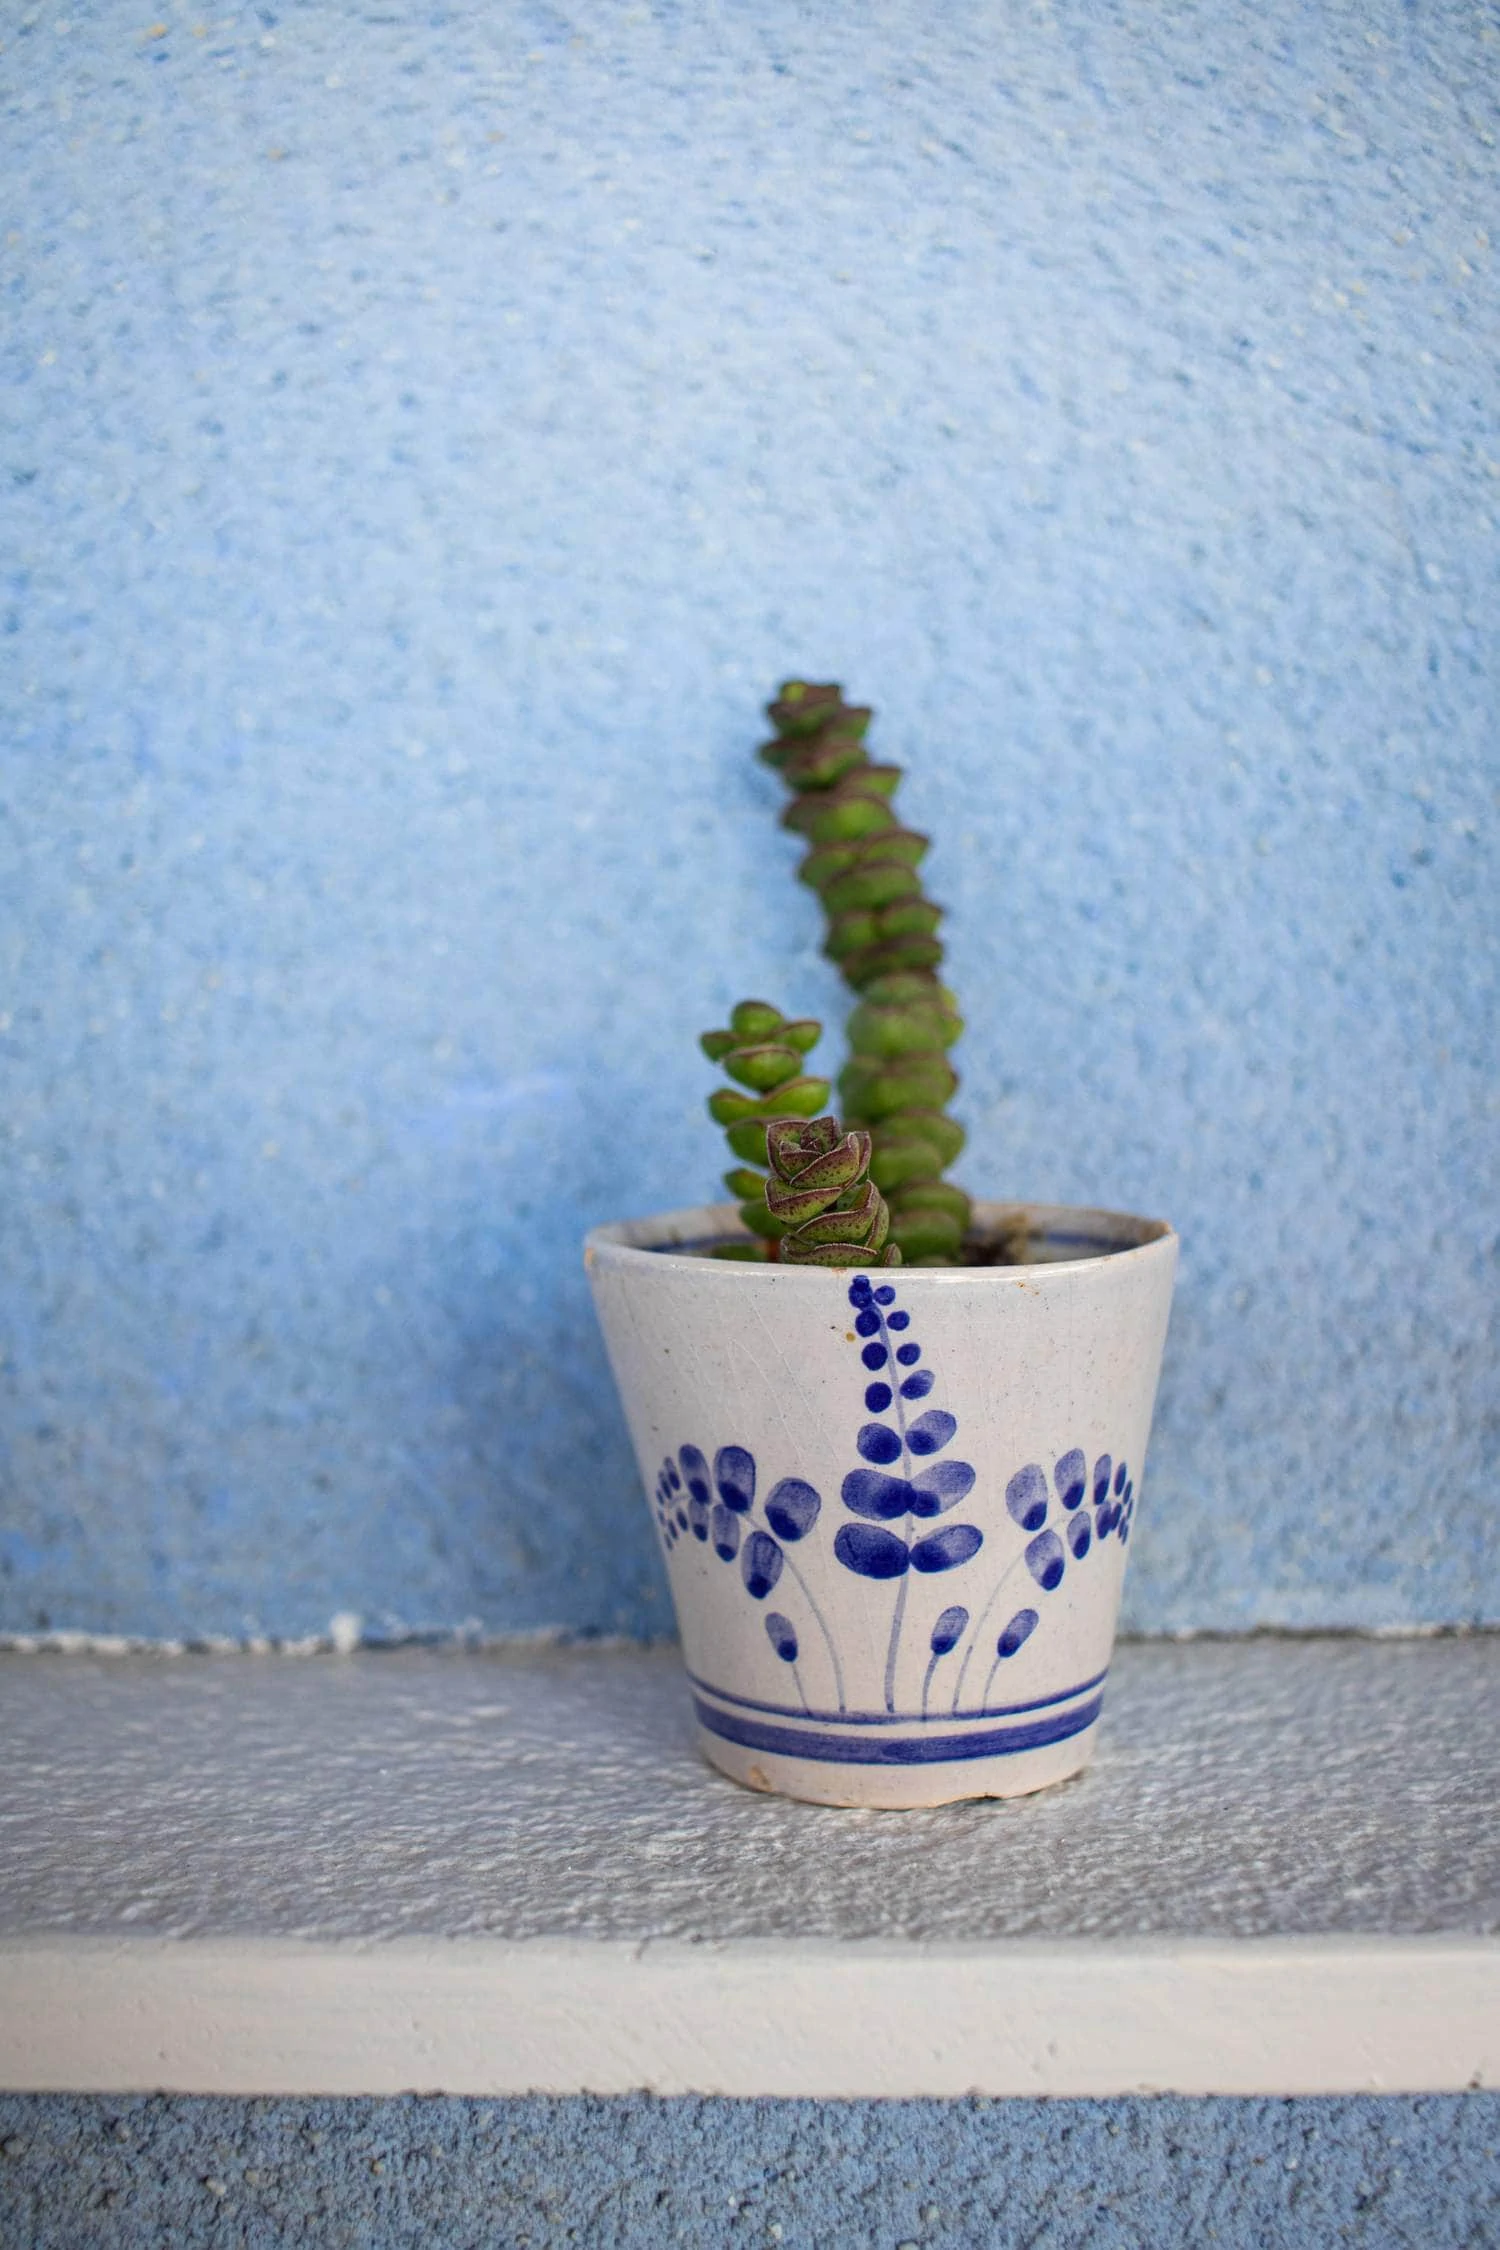
This is a simple scene for you to see that if you do not plan to edit anything, the best is the JPG, but that with two or three adjustments, your RAW can change a lot, as we have seen before.
RAW VS. JPG
If you are more of watching or listening than reading, in this video, Violeta explains very well on her channel what I just told you:
RAW FILE NAMES, CLEARING UP THE MESS
While a JPG is a JPG for Sony, Canon, Nikon, Lightroom, your aunt, your cousin, etc., a RAW, as I told you before, has different names. RAW is raw format, let's say, but each brand calls it in a way. So if you come across a file that says CR2, don't panic, that is because you have taken the photo in RAW format with a Canon camera.
RAW FORMAT NAMES ACCORDING TO EACH BRAND
Let's see then what each RAW is called depending on the brand:
- Nikon: NEF
- Canon: CR2
- Sony: SR2
- Pentax: PTX
- Olympus : ORF
- Fujifilm: R.A.F.
- Panasonic: RAW2
So if you come across a file with one of these weird names , you already know the explanation.
STEPS TO PROCESS RAW FORMAT
1. DOWNLOAD RAW PHOTOS TO YOUR COMPUTER
The first step is to download the photos to your computer. Management is important, so if you always use the same program, for example Lightroom, it is best to import the photos from that same program, especially if, as in this case, it is a program that not only reveals, but it's also a good file manager. This way you will not lose photos and it will be easier for you to always locate them.
Speaking of programs or software …
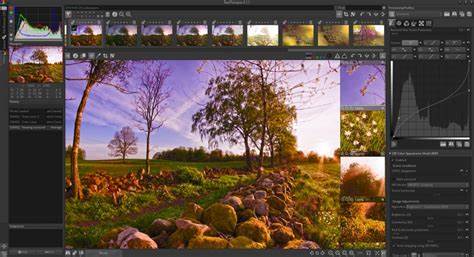
2. DOWNLOAD A PROGRAM OR SOFTWARE TO REVEAL THE RAW FORMAT
It is likely that you have ever found that your computer is not capable of opening a RAW file, and it is that, unless you do it through the appropriate program, you can find an incompatible file or a reading error. Because not all photo editing programs are capable of reading a RAW file.
Let's start with the basics. What do you need to develop a RAW file and turn it into a JPG that can be read by any device? The right program. The possibilities are:
THE SOFTWARE OF YOUR OPERATING SYSTEM, EITHER WINDOWS OR IOS
In both operating systems you will find the Photos program with which you can develop your RAW files and convert them to JPG after making some basic adjustments.
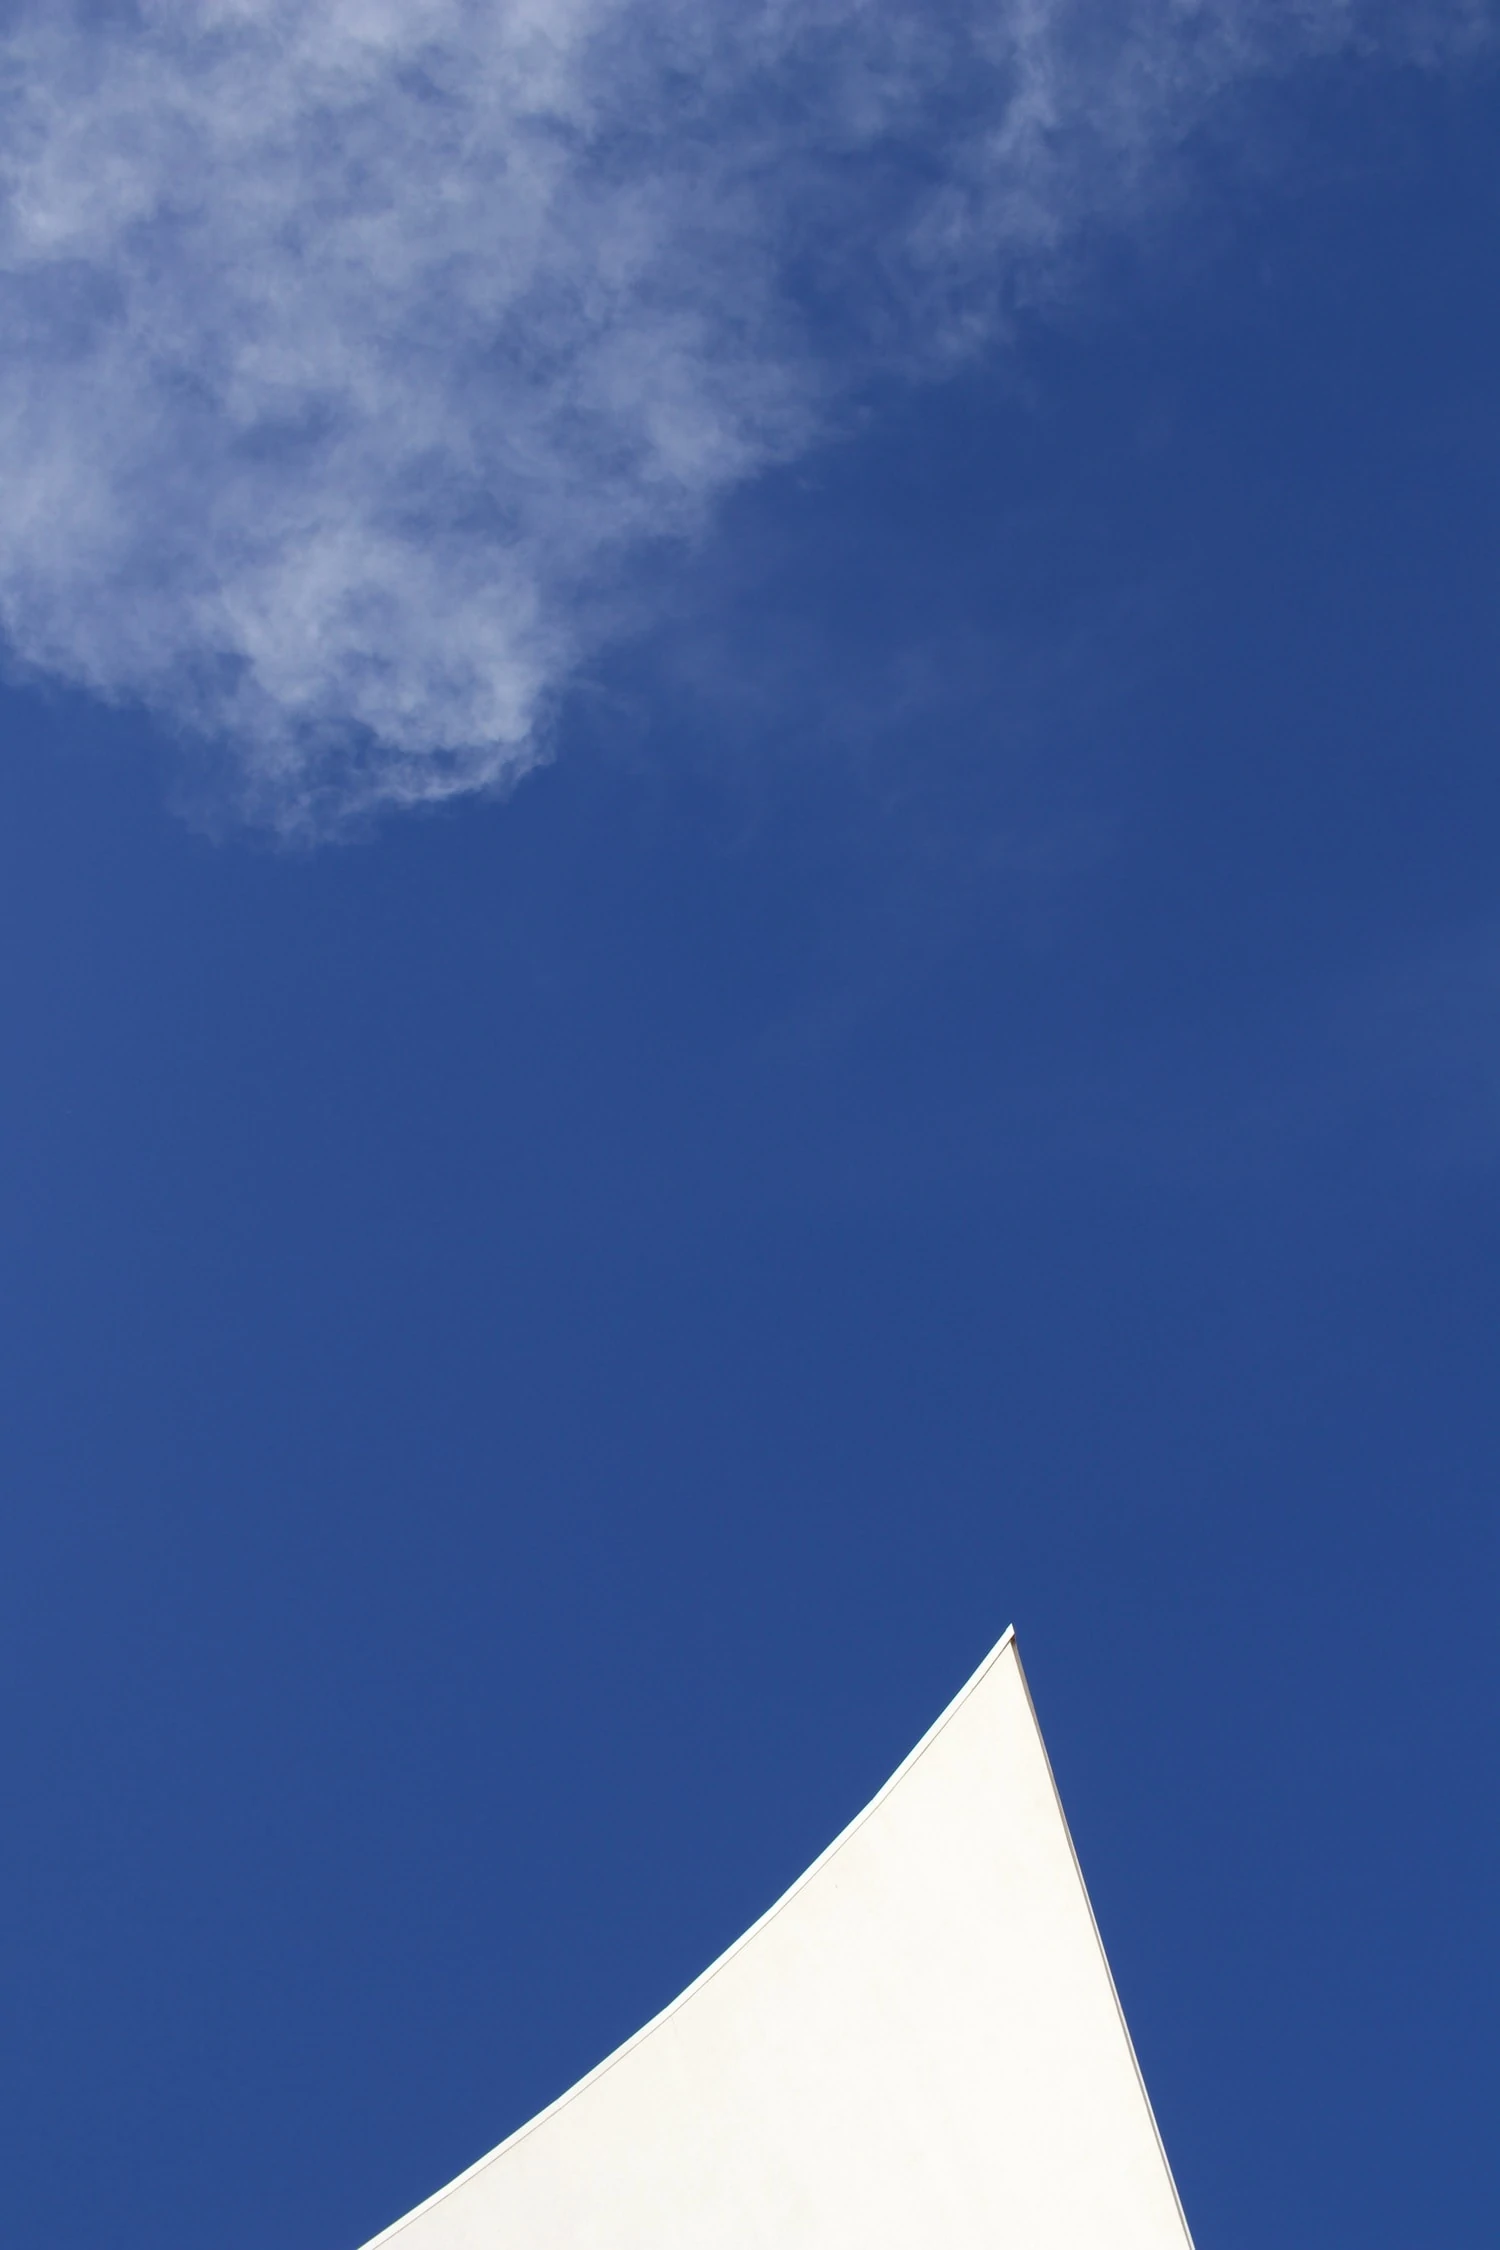
Here you can see a screenshot of an iOS Photos reveal.
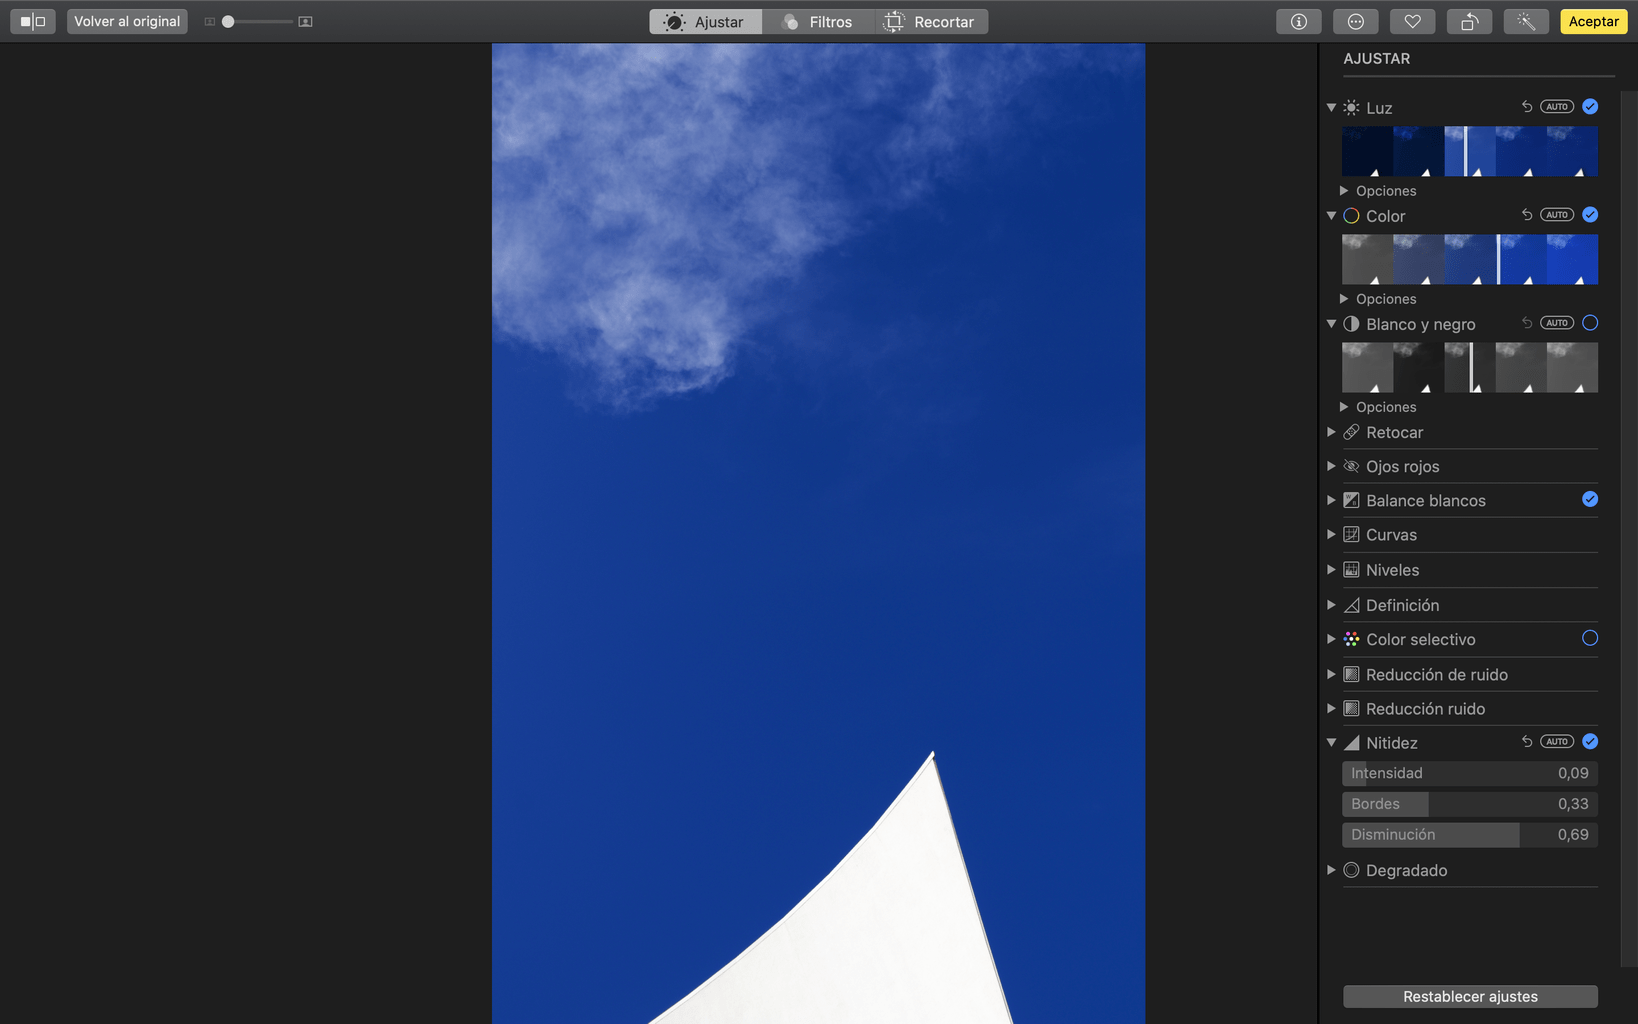
Here is the before and after of a basic development with this program.

THE SOFTWARE OF EACH BRAND
When you buy your camera you have the right to the original software of your camera brand.
- Nikons
- Canyon
- olympus
- fujifilm
- sony

When you enter the software page, it asks you for information such as the model of your camera and/or the serial number. Some are compatible only with that model or with several but not with all of the brand.
FREE PROGRAMS
There are free programs, in addition to those of the brand or of each operating system, that have many followers and that work very well. They may not be as complete as the professional ones or the paid ones, but for an amateur who wants to carry out basic development, they are really useful.
These are some, if you want us to delve deeper into any of them, you just have to leave it in the comments.
- GIMP
- LightZone
- Raw Therapee
- DarkTable
- DigiKam
PAYMENT PROGRAMS
For a much more elaborate development, you also have other paid ones. Choosing a free or paid one will depend on your needs, budget and tastes. Payment programs that we recommend:
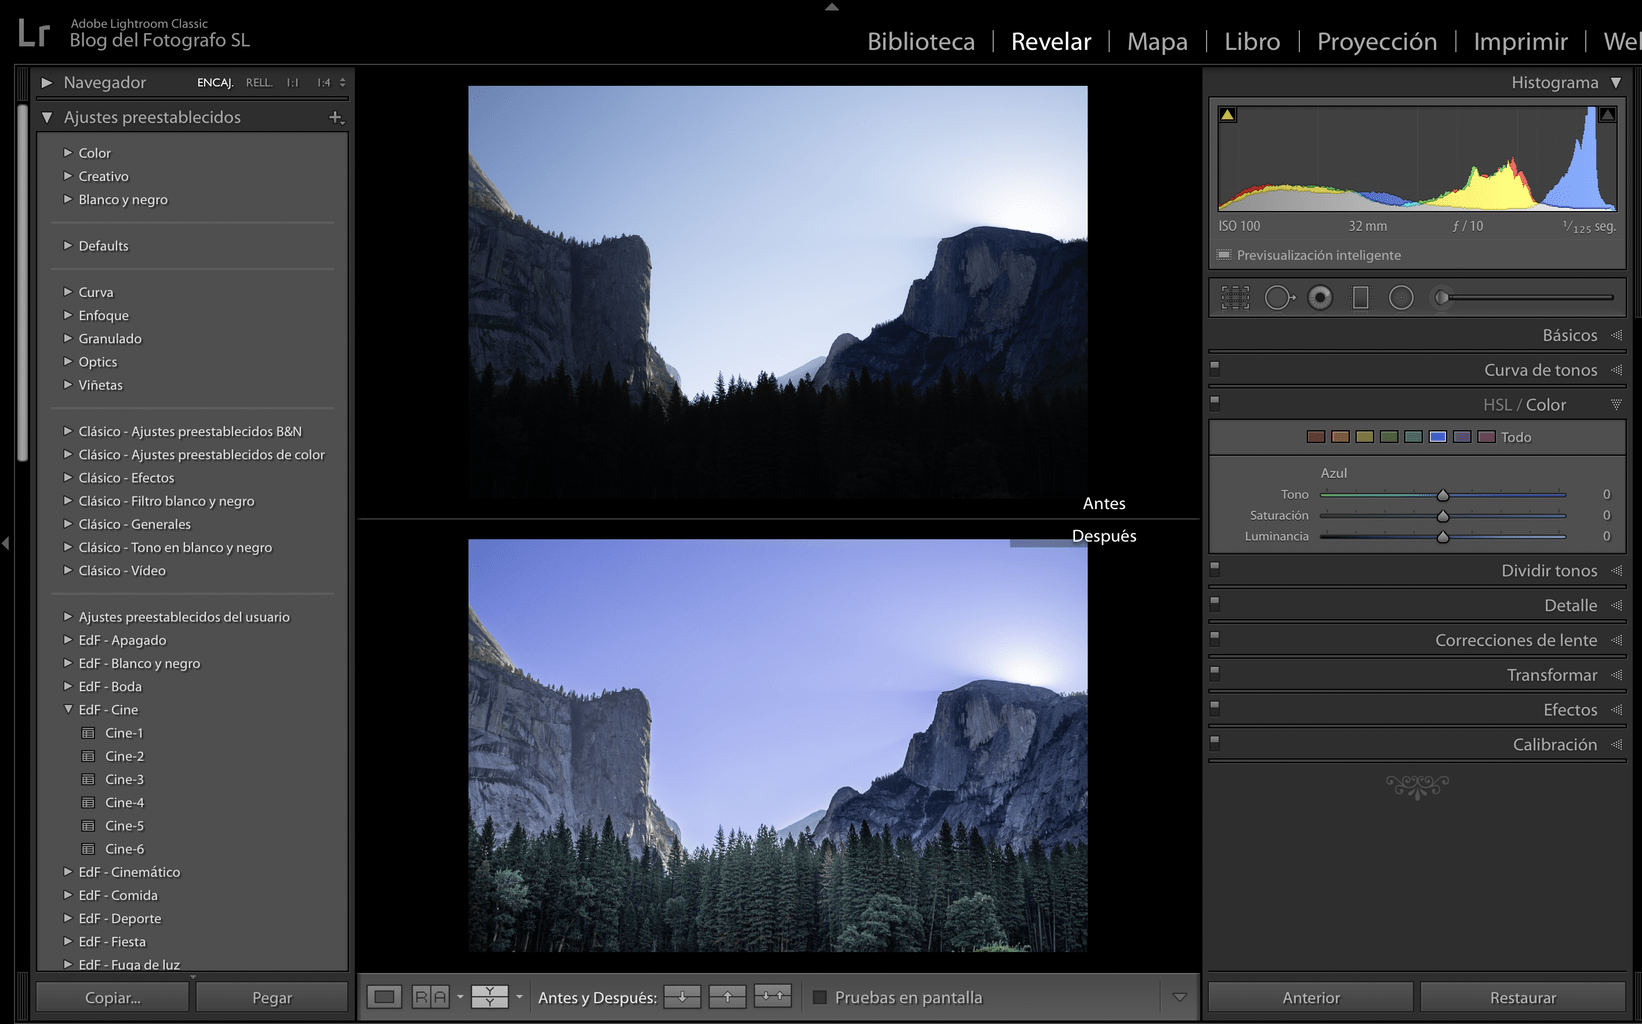
- Lightroom
- Capture One
- Camera RAW is not exactly a development program, but an Adobe plug-in to be able to work with Photoshop from a RAW file. No, Photoshop itself does not open RAW files.
3. DEVELOP YOUR RAW PHOTOS
Use the editor you use, unlike a JPG file to which the camera has applied some basic settings, in this case you have to do them yourself. You can do a basic development or finish with a development by zones that allows you more creativity.
BASIC DEVELOPMENT
As I was saying, there are some minimum adjustments when you process a RAW file, you won't always need to retouch all of them, but you do need to take them into account to leave your photography at its best:
- crop and straighten
- Exposure (ideally adjust highlights and shadows first)
- Adjust contrast with blacks and whites
- Adjust clarity for midtone contrast
- Correct white balance
- Saturation or intensity (the latter is usually more recommended)
- temperature or hue
In the following link you can see tips to do basic development in Lightroom and in this other article you will find how to do basic development in Camera RAW.
REVEALED BY ZONES
Once the global adjustments have been made, which are applied equally to all the photography, it is when you can proceed to carry out a development by zones, depending on the program you use. Brushes, layers, curves, etc., come into play to leave you all the creative freedom you want to use.
If you want to dive deeper into the topic, we recommend taking a look at our Lightroom for Everyone book . You will also find on the blog, within the Editing and development category, many tips and tricks to get the best out of your photos.
Remember that you, as an artist, have the last word on photography, what tone you want to give it, what emotion you want to arouse, where you want the gaze to rest, etc. All this is possible thanks to the development.
And here the RAW format for today. If you have any comments, please, leave them below, and if you found it useful, I would be infinitely grateful if you shared it, I'm sure it will also be useful to one of your contacts.
