Mario Pérez: How can a fixed, static photo transmit movement? Until now you thought that recording a video was the only way to capture movement with your camera. Today our collaborator Iaio has set out to refute this idea and show you that with a single shot you can make things appear to move. I eat? Read on .
A photograph is really impressive not only when a good composition is achieved or if the subject or object is attractive enough, but what differentiates a good photograph from an exceptional one is the sensation that it manages to transmit to the observer.
More incredible than being able to freeze an instant is being able to convey a sensation of movement. It is teleporting the spectator to the precise moment in which it was taken and making him feel there.
Ways of transmitting movement through a static photograph will be the reason that I am here to share with you in this article. Take a good seat.
WHAT IS MOTION PHOTOGRAPHY?
Moving photography is nothing more than a photo that, due to how it was taken, conveys a sensation of movement. Although the photograph itself is static, it is possible to express movement by using some techniques that we will see later in the article.
Unlike high-speed photography that stops the movement of a subject or object using very high shutter speeds (1/4000 seconds for example), motion photography is precisely the opposite, it is photographing subjects or objects, but using speeds much slower (1/10 seconds), which makes it possible to convey that sensation of movement and dynamism that impresses so much.
Although today it is possible to achieve this effect through post production or editing photos on the computer, today you will discover how to achieve this effect directly from your camera.
COMPOSE ON THE MOVE
Movement has its own laws of composition, and beyond the fact that you often wonder whether or not you should follow the photographic rules , I recommend that you pay special attention to this one:
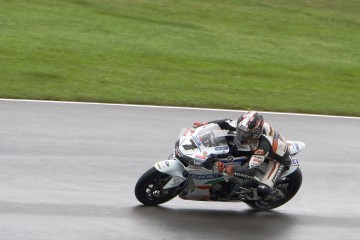
“When you take a photograph of a moving or moving object, the composition and framing must give more space in front of the object, towards the place where it is moving”
In other words, the moving elements within the frame must "enter" the photograph, leaving more space in front of the object than behind.
If you look at the two previous photographs, you will be able to perceive a difference between the two, one seems more "comfortable" despite the fact that both are almost identical. The one that leaves more space in front of the pilot seems more correct.
HOW TO ACHIEVE A SENSE OF MOVEMENT
Slow down the (shutter) speed: A very effective way to capture the feeling of movement in a still photograph is to slow down the shutter speed. All that time that we leave our camera recording the photo, the sensor will be capturing the movement of the subject. Therefore, the longer the exposure time, the greater the movement embodied in it.
“Amount” of light: this is another of the determining factors for taking a photograph in motion and that is strictly related to the shutter speed. The slower the shutter speed, the more light the sensor will pick up, so you risk overexposing your shot.
Later in the article we will see how you can compensate for shots with excessive light in long exposures.
Stability: if our camera is not stable enough, in addition to the movement of the subject or object of interest, we will have movement due to poor stability conditions of the camera. Therefore, it is important to use all possible stabilization elements that we know of (tripod, remote shutter release, etc.).
TECHNIQUES AND TRICKS
Now that you have a better idea of what motion photography is and what sets it apart from the rest of the photographic disciplines and makes it so particular, the time has come for you to begin to familiarize yourself with the techniques and tricks necessary to carry out out these kinds of snapshots.
There are several methods that you can use depending on the message or sensation you want to communicate:
1) Sweeping or Panning
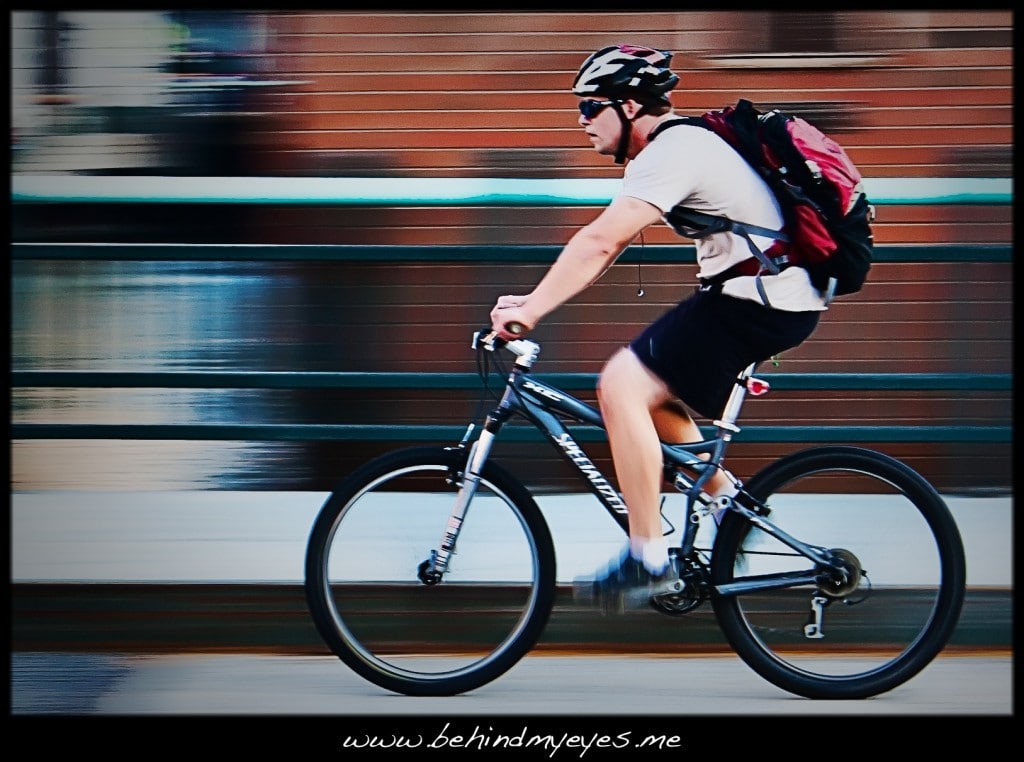
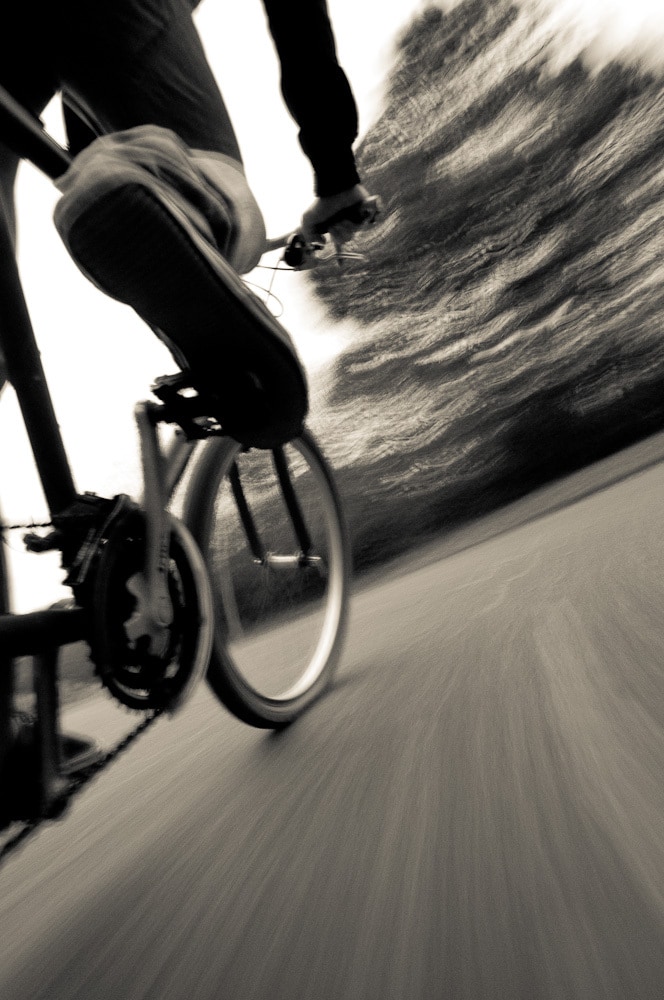
Sweeping is the technique that you should use if what you want is for the subject or object of interest to come out static and well defined while the background comes out moved. It is one of the most popular techniques for photographing moving objects since it is possible to transmit the movement and dynamism of a scene in a very effective way.
As its name indicates, sweeping consists of moving the camera at the same speed and in the same direction in which the object or subject we want to photograph is moving, "sweeping" the scene.
In this way it is possible to invert the effect of the movement: everything that was static will be moved, and the object that was moving will be static.
How do I get it?
- Depending on the amount of ambient light, select a slower shutter speed than you would usually use to take the photo if you were not using the panning technique. Medium speeds are used, but keep in mind that the slower the rate of fire, the easier it is for the object to be thrown around, so be careful.
- Try to get some distance from the object, as the closer you are to it, the faster it will move relative to the camera, and the more difficult it will be to get good results.
- Look for a location that allows you a clear view, that is, with nothing to obstruct your field of vision or come between you and the object or subject of interest.
- Accompany the movement and direction of the same as stable as possible to prevent it from moving.
To achieve spectacular results you must take into account:
- Depth of field: you will have to evaluate how in focus or out of focus you want the background to come out beyond being blurred. Pay attention to the diaphragm.
- Shutter speed: As I mentioned before, choose a shutter speed that is slower than what you would usually use when taking the photo.
- Sweep Speed: It will depend on the shutter speed and the shutter speed will depend on the speed of the sweep. If you use faster speeds (1/50 let's say) you will have to do a faster sweep, and vice versa.
- Subject Distance: The closer you are to the subject, the more difficult it will be to get good results from the scan.
- Stability: keep in mind that while you move the camera from one side to the other, if you don't use a tripod the camera will also move from top to bottom or vice versa, unintentionally of course. So if you use very low shutter speeds there will be a greater chance that you will not achieve the desired sharpness.
The difficulty of this technique, as you may have noticed, lies in the number of variables to take into account when carrying it out, so you will have to arm yourself with a lot of patience. If you persist and experiment and try, you will get really spectacular photos.
2) Zoom or Zooming Effect Zooming
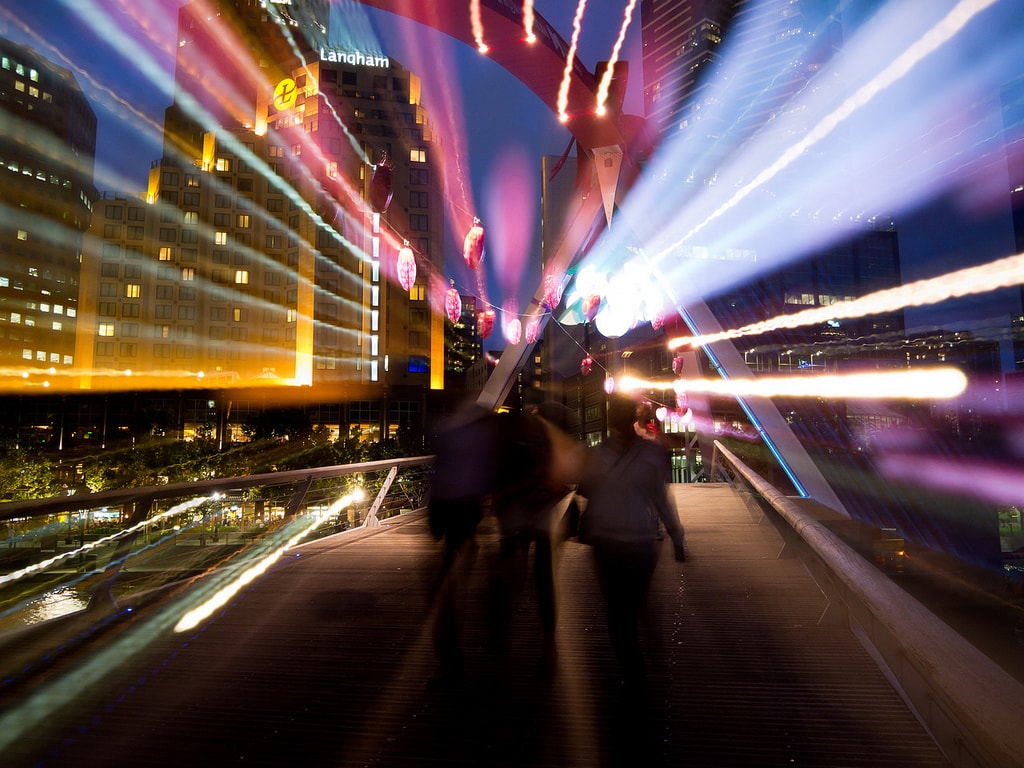
is a technique that, as you can imagine, allows you to give the sensation of movement by using the lens zoom.
This sensation can be both approaching, if we zoom in, or moving away from the subject or object to be photographed.
Through converging lines, it is possible to focus the observer's attention towards the center of the photograph, generating a sensation of movement in or out depending on how it is used, giving it very peculiar dynamism and movement.
How do I get it?
- Frame the photograph by placing the subject or object of interest in the center.
- Insofar as light possibilities are possible, it closes the diaphragm.
- Select a slower shutter speed than you would normally use to take the same shot.
- While the shutter is open, thus allowing light to reach the sensor, zoom in or out depending on the effect you want to achieve. Basically you do that by varying the focal length while the photo is being recorded.
To achieve spectacular results you must take into account:
- Focal length: in this particular technique, the focal length is not fixed, but rather varies during the shot. It is usual to "zoom" or rather, start from a more open focal point to a more closed one, to achieve that approach effect. In any case, you can experiment as you want and to your liking.
- Objectives: beyond the fact that with any objective that is not a fixed focal length you can perform this effect, you will obtain the best results with a wide-angle objective since its own distortions make this effect something spectacular.
- Zoom speed: The speed with which you change the focal length will cause you to obtain different results. If you are looking for more progressive lines, you will have to zoom more slowly. But if what you want to achieve are fast lines, you will have to vary the focal length very quickly.
- Shutter Speed: As in the sweep technique, the shutter speed depends on the sweep speed and vice versa. Depending on the results you expect to obtain, you should use faster or slower speeds, as you consider necessary.
- Stability: one of the primary conditions in photography is stability and the zooming technique is no exception. The slower the shutter speed, if the camera is not stable enough, the photo will come out blurry.
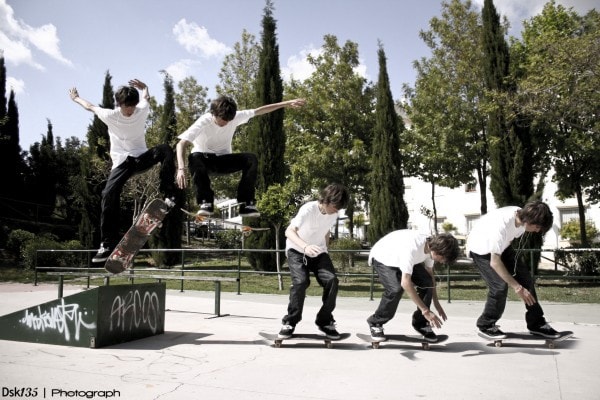
3) Photosequences
Expressing the time and movement of the subjects or objects of interest can also be done through multiple photographs, that is, a sequence of them. Here is a clear example:
How do I get it?
The way to achieve this spectacular effect is through the fusion of several images taken under equal conditions, so that we can observe the entire sequence of the subject's movement in the same image.
In order to do so we must have:
- a tripod .
- A camera that allows you to shoot in burst mode.
- A software that allows you to merge all the photos into one.
Pay special attention to the shutter speed, since if it is very slow, each of the images will be blurred. If the light conditions allow it, try not to slow down more than 1/60 of a second, although this will depend on the speed and, as I said before, on the light conditions of the scene.
Well, now all that remains is to look for a good sequence, which can be a person on a bicycle, on a skateboard, snowboarding, a good jump, etc. Once you have the frame ready, press the shutter from start to finish, then using the fusion software, achieve this incredible effect.
To the extent that you better perform the previous framing, the white balance, that is, the more time you dedicate to the preparation of the photograph, the less you will have to work on editing them later.
4) Long Exposure
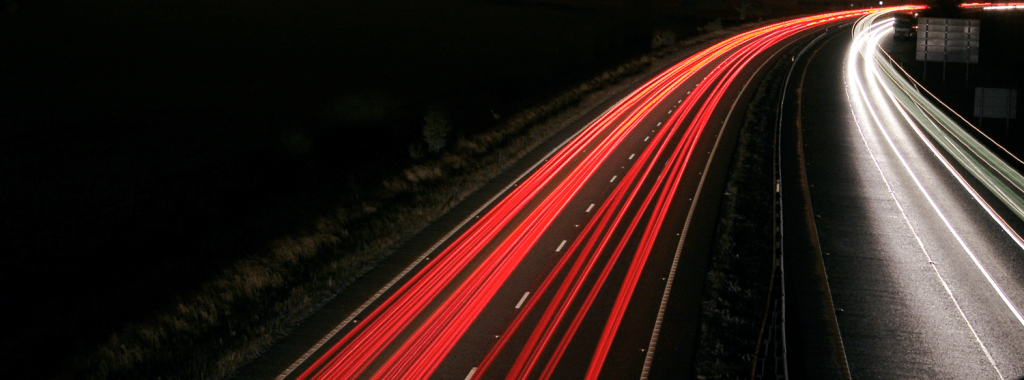
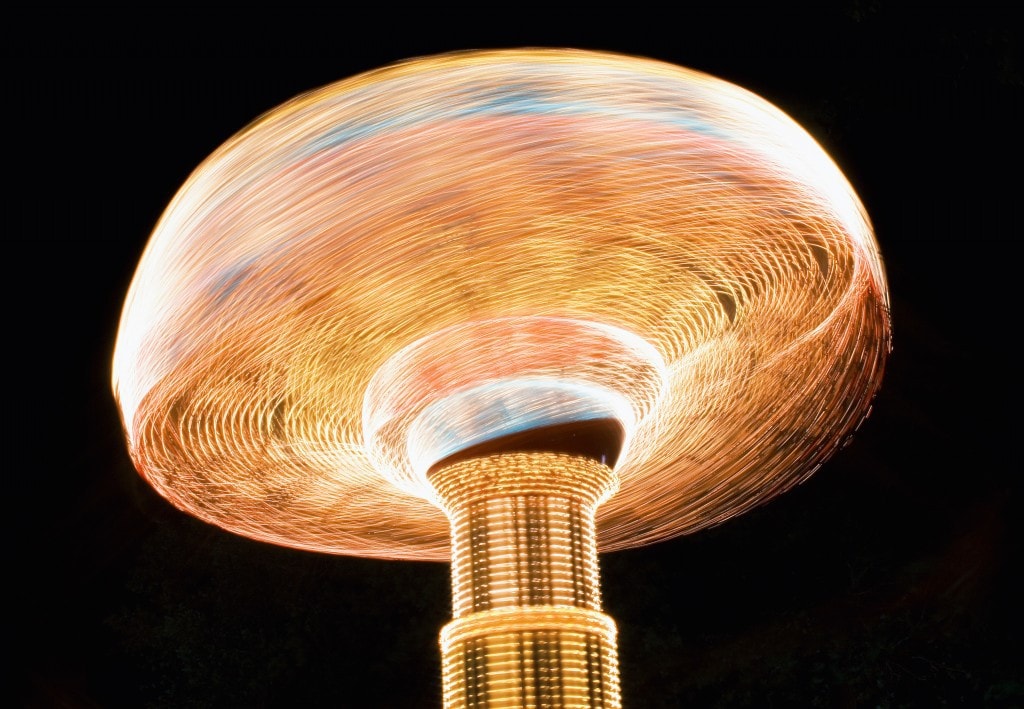
If you have been struck by those photographs where you can see long lines of light, or impressive photographs of storms with dozens of lightning bolts illuminating the sky, or waterfalls with water that looks like mist, this technique is for you.
Long exposure photography consists, as its name says, in leaving the camera for a long time (much longer than normal), capturing the "light" of the scene in question. You will only have to configure the shooting speed and the aperture of the diaphragm to avoid that it is overexposed.
The magic of these photographs happens when you leave the camera shutter open for a few seconds, minutes or even hours so that all the trails remain on the sensor, for example, from the lights of cars on a highway.
How do I get it?
- Mount the camera on a tripod and make sure it is firmly attached, as any vibration can ruin the shot. If you don't have a tripod, make sure you put the camera somewhere where it will stay steady to avoid blurry or shaky photos.
- Adjust shutter speed and aperture to compensate for the shot and prevent overexposure. At the end of this step by step I will tell you how to do it correctly.
- Once you've framed your scene and adjusted your camera settings, all you have to do is press the shutter. For this, I recommend that you either set the trigger delay mode, so as not to move the camera when pressing the shutter, or that you get a remote shutter release in order to avoid touching the camera that is already ready to shoot.
How to compensate the exposure when there is too much light in the environment?
As I was saying, to avoid overexposure as a result of long exposures, you have to compensate for "all that amount of extra light that will enter the sensor." To do so, I leave you the following tips:
- Use small apertures: by keeping the diaphragm as closed as possible the amount of “light reaching the sensor” will decrease considerably.
- Lower the ISO sensitivity: This is another way to compensate for the amount of light to avoid overexposing your shot. The lower the ISO, the more light it takes to get a correct exposure, so if you want to use very slow shutter speeds, you can compensate by adjusting the ISO sensitivity.
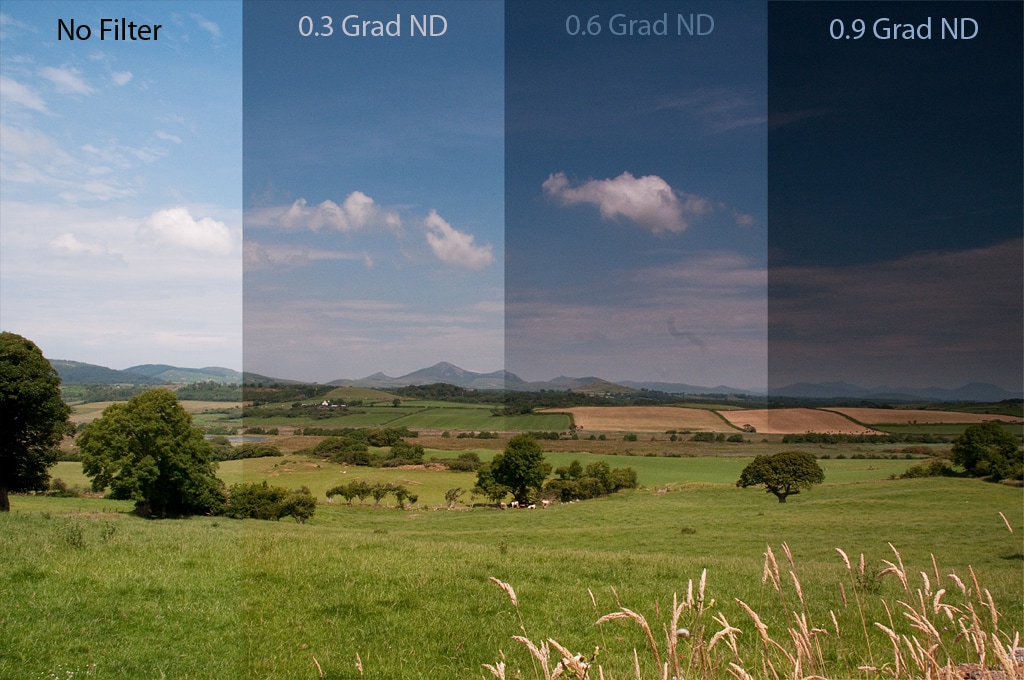
- Try neutral density filters: these types of filters that are placed in front of the lens considerably reduce the light that passes through it. It is as if you put sunglasses on your camera allowing you to increase exposure times. If you want to know more about these filters and the different types of them, read the following article: types and uses of photography filters.
SPECIAL TECHNIQUES AND RESOURCES
As we have already seen, movement photography requires a wide variety of techniques, resources and elements in order to obtain the best results. To the extent that you experiment with each one of them, you will be able to master them and adapt them to your needs.
Some of the most spectacular and with which you can not stop experimenting are:
- Combining Flash and Long Exposure: When you combine flash with a slow shutter speed, you'll be able to get photos with lots of moving elements and other static ones, frozen thanks to the flash. This type of effect is widely used at parties, clubs and events where you want to show people dancing and enjoying themselves like never before.
- Use neutral density (ND) filters: they are used by many professional photographers who need to absorb a lot of light from the scene. With them, you can use very slow shutter speeds in situations where there is too much ambient light that cannot be compensated by lowering the ISO or with very closed diaphragms. There are gelatin and glass ones and they absorb from 1 to 10 diaphragms of light.
- Not everything is stability: beyond the fact that I have recommended the use of tripods throughout the article, you should know that their use is not mandatory since in this type of photography sharpness is not everything.
- Anticipate the framing: to the extent that you can predict where the subject or object of interest will pass through, the better you will be able to frame the photograph and you will obtain better and more spectacular results.
- Be patient: being in the right place at the right time is very difficult, so you will have to be patient. Since luck has to be helped, the more you work on setting up the scene, the more chances you'll have of getting that jaw-dropping shot.
- Use manual mode, almost always: If you are already an expert in manual mode, this tip can be ignored, but if you are just getting familiar with it, you can use shutter speed mode, so you have less to do with setting the shutter speed. team.
TIPS AND TRICKS
In case this article seemed too short ? and as a closing, I have prepared some tips for you so that you can get the most out of motion photography. If you have no excuses:
I hope you are encouraged to experiment with this type of photography. Motion photography makes you strong in manual mode, helps you master the camera in the most challenging situations, and produces gorgeous photos that are full of dynamism and life.

