
In recent years, the digital photo album has almost completely superseded the albums of a lifetime, those in which you pasted your printed photos and that surely you have one at home from when you were younger . The possibilities offered by these digital albums are almost endless and the excitement of adding details can sometimes lose us from the main objective. Today I bring you some tips so that your digital photo album is beautiful, pleasant to see, does not get boring and does not go out of style. Does it seem complicated?
1. TIME AND PATIENCE
If I start here, it is because of the importance of dedicating time to the digital photo album. The day to day makes rushing our usual companions, however, they are just that, companions, not friends at all, more like enemies.
It can help you to make an album in a hurry to get out of trouble. If you don't care who it's for, the photos aren't very elaborate, you're very urgent, etc., well, go ahead, run, make your digital album automatically, with the photos you catch and in any way.
In fact, you could save yourself the following points ;), because we would be talking about an emergency to get out of trouble, and not about making it look beautiful, pleasant and lasting in time aesthetically speaking.
But you don't want that, that's why you're reading this. So we continue ?
2. TELL A STORY
A photo album has to count for something, if you only want to collect a few photos and have them in one place, it is almost more feasible that you print them and put them in a box. Your intention to compile them in an album is another, right? For it to make sense and grab attention, it has to tell a story. In this way it will be useful now and in a few years, when you want to remember those moments, what happened or if someone wants to know you a little more.
Make sure that the order of the photographs makes sense, either chronologically, or by theme, etc. It will depend on what is the subject on which you are mounting the album. The important thing is that you be clear about what you want to have with him (your little one's first year, a trip to Thailand, your best friends' wedding, the birth of your nephew or your sister's tennis championship, to name a few). Some examples).
Once you are clear about the topic, think about the best option to organize the photos. Some general advice.
- Set up a script beforehand.
- When in doubt, use chronological order.
- In a portrait session, start with wider shots and gradually zoom in until you're done with close-ups and extreme close-ups.
- If the photos are very varied, establish themes (excursions, day-to-day, celebrations...).
- Choose a photo of each key moment.
3. SELECT THE PHOTOS FOR YOUR DIGITAL ALBUM
I'll start by telling you that less is more. The digital age offers us the possibility of having an infinite number of photos of the same moment for free . This has its advantages, but it does not mean that you should put all those photos in the same album or page. It is preferable to be selective when deciding the photos you want to include in the album and, unless you have a specific intention, do not include photos that are very similar. Preferably one larger than many small and almost equal.
Try to have variety. Imagine a birthday and there are only photos of the birthday boy. It will be boring to death. Include photos of the preparations, details, guests, gifts, etc.
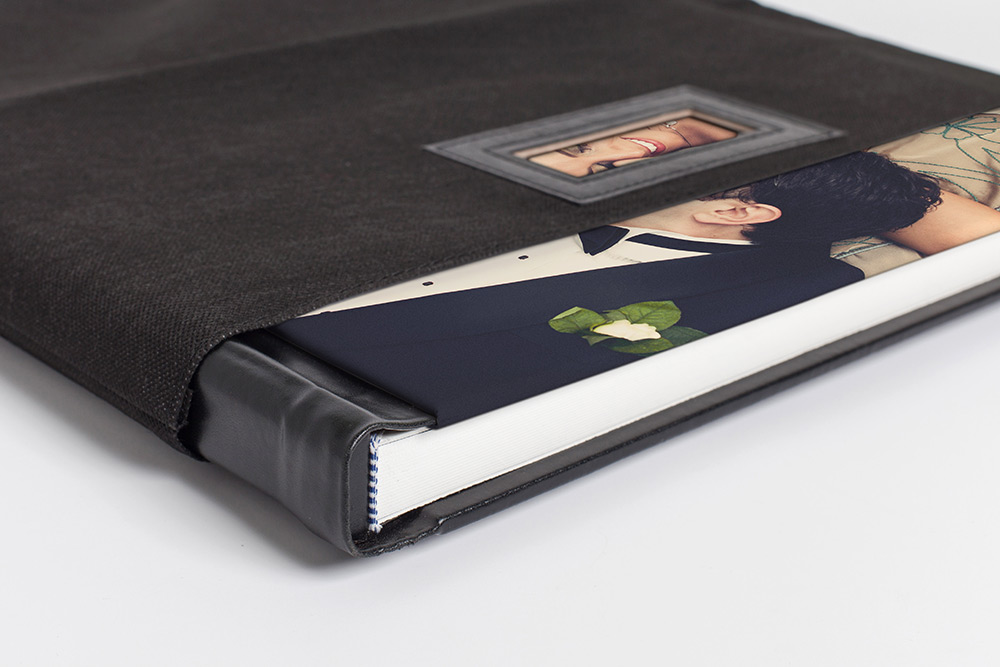
4. CHOOSE THE FORMAT AND WITH WHOM TO PRINT YOUR DIGITAL PHOTO ALBUM
You have already decided which are the photographs that you are going to include and you are clear about the subject. It's time to choose who you're going to print the album with and decide the format. For example, if you want a digital album, or if for this less important occasion you prefer a photo book, or a photo book, each house offers different possibilities. You also have to choose if you want it square, vertical, landscape, larger or smaller, with more or fewer pages, etc. Another important detail is deciding the type of printing (matt, glossy, etc.). There is no better finish, but rather an ideal one depending on the situation.

These are the aspects that you should take into account when deciding on one brand or another when printing your digital album:
- The products they offer and print quality
- The program used
- Customer service
These three points seem basic to me. I have my own opinions and experiences, which do not have to coincide with those of other people, but I will tell you that you have to convince me on these three points. Cewe's albums and photobooks have worked well for us.
5. SIMILAR ISSUE
Try that all the photographs have a similar edition, at least those that you are going to put together or those that are from the same day, same theme, section, etc. (depending on how you structure the album). This will make it more pleasing to the eye and not look old fashioned in a few years .

6. CHOOSE THE COVER WELL
With the cover you must summarize in an image what the album will be about. How many times have you decided to read a book or buy it for the cover? It has to suggest and invite you to enter. Choose the right photograph, dedicate the time you need to it.
In addition to the image, also choose the font you are going to use well. Make sure they are neutral colors or that harmonize with the photograph. Colors of the same tonal range so that they do not divert attention and that it is beautiful and pleasing to the eye.

7. GET FAMILIAR WITH THE PROGRAM
Before launching to assemble the album, once you have decided with which company you are going to print it, spend some time bugging their program. The idea is that you know how it works, the templates it offers and so on. This way you can better plan the album.
Some have an assistant that tells you how to proceed. Once you know the program you don't need it, but to get familiar with it it's very good.

If you decide on Cewe, here is a tutorial by Mario to create your album with his program.
8. ORGANIZE THE STRUCTURE
It is time to organize the structure of the album, you have the templates, the selected photos and more or less the order (remember point 2). Help yourself with paper and a pen if necessary to make an outline of what the album will be like.
Keep in mind that, if it does not have a full opening (180º), you should not put a photo in the middle or, if you do, that the union of the two pages does not coincide with an important part of the photo. Here's an example of full opening and how it looks with a photo that spans two pages:

In this other one you have an example of a book-type opening , never put photos that are in the middle of the two pages if you ask for this type of opening.

9. MAKE IT DYNAMIC
Try to be dynamic and simple at the same time. How is it achieved? Follow these tips:
- Less is more, try not to saturate the pages with many photos.
- In the same sheet includes different sizes.
- That the different sheets are homogeneous in terms of the number of photos. Try not to insert a full-size photo on one page and 20 photos on the next. That's a bit dizzy. Better to distribute the photos so that there is a similar number of photos in all of them.
- The same with frames, drawings and so on. I am in favor of completely plain albums, without a lot of drawings that have become obsolete in two years. The frames , if you use them, that are all the same, but try to keep them simple for the same reason as the drawings. If we talk about funds ... the same, the smoother the better. If you're worried that the background of your photo doesn't detract from the subject ... how are you going to put a page background with a flower pattern that doesn't even stick with glue! Having the resource does not force you to use it... do it sparingly or it's almost better not to do it ;).

The type of sheets that you should avoid if you want your album to not go out of style is something like the following.

10. BEWARE OF…
With some aspects it is important to be especially careful. Let's see with what.
SIZES
If you get a warning that the photo does not have enough resolution for the size you are choosing, please listen to it. Make the photo smaller or change it to another one. It is preferable that you make it small, or delete it, than omit this message and spoil all the work because this image looks regular.
THE EDGES
Be careful with putting certain important elements on the edges. You run the risk of being left out. In theory it shouldn't happen, but it is something that sometimes happens. Whoever avoids temptation... avoids danger ;).
DELIVERY TIMES
While most scrapbook printing companies tend to meet deadlines, you shouldn't be overconfident. Being cautious in this regard can save you a displeasure with a client or prevent a surprise from being completely flattened.
Sometimes the unexpected happens, with printing, messaging or anything else. Do not hurry times when ordering your album if you need it for a specific date. It happened to me once, they commissioned me for a gift, it arrived on time but was printed poorly. And although Hoffman agreed with me, to send it back to me they asked me to put together the entire album again. Impossible, I didn't have time. The album turned out badly, those who commissioned me too, and me worse ? .
11. CHECK IT OUT
You've finished it, your fingers burn to hit send, but no. It's not the moment. Remember what I told you at the beginning, rushing is not good. Let the album rest for at least a day and review it. Try to see it with new eyes, like someone seeing it for the first time. Check if there are any glitches and if it's nice to look at. If you're already getting bored, you have to redo something ? .
With this review you can avoid the occasional mistake like the ones that have happened to me when I put a repeated or rotated photo... yes yes, what I was telling you about being in a hurry was from my own experience. So, make yourself a coffee and enjoy the moment ;).

If after reading this article you are not sure if what you want is to have all those photos in an album or you are looking for other ideas, in this article I give you new ideas where to print your images.
