

After how to make your black backgrounds really black , come to your screen, how to make white backgrounds really white Because not only black backgrounds live man and woman, it is also possible that you were interested in those backgrounds whites so pure and luminous and for what they are able to convey: cleanliness, clarity, peace, tenderness, joy ... The choice of a background or another, is usually associated with high and low key images , very attractive visually and capable of transmitting different sensations, completely opposite. In this case, we will focus on white backgrounds, usually associated with high-key photographs. Let's see what you need to get a background that is really white and only white:
- Get a white background
- Separate the subject from the background
- Light up the background
- Use a neutral gray card
- Activate the histogram
- Activate the high beam indicator
- Control white balance
- Always work in RAW
- Edit
 Now, let's look in detail point by point.
GET A WHITE BACKGROUND
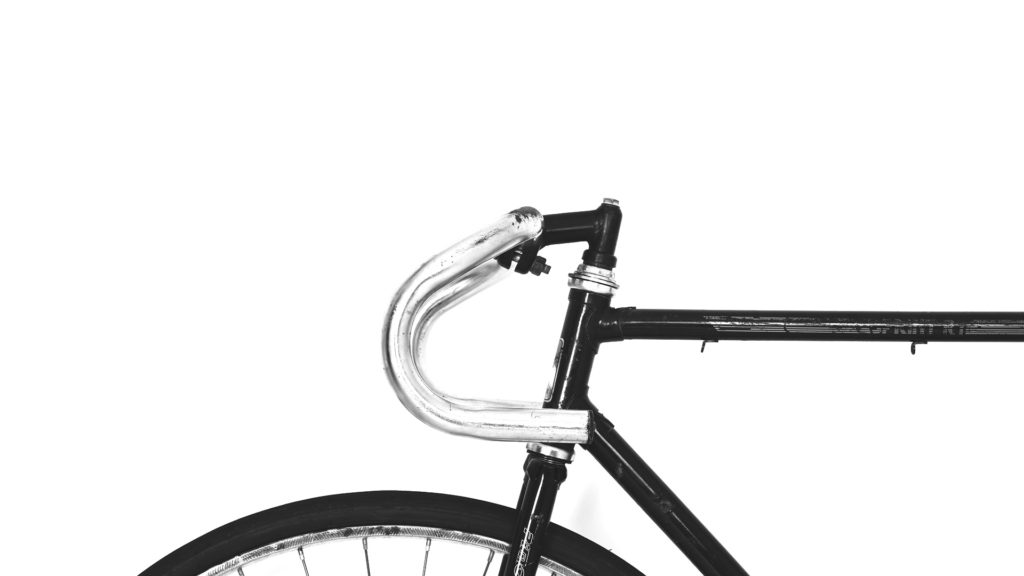
Don't put that face on me, if I write this article and you read it, you may have already tried to get a white background using a white background, but, oddly enough, you didn't get it. That is because a white background does not ensure that the result reaches pure white. Many other factors influence the final result, and if they do not apply, it is possible that the result is more than white, gray or gray, or broken white, but not white ;-). That we are not able to distinguish hundreds of whites like the Eskimos, but the pure white we can appreciate. That said, a white background helps, so get one, or at least as clear as possible and, above all, contrast with the protagonist of your image whatever.SEPARATE THE SUBJECT FROM THE BACKGROUND
Your first impulse may have been to place your protagonist directly on the whitest wall you have found in your house, or the curtain, the cardboard, or whatever you are going to use as a background. If you place your protagonist very close to the bottom, several things will happen:- The subject itself will generate shadows on the wall, which will stain your image gray.
- You will see the detail of the background and with it all its imperfections (gotelé, wrinkles, spots, etc.).
- The illumination of the background and that of the subject will be the same, so you cannot work by increasing the exposure in the background, as you will surely need.
 So, after locating a good background, your second mission is to make sure that your protagonist does not create shadows against him, that you can apply a sufficient aperture of diaphragm so that what you want to portray goes perfectly focused but not the background (it will help you conceal imperfections).
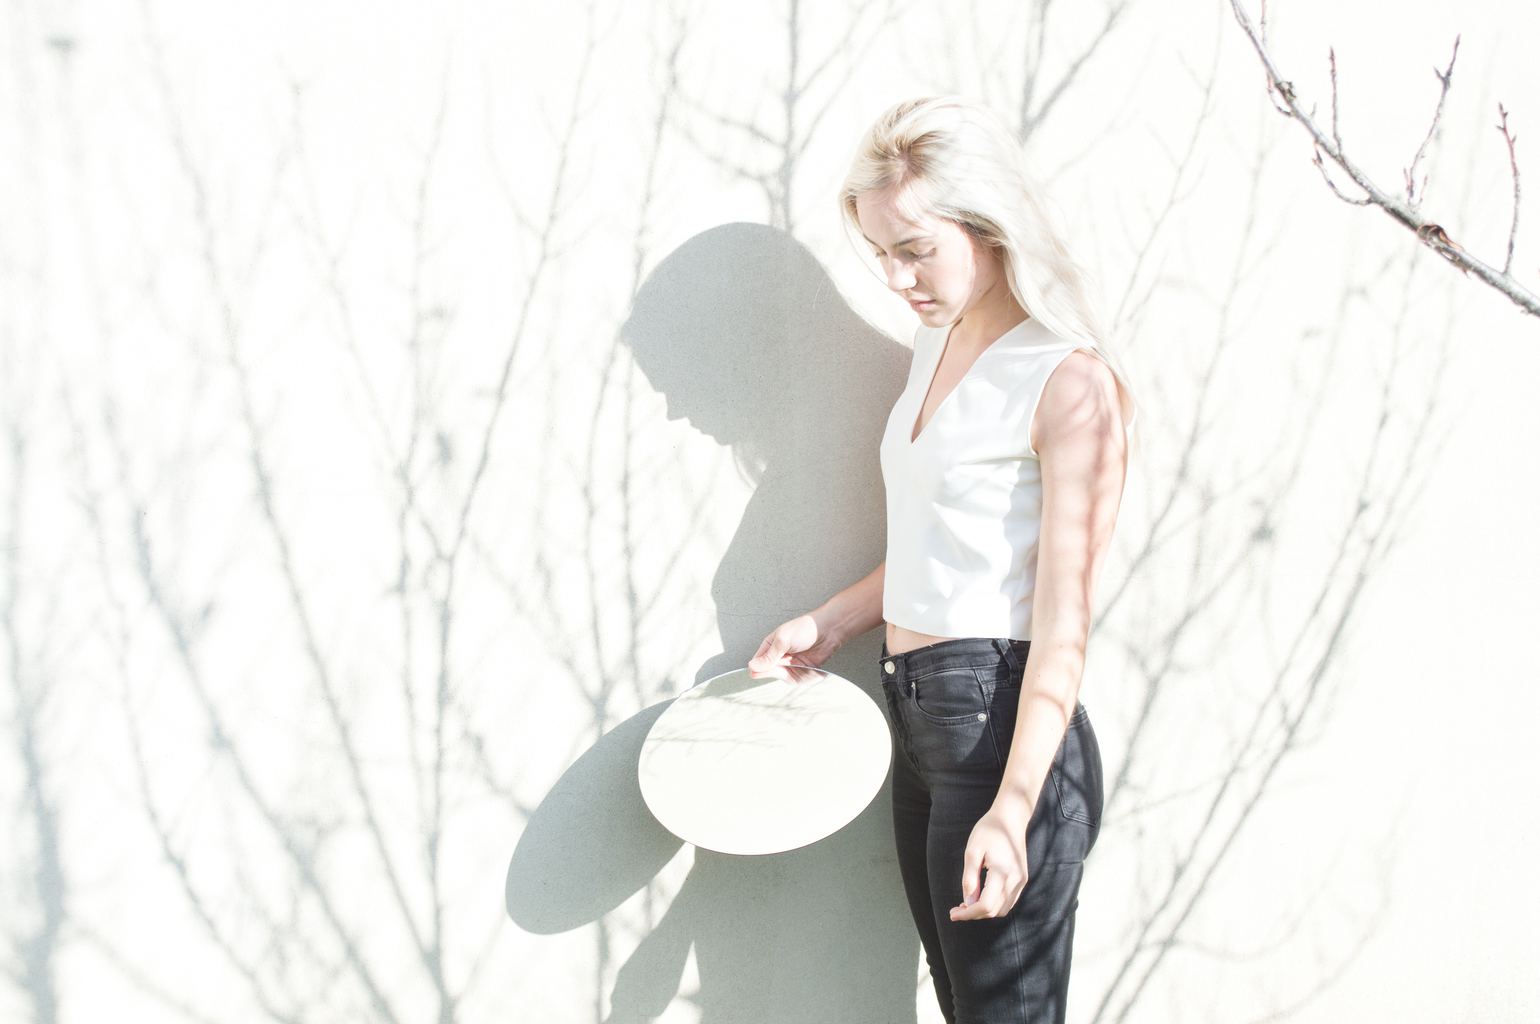
LIGHT UP THE BACKGROUND
Another essential trick is that the background is well lit , homogeneously , preventing shadow areas from being created. The background must be bright enough to appear as pure white . For this, the lighting must be higher in the background than in the main subject, and well differentiated in both planes. Thus we will try to prevent our protagonist from being overexposed or burned.A NEUTRAL GRAY LETTER
Assuming that you use your camera's photometer to measure the light, like most mortals, you will have the problem of measuring the reflected light. The photometers of reflected light, give you the exposure values ??based on the light that reflect the objects or people in which it affects. It is not the real light that reaches them (which is what external photometers can measure) but the one they give off . In addition, they are configured to measure based on a neutral gray. It is with this value that they give a correct exposure. That is why in white backgrounds or in snow images or, conversely, in scenes with many blacks, the photometer is easily confused and provides wrong values.- The easiest and most correct solution is that you get a neutral gray card. They are small and very economical and will serve you wherever you go. You should place it next to your subject in a place that receives exactly the same light as what you are going to photograph, and measure the values ??of the card.
- If you don't have any, look for something that looks like it, of a similar tone and that reflects the same light.
- If you do not clarify, measure your subject in a timely manner , so that the rest of the scene does not influence the measurement.
ACTIVATE THE HISTOGRAM
This will depend on each image, you know that the histogram is like a fingerprint of our photographs and each one is different depending on each image, but what you should have an area that clearly tilts partly to the right of the histogram (high lights) which is where the information about the white of your background should be reflected.ACTIVATE THE HIGH BEAM INDICATOR
It marks the areas where information is lost due to excess light. In this case you are interested in the fund being one of those areas, but not your main subject. It will be very useful to know what areas you have in pure white and if you should increase or reduce the backlight and / or your protagonist.CONTROL WHITE BALANCE
Especially if we do not have professional material to illuminate our stage, it is crucial that we control the white balance (or color temperature) of the lights we work with to ensure that they do not stain our image of unwanted tones.ALWAYS WORK ON RAW
But undoubtedly the best way to ensure a final image as correct as possible is, in addition to trying to make the image as perfect as possible in the camera itself, work in RAW format. RAW is an unprocessed format by the camera and is the one that retains more information about the scene, which allows you to work the editing with much better results.EDITION
To end up getting a pure white in case you need to do it, most editing programs allow you to increase whites, exposure or highlights, as well as improve blacks or shadows. The edition will give you that touch that you lack, if you are missing, but the best, as I said before, is that you try to get an image as perfect as possible on the camera.
MOST COMMON APPLICATIONS OF WHITE BACKGROUNDS
Even if you have been interested in the high key or the white backgrounds simply because of your hunger for knowledge, the truth is that any photographer who wants to professionalize will need these resources (or at least it will be very, very good to know and exploit them ), because it has many applications in the photographic world.- Fashion portraits
- Corporate images of a company's employees
- Product photography
- Websites
- Journals
